Loading ...
Loading ...
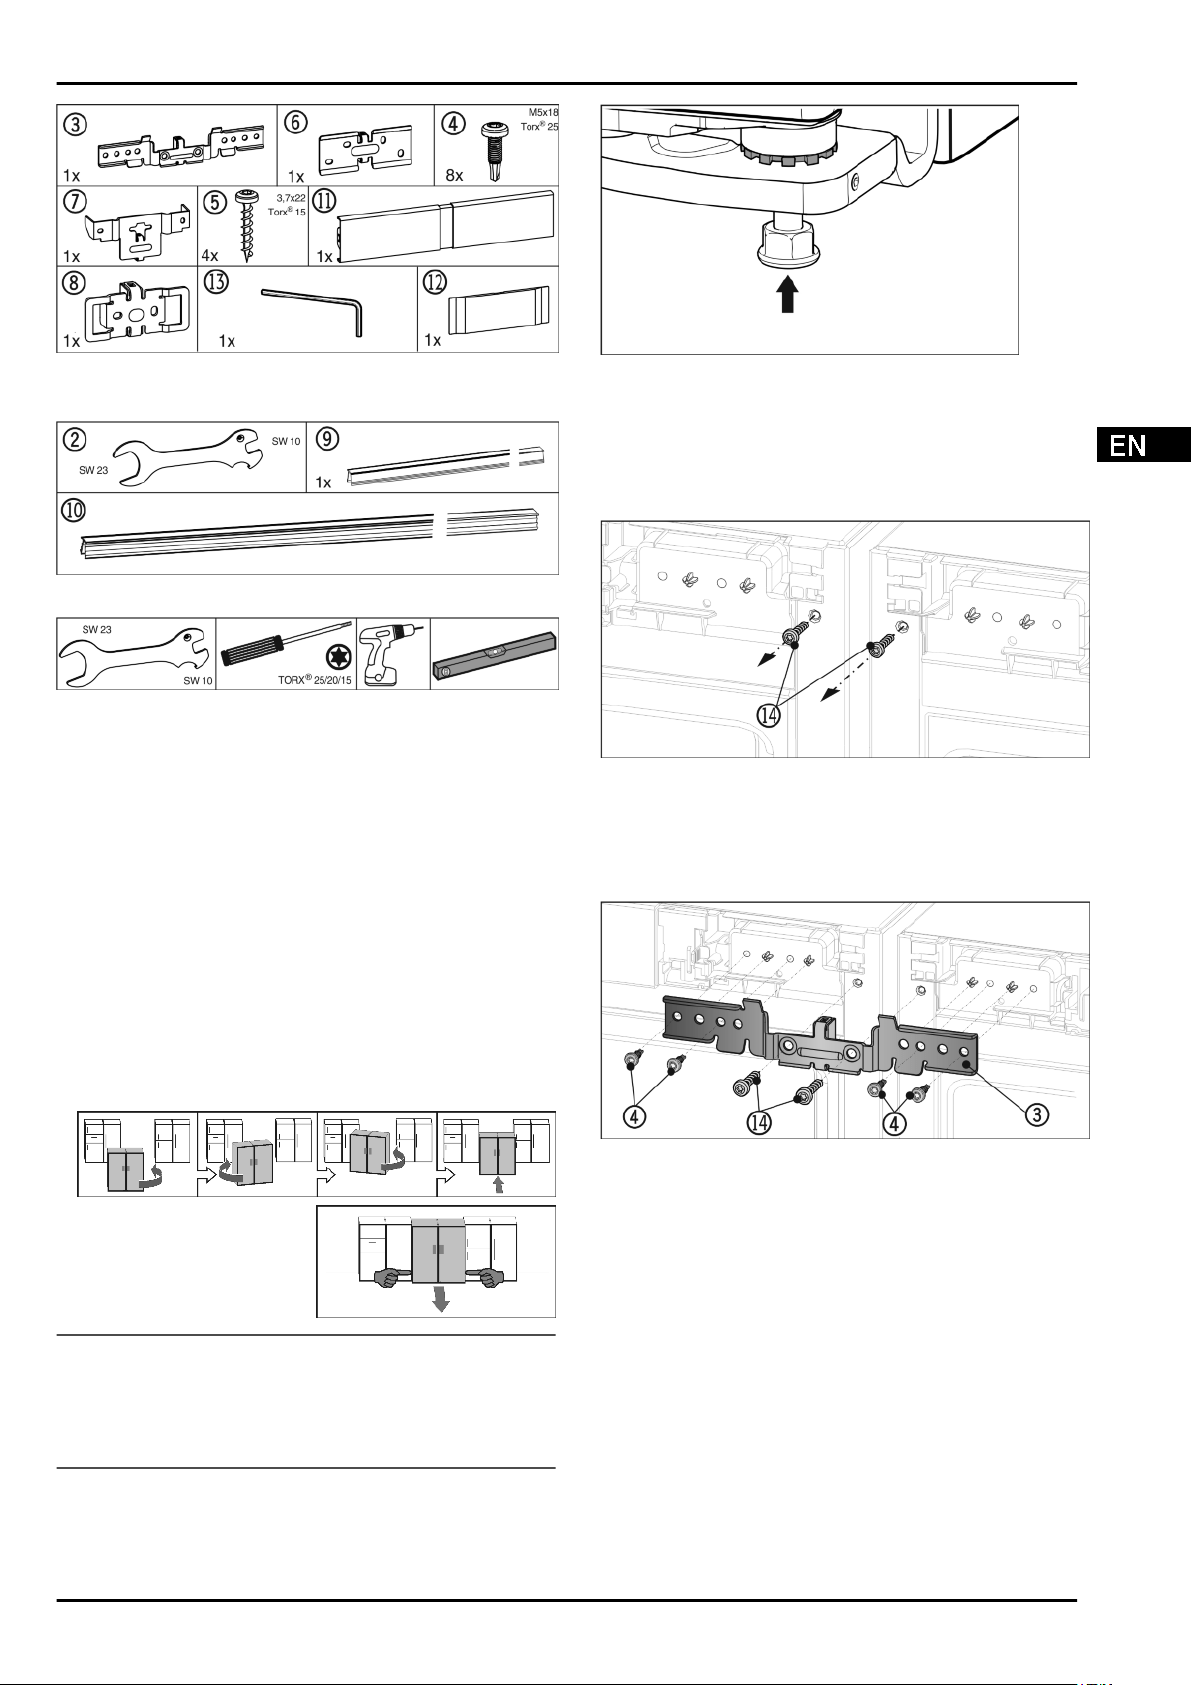
Fig. 2
Fitting parts, supplied in the appliance.
Fig. 3
Fig. 4
Ensure that the following tools are to hand:
q
SW 23/10 open-ended wrench (supplied)
q
Torx® 25/20/15 screwdriver
q
Power screwdriver
q
Spirit level
Information for moving the combined appliance:
q
Before assembling the appliances, site them as closely as
possible to the final position.
For proper assembly, the appliances must however be
accessible on all sides.
q
When moving the appliances after assembly, always grasp
the front outside corners. Never press your knee against the
side walls or door.
q
The combined appliance is easiest to shift diagonally by
moving the left and right corner alternately.
Once the combined appliance is exactly in front of the aper-
ture, push it straight in.
q
If the combined appliance
has to be pulled out of the
aperture again, take hold of
it in the lower third area and
pull it straight forwards.
NOTICE
Risk of damage when moving the combined SBS appliance!
The combined SBS appliance is heavy once assembled. The
appliance may be dented by improper movement.
u
Observe the information given on moving the appliance (see
above).
u
Remove all protective film from the outside of the housing.
Bottom front of the appliance:
Fig. 5
u
Tighten the outer adjustment feet. The appliances can be
moved easier
u
Push both appliances together up to approx. 10 mm apart so
that they stand flush at the front.
u
Line the appliances up with a spirit level on the top of the
appliance.
Top front of the appliance:
Fig. 6
u
Remove the existing covers.
u
Before fitting the top bracket remove both earthing screws
Fig. 6 (14)
.
u
Store the earthing screws safely. The screws are necessary
for fitting the bracket as shown below.
Fig. 7
u
Slide the bracket
Fig. 7 (3)
onto the pins with the spacer
between the appliances. Screw the brackets in loosely alter-
nately right and left with four screws
Fig. 7 (4)
and the previ-
ously removed earthing screws
Fig. 7 (14)
.
u
If necessary, line the appliances up with a spirit level on the
top of the appliance.
Bottom front of the appliance:
Side-by-side assembly
* Depending on model and options 3
Loading ...
Loading ...
Loading ...