Loading ...
Loading ...
Loading ...
15
INSTALLATION DIAGRAMS-TOP INLET/OUTLET USAGE
GENERAL
The type, size and location of the relief valves must be in
accordance with local codes. The locations of the relief valves
shown in the installation diagrams are typical. The heater has a
factory installed high temperature limit switch and temperature
and pressure relief valve.
Cold water lines to heater should be installed as shown in order
to minimize gravity circulation of hot water to building cold water
lines.
A listed temperature and pressure relief valve of adequate
capacity is installed on the heater. The locations shown in the
installation diagrams on the following pages are typical.
The discharge opening of the temperature and pressure relief
valve, located in front of the heater must be piped to an open
drain and should not be subject to freezing temperatures.
Install in accordance with all local codes.
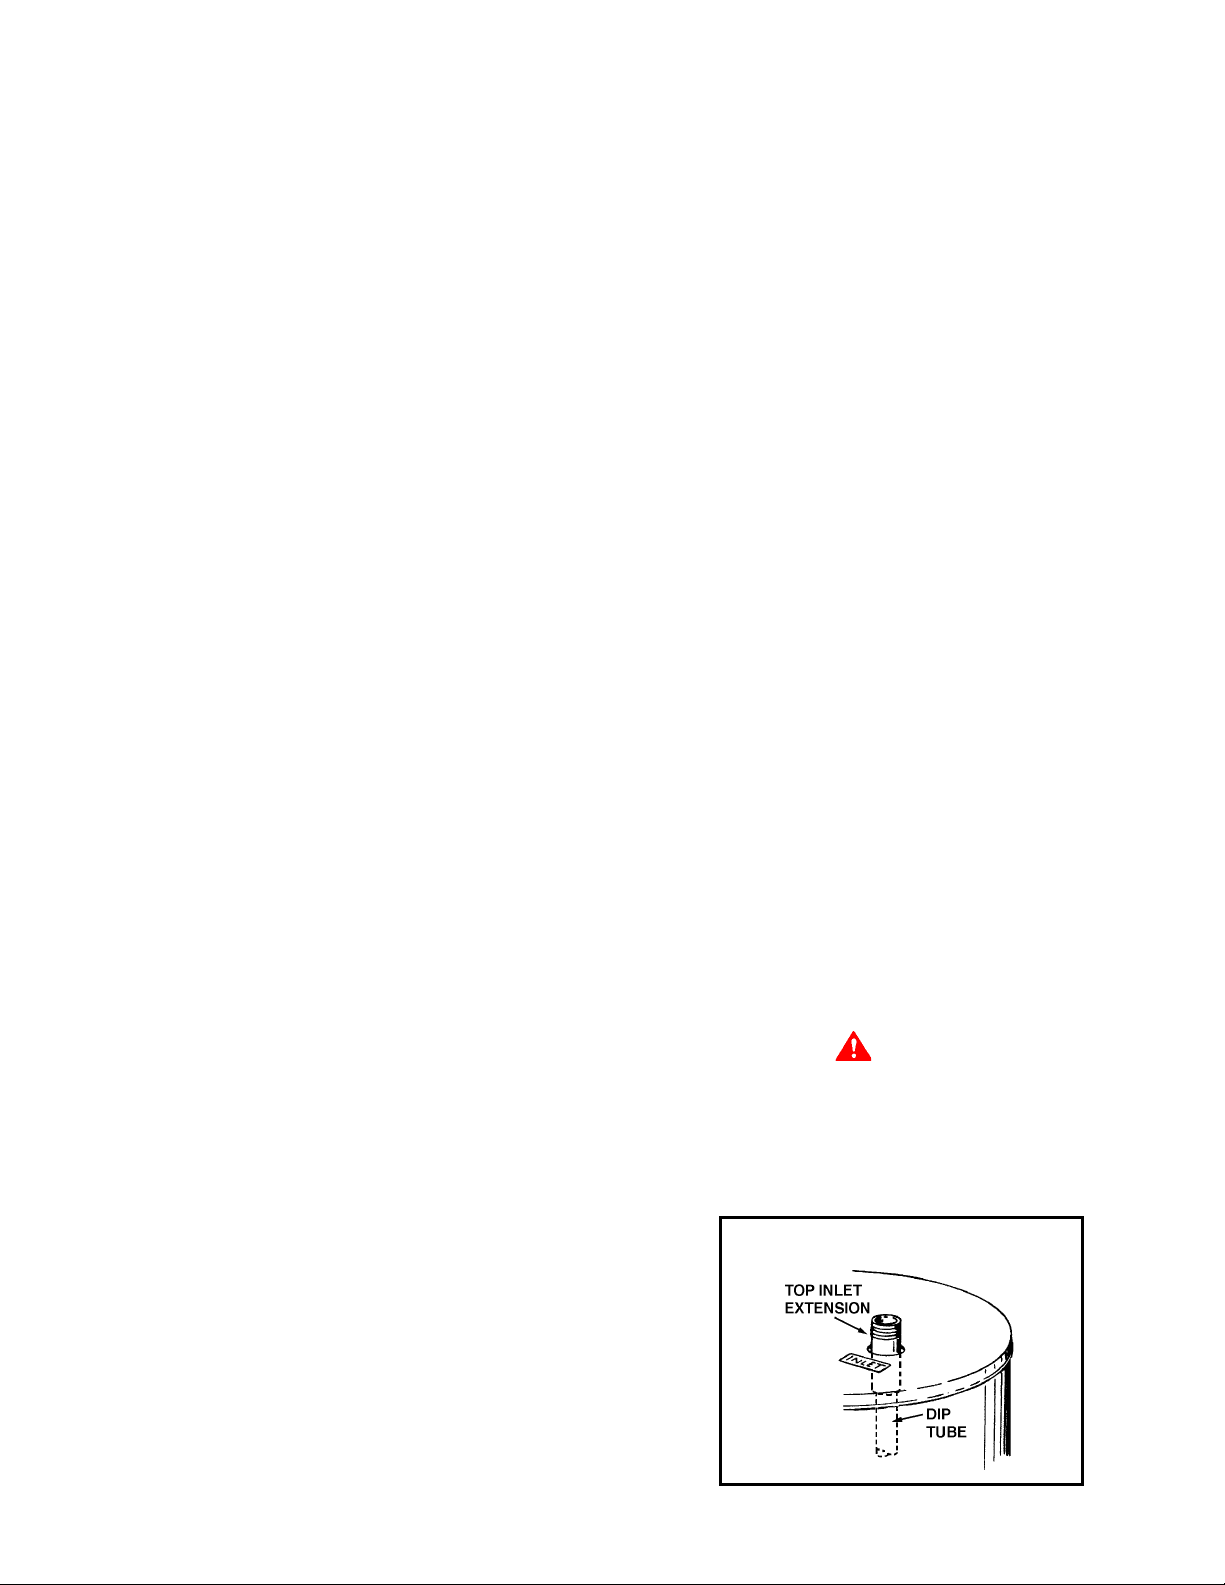
Use of the top inlet water connection requires installation of an
inlet dip tube (refer to figure 11). The tube is supplied in the
heater. Follow caution labels if applying heat to this fitting. Do
not allow pipe dope to contact the plastic tube during installation.
CODE RESTRICTIONS
Use of the top inlet water connection is not permitted on
installations in the state of North Carolina, due to the material of
the tube (Polypropylene). Where such code restrictions exist,
use only lower inlet tank connection. This may also require a
heat trap - check local codes. The “Top Outlet” connection may
still be used on these applications. Plug or cap all unused
openings in the tank before filling with water.
DANGER
TEMPERATURE SETTING SHOULD NOT EXCEED SAFE USE
TEMPERATURE AT FIXTURES. SEE WATER TEMPERATURE
CONTROL WARNING ON PAGE 27. IF HIGHER PREHEAT
TEMPERATURES ARE NECESSARY TO OBTAIN ADEQUATE
BOOSTER OUTPUT, ADD AN ANTI-SCALD VALVE FOR HOT
WATER SUPPLIED TO FIXTURES.
TUBE INLET INSTALLATION
FIGURE 13
BEFORE PLACING THE HEATER IN OPERATION, CHECK FOR
GAS LEAKAGE. Use soap and water solution or other material
acceptable for the purpose in locating the leaks. DO NOT USE
MATCHES, CANDLES, FLAME OR OTHER SOURCES OF
IGNITION FOR THIS PURPOSE.
DISCONNECT THE HEATER AND ITS MANUAL GAS SHUT-OFF
VALVE FROM THE GAS SUPPLY PIPING SYSTEM DURING ANY
SUPPLY PRESSURE TESTING EXCEEDING 1/2 PSIG (3.5 kPa).
GAS SUPPLY LINE MUST BE CAPPED WHEN DISCONNECTED
FROM THE HEATER FOR TEST PRESSURES OF 1/2 PSIG
(3.5 kPa) OR LESS. THE APPLIANCE NEED NOT BE
DISCONNECTED, BUT MUST BE ISOLATED FROM THE SUPPLY
PRESSURE TEST BY CLOSING THE MANUAL GAS Shut-off
VALVE.
GAS METER SIZE — NATURAL GASES ONLY
Be sure the gas meter has sufficient capacity to supply the full
rated gas input of the water heater as well as the requirements
of all other gas fired equipment supplied by the meter. If gas
meter is too small, ask the gas company to install a larger meter
having adequate capacity.
GAS PRESSURE REGULATOR
The gas pressure regulator is built into the gas valve and is
equipped to operate on the gas specified on model and rating
plate. The regulator is factory adjusted to deliver gas to burner at
correct water column pressure allowing for a nominal pressure
drop through the controls.
The minimum gas supply pressure for input adjustment must
not be less than 4.5" w.c. (1.12 kPa) for natural gas and 11.0" w.c.
(2.74 kPa) for propane gas.
Do not subject the combination gas valve to inlet gas
pressures of more than 14.0" W.C. (3.48 kPa) - natural gas,
14.0" W.C. (3.48 kPa)- propane gas. A service regulator is
necessary if higher gas pressures are encountered.
Gas pressure specified in Table 5, refer to flow pressure taken
at pressure tap of automatic gas valve while heater is operating.
GROUNDING INSTRUCTIONS
This water heater must be connected to a grounded metal,
permanent wiring system; or an equipment grounding conductor
must be run with the circuit conductors and connected to the
equipment grounding terminal or lead on the water heater.
HEATER WIRING
All electrical work must be installed in accordance with the latest
version of the National Electrical Code ANSI/NFPA No. 70, and /
or the CSA C22.1 Electrical Code, for Canada use Canadian
Electrical Code CSA C22.1 and must conform to all local code
authority having jurisdiction. AN ELECTRICAL GROUND IS
REQUIRED TO REDUCE RISK OF ELECTRICAL SHOCK OR
POSSIBLE ELECTROCUTION.
For Canadian installations the electrical connections and
grounding shall be done in accordance with current Canadian
Electrical Code CSA C22.1, Part 1 and/or local codes.
If any of the original wire as supplied with the appliance must be
replaced, use only type 105
0
C thermoplastic or equivalent. 250
0
C
type F must be used for the flame sensor leads and the spark
ignition cable must be high voltage 250
0
C.
Loading ...
Loading ...
Loading ...