Loading ...
Loading ...
Loading ...
9
14
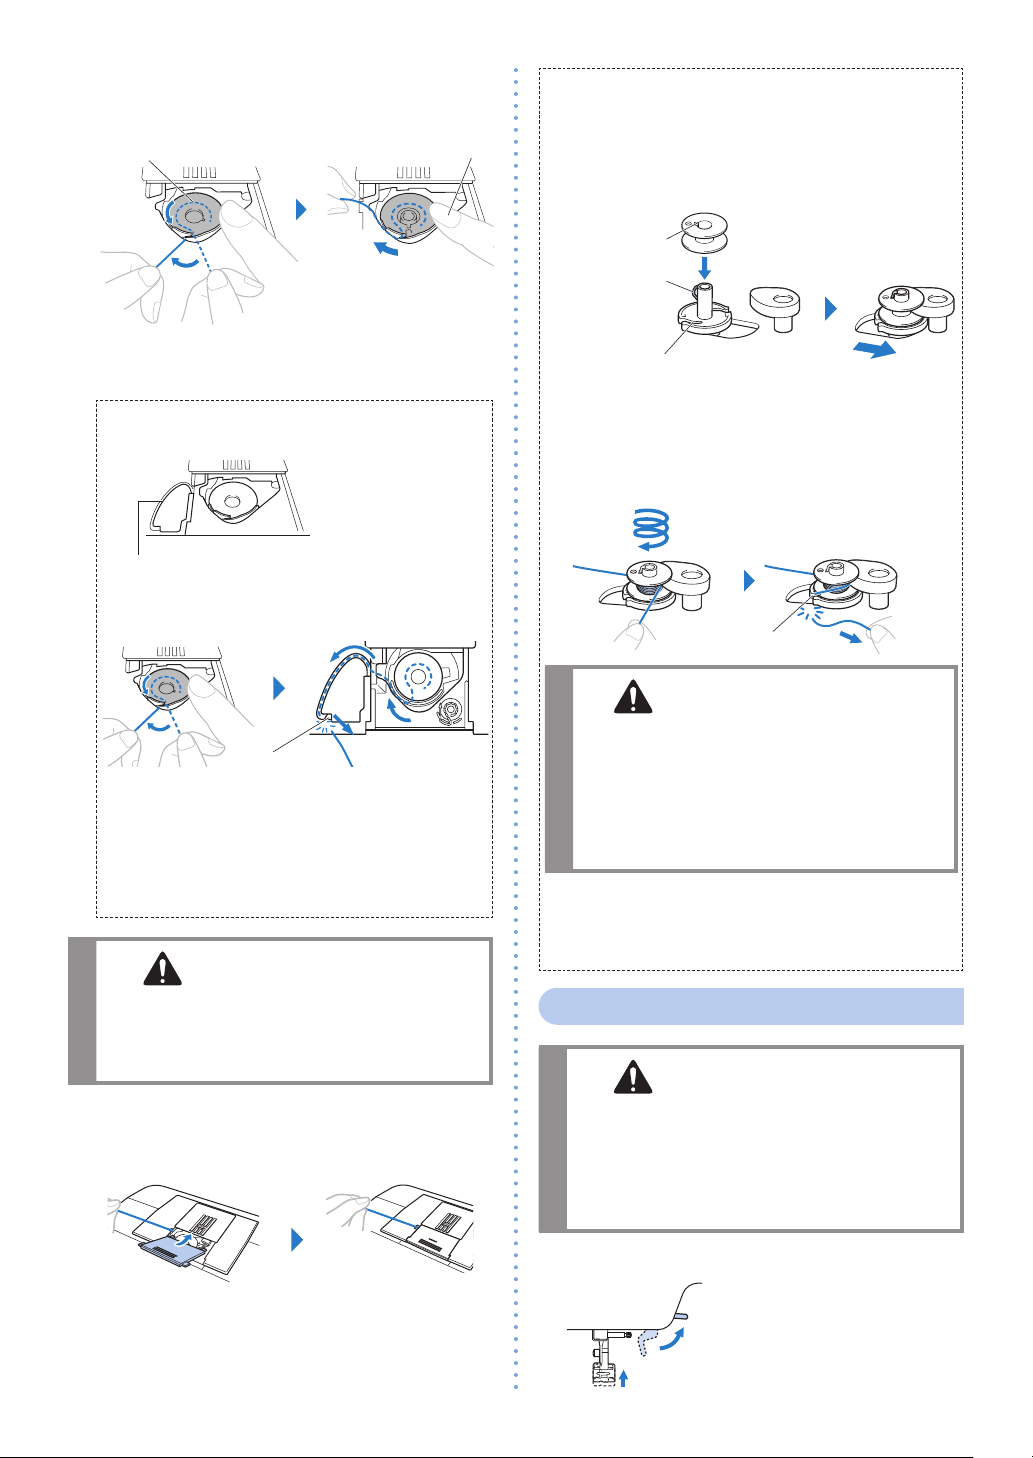
Put the bobbin in, hold the end of the thread,
push the bobbin down with your finger, and
then pass the thread though the slit as shown�
Hold the bobbin�
Counterclockwise
*
Follow this instruction so that the thread is correctly
inserted through the tension spring of the bobbin
case�
For models equipped with the quick-set
bobbin ★
Feed the end of the thread through the slit,
and then pull the thread to cut it�
Cutter
Slit for the quick set bobbin
*
The thread feeding direction is indicated by
arrows on the needle plate�
X
You can begin sewing without drawing up the
bobbin thread� When pulling up the bobbin
thread before sewing, refer to “Drawing up the
bobbin thread” (page 11)�
CAUTION
• Be sure to hold down the bobbin with
your finger and unwind the bobbin thread
correctly, otherwise the thread may break or
the thread tension will be incorrect�
15
Reattach the bobbin cover�
*
Make the end of the thread come out from the left
side of the cover�
n For models equipped with the cutter ★
1
Follow steps 1 to 2 of “Winding/Installing the
bobbin”�
2
Set the bobbin on the bobbin winder shaft,
and then slide the shaft to the right�
Make sure the notch fits
the projection�
Notch
Projection
Slit (cutter)
*
Check the installation orientation of the bobbin by
using the "b" mark on one side of the bobbin as a
reference� When placing the bobbin in the bobbin
case, be sure to place it in the same orientation�
3
Slit
Wind five or six
times�
Pull the thread�
The thread is cut at the
slit�
CAUTION
• Be sure to cut the thread as described� If
the bobbin is wound without cutting the
thread using the cutter built into the slit
in the bobbin winder seat, the thread may
become tangled in the bobbin or the needle
may bend or break when the bobbin thread
starts to run out�
4
Turn on the machine�
5
Follow steps 7 to 15 of “Winding/Installing
the bobbin”�
Upper threading
CAUTION
• Make sure you thread the machine properly�
Otherwise, the thread could tangle and break
the needle�
• Never use a thread weight of 20 or lower�
• Use the needle and the thread in the correct
combination� (page 12)
1
Raise the presser foot lever�
★: Only for some models�
Loading ...
Loading ...
Loading ...