Loading ...
Loading ...
Loading ...
17
Automatic reverse/reinforcement
stitching
Turn on the automatic reverse/reinforcement stitching
function before sewing, and the machine will
automatically sew reinforcement stitches (or reverse
stitches, depending on the stitch pattern) at the
beginning and end of sewing�
1
Turn on the automatic reverse/reinforcement
stitching� (page 7)
2
Select a stitch�
3
Set the fabric in the start position and start
sewing�
Reverse stitches (or reinforcement stitches)
X
The machine will automatically sew reverse stitches (or
reinforcement stitches) and then continue sewing�
Note
• You can pause or resume sewing by pressing
(“Start/Stop” button) while sewing� ★
4
Once you have reached the end of the stitching,
press
(Reverse/Reinforcement stitch button)�
Reverse stitches (or reinforcement stitches)
X
The machine will sew reverse stitches (or
reinforcement stitches) and stop�
Thread tension
The thread tension will affect the quality of your
stitches� You may need to adjust it when you change
fabric or thread�
Note
• We recommend that you do a test sample on scrap
of a fabric before you start to sew�
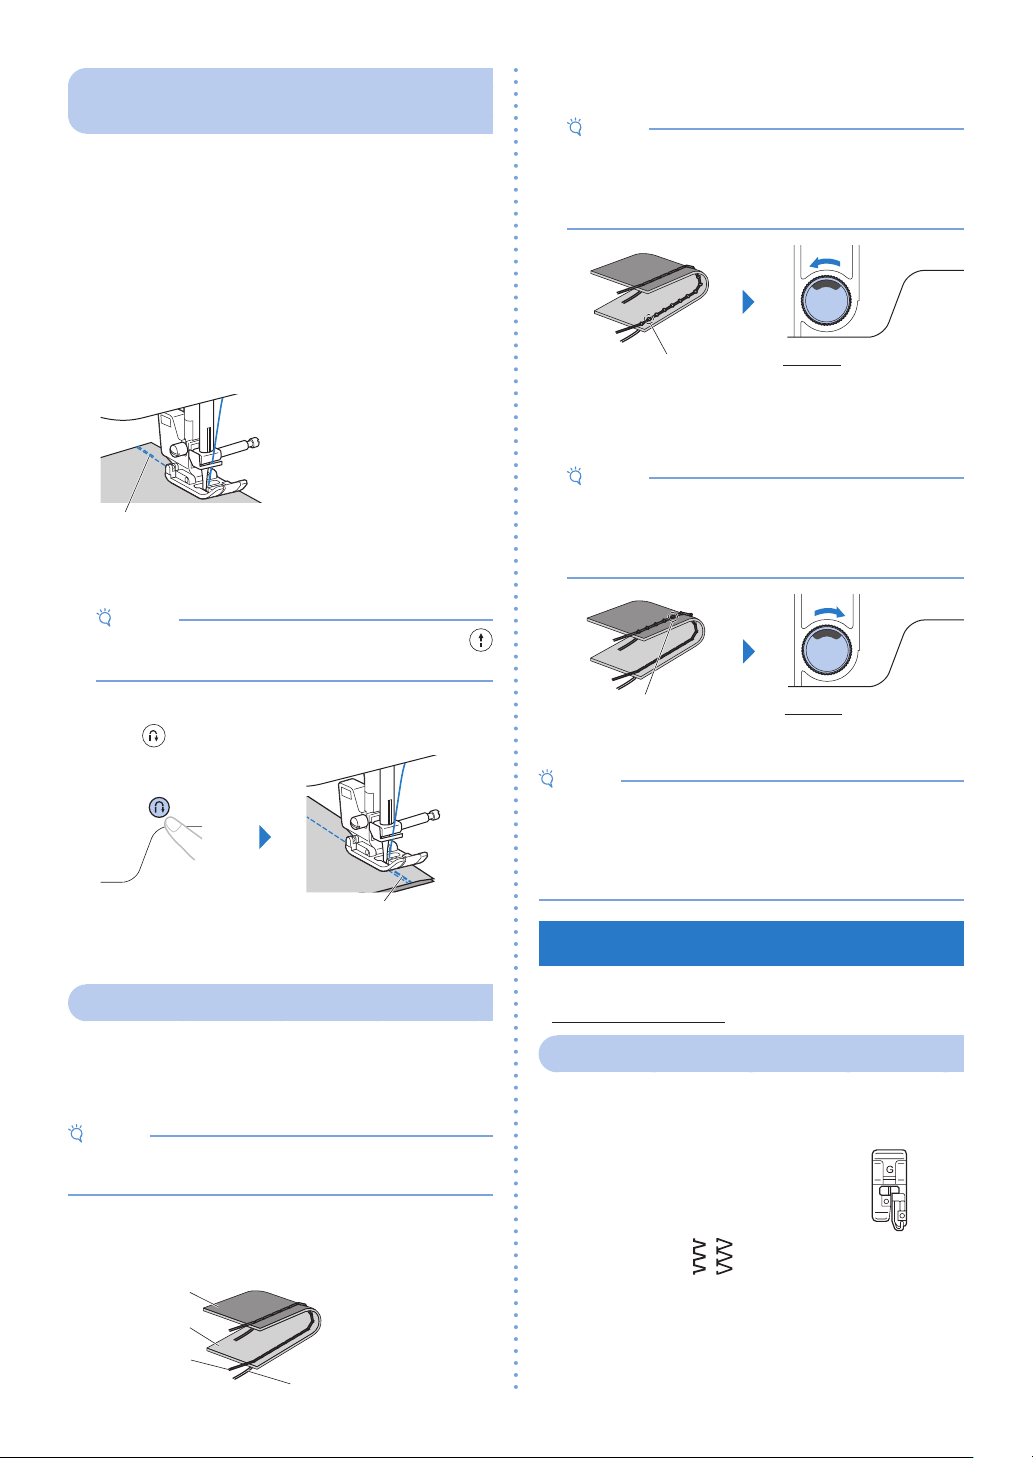
n Correct tension
*
Too much or too little tension will weaken your seams
or cause puckers on your fabric�
Wrong side
Right side
Upper thread
Bobbin thread
n Upper tension is too tight
Note
• If the bobbin thread was incorrectly threaded,
the upper thread may be too tight� In this case,
refer to “Winding/Installing the bobbin” (page
7) and rethread the bobbin thread�
0
1
2
3
4
5
6
7
8
9
Loops will appear on the
right side of the fabric�
Solution
Reduce the upper thread
tension�
n Upper tension is too loose
Note
• If the upper thread was incorrectly threaded,
the upper thread may be too loose� In this case,
refer to “Upper threading” (page 9) and
rethread the upper thread�
0
1
2
3
4
5
6
7
8
9
Loops appear on the
wrong side of the fabric�
Solution
Increase the upper thread
tension�
Note
• If the upper thread is not threaded correctly or
the bobbin is not installed correctly, it may not be
possible to set the correct thread tension� If the
correct thread tension cannot be achieved, rethread
the upper thread and insert the bobbin correctly�
Utility Stitches
You can see the “Stitch chart” from
“ http://s�brother/cmkag/ ”�
Overcasting stitches
Sew overcasting stitches along the edges of cut fabric
to prevent them from fraying�
1
Attach overcasting foot “G”�
2
Select a stitch�
*
Stitches may differ depending on the model� Check
stitch selections on the machine's body, and then
select the stitch number�
★: Only for some models�
Loading ...
Loading ...
Loading ...