Loading ...
Loading ...
Loading ...
19
P/N AYRD-210-INST-FUL Rev F
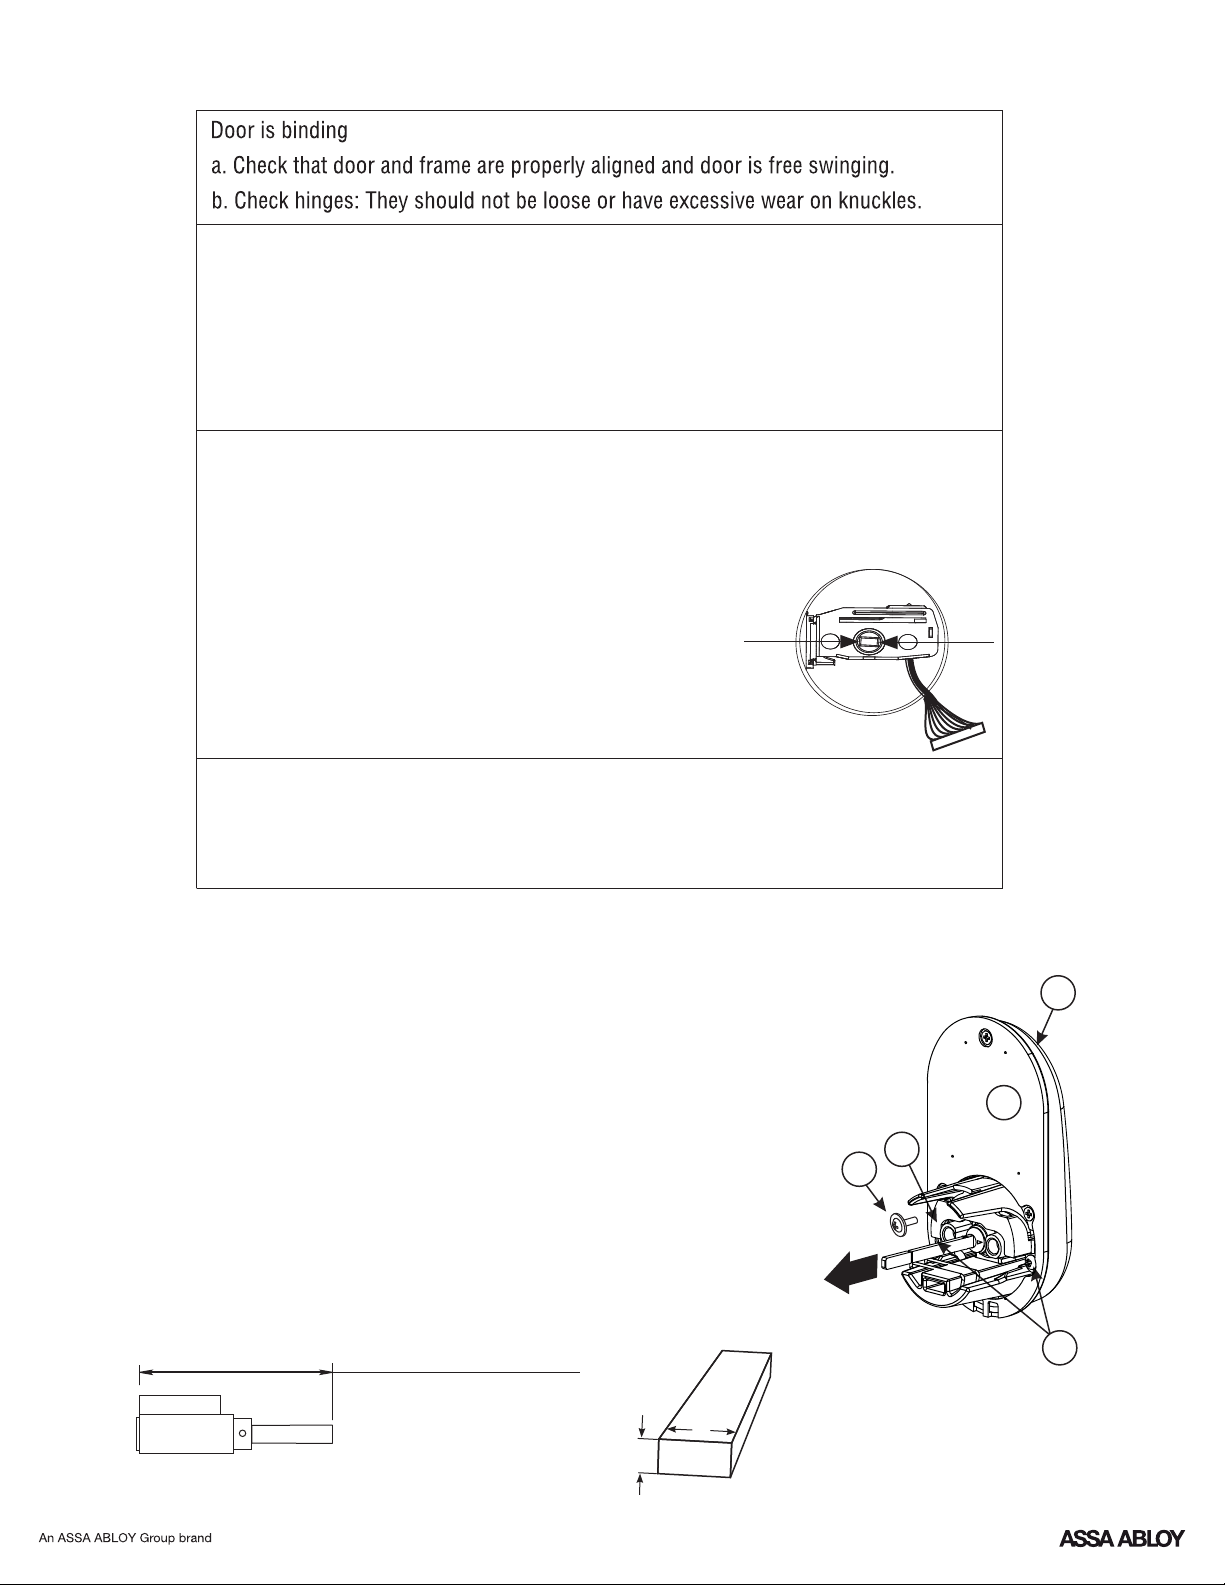
L
w
T
Changing Lock: Replacing Cylinder
Hardware Troubleshooting
Cycle lock in both the locked and unlocked positions. If problems are found:
1-3/8"* - 2" thick doors:
= 3-1/2" (88.8mm)L
2" - 2-1/4" thick doors:
= 3-3/4" (95.3mm)L
W = .2" (5.2mm)
Tailpiece
T = .098" (2.5mm)
1.To Remove cylinder:
A. Remove outside escutcheon from door.
B. Remove rubber gasket.
C. Remove two screws holding plastic guide in place.
D. Remove plastic guide.
E. Remove screw with washer holding cylinder in place (visible after
removing plastic guide).
F. Remove cylinder housing by pulling cylinder tailpiece away from
escutcheon.
Before installing cylinder, be sure tailpiece is correct length (see below).
2.To install new cylinder:
A. Reverse previous steps for removing cylinder.
*Requires addition of Thin Door Kit.
Bolt will not deadlock
a. Check for sufficient clearance of the bolt within the strike-side jamb. Correct this by
increasing the depth of the pocket for the bolt.
b. Check for misalignment of bolt and/or strike which may be preventing bolt from
properly entering the strike. With the door open, extend and retract the bolt; if it is
smooth, check the strike alignment.
Bolt does not extend or retract smoothly
a. Bolt and strike are misaligned, see above.
b. Check the backset of door relative to adjustments already made to bolt.
c. Verify proper door preparation and re-bore holes that are too small or misaligned.
d. Verify keypad wire harness is routed under the bolt (see Fig. A).
e. Verify bolt is installed with correct side up (Fig. A).
Keypad numerics are scrolling
Remove interior escutcheon and check to ensure that the wire harness lies flat against
the back recessed area and is properly routed along the side of the escutcheon and
tucked under the plastic cable guide.
Figure A
A
B
C
D
F
E
Loading ...