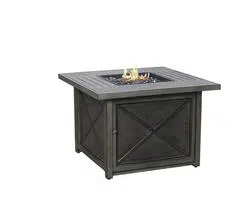
ASSEMBLY INSTRUCTIONS NAPLES NOOK SQR FIREPIT for Backyard Creations BRK00900K01
Table of contents
Important Safety Information
Important Information about Propane
Specification
Parts Identification List
Installation
Natural Gas Conversion
Maintenance
Batteries
Lighting Instructions
Troubleshooting Guide
Warranty
INSTALLATION
Carefully unpack all items from the box. Place the base in the final position. There must be a minimum of 24 in / 60.96 cm of clearance from the side of the table top to any combustible walls.
Attach the back panel to the side panels by using four 1/4"x15 mm bolts and Ø6.5x1.0 mm washers as shown in Figure 2. Guide the bolts through the holes in back panel, into the pre-drilled holes in the side panels. Hand tighten only
. Attach the middle support to the side panels by using two 1/4"x15 mm bolts and Ø6.5x1.0 mm washers as shown in Figure 3. Guide the bolts through the holes in the middle support, into the pre-drilled holes in the side panels. Hand tighten only.
Attach the lp support to the side panels by using four 1/4"x30 mm bolts and Ø6.5x1.0 mm washers as shown in Figure 4. Guide the bolts through the holes in the lp support, into the pre-drilled holes in the side panels. Hand tighten only.
With the help of another person, carefully place the table top onto the firepit base. After making any necessary adjustments to the alignment of the table top and the assembled base, use four 1/4"x20 mm bolts and Ø20xØ6.5x2.0 mm washers as shown in Figure 5. Guide the bolts through the holes in the base brackets, into the pre drilled holes in the table top. Do not tighten completely.
Attach the U Bracket to the lp support by using two 1/4"x15 mm bolts and washers as shown in Figure 6. Do not over tighten.
Pour ALL of the media into the burner pan. The burner MUST be completely covered to ensure the appliance functions properly and safely. Remove any lava rocks or fire ice on top of the ignition well. See figure 7.
Slide the tank drawer out and place the LP tank in the drawer. Connect the regulator as shown in Figure 8. Turn the black handle clockwise to tighten. Turn the handle counter clockwise to remove. The hose must point down. Check that the valve is turned all the way clockwise to the "OFF" position. Open the tank valve. Apply a solution of soapy water to the tank-regulator connection and to the valve-hose connection to check for leaks. If soap bubbles continue to form, the connection has a leak. If a leak is found, close the tank valve and tighten all connections.
Tighten the threaded knobs found on the lp support frame (Figure 9) so that the LP tank cannot move from side to side. Do not remove the plastic cap from the end of threaded section.
MAINTENANCE
The flames should look like those in Figure 11. To clean the burner, use a soft brush after the burner has cooled completely. Never use a vacuum cleaner on the burner. It is recommended to store the fire pit indoors during winter if it will be subjected to freezing temperatures. The LP cylinder must be disconnected and removed from the appliance before the appliance can be stored indoors.
BATTERIES
Make sure the control knob is in the "OFF" position. Unscrew the push button cap on the ignition module located on the control panel to access the battery compartment. The ignition module requires one Alkaline AA size battery (1.5V). The negative (-) end goes in first. See Figure 12. Dispose of the battery safely as it may explode or leak if charged or disposed of in a fire. Make sure of the polarity. Mercury and cadmium free.
CAUTIONS: BATTERY INSTRUCTIONS
Always purchase the correct size and grade of battery most suitable for the intended use.
Always replace the whole set of batteries at one time, taking care not to mix old and new ones, or batteries of different types.
Clean the battery contacts and also those of the device prior to battery installation.
Ensure the batteries are installed correctly with regard to polarity (+ and -).
Remove batteries from equipment which is not to be used for an extended period of time.
Remove used batteries promptly.
For recycling and disposal of batteries to protect the environment, please check the internet or your local phone directory for local recycling centers and / or follow local government regulations.
LIGHTING INSTRUCTIONS
Warning: If these instructions are not followed exactly, a fire or explosion may result causing property damage, personal injury, or loss of life.
Read instructions before lighting.
Push the control knob in and turn the knob to ON.
Press the igniter button to light the burner, release the control knob after 15 seconds. If the burner does not light, wait 5 minutes, repeat.
Adjust the flame to the desired amount by using the control knob. See Figure 13
TROUBLESHOOTING GUIDE
Burner won’t light
No propane gas at the burner - Check that the gas tank valve is open. Turn the control knob to “ON” and push the control knob in. Make sure the tank has propane gas.
No spark at electrode - Check that the AA battery is installed with the negative (-) end first and has a charge. Check that the wire is connected to the ignition module. Check that the electrode is not cracked or broken.
Lack of oxygen - Remove excess fire ice or lava rocks from around the ignition well.
Burner won’t stay lit after lighting
Thermocouple not in the flame - Check that the tip of the thermocouple is even with the top of the ignition well. Remove any fire ice or lava rocks from the ignition well.
Thermocouple connection at the main control valve is loose - Tighten the thermocouple nut at the back of the valve.
No fire ice or lava rocks on the burner - Cover the burner with fire ice or lava rocks as per the instructions.