Loading ...
Loading ...
Loading ...
Getting to Know Your Band Saw ...........................
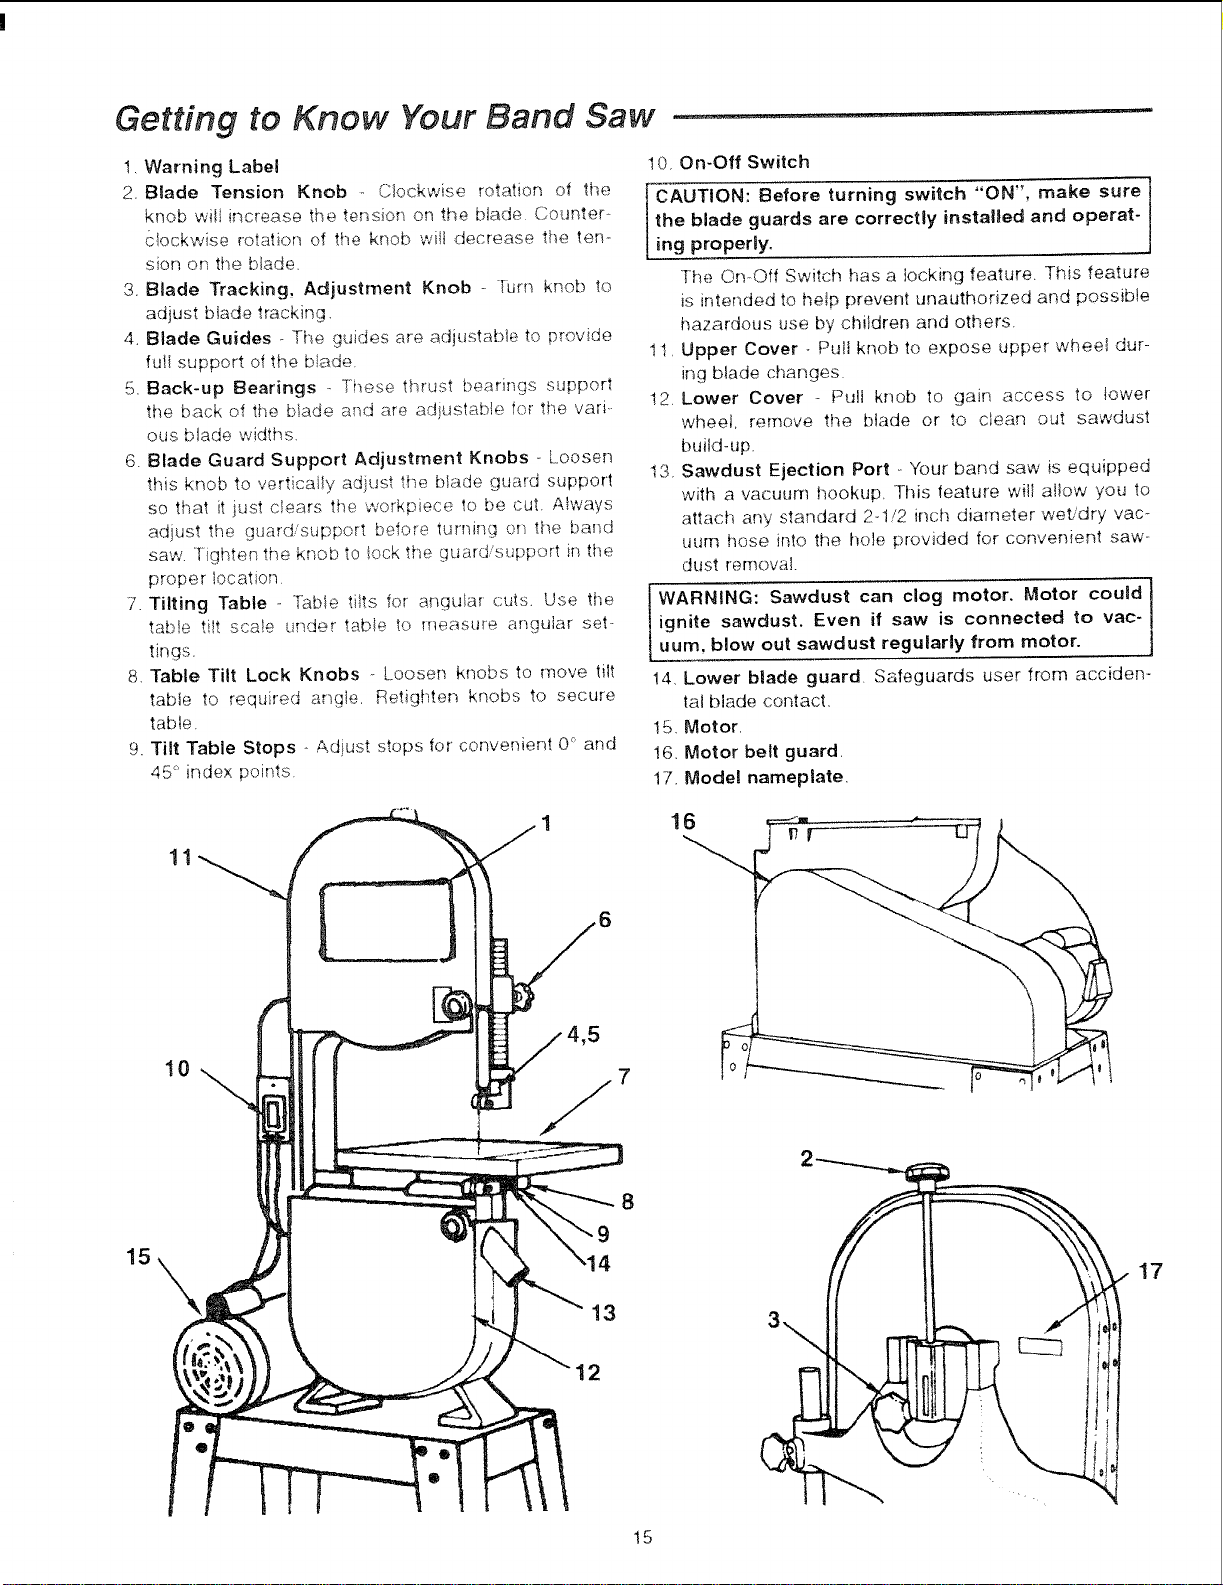
t, Warning Label
2. Blade Tension Knob _ Clockwise rotation of fi_e
knob wilt increase the tensior_ on the blade. Counter-
clockwise rotation of the knob wJJt decrease the ten °
sion on the bIade.
3. Blade Tracking, Adjustment Knob - RJrn knob to
adjust blade tracking.
4. Blade Guides oThe guides are adiustable to provide
full support ot the blade.
5. Back-up Bearings _ These thrust bearings support
the back of the blade and are adi_stabte for the vari.
ous blade widths,
6. Blade Guard Support Adjustment Knobs oLoosen
this knob to vertically adiust the blade guard support
so that it just clears the workpiece to be cut. A!ways
adjust the guard/support belore turning ot_ the [:!aI_d
saw. Tighten the knob to lock the guard/support in the
proper location.
7. Tilting Table - Table ti_ts for angular cuts. Use the
tab!e ti!t sca!e _!nder tabie to measure angular set-
tings.
8. Table Tilt Lock Knobs --Looser_ knobs to move tilt
table to required angle. Retighten knobs to secure
table.
9. Tilt Table Stops - Adjust stops for" convenient 0° a_qd
45 ° index points.
10. On-Off Switch
CAUTION: Before turning switch "ON", make sure
the blade guards are correctly instaiJed and operat-
ing properly.
J
The On-Off Switch has a iocking feature. This feature
is intended to help prevent unauthorized and possibte
hazardous use by children and others.
11. Upper Cover - Pull knob to expose upper whee_ dur-
ing btade changes.
12. Lower Cover - Pull knob to gain access to lower
wheel, remove the blade or to clean out sawdust
build-up.
t3. Sawdust Ejection Port - Your band saw is equipped
with a vacuurn hookup This feature witl allow you to
attach any standard 2-1/2 inch diameter wet/dry vac-
uum hose into the hole provided for convenient saw-
dust removal.
WARNING: Sawdust can clog motor. Motor could I
ignite sawdust. Even if saw is connected to vac-
uum, blow out sawdust regularly from motor.
14. Lower blade guard Safeguards user from acciden-
tat blade contact,
15_Motor
16. Motor belt guard.
17. Model nameplate.
15
13
7
8
16
17
15
Loading ...
Loading ...
Loading ...