Loading ...
Loading ...
Loading ...

14 15
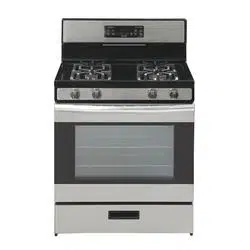
OVEN USE (continued)OVEN USE
PRE-HEATING THE OVEN
• To begin pre-heating the oven, press the “Bake” pad, and then press the “Start” pad.
“PrE” icon will appear on the display when the oven is pre-heating and it will sound 3
reminder tones when the preheat is done.
• The oven will take approximately 6 to 11 minutes to reach 350°F (177°C) with all of the
oven racks provided with your oven inside the oven cavity. Higher temperatures will take
longer to preheat.
• The preheat cycle rapidly increases the oven temperature. The actual oven temperature
will go above your set temperature to offset the heat lost when your oven door is opened
to insert food. This ensures that when you place your food in the oven, the oven will
begin at the proper temperature. Insert your food when the preheat tone sounds.
• Do not open the door during preheat before the tone sounds.
BAKE
Before baking, position racks according to the “Positioning Racks and Bakeware” section.
HOW TO SET OVEN TO BAKE FUNCTON:
1. To set the oven to Bake mode, press the “Bake” pad on the control panel.
2. 350°F (177°C) will appear on the display.
3. Use the “+ or -” pad to enter the desired oven temperature.
• The temperature of the oven can be set from 170°F (77°C) to 550°F (290°C).
4. Once the oven temperature has been set, press the “Start” pad to begin the oven heat-
ing process.
5. Once the oven has reached the specified temperature, place food in the oven.
6. When you are finished using the oven, press the “Cancel Off”pad to turn off the oven.
7. Remove food from the oven.
BROIL
The broiler is located at the bottom of the range below the oven door.
IMPORTANT: To avoid permanent damage
to the porcelain finish, do not place food
or bakeware directly on the “Broil” door
or bottom. Do not line the bottom or racks
with aluminum foil or liner.
HOW TO SET THE OVEN TO BROIL FUNCTION :
High Setting:
1. To set the Broiler, press the “Broil” pad on the control panel.
2. Next, press the “Start” pad. The display will show HI and is set to the highest tempera-
ture setting of 550°F.
Low Setting:
1. To set the Broiler on low, press the “Broil” pad twice on the control panel.
2. Next, press the “START” pad. The display will show LO and is set to the lowest tempera-
ture setting of 450°F.
Once the HI or LO Broiler setting is selected, you can now use the broiler.
1. Open the broiler door and pull the rack out to the stop position
2. Place food on a broiler safe pan, then place it in the center of the broiler rack
3. Push the broiler rack to the original position. Close the door to ensure the proper broiler
temperature
4. Press the “Cancel Off” pad when you are finished using the broiler.
To remove the “Broil” rack, pull it out to the stop position, raise the front edge, then lift out.
Reverse the steps to replace the rack.
For best results when baking layer cakes
on 2 racks, use racks 2 and 5 in the lower
and upper section of the oven. For an even
bake, stagger the cake pans on the bottom
rack so that it is not positioned directly
below the cake pans on the top rack. Place
the cake pans on the racks as shown in the
illustration below. (Diagram A)
For best results when baking layer cakes
on 2 racks in the middle section of the
oven, use racks 3 and 5. For an even bake,
stagger the cake pans on the bottom rack
so that it is not positioned directly below
the cake pans on the top rack. Place the
cake pans on the racks as shown in the
illustration below. (Diagram B)
OVEN USE
IMPORTANT: To avoid permanent damage
to the porcelain finish, do not place food or
bakeware directly on the oven door or bot-
tom. Do not line the oven bottom or racks
with foil or liner.
POSITIONING RACKS AND BAKEWARE
• Position racks before turning on the
oven.
• Do not position racks with bakeware on
them.
• Make sure racks are level.
• Placement of food items on the dif-
ferent rack positions will impact the
cooking results.
TO REMOVE OVEN RACKS
Pull rack out to the stop position, raise the
front edge, and then lift out.
TO INSERT OVEN RACKS
Place rack on the rack support in the oven.
Tilt the front edge up slightly, and slide rack
back until it clears the stop position. Lower
front and slide back into the oven.
OVEN
FUNCTION
RACK
POSITION
BAKE:
Large Roast/Turkey Use Rack 1
Meat/Poultry Use Rack 2
Cake/Cookies Use Rack 3
Batch Baking Use Rack 2 and 5
6
5
4
3
1
2
Loading ...
Loading ...
Loading ...