Loading ...
Loading ...
Loading ...
The Self-CleanCycle (contlnuedo_.)
2. Turn the OVEN CONTROL KNOB to the CLEAN
position.
The LOCK DOOR indicator Light will blink alerting
you that the door lock handle has not been engaged in
the lock position.
The display will be showing 4:20. The oven wlII
automatically clean for 4 hours and 20 minutes.
Here's how to Increase or decrease cleaning time:
While 4:20 Is showing In the display and the colon (:) is
blinking, press the HR= UP or DOWN arrow pad to
change the hours needed and press the MIN. UP or
DOWN arrow pad to change the minutes needed. The
control will allow you 1 minute to make the change
before t_begins the cycle automatically.
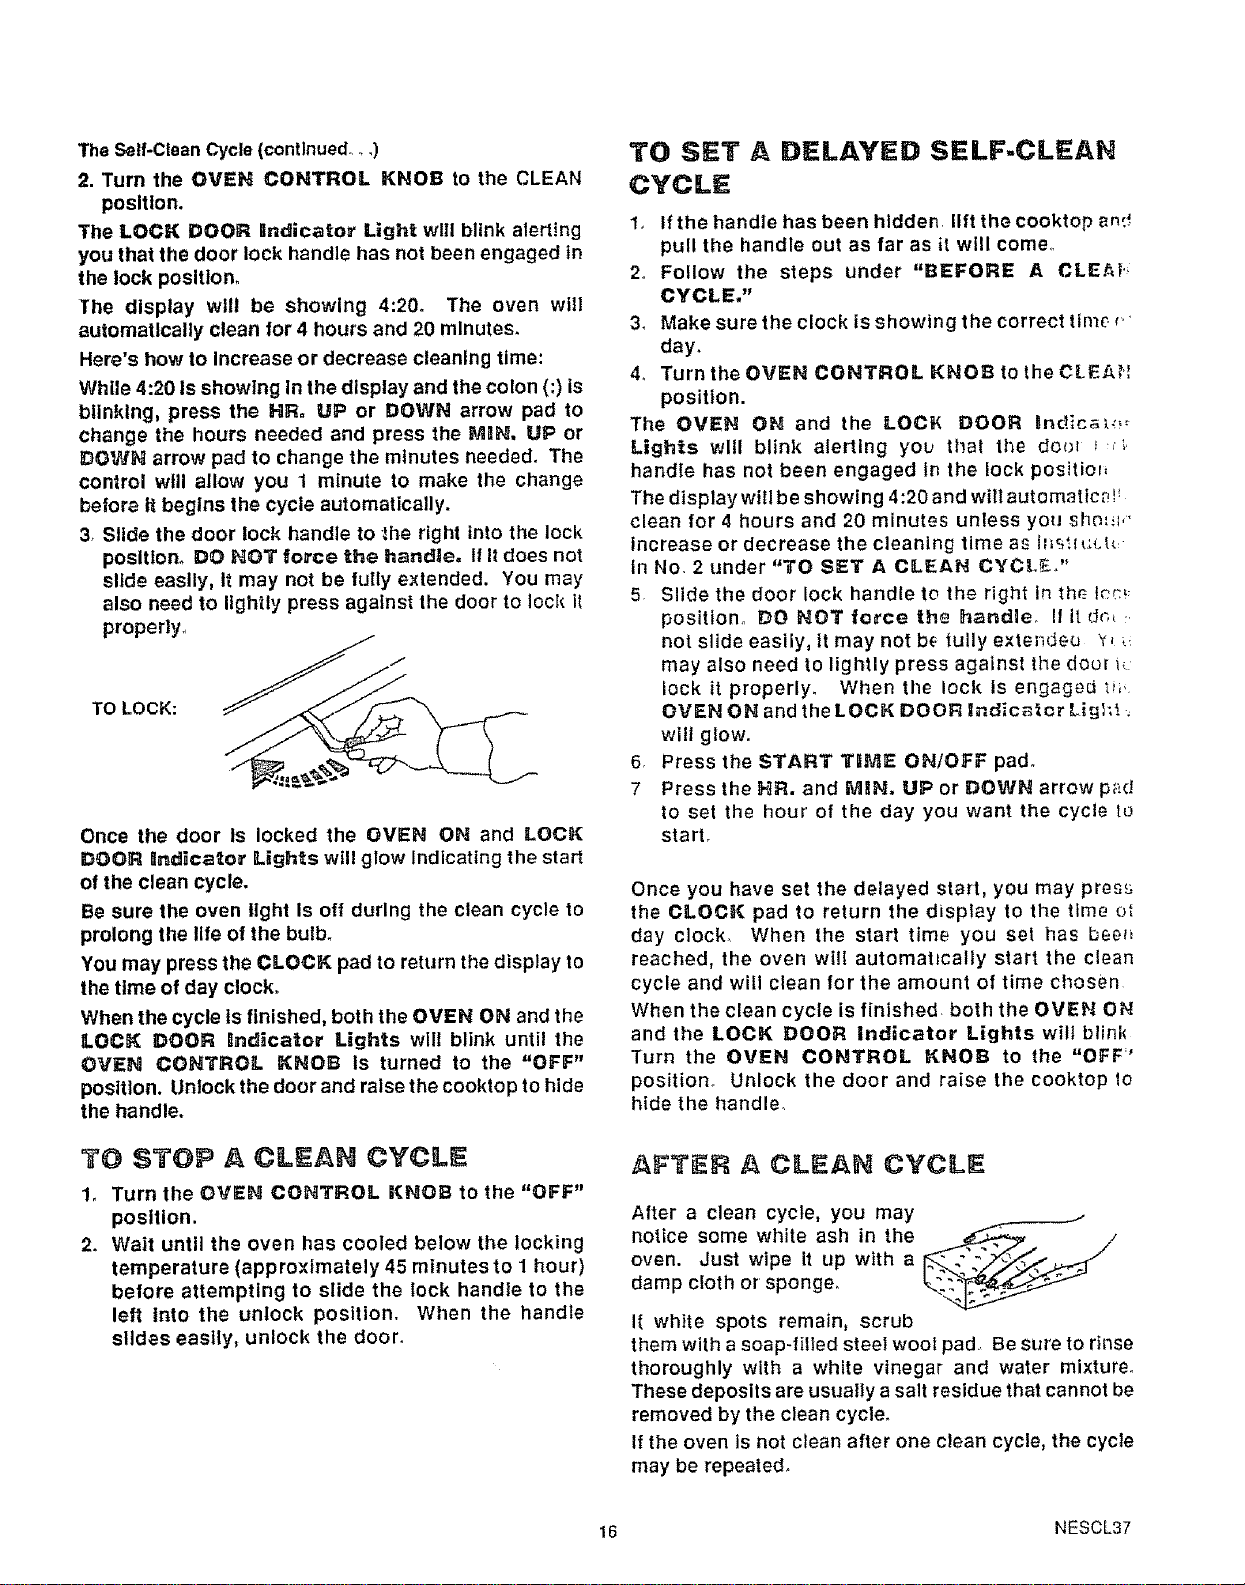
3. Slide the door lock handle to the right into the lock
position. DO HOT fo_'ce the handle, If It does not
slide easily, It may not be fully extended. You may
also need to lightly press against the door to lock it
properly.
TO LOCK:
Once the door Is locked the OVEN ON and LOCK
DOOR Ilnd_cator Lights will glow Indicating the start
of the clean cycle.
Be sure the oven light Is off during the clean cycle to
prolong the life of the bulb.
You may press the CLOCK pad to return the display to
the time of day clock.
When the cycle ts finished, both the OVEN ON and the
LOCK DOOR Indicator Lights will blink until the
OVEN CONTROL KNOB Is turned to the "OFF"
position. Unlock the door and raise the cooktop to hide
the handle.
TO STOP A CLEAH CYCLE
1. Turn the OVEN CONTROL KNOB to the "OFF"
position.
2. Wait until the oven has cooled below the locking
temperature (approximately 45 minutes to 1 hour)
before attempting to slide the lock handte to the
left into the unlock position, When the handle
slides easily, unlock the door.
TO SET A DELAYED SELF-CLEAN
CYCLE
1, If the handle has been hidden, lift the cooktop and
pull the handle out as far as it wtll come,,
2. Follow the steps under "BEFORE A CLE!_,
CYCLE."
3. Make sure the clock is showing the correct time _,'
day.
4o Turn the OVEN CONTROL KNOB to the CEEAH
position.
The OVEN ON and the LOCt_ DOOR Bnd_c_o_
Lights will blink alerting you that tl_e door _. ;
handle has not been engaged in the lock positior_
The display will be showing 4:20 and will automatics! _
clean for 4 hours and 20 minutes unless you shinto'
Increase or decrease the cleaning time as inst{uL_.
In No. 2 under "TO SET A CLEAN CYCLe,"
5 Slide the door lock handle to the right in th_ I_c_
position. DO NOT torce the handle_ II It dm
not slide easily, it may not be tully exte;_deu _, _:
may also need to lightly press against the door i_
lock it properly. When the Iocktsengaged_i_,
OVEN ON and the LOCK DOOR lndic_tar Ligl_.-,
will glowo
6, Press the START TIIME ON/OFF pad°
7 Press the HR. and IVllIN. UP or DOWN arrow pad
to set the hour of the day you want the cycle t_J
start.
Once you have set the delayed start, you may press
the CLOCK pad to return the display to the time ot
day clock, When the start time you set has bee_
reached, the oven will automahcally start the clean
cycle and will clean for the amount of time cl_osen
When the clean cycle is finished, both the OVEN ON
and the LOCK DOOR indicator Lights will blink
Turn the OVEN CONTROL KNOB to the "OFF"
position, Unlock the door and raise the cooktop to
hide the handle,
, FTiER CLEAN CYCLE
After a clean cycle, you may
notice some white ash in the ._-_. /
oven. Just wipe it up with a __:'_,
damp cloth or sponge.
I1 white spots remain, scrub
them with a soap-filled steel wool pad. Be sure to rinse
thoroughly with a white vinegar and water mixture.
These deposlls are usually a salt residue that cannot be
removed by the clean cycle°
If the oven Is not clean after one clean cycle, the cycle
may be repeated.
16 NESCL37
Loading ...
Loading ...
Loading ...