Loading ...
Loading ...
Loading ...
Installation Instructions
i
[] PLUG IN THE REFRIGERATOR
A,_ange tile coil ol tubhlg so that it does not viblate
against Ihe back ot the 1oh igmalor m against the
wall Push the reliigelalor back to the wall
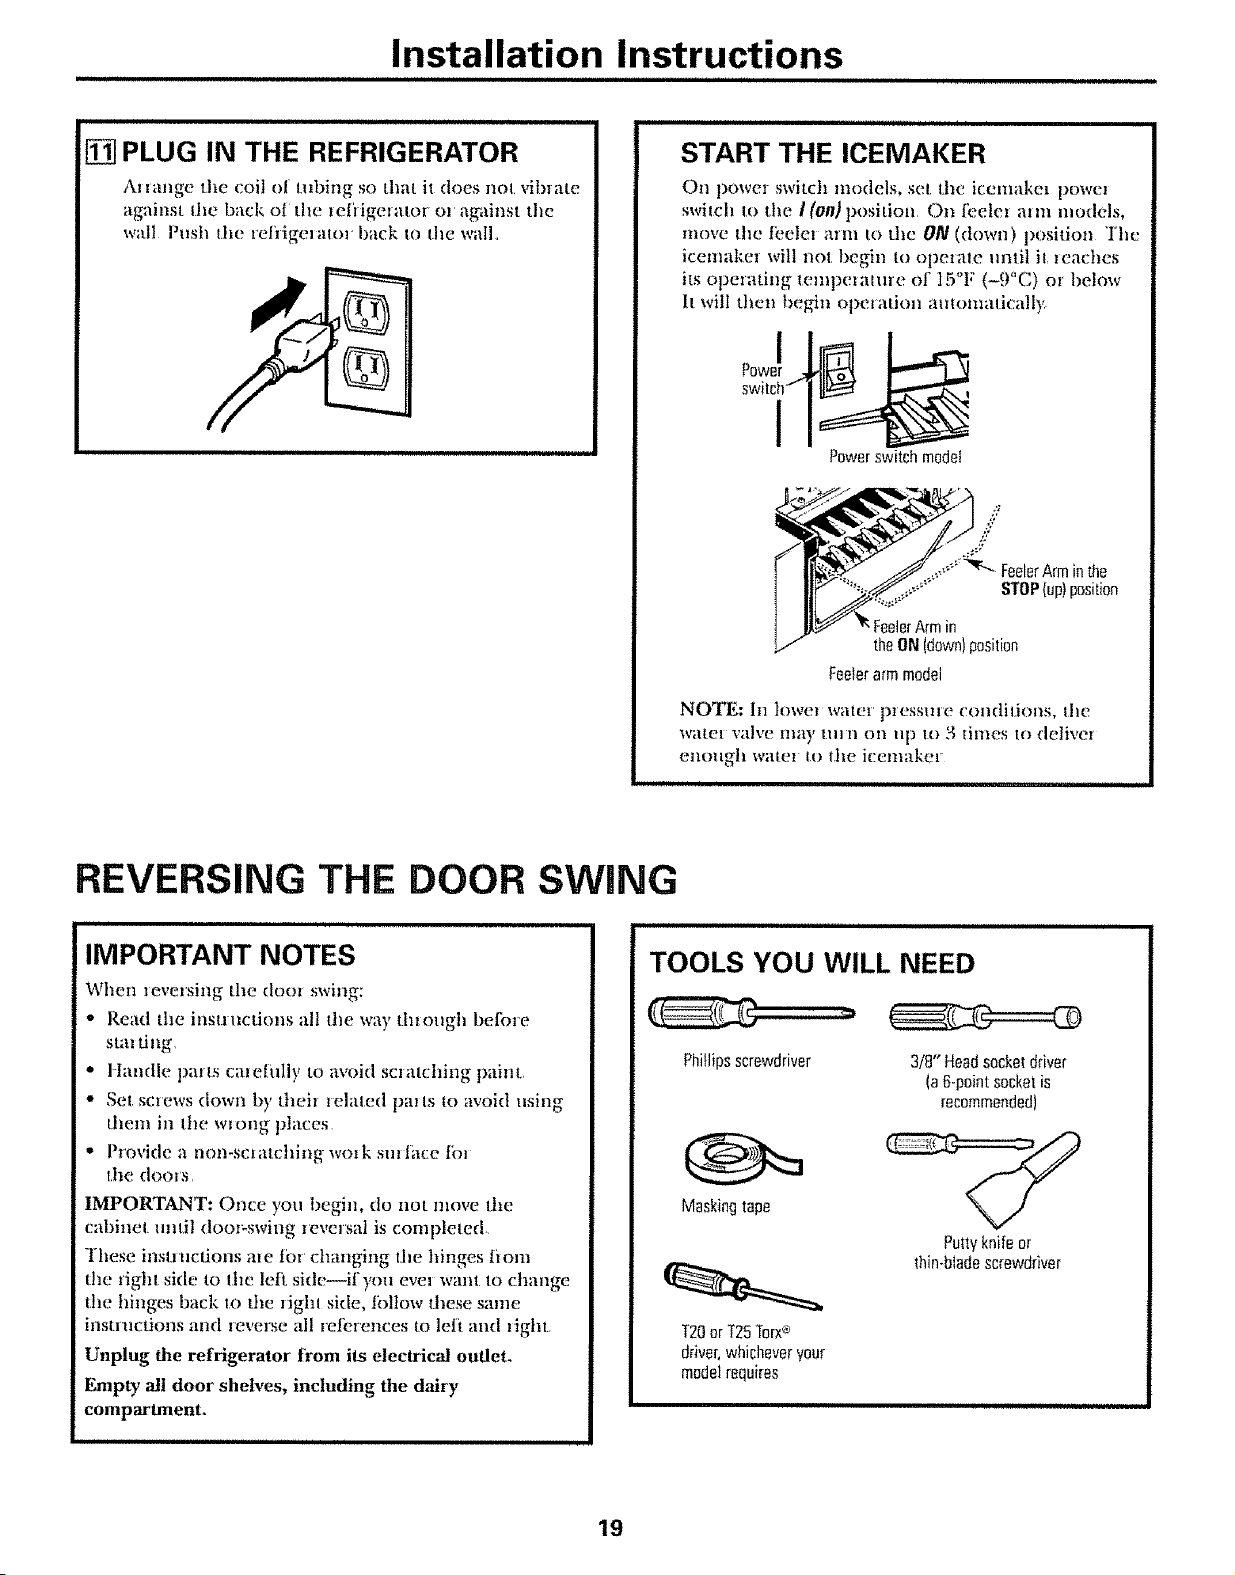
START THE ICEMAKER
011 powe_ switch models, so! the icemakm powel
switch to the I (on) position On tkmlm m m modds,
move the fbelm arm IO the ON (down) l)osition The
icemakm will not begin to opezate until it leaches
its operating tempelature of 15°1: (-9"C) or belmv
It will then begin opelation automatically
Power switch model
in the
SIOP (up)position
theON(down)position
Feelerarmmodel
NOTE: In lowel water p_essu=e colldit.iolls, tile
water valve lrl,_ty 111111 oil lip It) 3 times to delivm
enougll warm to the icemake_
REVERSING THE DOOR SWING
IMPORTANT NOTES
When leversing the dool swing:
• Read the instluctions all tim way through befme
stal ting,
• Handle parts cmetully to avoid sclatching paint,
• Set, screws ([own by theh 1elated palls to avoid using
them in the wrotlg places
• Provide a non-sclatching wo! k smlace tbl
the doms,
IMPORTANT: Once you begin, do not nlove the
cabinet lmtil door-swing levmsal is completed
These inst]tlctJons m e tbl changing the hinges ti om
tile right side to tim left side--if you eve1 wallt to change
tim binges back to the dght side, tollow these same
instrnclions and levm_e all rel_rences to left and light.
Unplug the refrigerator from its electrical outlet.
Empty all door shelves, including the dairy
compartment.
TOOLS YOU WILL NEED
Phillipsscrewdriver 3/8" Head socket driver
(a fi-point socket is
recommended)
Maskingtape
Puttyknifeor
thin-bladescrewdriver
T20orT25Torx_
driver,whicheveryour
modelrequires
19
Loading ...
Loading ...
Loading ...