Loading ...
Loading ...
Loading ...
Installation
Instructions
Refrigerator
Models 18and 19
BEFORE YOU BEGIN
Read these instructions completely and carefully.
"IMPORTANT - Saw.,esc
insuucdons ib, local inspectox's use
• IMPORTANT - Obse,, an
govm ning codes and ordinances
• Note to Installer - Be sure to leave these
instzuctions with the Consumer:
o Note to Consumer - Keepthese ills!! ItClJolls
tbz ftztuze te!_zen(:e,
° Sldll level - [nstathttion ol dfis appliance Jequites
bask mechanical skills
- Completion time - Refiigelatot InstallaOol_
15 minutes.
° Pmpm installation is tile responsibility ot the
inslalle,
° Product iN!hue due m impmpei installation is not
covmed undei the Walranly
WATER SUPPLY TO THE ICENIAKER
(ON SOME MODELS)
It ,he !ehige_atm has an icemaker; it will have to be
connecmd to a cold warm line AGE warm supply kit
(con,aining miring, shutolt valve, fittings and
inslructions) is available at extra cost ti'om your dealer
or by visiting ottl Website at www GEApptiances.x:om
or Pazts and Accessmies, 800..626 2002
REFRIGERATOR LOCATION
• Do not install the tefiigetatm whoe ,.tie ternperature
will go below 6()°1; (!6°C) because it will no, llln olten
enotigh to ,nahlt:-tili plope! tempera!tiles,
• Do not install die refiige_ator where the temperattue
wilt go above 100°F (37°C) because it will not pet !orm
properly
• Inst_flI it on a 1tool st, ong enough m support it fiflly
loaded
CLEARANCES
Allow the tbllowing cleanmces _bl e_Lse ol installation,
pvopez air cizcutation and plumbirlg and electrical
Con!!eel jOHN
"Sides 1/8" (3 ram)
• lbp t" (25 ram)
• Back 1" (25 ram)
II ,tie reliigma,oi is to he inslalted next to a wall on tile
bin W side, allow 5/16" (8 ram) doo, clearance
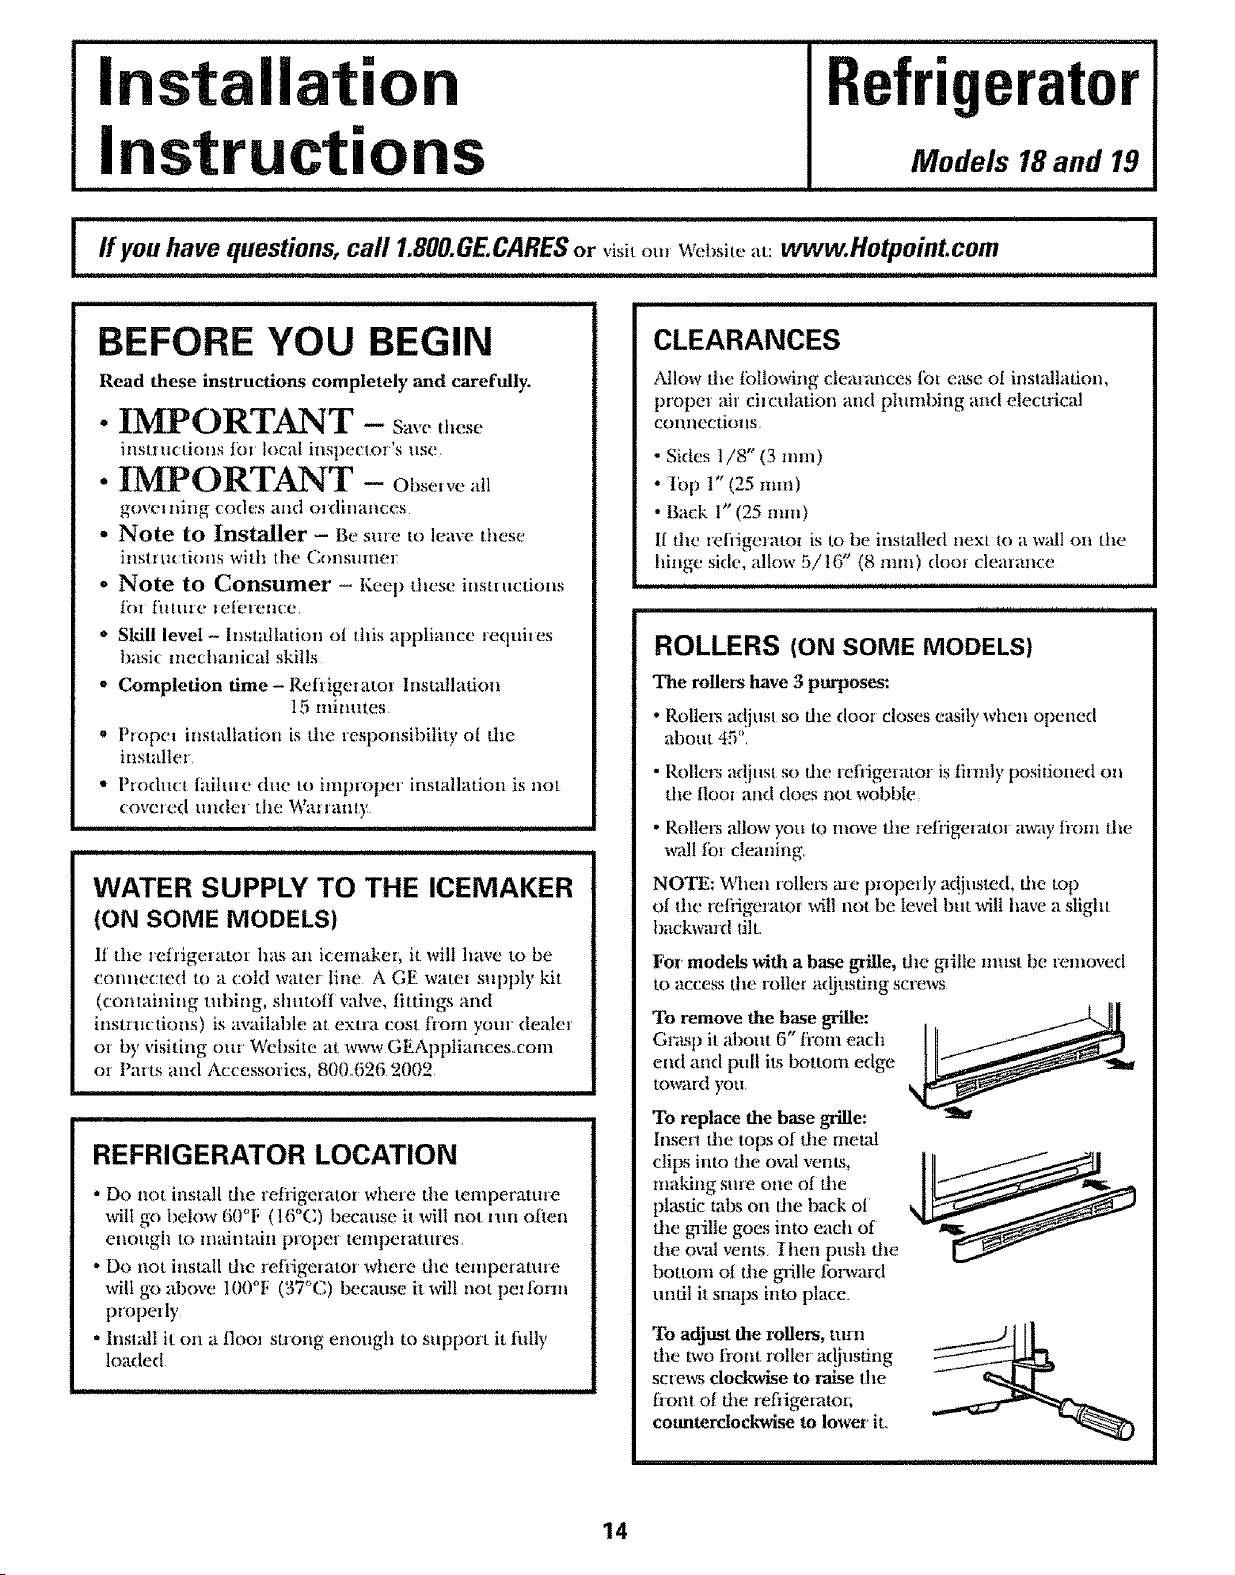
ROLLERS (ON SOME MODELS)
The rogers have 3 purposes:
• P.ollens a_!just so tim dooz closes e_sily when opened
about 4: ,
• Rolteis a@tst so !he refiigeaa!o, is iim_ly positioned on
tim floo, and does not wobble
• P,olletx allow you to move die retiigeialot away iiom tile
wall for cleaning
NOTE: V_qm,lrollel_ me properly ac{justed, die top
ol tim iefiigeralor _4tl not be level but will have a slight
backwmd lilt.
For models with a base grille, die grille must be removed
to access tile rolIet adjusdng screws
To remove tile base grille:
Gr;Lsp it abotlt 6" iiom each
end and pull its bottom edge
towaid you
To replace the base grille:
Inser! the tops ot dm metM
clips into die o_tl vents,
maMng sure one of the
pktsfic tabs on rite back o[
tile gnille goes into each of
die oval vents. Ihen push die
bottom ot dm brailleforwmd
until it.snaps into place.
To adjust the rollers, mrn
the two liont miler ac[jusdng
sciews docl_vise to _aise tim
fiont o! dm refiigemto_;
counterclockwise to lower it.
14
Loading ...
Loading ...
Loading ...