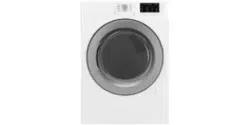
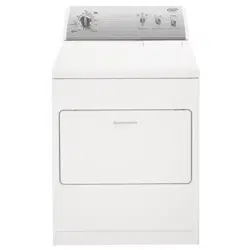
Use & Care Guide ELECTRONIC GAS DRYER for Whirlpool GGW9250PW0
Table of Contents
Dryer Safety
Installation Instructions
Tools And Parts
Options
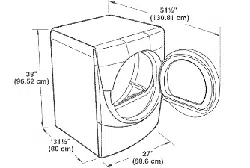
Location Requirements
Electrical Requirements
Gas Supply Requirements
Venting Requirements
Plan Vent System
Install Vent System
Install Leveling Legs
Level Dryer
Make Gas Connection
Connect Vent
Complete Installation
Dryer Use
Starting Your Dryer
Stopping Your Dryer
Pausing Or Restarting
Control Locked
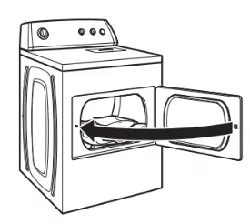
Loading
Drying And Cycle Tips
Status Lights
Cycles
Additional Features
Drying Rack
Dryer Care
Cleaning The Dryer Location
Cleaning The Lint Screen
Cleaning The Dryer Interior
Removing Accumulated Lint
Vacation And Moving Care
Changing The Drum Light
Troubleshooting
Assistance Or Service
Warranty
Install Vent System
(Optional) Put on safety glasses and gloves.
Install exhaust hood. Use caulking compound to seal exterior wall opening around exhaust hood.
Connect vent to exhaust hood. Vent must fit inside exhaust hood. Secure vent to exhaust hood with 4" (10.2 cm) clamp.
Run vent to dryer location. Use the straightest path possible. See "Determine Vent Length." Avoid 90° turns. Use clamps to seal all joints. Do not use duct tape, screws or other fastening devices that extend into the interior of the vent to secure vent.
Connect Vent
Using a 4" (10.2 cm) clamp, connect vent to exhaust outlet in dryer. If connecting to existing vent, make sure the vent is clean. The dryer vent must fit over the dryer exhaust outlet and inside the exhaust hood. Make sure the vent is secured to exhaust hood with a 4" (10.2 cm) clamp.
Move dryer into final position. Do not crush or kink vent. Make sure dryer is level.
(On gas models) Check to be sure there are no kinks in the flexible gas line.
Drying and Cycle tips
Drying tips
Follow care label directions when they are available.
If desired, add a fabric softener sheet. Follow package instructions.
Remove the load from the dryer as soon as tumbling stops to reduce wrinkling. This is especially important for permanent press, knits, and synthetic fabrics.
Avoid drying heavy work clothes with lighter fabrics. This could cause overdrying of lighter fabrics, leading to increased shrinkage or wrinkling.
If you dry sheets in a mixed load or large items in the "Bulky Items" cycle, rearrange the load halfway through the dryer cycle. This will aid in the drying process.
Cycle tips
Dry most loads using the preset cycle settings.
Drying temperature and Dryness Level are preset when you choose an Automatic Cycle. You can choose a different dryness level, depending on your load by pressing the DRYNESS LEVEL button to select MORE or LESS. If you wish to adjust the cycle length of a Manual Cycle, you must press MORE TIME or LESS TIME. Adjust the temperature of a Manual Cycle by pressing TEMPERATURE until the desired temperature is selected.
Dryer Care
Cleaning the Dryer Location
Keep dryer area clear and free from items that would obstruct the flow of combustion and ventilation air.
Cleaning the Lint Screen
Every load cleaning - The lint screen is located in the door opening of the dryer. Clean it before or after each load. A screen blocked by lint can increase drying time. To clean
Pull the lint screen straight up. Roll lint off the screen with your fingers. Do not rinse or wash screen to remove lint. Wet lint is hard to remove.
Push the lint screen firmly back into place.
As needed cleaning - Laundry detergent and fabric softener residue can build up on the lint screen. This buildup can cause longer drying times for your clothes, or cause the dryer to stop before your load is completely dry. The screen is probably clogged if lint falls off the screen. Clean the lint screen with a nylon brush every 6 months, or more frequently, if it becomes clogged due to a residue buildup. To wash
Roll lint off the screen with your fingers.
Wet both sides of lint screen with hot water.
Wet a nylon brush with hot water and liquid detergent. Scrub lint screen with the brush to remove residue buildup.
Rinse screen with hot water.
Thoroughly dry lint screen with a clean towel. Replace screen in dryer.
Cleaning the Dyrer Interior
To clean dryer drum
Make a paste with powdered laundry detergent and very warm water.
Apply paste to a soft cloth. OR Apply a liquid, nonflammable household cleaner to the stained area and rub with a soft cloth until all excess dye and stains are removed.
Wipe drum thoroughly with a damp cloth.
Tumble a load of clean cloths or towels to dry drum. NOTE: Garments which contain unstable dyes, such as denim blue jeans or brightly colored cotton items, may discolor the dryer interior. These stains are not harmful to your dryer and will not stain future loads of clothes. Dry unstable dye items inside out to prevent dye transfer.
Remove Accumulated Lint
From Inside the Dryer Cabinet: Lint should be removed every 2 years or more often, depending on dryer usage. Cleaning should be done by a qualified person.
From the Exhaust Vent: Lint should be removed every 2 years, or more often, depending on dryer usage.
Vacation and Moving care
Vacation care - Operate your dryer only when you are at home. If you will be on vacation or not using your dryer for an extended period of time, you should:
Unplug dryer or disconnect power.
Close shutoff valve in gas supply line.
Clean lint screen.
Moving care
Unplug the power supply cord.
Close shutoff valve in gas supply line.
Disconnect gas supply line pipe and remove fittings attached to dryer pipe.
Cap the open fuel supply line.
Make sure leveling legs are secure in dryer base.
Use masking tape to secure dryer door.
Change the Drum Light
The dryer light automatically turns on inside the dryer drum when you open the door. To change the drum light
Unplug dryer or disconnect power.
Open the dryer door. Locate the light bulb cover on the back wall of the dryer. Remove the screw located in the lower right corner of the cover. Remove the cover.
Turn bulb counterclockwise. Replace the bulb with a 10-watt appliance bulb only. Replace the cover and secure with the screw.