Loading ...
Loading ...
Loading ...

This section deals with the proper procedures for making
these seven basic cuts.
CUTTING TIPS
The kerf (the cut made by the blade in the wood) will be
wider than the blade to prevent overheating or binding.
Make allowances for the kerr when measuring wood.
Make sure the kerf is made on the scrap side of the
measuring line.
Cut the wood with the finish side up.
Knock out any loose knots with a hammer before making
the cut.
Always provide proper support for the wood as it comes
out of the saw.
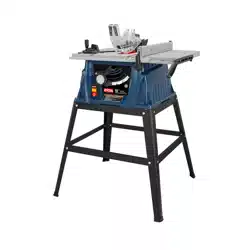
TO MAKE A RIP CUT
It is recommended that you make a test cut on scrap wood
first.
& WARNING:
Make sure the blade guard assembly is securely installed
and working properly to avoid sedous personal injury. ,
PUSHINGHAND
GUIDINGHAND
PROPERFEEDINGPROCEDUREFORRIPCUTS
Fig. 21
i
3.
4.
5.
6.
7.
8,
9.
10.
If ripping a piece larger than 36" long, place a support
the same height as the table surface behind the saw for
the cut work.
Make sure thatall loose items have been removed from
the table surface and that the workpiece isnot in contact
with the blade.
Turn the On/Oft switch to the On position.
Position the workpiece flat on the table with the edge
flush against the rip fence. Let the blade build up to full
speed before feeding the workpiece into the blade.
Using a push stick and/or push blocks, slowly feed the
workpiece toward the blade. Stand slightly to the side of
the wood as it contacts the blade to reduce the chance
of injury should kickback occur.
Once the blade has made contact with the workpiece,
use the hand closest to the rip fence to guide it. Make
sure the edge of the workpiece remains in solid contact
with both the rip fence and the surface of the table. If
ripping a piece narrower than 4", use a push stick to
move the piece through the cut and past the blade.
Continue to feed the workpiece into the blade until the
cut has been completed.
Grasp the workpiece from the lead end (the end that
was fed into the blade first) and carefully remove it from
the table.
11. Turn the On/Off Switch to the Off position.
12. After the blade has stopped completely, remove the cut-
off stock.
A WARNING:
Toavoidseriouspersonal injury, never push a smallpiece
ofwoodintothe bladewithyourhand,alwaysusea push
stick. The use of push blocks, push sticks, and
featherboards are mandatorywhen makingnon-through
cuts.
TO MAKE A CROSS-CUT
It is recommendedthatyou make a test cuton scrapwood
first.
1. Removed the miter gauge bysliding itout ofthe channel.
2. Position the ripfence the desireddistance from the blade,
remembering to allow for the kerf, and lock down the
handle.
A WARNING: I
Make surethe bladeguardassemblyissecurelyinstalled
and workingproperlytoavoid seriouspersonalinjury.
1. Removethe rip fence by liftingthe lockdownhandle.
2. Loosenthe lockknobon the miter gauge, set the miter
gauge to90° and tightenthe lockknob.
3. Makesurethat all looseitemshavebeen removedfrom
thetablesurfaceandthattheworkpieceisnotincontact
withthe blade.
4. Turnthe On/Oft Switchtothe On position.
Page 16
Loading ...
Loading ...
Loading ...