Loading ...
Loading ...
Loading ...
26
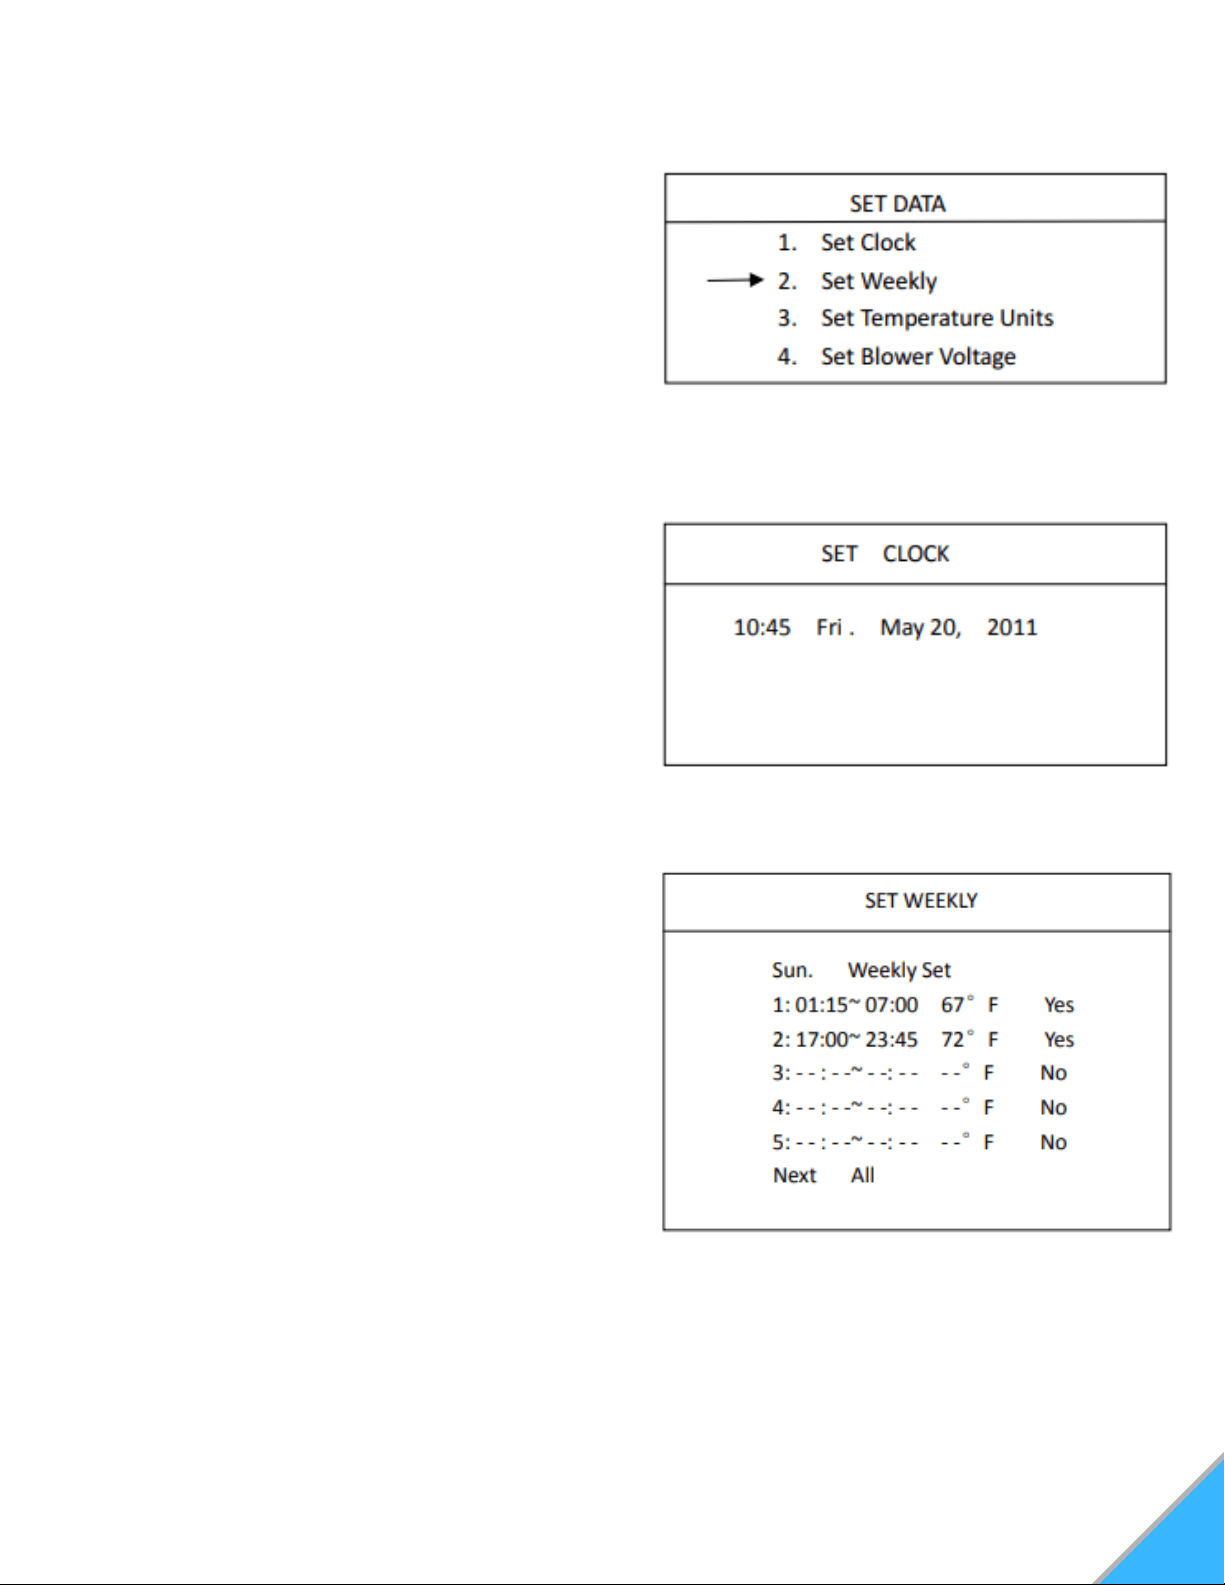
Press and hold the "Enter" button until the "set
data" menu appears on the screen. Using the
"Scroll Down" button, select "Set Weekly" and
press "Enter" This will take you into the weekly
schedule screen. See Figure 22
In the "Weekly Schedule" screen, you can begin
with setting the operation times for Sunday.
Press "Enter" to highlight the hour and use the
"Scroll Up and "Scroll Down" buttons until you
reach your desired hour of start time. Press
"Enter" again to highlight the minutes and use
the "Scroll Up" and "Scroll Down" until you
reach the desired minute of start. See Figure
24.
Pressing "Enter" again will allow you to set the
stop time of your stove. Use the same
procedure for setting your stove's start time for
selecting a stop time. Once you've selected the
stop time, press "Enter"
Next you will have the opportunity to set the
desired temperature. Use the "Scroll Up" or
"Scroll Down" keys until you've reached the
appropriate temperature for the times you have
selected. Press "Enter".
1.
2.
3.
4.
Figure 22: Set Data Menu
Figure 24: Set Weekly Menu
SETTING DATA ON YOUR CONTROLLER
SETTING THE TIME AND DATE
Press and hold the "Enter" button. This will take
you to the "Set Data" screen. See Figure 22
Press "Enter" again to enter the "Set Clock"
screen. See Figure 23
To change the hour, press "Enter". This will
highlight the hour block. Using "Scroll Up" and
"Scroll Down" select the correct time. Press
"Enter to select the correct hour, and then press
"Enter" a second time to begin setting the
minutes.
Continue this process for selecting and setting
the Day, Month, Date, and Year.
1.
2.
3.
4.
Figure 23: Set Clock Menu
SETTING WEEKLY SCHEDULE
NOTE: Your stove controller uses 24 hour
military time to set your weekly schedule.
Loading ...
Loading ...
Loading ...