Loading ...
Loading ...
Loading ...
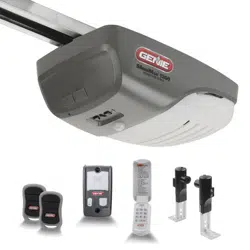
Sectional Door (Typical):
7a. Center bracket on door. Attach near
approximate height as top rollers.
7b. Using bracket, mark holes on door or frame.
7c. Drill 1/8" pilot holes partially through the door.
7d. Secure with 1/4" - 20 - 3/4" self-drilling screws.
7e. Some garage door manufacturers provide
door brackets that CAN be used with your
Genie Door Arms.
Sectional Door (Wooden):
7a. Center bracket on door. Attach near approximate
height as top rollers.
7b. Using bracket, mark holes on door or frame.
7c. Drill 9/32" holes completely through the door.
7d. Fasten bracket with 1/4" x 2" carriage bolts and nuts (not provided)
NOTE: One-Piece Door (Top Edge/Face Mount) instructions are in the
Operation and Maintenance Manual provided.
CAUTION
Doors made of masonite, lightweight wood, berglass, and sheet metal must be properly braced before
mounting door powerhead. Contact door manufacturer or distributor for any questions or concerns. The
Genie
®
Company is not responsible for any damage caused due to an improperly braced door.
Door centerline
Top rollerTop roller
Attach near approximate height as top rollers.Attach near approximate height as top rollers.
7a
Door centerline
Door centerline
Door
centerline
7d Sectional (Wooden)
7d Sectional (Typical) 7e Top of door
ATTACHING DOOR BRACK
ET
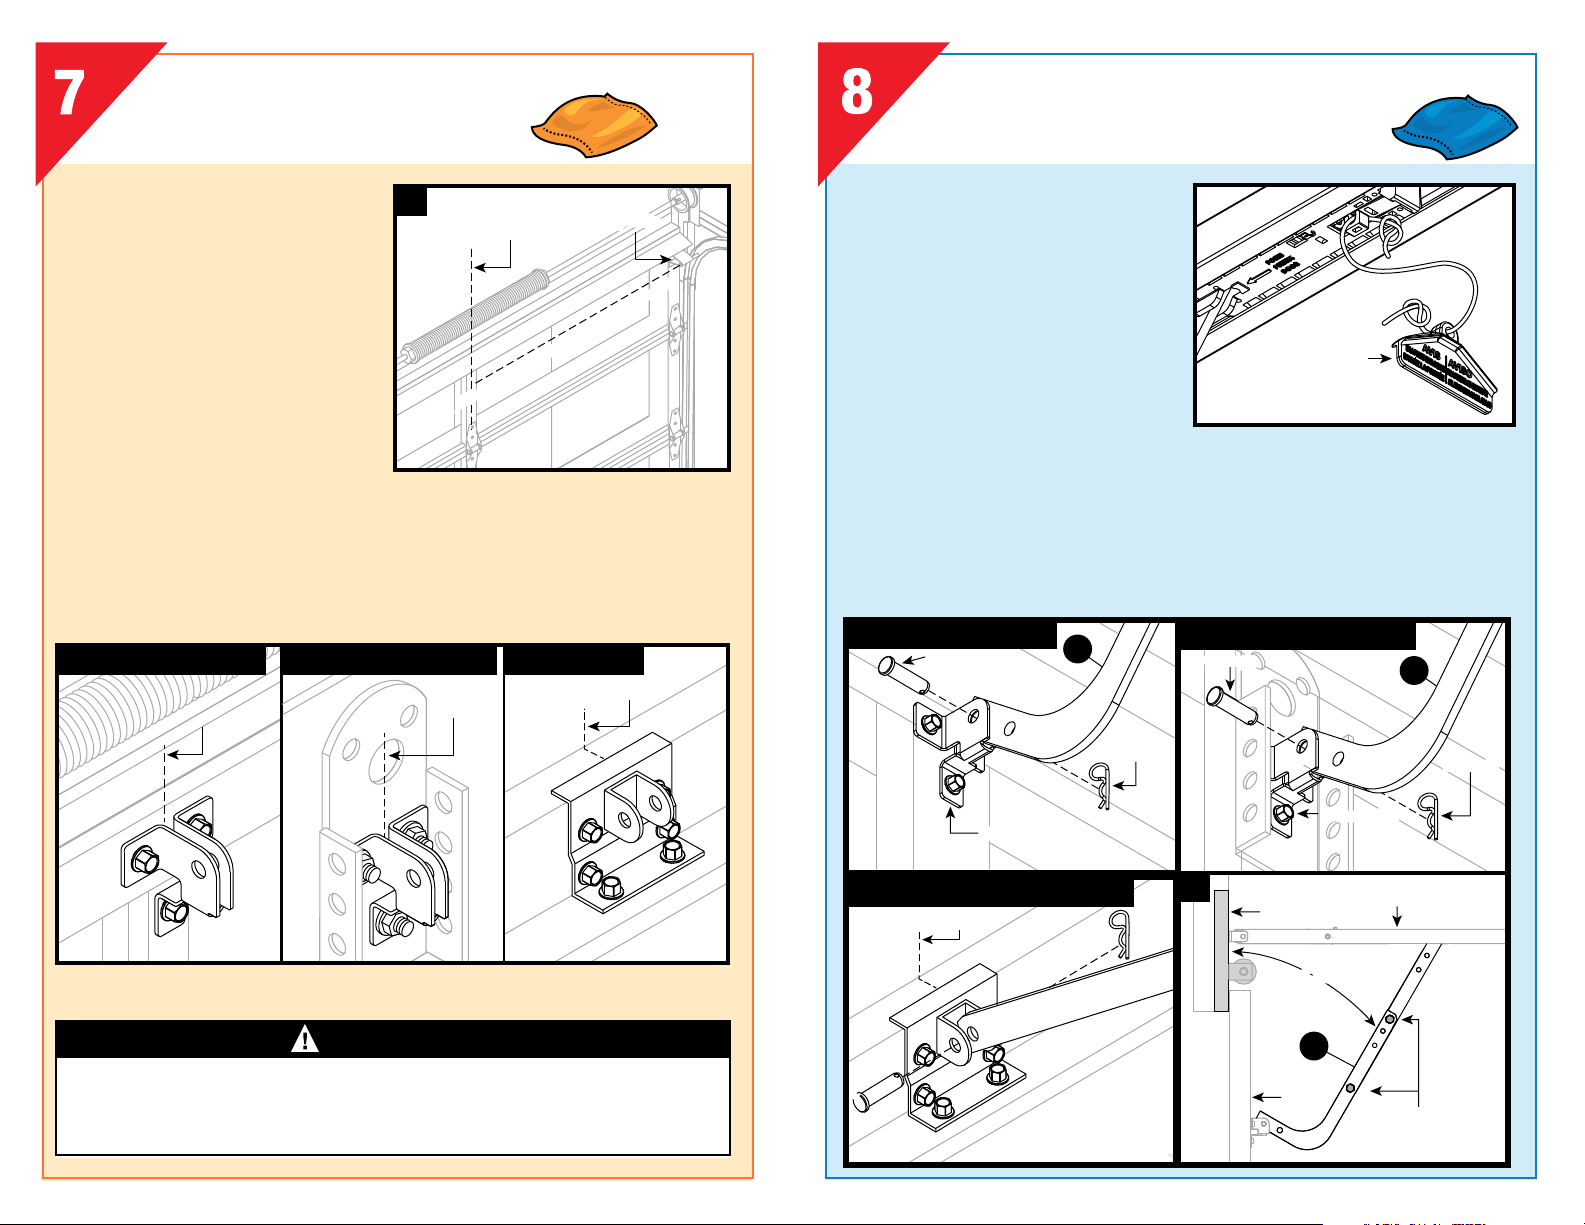
ATTACHING DOOR ARM TO DOOR
BRACKET & SHUTTLE (BLUE BAG)
Release handle
(Orange Bag)
K
G
8a.
Secure emergency release handle
(orange bag) to cord.
8b. Using the emergency release cord, disengage
the shuttle/carriage and move it toward the
door, about 16" from the header.
8c. Sectional Doors typically accept curved door
arm (D). Install the curved door arm to the door
bracket using clevis and cotter pins. In some
cases, just the straight door arm may be used if
the door bracket is mounted on the top edge of
the door.
8d. With the door closed, attach the curved and
straight door arms together using 3/8" bolts and
nuts. Space the fasteners as far apart as possible.
NOTE: Overall length of both arms should be minimized, but not so short that the straight
arm is vertical or exceeds 30° from the header.
NOTE: One-Piece Door (Top Edge/Face Mount) instructions are in the Operation and
Maintenance Manual provided.
Clevis pinClevis pin
Cotter pin
D
Clevis pinClevis pin
Door bracketDoor bracket
Door bracketDoor bracket
D
Cotter pinCotter pin
8c
8d
DoorDoor
Door end rail section
Door end rail section
30˚ max30˚ max
Header
Header
D
8c
Door centerline
Straight arm top of door
8c (Alt.)
Sectional (Typical)
Sectional (Wooden)
3/8"-16 - 7/8" Bolt and
3/8" Lock nut
Loading ...
Loading ...