Loading ...
Loading ...
Loading ...
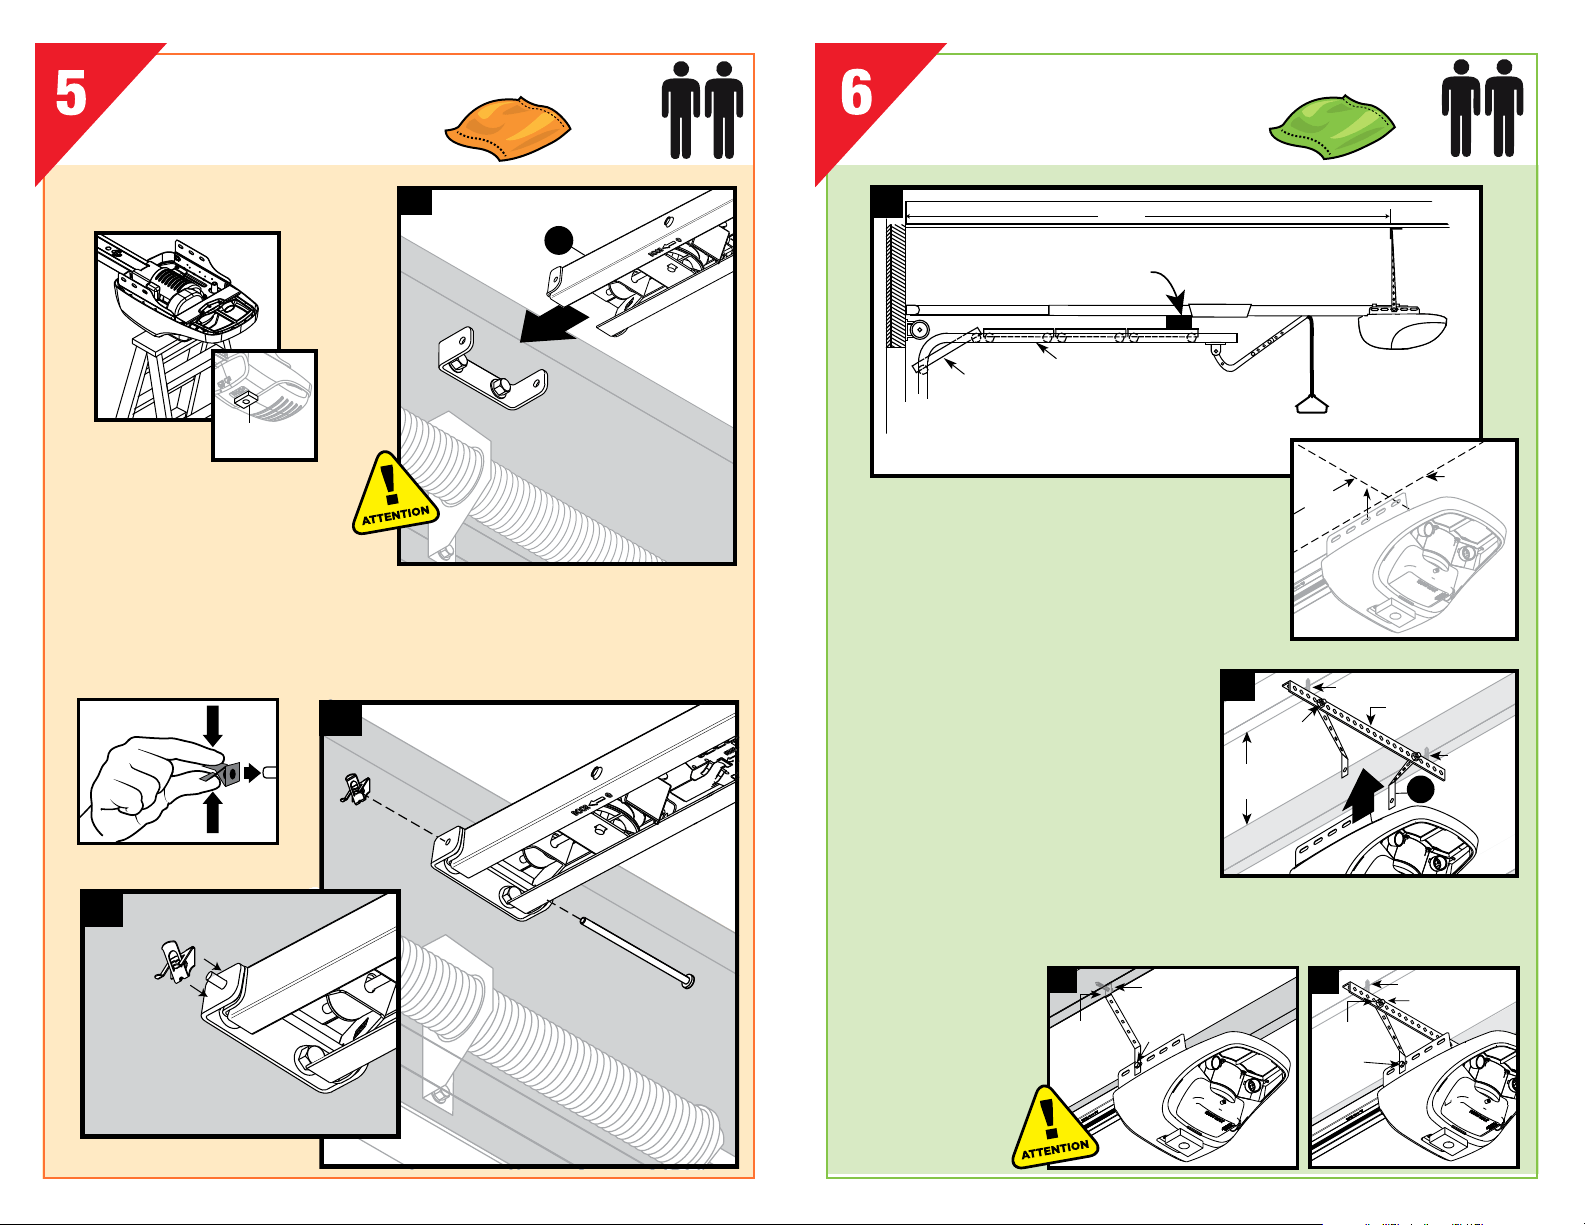
5a. Elevate powerhead assembly and position door
end rail section (C) inside bracket.
NOTE: Support powerhead and have a second
person assist during this step.
5b. Align holes in rail with holes in bracket.
5c. Slide clevis pin through holes in rail and
bracket and secure with speed nut by
pressing the speed nut ends together.
5d. Slide carriage near the powerhead.
Protective
foam cushion
C
5a
Header
bracket
5b
5c
Speed nut
Speed nut
Clevis pin, long
ATTACHING RAIL TO
BRACKET (ORANGE BAG)
6a. If possible, lift and support powerhead while a second person
fully opens the door. Insert a 2" x 4" board, cardboard or
towel between door and rail, to protect door. Position
powerhead over the centerline of door and allow it to rest on
board. Otherwise, measure and mark ceiling 115" back from the
header, aligned with the centerline of the door.
6b. Angle the mounting straps (G) and attach to joists
with two 5/16" x 1-3/4" lag screws provided in the
green bag. For finished ceilings, attach a cross-piece
(not supplied) to joists using lag screws and secure
mounting straps to the cross-piece with 5/16"-18
bolts and nuts (not supplied).
6c. Raise powerhead unit so that there is sufficient
clearance between door and rail. Cut or bend
mounting straps as needed to align with the
powerhead and level rail.
6d. Secure powerhead to mounting straps using 5/16"-18
- 3/4" bolts and nuts provided in green bag. Ensure
powerhead is centered with the door and remove
the 2"x 4" board and/or other protective material.
6a
NOTE: Rail should be level to floor. For tall garage
ceilings additional hanging angle and hardware
may be required and is available at leading
retail stores.
Door Track
Door
Protective material to prevent
damage to the door
115"
Door
centerline
Cross piece
location
115"
G
5/16" x 1-3/4" Lag screw
5/16"-18
bolts
& nuts
6b
Lag screw
Cross piece
(not supplied)
(not supplied)
Hidden
joists
5/16" -
18 - 3/4"
Bolt
6d
Attach
to joists
Lag screws
5/16" -
18 - 3/4"
Bolt
5/16" - 18 - 3/4"
Bolt
5/16" - 18
Nut
6d
Lag screws
MOUNTING POWERHEAD
TO CEILING (GREEN BAG)
Open Beam Ceiling Finished Ceiling
Squeeze ends of speed nut to
install on pin.
Loading ...
Loading ...
Loading ...