Loading ...
Loading ...
Loading ...
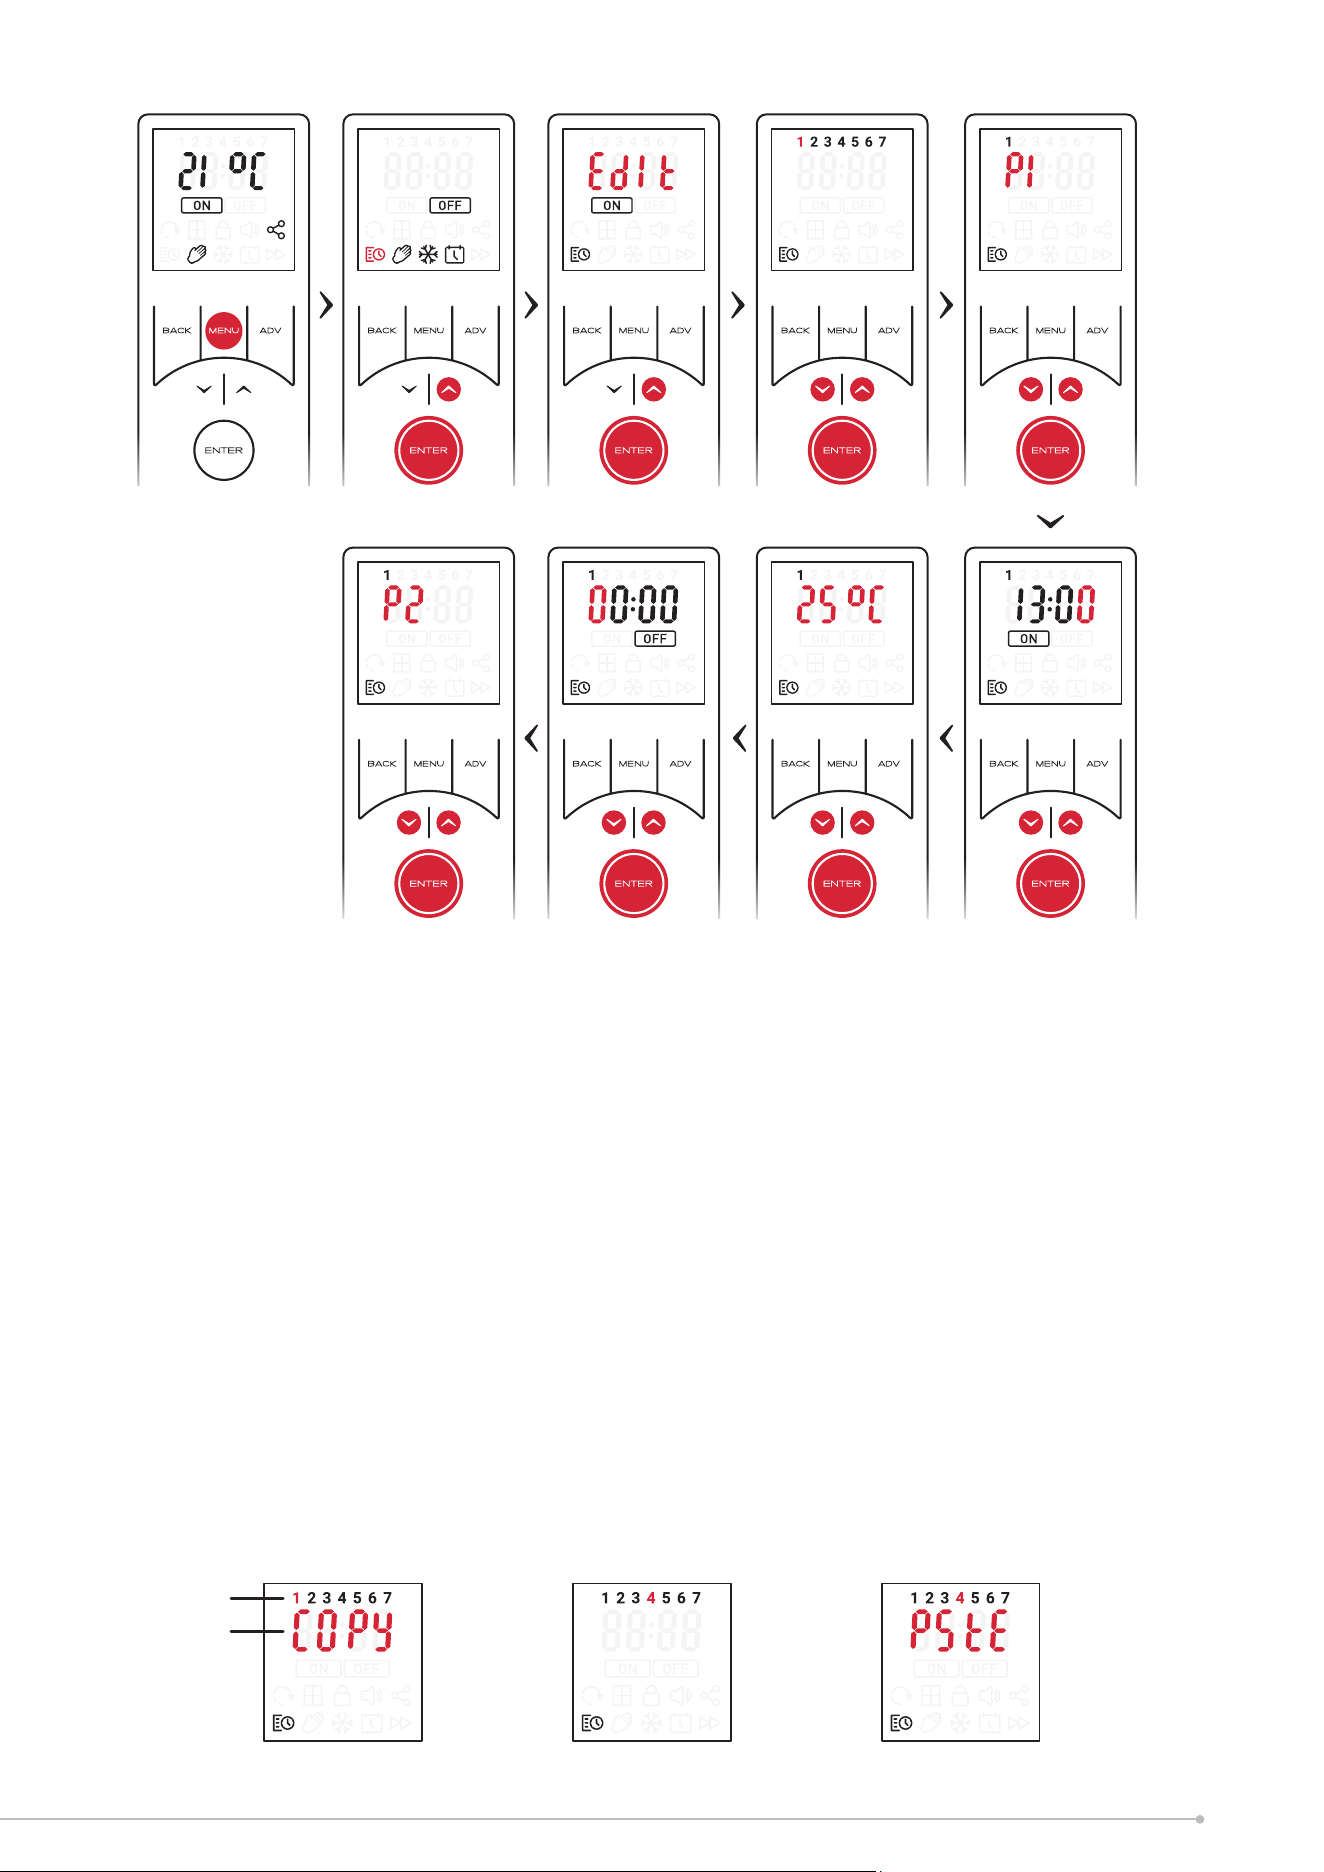
• Use the arrow keys to select the period (1-4) you wish to set and confirm using
the ENTER key.
• Use the arrow keys to edit the ‘On’ time, confirm each digit using the ENTER
key. After the final digit is confirmed the remote will automatically enter the
set-point setting screen.
• Use the arrow keys to set the desired set-point temperature, confirm using the
ENTER key.
• The ‘O’ time should then be set using the same method as the ‘On’ period .
You will then be returned to the Period setting screen, with the next period highlighted.
The previous Period has been successfully set and is confirmed by a beep from the
appliance. The remainder of the periods can then be set as per the above procedure.
Alternatively the timer setting mode can be exited by pressing MENU or continuously
pressing the BACK key
NOTE:
If the MENU key or the BACK key is used exit setting mode from the time or
temperature setting screen the changes will not be saved, it is essential that the
final ‘O’ time is confirmed and a beep is heard from the appliance before exiting
this mode.
Copy and Paste Time profiles
It is possible to copy the complete time profile from one day and paste it to another
day. This will copy all four program periods and associated time and temperatures. To
copy and paste a day profile:
• From the day selection screen, use the arrow keys to highlight the day you wish
to copy.
• Hold the ADV key for 2 seconds, ‘COPY’ will flash on screen to show it has copied,
• Use the arrow key to highlight the day to which you wish to copy the profile.
• Hold the ENTER key for 2 seconds, ‘PSTE’ will flash on the screen and the appliance
will beep to signify the timers have been pasted successfully.
• If required the same profile can then be copied to other days using the same ‘Paste’
procedure.
1. Hold ADV for 2 seconds on
Monday (1)
2. Press UP until Thursday
(4) is flashing
3. Hold ENTER to paste timers
onto selected day
Flashing icon
Double Flash
23
Loading ...
Loading ...
Loading ...