Loading ...
Loading ...
Loading ...
Page 10
ASSEMBLY
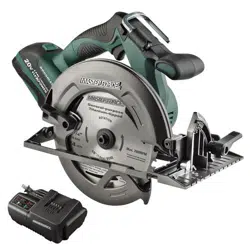
INSTALLING THE SAW BLADE
(FIG. 2)
FIG. 2
Inner Flange
Outer Flange
Saw Blade
Blade
Bolt
1. Remove the battery pack from the tool.
2. Depress and hold the spindle-lock
button.
3. Loosen the blade bolt by turning it
counterclockwise with the blade wrench
(included).
4. Remove the blade bolt and outer flange.
5. Use the lower blade-guard lever to
retract the lower blade guard into the
upper blade guard.
6. Fit the saw blade inside the lower blade
guard and onto the spindle. Verify that
the saw teeth, the arrow on the saw
blade and the blade-rotation indicator
arrow on the blade guard are all pointing
in the same direction.
7. Replace the outer blade flange with the
protuberance facing outward.
8. Depress and hold the spindle-lock
button, and replace the blade bolt.
9. Tighten the blade bolt securely by
turning it clockwise with the blade
wrench.
NOTICE: Never use a blade that is too
thick to allow the outer blade ange to
engage with the at section of the spindle.
WARNING:
Remove the battery
pack from tool before making any
assembly, adjustments or changing
accessories. Such preventive safety
measures reduce the risk of starting the
tool accidentally.
WARNING:
For all work and
when changing the blade, always wear
protective gloves. The sharp edges of the
blade will cause personal injury. The blade
can become very hot while working.
REMOVING THE SAW
BLADE (FIG. 2)
1. Remove the battery pack from the tool.
2. Depress and hold the spindle-lock
button.
3. Loosen the blade bolt by turning
it counterclockwise with the blade
wrench.
4. Remove the blade bolt and outer blade
flange.
5. Lift the lower blade guard and then
remove the blade.
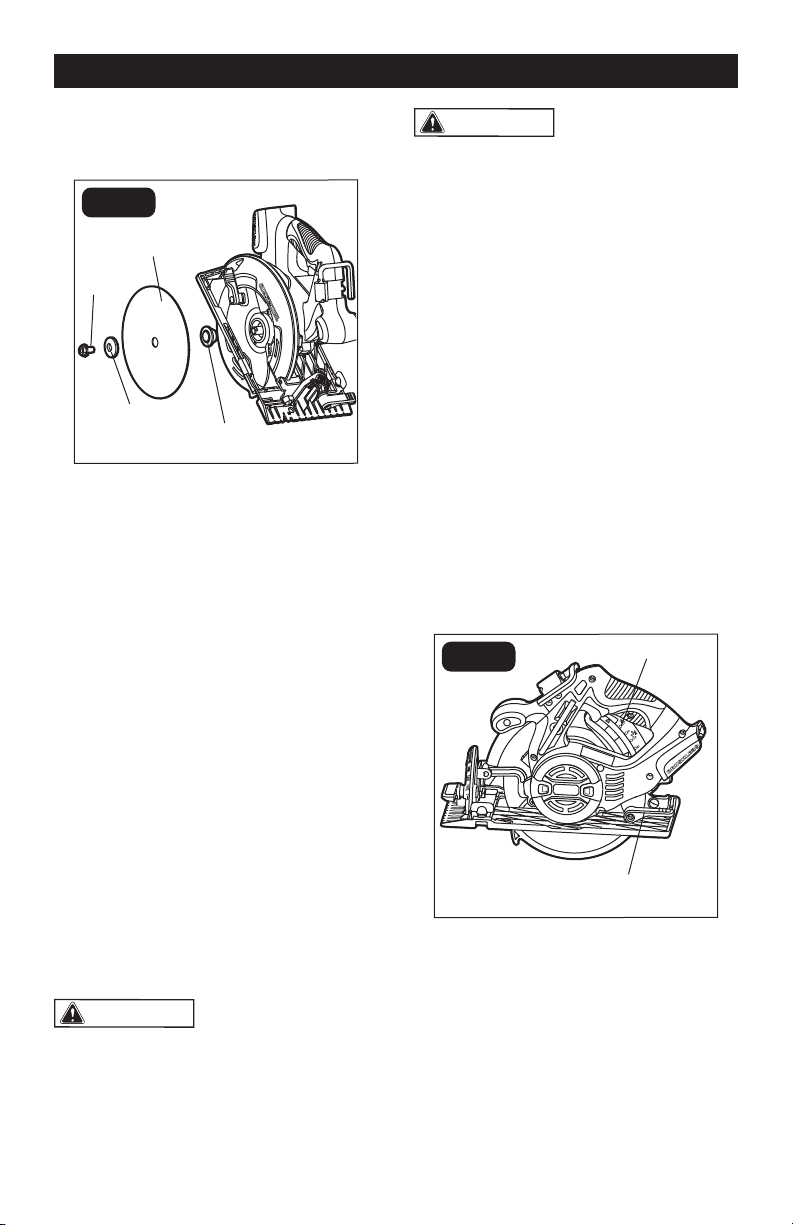
ADJUSTING THE CUTTING
DEPTH (FIG. 3)
FIG. 3
Depth Scale
Depth-adjustment Lever
1. Remove the battery pack from the tool.
2. Raise the depth-adjustment lever to
release it.
3. Hold the base shoe against the
workpiece and raise or lower the saw
until the indicator mark on the saw
aligns with the desired depth on the
depth scale.
4. Lower the depth-adjustment lever to
lock it into position.
Loading ...
Loading ...
Loading ...