241-0444
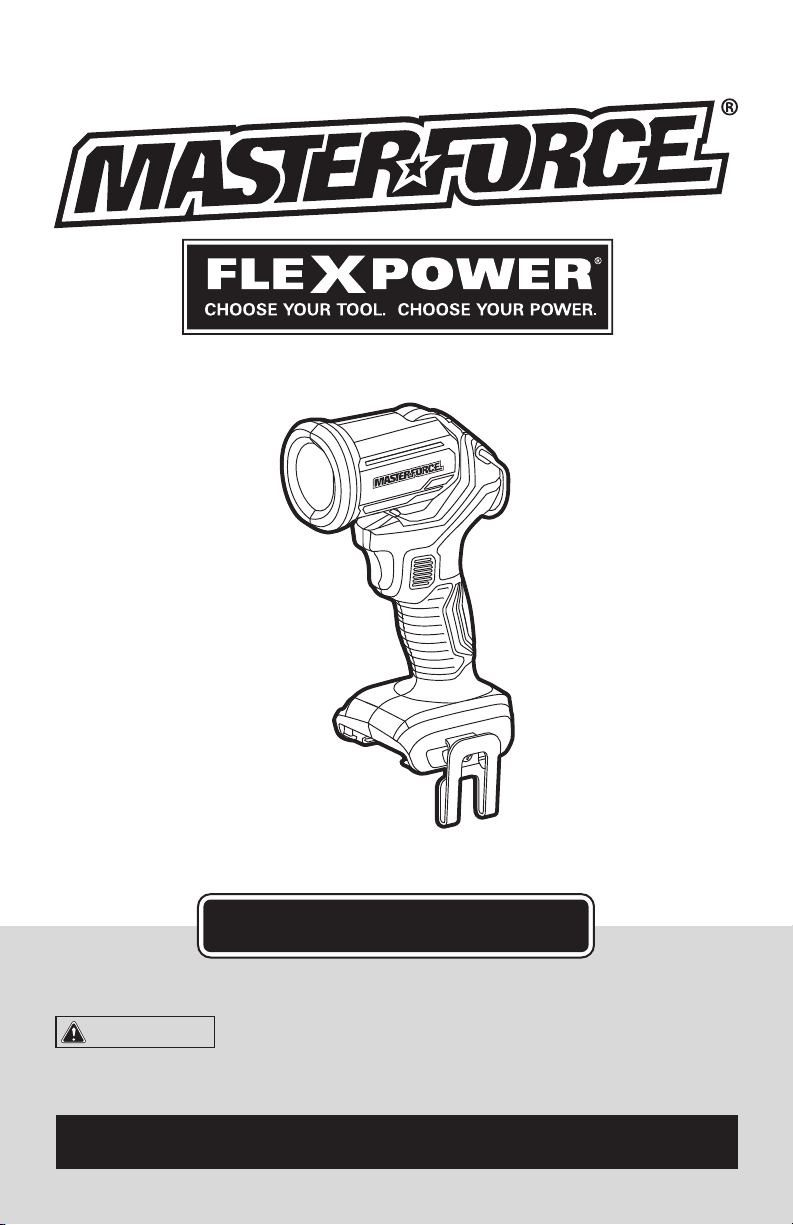
LED Spot Light
OPERATOR’S MANUAL
CAUTION:
To Reduce The Risk Of Injury, User Must
Read And Understand Operator’s Manual. Save These
Instructions For Future Reference.
For questions / comments, technical assistance or repair parts –
Please Call Toll Free: 1-866-917-4374. (M-F 8:30am-5:00pm Est.)

TABLE OF CONTENTS
Safety Symbols ..........................................................Page 2
Safety Instructions .......................................................Page 3
Overview/Specifications ..................................................Page 6
Assembly ..............................................................Page 7
Operation ..............................................................Page 8
Maintenance ...........................................................Page 10
Troubleshooting ........................................................Page 11
Warranty ..............................................................Page 14
Page 2
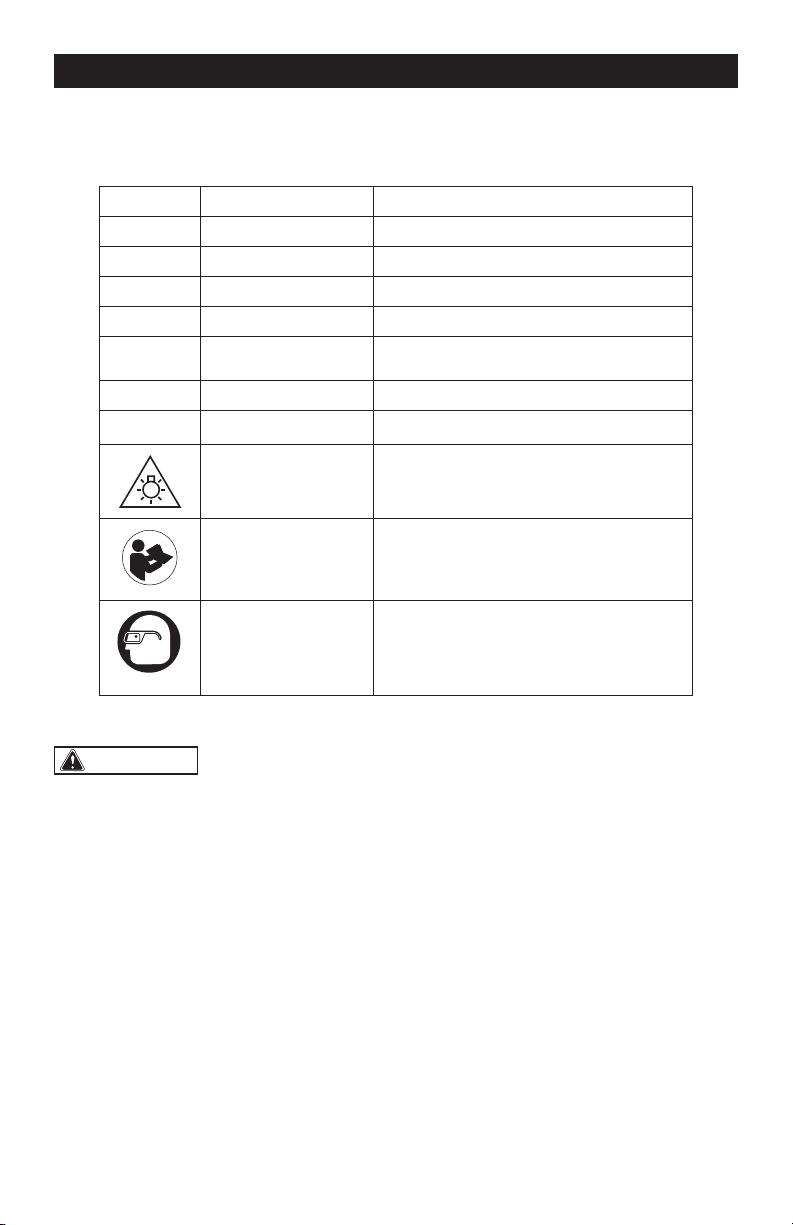
SAFETY SYMBOLS
Some of these following symbols may be used on this tool. Please study them and learn their
meaning. Proper interpretation of these symbols will allow you to operate the tool better and
more safely.
Symbol
Name
Designation / Explanation
V Volts Voltage
A Amperes Current
Hz Hertz Frequency (cycles per second)
W Watts Power
lbs Pounds Weight
n
o
No-load speed Rotational speed at no load
� or d.c.
Direct current Type of characteristic of current
Do not stare at
operating lamp
To reduce the risk of injury, do not stare
at operating lamp. Serious eye injury
could occur.
Read instruction
manual
To reduce the risk of injury, user must
read instruction manual.
Wear safety goggles
To reduce the risk of injury, always wear
eye protection.
WARNING:
To ensure safety and reliability, all repairs should be performed by a
qualified service technician.
Page 3
SAFETY INSTRUCTIONS
The purpose of safety symbols is to attract your attention to possible dangers. The safety
symbols, and the explanations with them, deserve your careful attention and understanding.
The symbol warnings do not, by themselves, eliminate any danger. The instructions and
warnings they give are no substitutes for proper accident prevention measures.
WARNING:
Be sure to read and understand all safety instructions in this manual,
including all safety alert symbols such as “DANGER”, “WARNING” and “CAUTION” before
using this tool. Failure to follow all instructions listed below may result in electric shock,
fire, and/or serious personal injury.
SYMBOL MEANING
SAFETY ALERT SYMBOL: Indicates DANGER, WARNING, OR CAUTION. May be
used in conjunction with other symbols or pictographs.
DANGER:
Indicates an imminently hazardous situation, which, if not avoided, will
result in death or serious injury.
WARNING:
Indicates a potentially hazardous situation, which, if not avoided,
could result in death or serious injury.
CAUTION:
Indicates a potentially hazardous situation, which, if not avoided, could
result in minor or moderate injury.
NOTICE: (Without Safety Alert Symbol) Indicates a situation that may result in property
damage.
SAVE THESE INSTRUCTIONS!

Page 4
SAFETY INSTRUCTIONS
SPECIFIC SAFETY WARNINGS
FOR LED WORK LIGHT
WARNING:
Read all safety
warnings, instructions, illustrations and
specifications provided with this power
tool. Failure to follow all instructions listed
below may result in electric shock, fire and/
or serious injury.
• Prevent unintentional starting. Ensure
the switch is in the off-position before
connecting to battery pack, picking up
or carrying the appliance. Carrying the
appliance with your finger on the switch or
energizing appliance that have the switch
on invites accidents.
• Disconnect the battery pack from the
appliance before making any adjustments,
changing accessories, or storing
appliance. Such preventive safety measures
reduce the risk of starting the appliance
accidentally.
• Do not direct the light beam at persons
or pets and avoid staring into the light even
from a distance.
• Recharge battery packs only with the
charger specified by the manufacturer.
A charger that is suitable for one type of
battery pack may create a risk of fire when
used with another battery pack.
• Use appliances only with specifically
designated battery packs. Use of any other
battery packs may create a risk of injury and
fire.
• When battery pack is not in use, keep
it away from other metal objects, like
paper clips, coins, keys, nails, screws or
other small metal objects, that can make
a connection from one terminal to another.
Shorting the battery terminals together may
cause burns or a fire.
• Under abusive conditions, liquid may
be ejected from the battery; avoid contact.
If contact accidentally occurs, flush with
water. If liquid contacts eyes, additionally
seek medical help. Liquid ejected from the
battery may cause irritation or burns.
• Do not use a battery pack or appliance
that is damaged or modified. Damaged or
modified batteries may exhibit unpredictable
behavior resulting in fire, explosion or risk of
injury.
• Do not expose a battery pack or
appliance to fire or excessive temperature.
Exposure to fire or temperature above 265°F
(130°C) may cause explosion.
• Follow all charging instructions and do
not charge the battery pack or appliance
outside of the temperature range specified
in the instructions. Charging improperly
or at temperatures outside of the specified
range may damage the battery and increase
the risk of fire.
• Have servicing performed by a
qualified repair person using only identical
replacement parts. This will ensure that the
safety of the product is maintained.
• Do not modify or attempt to repair the
appliance or the battery pack except as
indicated in the instructions for use and
care.
• To reduce the risk of injury, close
supervision is necessary when a product is
used near children.
• Do not contact hot parts.
• Only use attachments recommended
or sold by the manufacturer.
• Do not use in the rain.
• To reduce the risk of electrical shock,
do not put the appliance in water or other
liquid. Do not place or store product where
it can fall or be pulled into a tub or sink.
• To reduce the risk of injury, do not stare
at operating lamp. Serious eye injury could
occur.
CAUTION:
• Hot surface.
• Risk of burns - Do not touch.
• Risk of fire - Keep away from combustible
materials.
Page 5
IMPORTANT SAFETY
INSTRUCTIONS
1. To reduce the risk of electric shock
or damage to the chargers and batteries,
use only with the MASTERFORCE
®
battery
packs and chargers listed.
Battery pack Charger
252-8029 (1.5Ah)
252-8025
252-8037
252-8026
252-8031 (2.0Ah)
252-8030 (2.5Ah)
252-8003 (2.5Ah)
252-8034 (4.0Ah)
252-8035 (5.0Ah)
252-8005 (5.0Ah)
252-8027 (7.5Ah)
252-8007 (7.5Ah)
2. For best results, your battery and tool
should be stored, charged and used in a
location where the temperature is more
than 5°C (41°F) but less than 40°C (104°F).
Do not store outside or in vehicles.
DANGER:
People with electronic
devices, such as pacemakers, should
consult their physician(s) before using this
product. Operation of electrical equipment
in close proximity to a heart pacemaker
could cause interference or failure of the
pacemaker.
SAVE THESE INSTRUCTIONS!
SAFETY INSTRUCTIONS
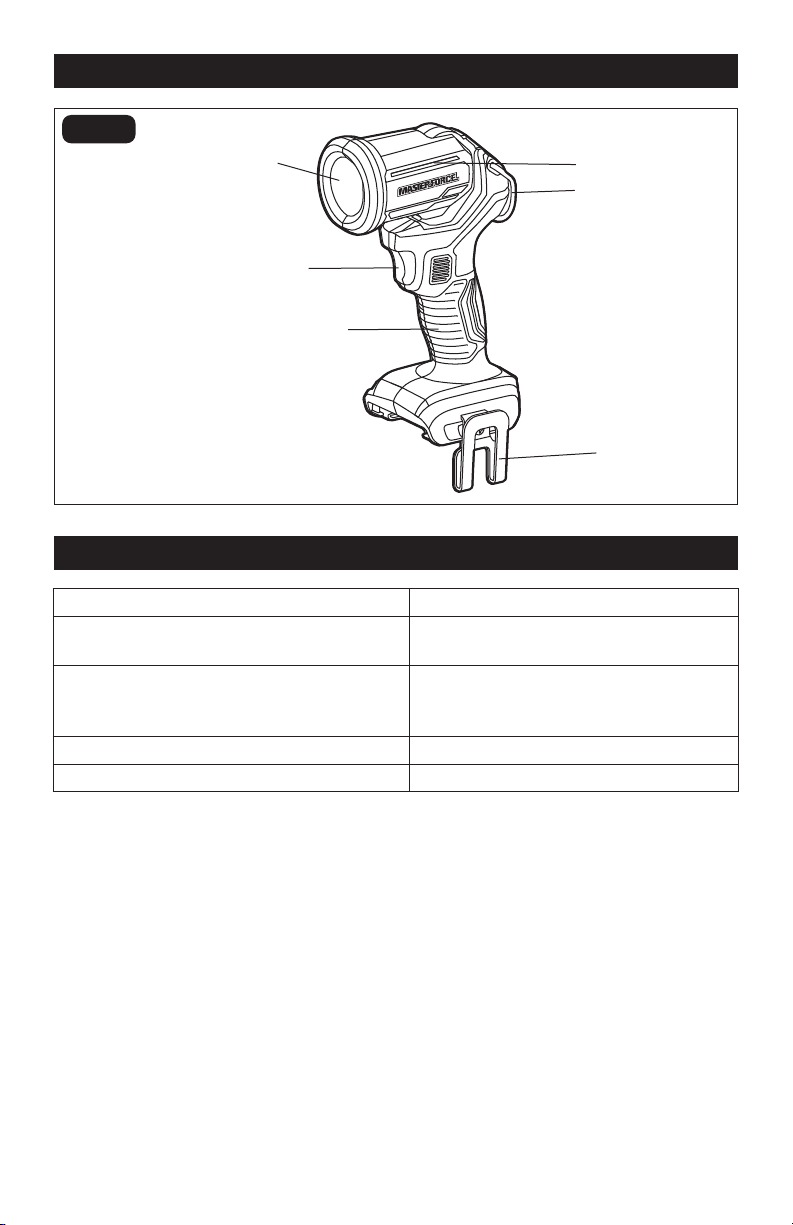
Page 6
Lens (Transparent Cover)
Hanging Loop
Pivoting Head
Belt Clip
ON/OFF Switch
FIG. 1
SPECIFICATIONS
Rated Voltage 20 V d.c.
Luminous Flux (brightness) 150 Lumens -Low
330 Lumens - High
BOOST 2.5 Ah Runtime
BOOST 5.0 Ah Runtime
BOOST 7.5 Ah Runtime
27 h (low), 10.5 h (high)
54 h (low), 21.5 h (high)
80 h (low), 32 h (high)
Head Pivot Range 0–104°
Weight (without battery) 13 oz. (0.37kg)
OVERVIEW
Handle

Page 7
ASSEMBLY
WARNING:
If any part is broken or
missing, DO NOT attach the battery pack
or operate the light until the broken or
missing part is replaced. Failure to do so
could result in possible serious injury.
WARNING:
Do not attempt to
modify this light or create accessories not
recommended for use with this light. Any
such alteration or modification is misuse
and could result in a hazardous condition
leading to possible serious injury.
WARNING:
Your light should
never be connected to the battery pack
when you are assembling parts, making
adjustments, cleaning, or when it is not
in use.
CONTENTS
Cordless Work Light
Belt Clip
Screw for Belt Clip
Instruction Manual
UNPACKING
1. Carefully remove the light and any
accessories from the carton. Make sure
that all items listed in the packing list are
included.
2. Inspect the light carefully to make sure
that no breakage or damage occurred
during shipping.
3. Do not discard the packing material
until you have carefully inspected and
satisfactorily operated the light.
Page 8
OPERATION
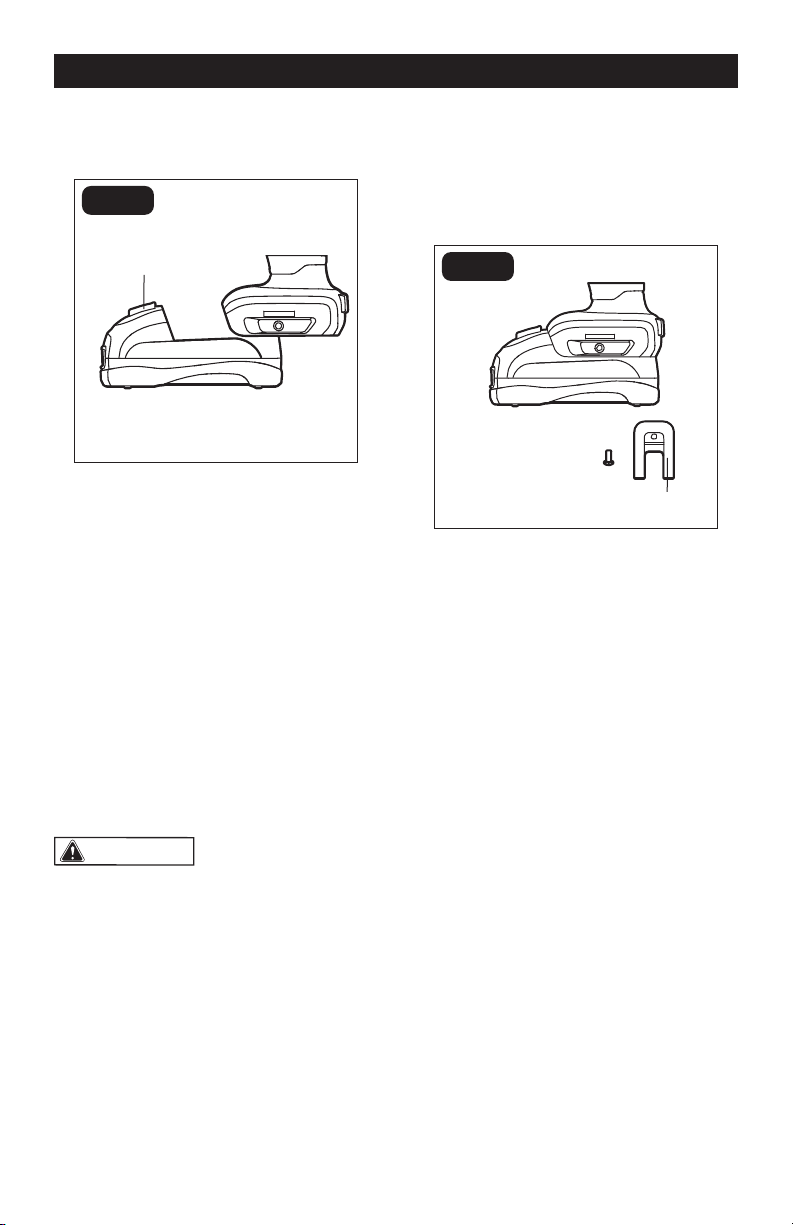
TO ATTACH BATTERY PACK
(FIG. 1)
FIG. 1
1. Align the raised rib on the battery pack
with the grooves on the bottom of the
light, then slide the battery pack onto
the light.
2. Ensure that the battery-release button
on the battery pack snaps into place
and the battery pack is secured to the
light before beginning the operation.
NOTICE: When placing the battery pack
on the light, be sure that the raised rib on
the battery pack aligns with the groove
on the light and the latches snap into
place properly. Improper assembly of the
battery pack can cause damage to internal
components.
WARNING:
Do not direct the
light beam at persons or animals before
attaching the battery pack. The light will
be on if you didn’t turn off the light last
time. Turn the light off before detaching
the battery pack.
TO DETACH BATTERY PACK
(FIG. 1)
1. Press the battery-release button to
release the battery pack.
2. Pull the battery pack to remove it from
the light.
TO INSTALL THE BELT CLIP
(FIG. 2)
Belt Clip
FIG. 2
1. Remove the battery pack from the light.
2. Align the rib of the belt clip with the hole
on the base of the light.
3. Insert the screw and securely tighten the
screw with a screwdriver (not included).
TO REMOVE THE BELT CLIP
(FIG. 2)
1. Remove the battery pack from the light.
2. Use a screwdriver (not included) to
loosen the screw that attaches the belt
clip to the light.
3. Remove the screw and the belt clip.
Keep them in a safe place for future use.
Battery-Release Button

Page 9
OPERATION
TWO-STAGE BRIGHTNESS AD-
JUSTMENT CONTROLLED BY
ON/OFF SWITCH
(FIG. 3)
FIG. 3
Your tool is equipped with a two-stage
brightness adjustment, providing different
light intensities for your operation. Depress
the on/off switch to turn on the light: the
light is in the high light mode. Depress the
on/off switch again to changeto the low
light mode. Depress a third time to turn the
light off.
PIVOTING HEAD
(FIG. 4)
The light head pivots 104° for maximum
flexibility. Manually move the head to any
position within the pivot range. Do not force
the head beyond that range.
HANGING LOOP (FIG. 5)
FIG. 5
Your tool is equipped with a loop. It can be
carried or hung on a hook or a hook-like
object.
To prevent the risk of injury or product
damage make sure that the hook is sturdy
enough to hold the weight of the light with
attached battery pack.
ON/OFF Switch
Hanging Loop
MAX: 104
o
FIG. 4

Page 10
MAINTENANCE
WARNING:
To avoid serious personal injury, always
remove the battery pack from the
light when cleaning or performing any
maintenance.
When servicing, use only identical
replacement parts. The use of any other
parts may create a hazard or cause
damage to the product.
All maintenance should only be carried
out by a qualified repair person.
CLEANING
Always use only a soft, dry cloth to clean
the plastic transparent cover, never use
detergent or alcohol.
Always wear safety goggles when
cleaning with compressed air.
Do not at any time let brake fluids,
gasoline, petroleum-based products,
penetrating oils, etc. come in contact with
plastic parts. Chemicals can damage,
weaken or destroy plastic, which may
result in serious personal injury.

Page 11
TROUBLESHOOTING
PROBLEM POSSIBLE CAUSE SOLUTION
The light does
not work.
The battery pack is depleted. Charge the battery pack.
The battery pack is not
installed properly.
Confirm that battery pack is properly
secured to the light.
The light or the battery pack is
overheated.
Allow the light and battery pack to
cool down before restarting the light.

Page 12
NOTES

Page 13
NOTES

SAVE YOUR RECEIPTS
THIS WARRANTY IS VOID WITHOUT THEM
LED Spot Light
WARRANTY
90-DAY MONEY BACK GUARANTEE:
This MASTERFORCE® brand power tool carries our 90-DAY Money Back
Guarantee. If you are not completely satisfied with your MASTERFORCE® brand
power tool for any reason within ninety (90) days from the date of purchase, return
the tool with your original receipt to any MENARDS® retail store, and we will provide
you a refund – no questions asked.
3-YEAR LIMITED WARRANTY:
This MASTERFORCE® brand power tool carries our famous No Hassle 3-Year
Limited Warranty to the original purchaser. If, during normal use, this
MASTERFORCE® power tool breaks or fails due to a defect in material or
workmanship within three (3) years from the date of original purchase, simply bring
this tool with the original sales receipt back to your nearest MENARDS® retail store.
At its discretion, MASTERFORCE® agrees to have the tool or any defective part(s)
repaired or replaced with the same or similar MASTERFORCE® product or part
free of charge, within the stated warranty period, when returned by the original
purchaser with original sales receipt. Not withstanding the foregoing, this limited
warranty does not cover any damage that has resulted from abuse or misuse of the
Merchandise. This warranty: (1) excludes expendable parts including but not limited
to blades, brushes, belts, bits, light bulbs, and/or batteries; (2) shall be void if this
tool is used for commercial and/or rental purposes; and (3) does not cover any
losses, injuries to persons/property or costs. This warranty does give you specific
legal rights and you may have other rights, which vary from state to state. Be
careful, tools are dangerous if improperly used or maintained. Seller’s employees
are not qualified to advise you on the use of this Merchandise. Any oral
representation(s) made will not be binding on seller or its employees. The rights
under this limited warranty are to the original purchaser of the Merchandise and may
not be transferred to any subsequent owner. This limited warranty is in lieu of all
warranties, expressed or implied including warranties or merchantability and fitness
for a particular purpose. Seller shall not be liable for any special, incidental, or
consequential damages. The sole exclusive remedy against the seller will be for the
replacement of any defects as provided herein, as long as the seller is willing or
able to replace this product or is willing to refund the purchase price as provided
above. For insurance purposes, seller is not allowed to demonstrate any of these
power tools for you.
For questions / comments, technical assistance or repair parts – Please Call Toll
Free at: 1-866-917-4374. (M-F 8:30am-5:00pm Est.)
Page 14

Page 15
04/2021
© 2021 Menard, Inc., Eau Claire, WI 54703