Loading ...
Loading ...
Loading ...
Floor
vacuum
cleaning
Handheld
vacuum
cleaning
5
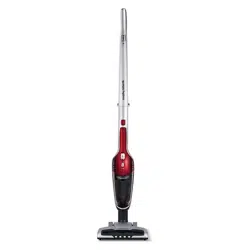
Dual functionality
Your vacuum cleaner can easily be configured
into two different cleaning modes:
• Upright vacuum cleaner for floors and carpets.
• Handheld vacuum cleaner (10) which can be
carried with you whilst cleaning hard to reach
places.
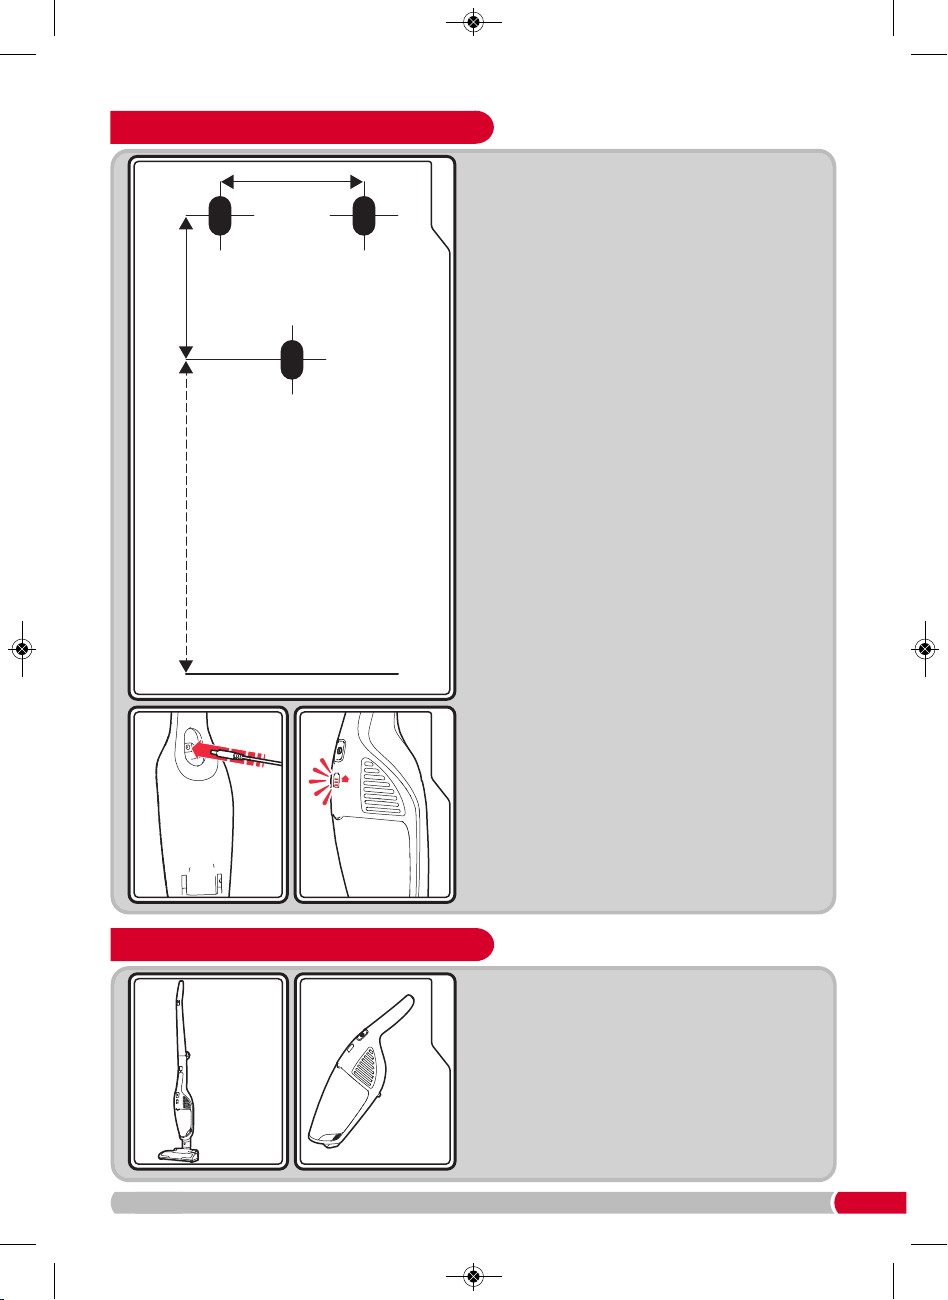
Charging / storage mount fixing
25.4mm
25.4mm
the ground
1
23
762mm - This is the minimum height
above the ground for wall
mounting, it may be
mounted higher if required.
NOTE: The mounting
must be within 1.5 metres
of a mains outlet socket
to enable the mains
adaptor to reach.
D
uring unpacking of the product, make sure that
t
he packing insulation piece between the handheld
vacuum cleaner
(10) and the main vacuum cleaner
body
(11) is removed.
C
harge the product fully before first use.
1 T
he charging / storage mount
(
6)
m
ust be fixed to
a suitable wall with three 4mm (No. 8) pan-head
screws (NOT PROVIDED). The screws and plug
m
ust be suitable for the relevant wall type and be
capable of supporting a minimum of 5kg.
The position of the three holes for the fixing plugs
should be as shown in the diagram (see left).
After the charging / storage mount has been fixed
to the wall, fit the storage hook (7) to the rear of the
upright handle (1) by locating in the slot provided
and then lifting up until it clicks into position.
To fit the vacuum cleaner onto the charging /
storage mount, simply hook the product onto the
mount using the storage hook.
2 To charge, plug the mains adaptor (13) into the
mains supply and switch on, then plug the mains
adaptor connector
(13a) into the charging inlet (14)
on the underside of the handheld vacuum cleaner
(10), this is accessible through a hole in the back
of the main vacuum cleaner body (11).
Then hook the vacuum cleaner onto the wall
mounted charging / storage mount whilst charging.
3 The four charging/power indicator lights (16) will
illuminate one by one from the lowest light to the
uppermost light in a continuous loop to indicate
the product is charging.
As charging continues, each light from the lowest
to the uppermost will remain constantly illuminated
one-by-one to indicate how much the unit has
charged. All lights will extinguish when the product
is fully charged. A full charge may take 5 hours.
When fully charged, unplug the mains adaptor
connector and switch off / unplug the mains
adaptor from the mains supply.
VC732102 MUK Rev1.qxp_Instruction Book 14/11/2016 09:28 Page 5
Loading ...
Loading ...
Loading ...