Loading ...
Loading ...
Loading ...
10
•
“Does not pick-up”/ “Motorised floor-brush
running slow or soon stops”
C
heck for hairs/fibres that may be wrapped
around the rotating brush-bar.
I
MPORTANT: Remove the brush bar as described
on page 9. Fine hairs or fibres may be caught
u
nseen in the ends of the brush bar. Carefully
r
emove the hairs and re-fit the brush bar.
• “Does not pick-up” / “Suction of handheld
cleaner has reduced”
In addition to emptying the dust canister, it is very
important that the individual parts of the dust
canister filter holder assembly (18) (see image 3
on page 9) are regularly and thoroughly cleaned.
See ‘Maintenance - filters’ section on page 9 for
details of how to access and clean them.
• “Does not pick-up from the floor but the floor
brush is rotating and the handheld has good
suction”
Switch off the product, remove the motorised
floor brush and check for blockages in the
floorhead suction inlet connector area between
the motorised floor brush and the main vacuum
cleaner body.
• “Product not charging”
Check the indicator light (16) on the front of the
handheld cleaner is glowing to indicate that
charging is in process. If the indicator is not
showing, check the mains adaptor is fully fitted into
the mains socket and the socket is switched on.
1.
F
it the handheld vacuum cleaner
(
10)
b
ack into
the cavity on the main vacuum cleaner body
(11)
b
y firstly sliding the suction end into place over
the suction hole in the main vacuum cleaner body
cavity, then push the handle end in to place until a
c
lick is heard.
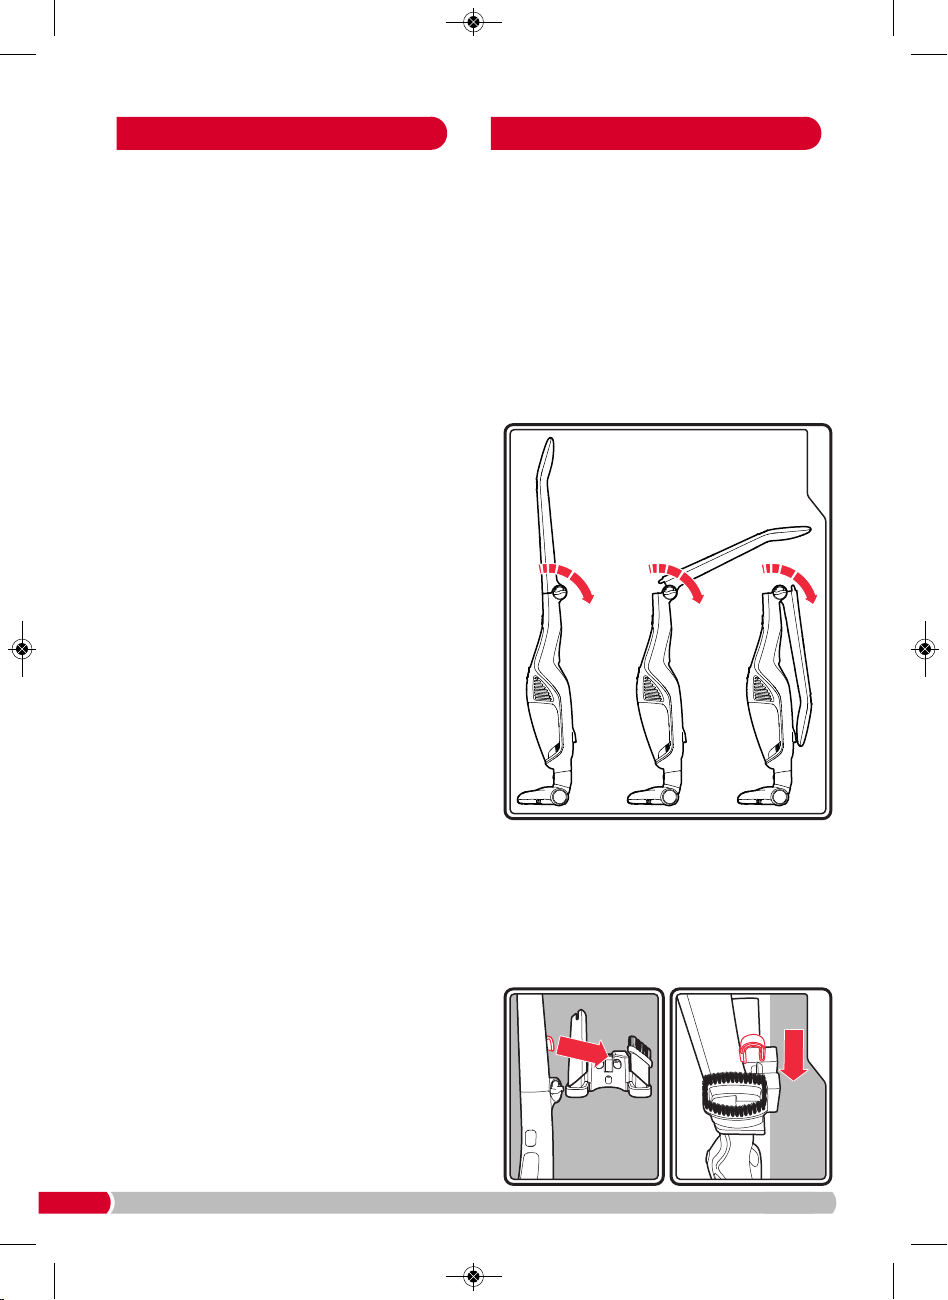
2.
T
he upright handle
(
1)
i
s collapsible for compact
storage by turning the upright handle release dial
(8)
towards the front of the main vacuum cleaner
body.
WARNING: When locking the handle, keep this
area clear. Be careful not to trap your fingers
or any loose items of clothing etc
.
3.
Place the tools onto the charging / storage mount
(6)
(see ‘Tool storage’, page 8).
4.
Rather than compact storage (as described in point
2), you may wish to hang the product from the
charging / storage mount (which must be attached
to a wall using suitable screws and wall plugs). Use
the storage hook (7) to hang the product from the
lip in the centre of the charging / storage mount.
Maintenance - troubleshooting
Storage
Wall
Wall
VC732102 MUK Rev1.qxp_Instruction Book 14/11/2016 09:28 Page 10
Loading ...
Loading ...