Loading ...
Loading ...
Loading ...
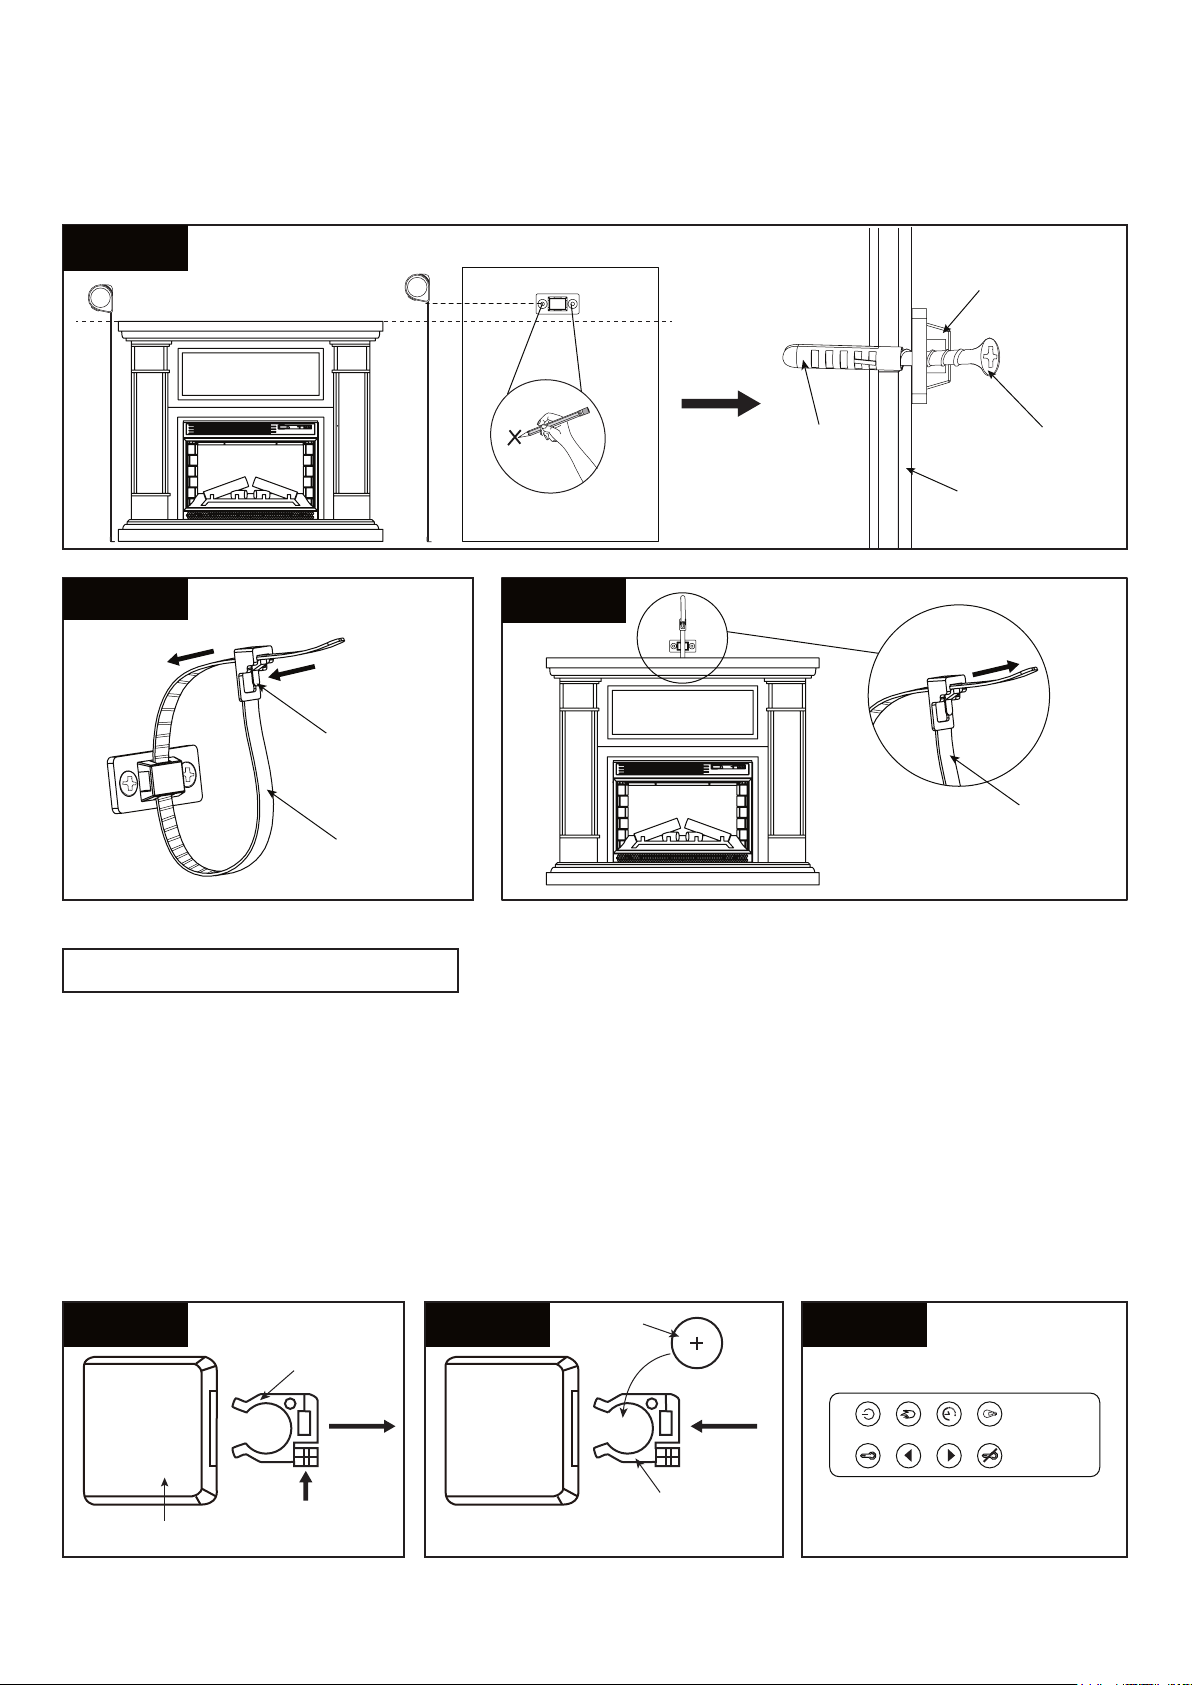
3. Flip the lock on the tipping restraint strip, pull out the strip completely (see Figure 3).
4. Lace the strip through the hole of bracket mounted on the wall, bring both ends together and draw
it through until all slack is removed (see Figure 4).
5. Confirm that the strip is securely laced and locked.
05
Wall stud
Bracket
Tipping
restraint strip
Screw (M4x40)
Anchor
Figure 2
Figure 3 Figure 4
ON/OFFHeat
+
_
Flame
Timer
Heat OFF Downlight
Figure 5
Push
Open
Battery
compartment
Remote control
Figure 6
Battery
compartment
Battery
Figure 7
1. Push the side fixture and then pull out the battery compartment from the bottom of the remote
control (see Figure 5).
2. Place button battery in the battery compartment with “+” (positive) mark face up to correspond the
“+” mark on the battery compartment, then push it into the remote control (see Figure 6).
NOTE: battery is pre-installed.
3. Installation is completed (see Figure 7).
NOTE: be sure to use Lithium Battery Model CR2032 DC3V, and make sure the positive side and
negative side follow the instruction on the battery holder.
WARNING: KEEP BATTERY OUT OF REACH OF CHILDREN.
BUTTON LITHIUM BATTERY
Tipping
restraint strip
Lock
Loading ...
Loading ...
Loading ...