
Supported Control
+ Smart Life App
Durablow
®
Smart Home Series -
Gas Valve Control SH3001-BT
(Bluetooth)

01
02
03
04
CON
TENTS
DOWNLOAD APP &
CREATE ACCOUNT
ADD DEVICE & WIFI SETTING
WIRING & FUNCTIONS
FAQ & WARRANTY
1

1
DOWNLOAD APP & CREATE ACCOUNT
2
1
REGISTER A NEW ACCOUNT
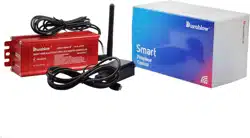
1. Tap “Register” on the bottom. (Pic 1)
2. Select your country code and enter mobile phone number / E-mail and tap “Next”. (Pic 2)
3. For mobile phone number account, enter the verification code (Pic 3) given in the text message.
Enter desired password, tap “Confirm” to finish the registration.
4. For E-mail account, enter desired password (pic 4), tap “Confirm” to finish the registration.
Mobile phone number / Email address
Pic. 1 Pic. 2 Pic. 3 Pic. 4
4
1
LOGIN SMART LIFE APP
Pic. 1 Pic. 2
5
Login methods:
• Login with mobile number + SMS
verification code (text message). (Pic. 1+2)
• Login with account number (mobile
number/E-mail) + password. (Pic. 1)
• Login with social media account.
(If you have installed Facebook or Twitter in
your phone, tap the corresponding icon
below, and sign in the App after social
network authentication)

1
FORGOT PASSWORD / RESET
If forgot password, follow steps below and
reset:
1. Tap “Forgot password”. (Pic. 1)
2. Select your country, enter your account the
cellphone number / E-mail, and tap “Next”.
(Pic. 2)
3. Enter the verification code given in the
message / E-mail , and enter a new
password, tap “Confirm” to finish. (Pic. 3)
4. Login with new password.
Pic. 1
Pic. 2
Pic. 3
6

2
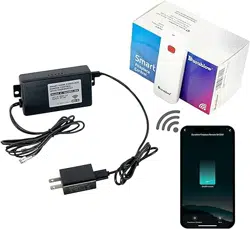
ADD DEVICE & BLUETOOTH SETTING
7
2
ADD DEVICE & BLUETOOTH SETTING
Pic. 1 Pic. 2
8
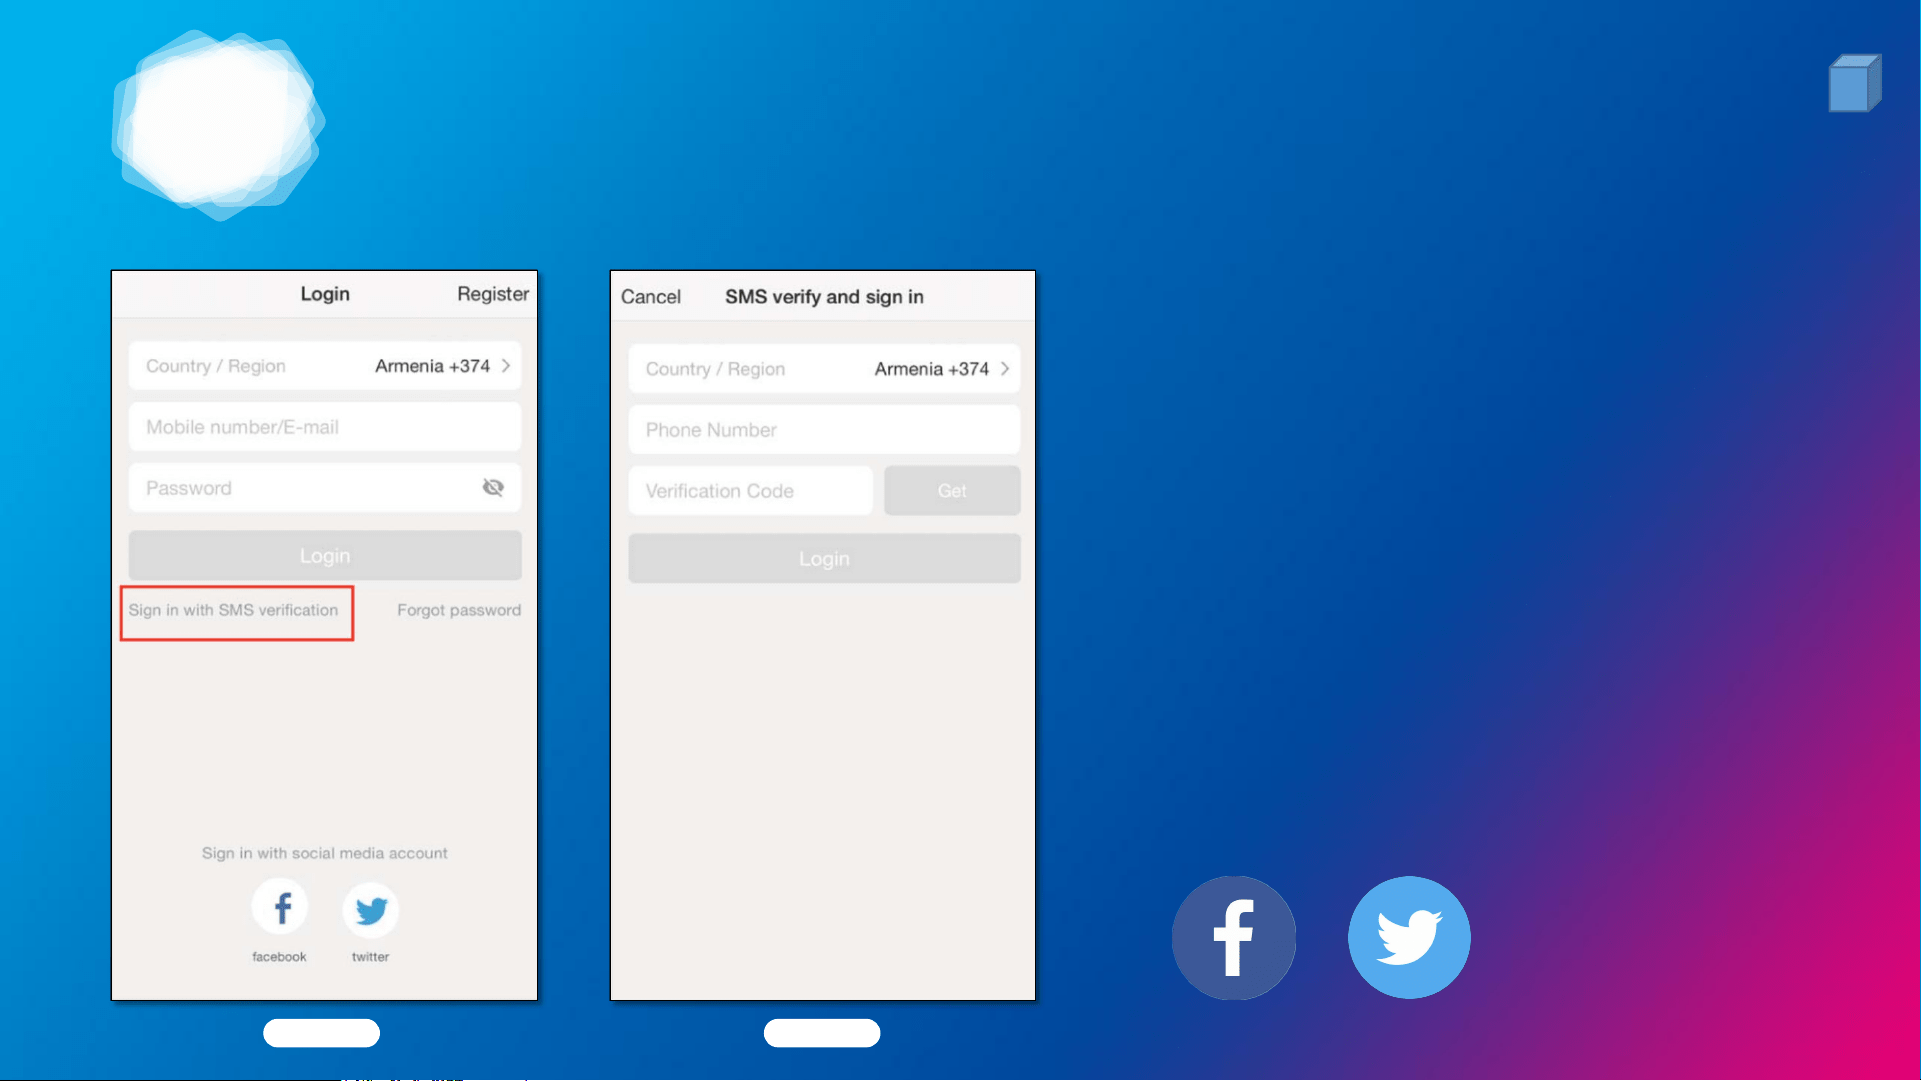
1. Power ON your device.
2. Login your Smart Life App, and tap the “+” or
“Add Device” Icon (Pic. 1) to add device in
Smart Life App, select the right device (Pic. 2).
For this device, Switch (Bluetooth) is preferred.
3. Hold the reset button for 10 seconds. (Pic. 3)
Find RESET BUTTON
on controller box
Pic. 3
2
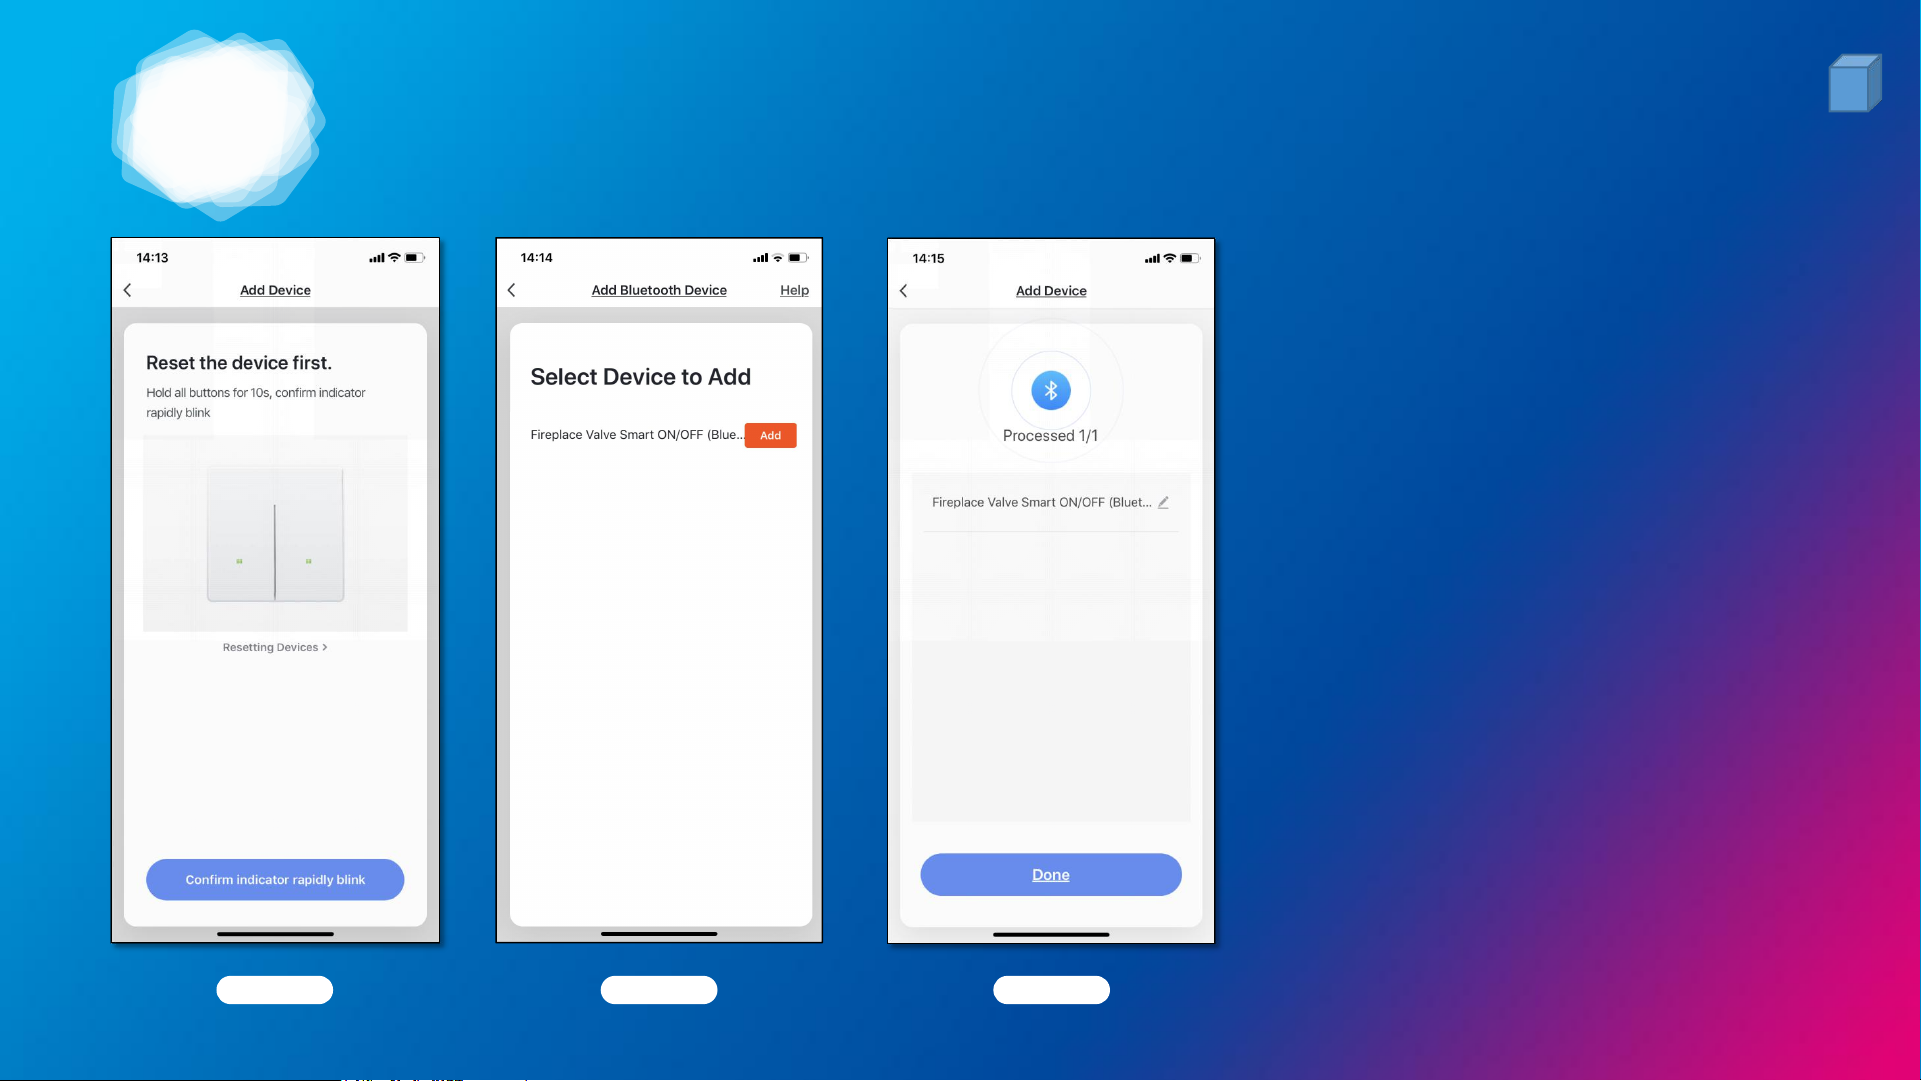
ADD DEVICE & BLUETOOTH SETTING
Pic. 1 Pic. 2
9
4. Confirm indicator rapidly blink.
5. Select device to add.
6. Add device successfully.
7. Rename your device.
*8. If failed, please unplug and
plug-in the power cord. Make
sure the device is close enough to
your smart phone (in 20 feet).
Repeat steps 1-7.
Pic. 3

3
WIRING & FUNCTIONS
10
3
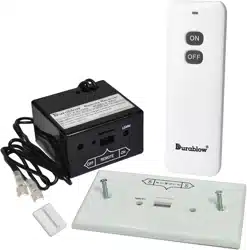
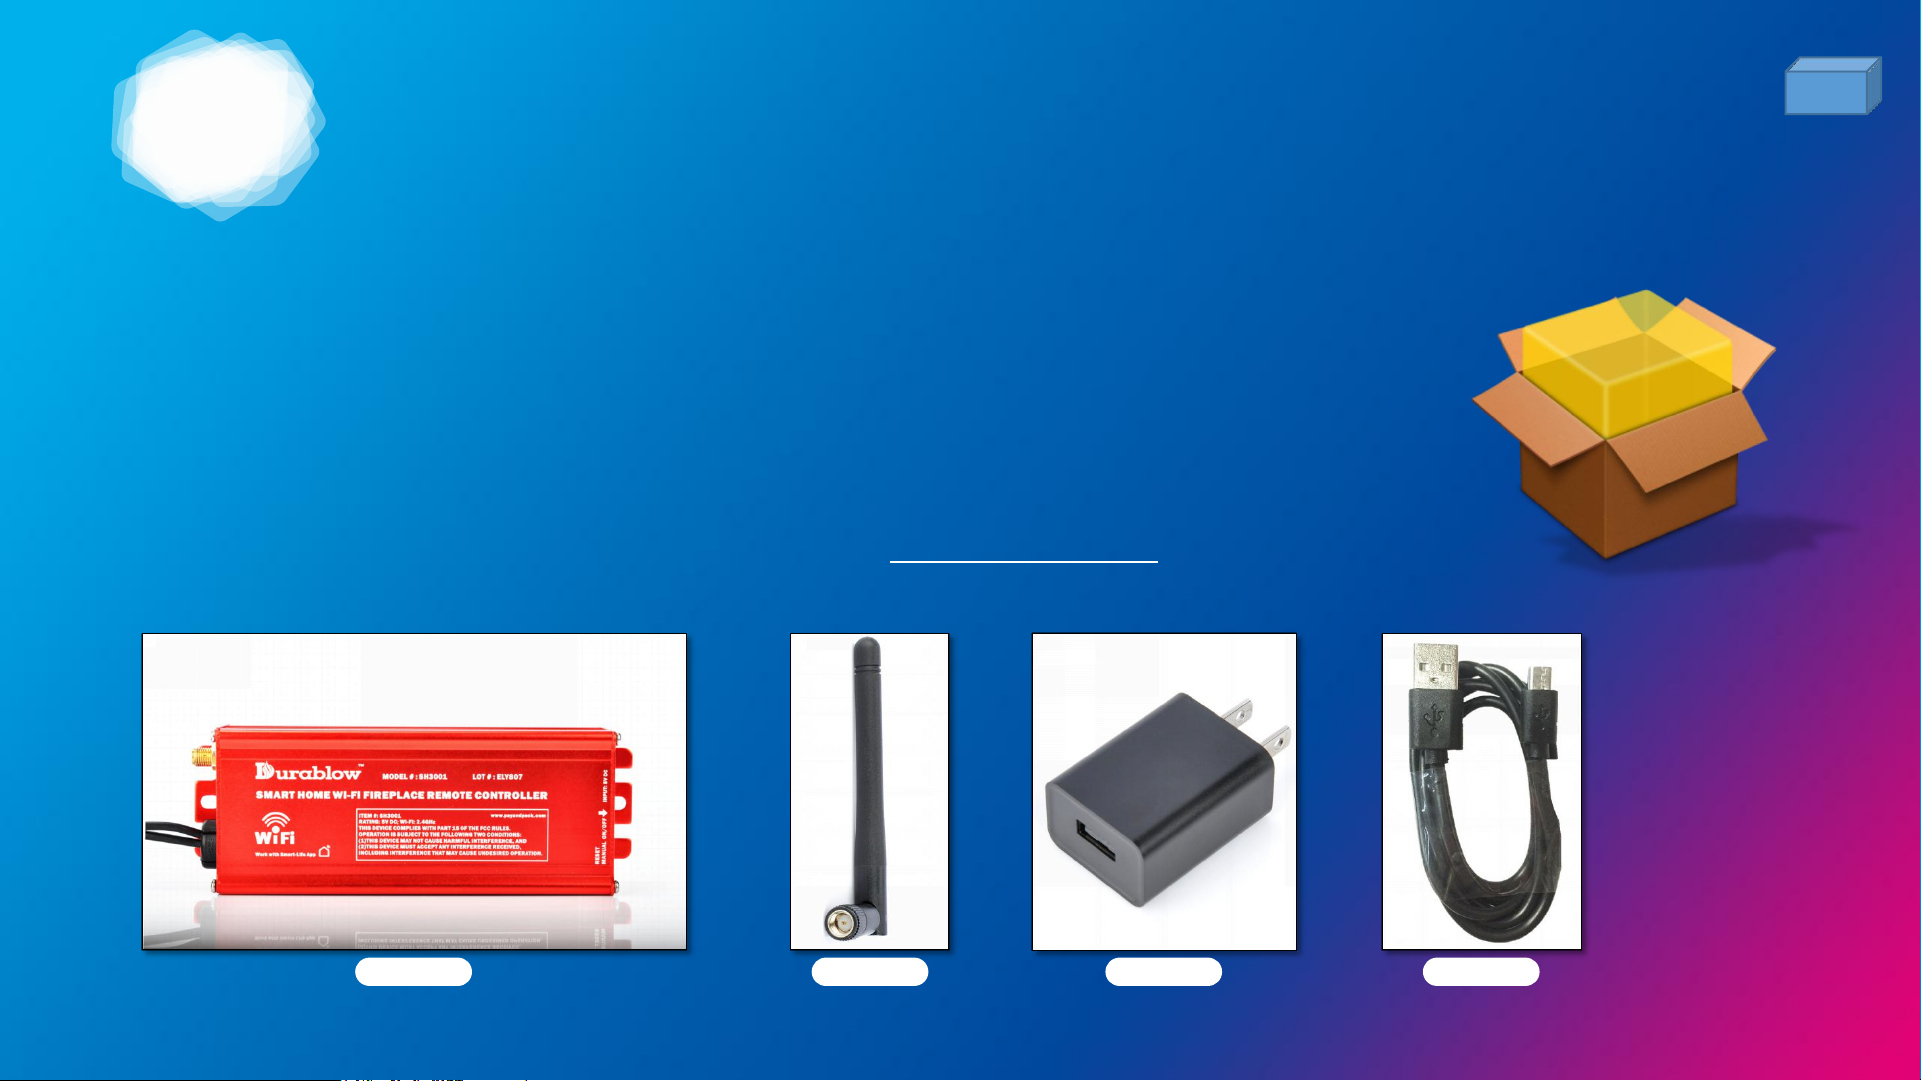
PACKING LIST
11
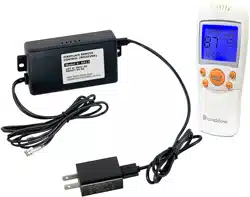
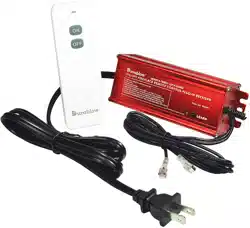
1. Remote Controller Box with Two Connected Wires (Model #: SH3001-BT)
2. Bluetooth Antenna (Black)
3. Power Supply USB Adapter (100-240VAC)
4. Power Cord (Type: USB + Micro USB)
5. Installation Instruction / Manual
(For any missing parts or damages, please contact your sellers, or info@payandpack.com with order ID)
Pic. 1 Pic. 2 Pic. 3 Pic. 4
(Pic. 1)
(Pic. 2)
(Pic. 3)
(Pic. 4)

3
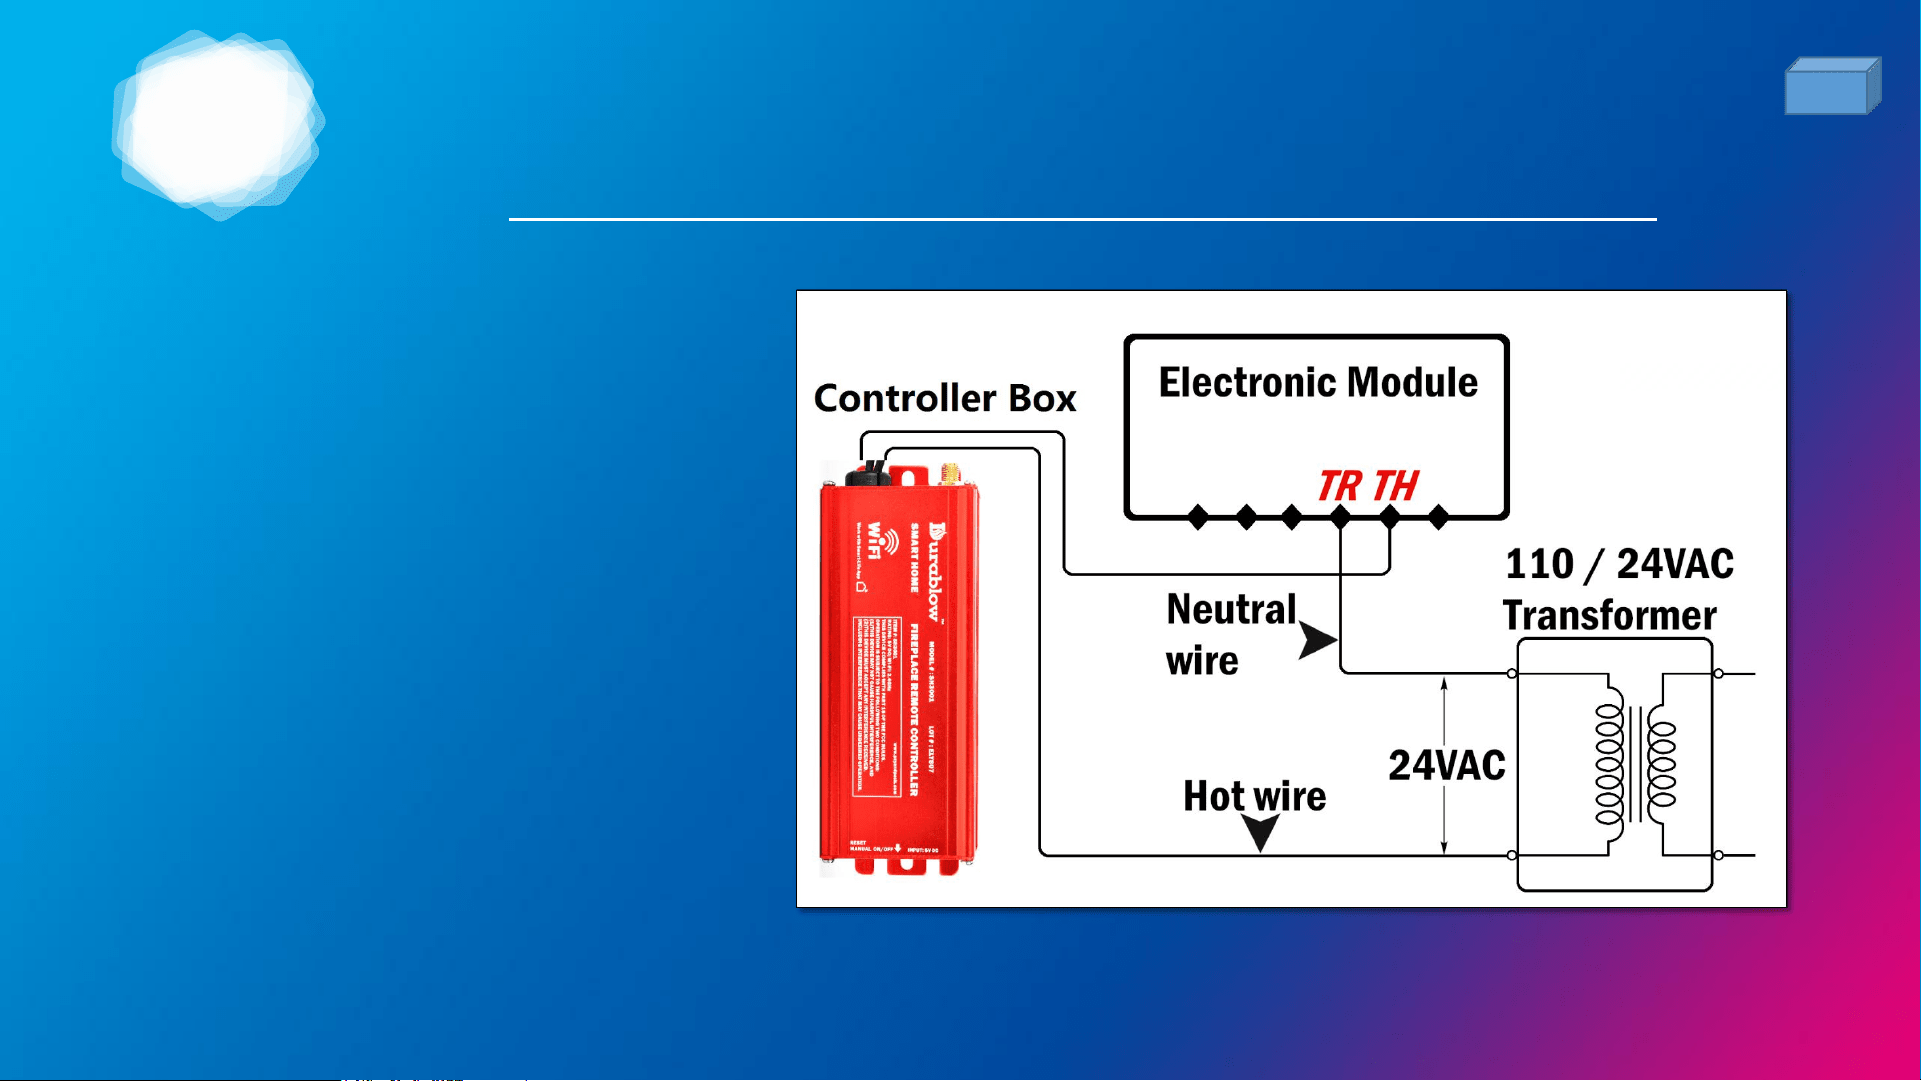
WIRING METHOD (1)
FOR *MILLIVOLT VALVE
13
Connect the two wires of the controller
box to the Millivolt gas valve at the TH,
TH/TP terminals on the terminal block.
(*Both wires can be connected to TH,
TH/TP terminals)
The controller box‘s operation is to turn
the gas valve ON and OFF. App or other
devices (such as Amazon Alexa Echo Dot)
send signals to the controller box, and
then it passes the signals to Millivolt
valve to function the ON and OFF of gas
supply / fire / heater.
* The Millivolt valve shown in picture is for reference only, your actual Millivolt valve may differ in shape.
Please locate the TH, TH/TP terminals with valve's manual or original maker.
3
WIRING METHOD (2)
FOR *ELECTRONIC SPARK IGNITION MODULE
14
1. Connect a 24VAC transformer in
s e r i es to t h e TR ( t ra n s fo r m e r )
terminal on the ELECTRONIC SPARK
IGNITION MODULE.
2. Connect the hot wire from the 24VAC
transformer to either of the wire
terminals on the controller box.
3. Co nnect a not he r w ire bet ween
controller box terminal and the TH
( t h e r m o s t a t ) t e r m i n a l o n t h e
ELECTRONIC MODULE.
* This picture is for reference only, your actual installation may differ.
Please refer to your module manual or original maker.

3
REMOTE CONTROL WITH SMART LIFE APP
15
1. Login Smart Life App.
2. Find your paired device from the All Devices list.
3. Tap it to enter the device control panel.
4. Functions:
• Switch: Turn ON/OFF your fireplace (gas valve).
• Timer: Set time count down to turn ON/OFF your fireplace (gas valve).

4
FAQ & WARRANTY
16

4
1. How to contact customer support?
17
A: Go to your device control panel and tap the “...” at the upper right corner. Find “Send Feedback” in the
list to send message to Durablow customer support. Usually reply in 24 hours. For order questions or
suggestion, please email to info@payandpack.com
2. What are the dimensions? Where to place it?
A: The controller is 6”x2.2”x1.6”. Do NOT place it under / in the fireplace. At least 2 feet away from heat.
3. Wall-mounted?
A: It can be wall-mounted with its screw-holes at both ends.
FAQ
4. Can I turn ON/OFF if no App, no phone, no network?
A: Yes. Just press the RESET button manually at the side of controller box to operate ON/OFF.

4
18
WARRANTY
• Durablow® warrants this product for a 2-YEAR LIMITED WARRANTY of the original purchaser / owner
of this product. This warranty is not transferable to another person. It is for the original purchaser of
the product. Durablow warrants any parts failed because of defective workmanship in production or
materials from the original date of purchase. Durablow will repair or replace the defective parts at
Durablow’s decision.
• Replacement parts will be available at NO charges and free-shipping to users for the FIRST 2 years of
this warranty. If Durablow does not have the parts for a certain model, then a replacement product
will be provided.
• The Owner must provide a bill of sale, order ID or payment record which should be kept to verify
purchase date and establish warranty period.
• This warranty does not cover claims. Damage to the product caused by accident, misuse, abuse, or
installation error, no matter implemented by a contractor, third party Service Company, or owner, is
not covered by this warranty. Any modifications of this product will void this warranty.
• Photos and simple questions may be required for further product investigation & improvement.
Durablow & PayandPack will reserve the right to physically inspect the product for defects, by
authorized representatives.

MODEL: SH3001-BT
This device complies with Part 15 of the FCC rules. Operation is
subject to the following two conditions: 1) this device may not
cause harmful interference, and 2) this device must accept any
interference received, including interference that may cause
undesired operation.