Loading ...
Loading ...
Loading ...
Page 35
Installation and Operation Manual - Escape 1500-I
ENGLISH
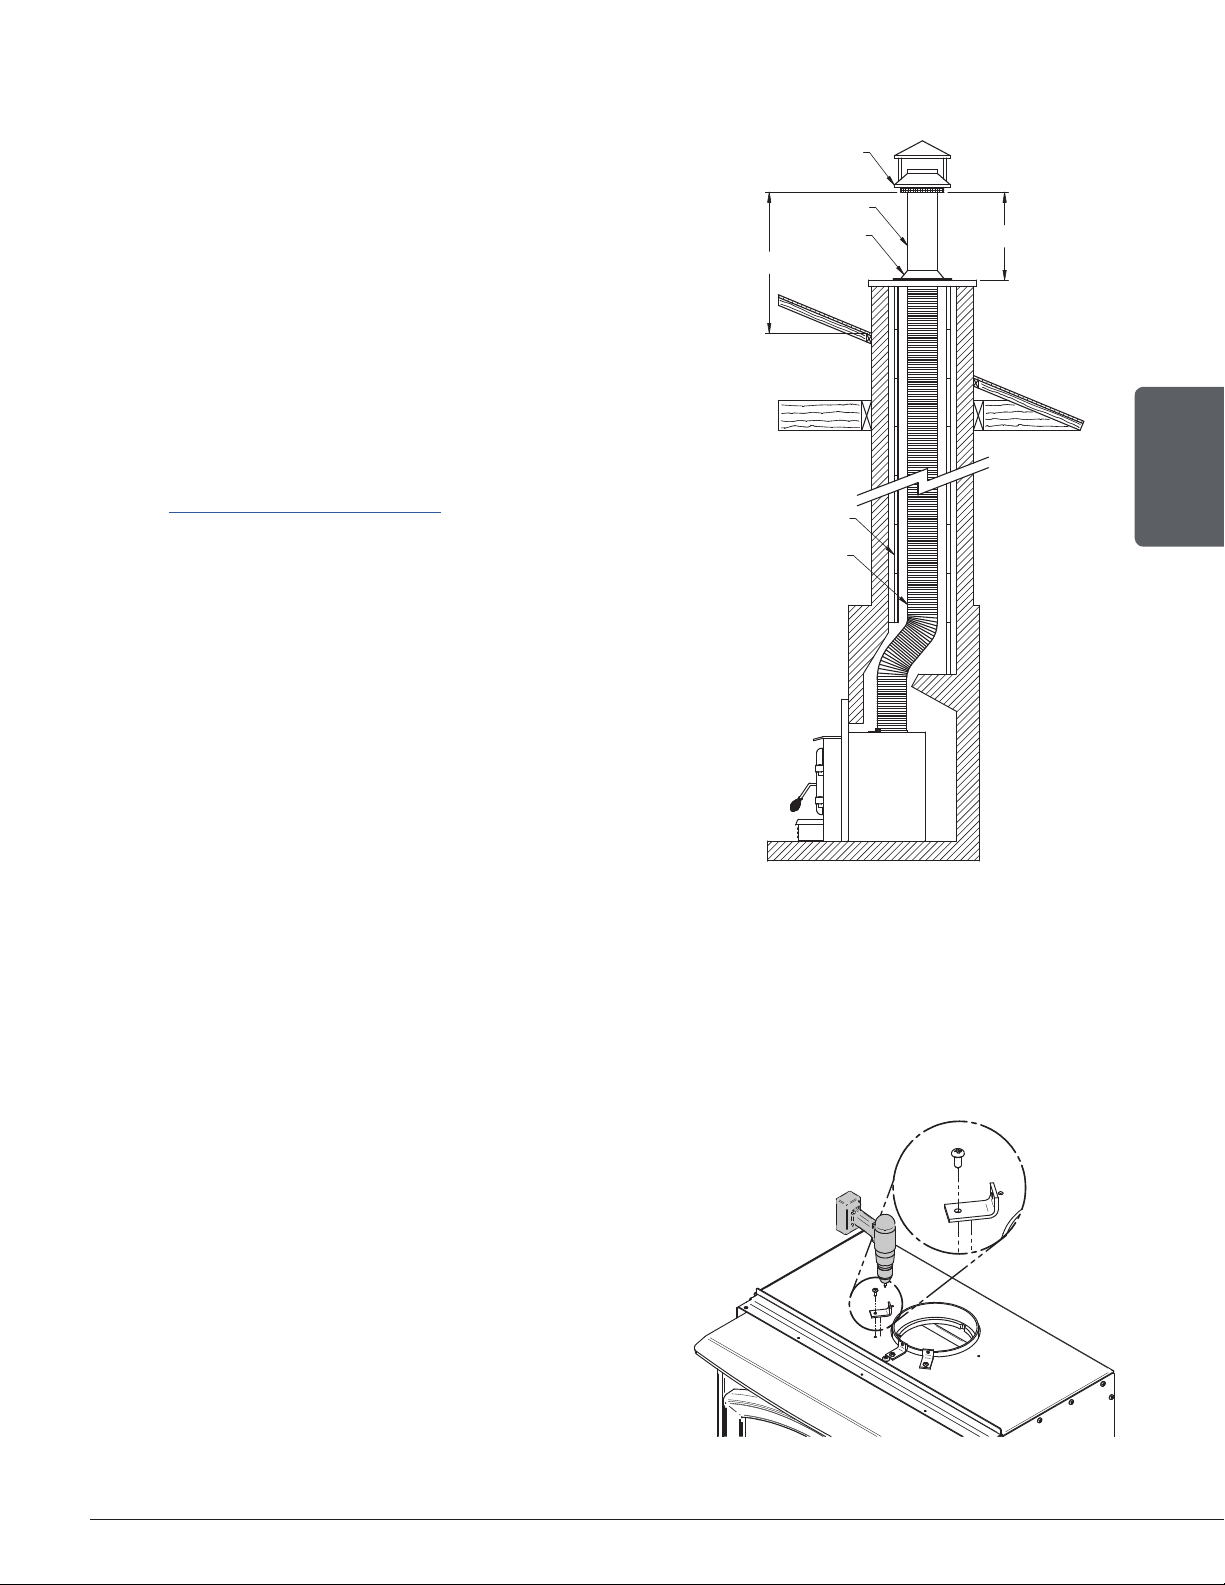
10.4 Chimney Liner Installation
The use of a chimney liner (rigid or flexible) is
recommended to ensure the best performance. To
ensure an optimal draft, it is also strongly recommend
adding a minimum of 12" rigid liner between the top of
the masonry chimney and the rain cap. In all cases,
liners should be installed in accordance with the liner
manufacturer’s instructions, including instructions for
extension above the masonry.
Use chimney liners listed UL 1777, ULC S635 or CAN/
ULC S640.
In order to connect the insert to the liner, refer to
section «10.5 Liner Connection».
ATTENTION INSTALLER:
When positioning the unit in a fireplace opening,
prior to the flue installation, install the insert into the
opening until the top lip of air jacket is flush with
fireplace facing.
If lag bolts or anchors are to be used to secure the
insert, the holes location should be marked with
the unit in place. Remove the insert and locate the
anchors.
6" STAINLESS STEEL
R
IGID OR FLEX LINER
RAIN CAP
MASONRY FLUE
FLASHING
RIGID LINER
12"
305mm
MIN.
36"
914mm
MIN.
Figure 27: Liner Installation
10.5 Liner Connection
Two options are possible to connect the liner to the insert :
10.5.1 Liner Starter Adaptor
Install the chimney liner starter adapter, provided with
the chimney liner. Follow the chimney liner starter
adapter manufacturer’s instructions.
In order to connect the chimney liner starter adapter
to the flue outlet, install three brackets with the three
screws, all provided in the user manual, on top of the
insert. The long end of the brackets must be attached
to the insert. Insert the chimney liner into the flue
collar of the unit and secure the liner to the brackets
with three self-tapping screws (not included).
Figure 28: Securing the brackets
Loading ...
Loading ...
Loading ...