Loading ...
Loading ...
Loading ...
6
4. Align the cover so that the pulp spout cover fits over the back of the base.
Fit the tab of the cover into the slot on the top of the juice bowl. (See Figure 4.)
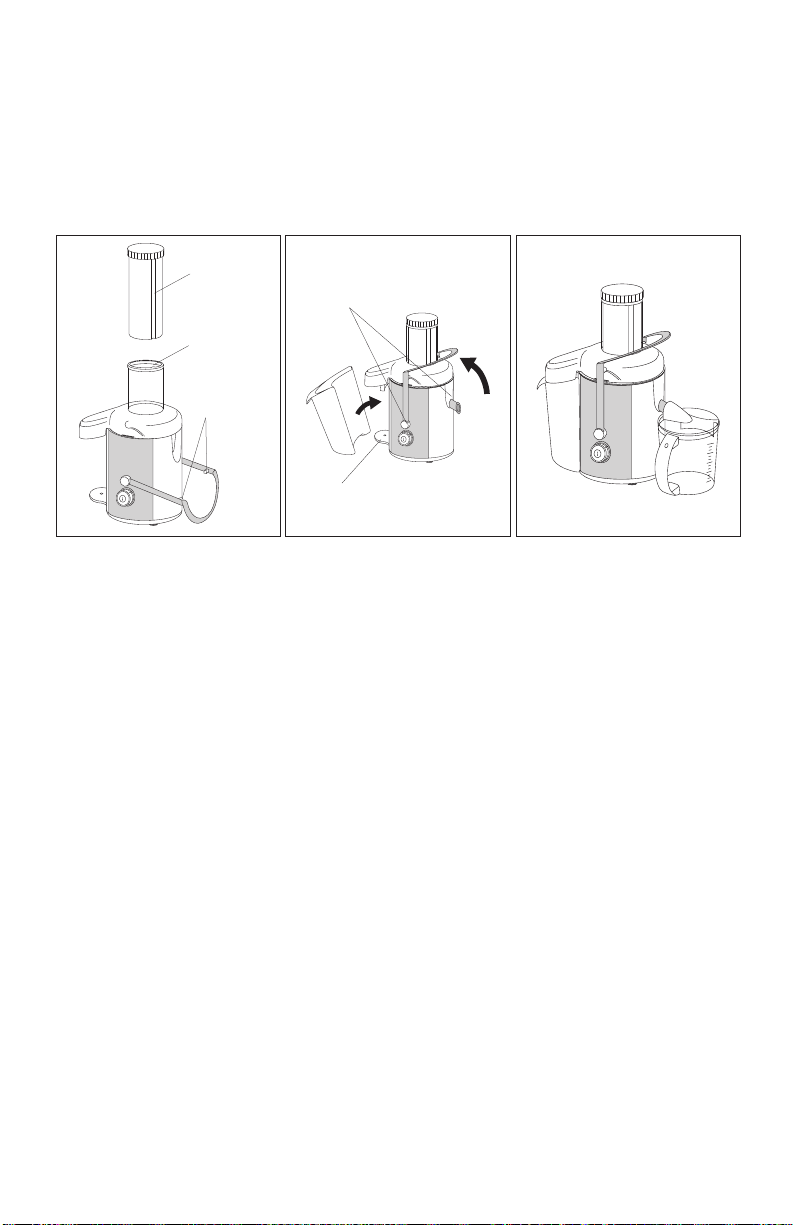
5. Turn the food pusher so that the groove in the side lines up with the tab
in the feed tube. Insert the food pusher into the feed tube. (See Figure 5.)
Store the food pusher in the feed tube of the lid until the produce is ready to juice.
6. Push the locking clamp up and over the lid. Hold clamp firmly and push until
the two black clamp locks rest in the 2 locking slots on the top of the lid.
Make sure the lid is clamped securely into place. (See Figure 6.)
7. Add the pulp basket. (See Figure 7.) Tilt the pulp basket slightly so that the lip
of the juice bowl fits snugly over the inside of the pulp basket. Push the bottom
of the pulp basket so that it rests securely on its platform.
IMPORTANT: To avoid spillage, make sure the pulp basket sits flush
up against the base.
NOTE: To save cleaning time, line the pulp basket with a plastic grocery store
produce bag.
8. Add the juice pitcher lid to the juice pitcher so that the lid’s cut out fits over
the pitcher’s pouring spout. Tilt the juice pitcher slightly so that the Extractor’s
juice spout fits into the top of the pitcher lid. (See Figure 7.) This will prevent
juice spillage.
Figure 5
Figure 6
Figure 7
Groove
Tab
Black
Clamp
Locks
Platform
Lid Locking
Slots
Loading ...
Loading ...
Loading ...