Loading ...
Loading ...
Loading ...
Page 11
OPERATION
INSTALLING AND REMOVING
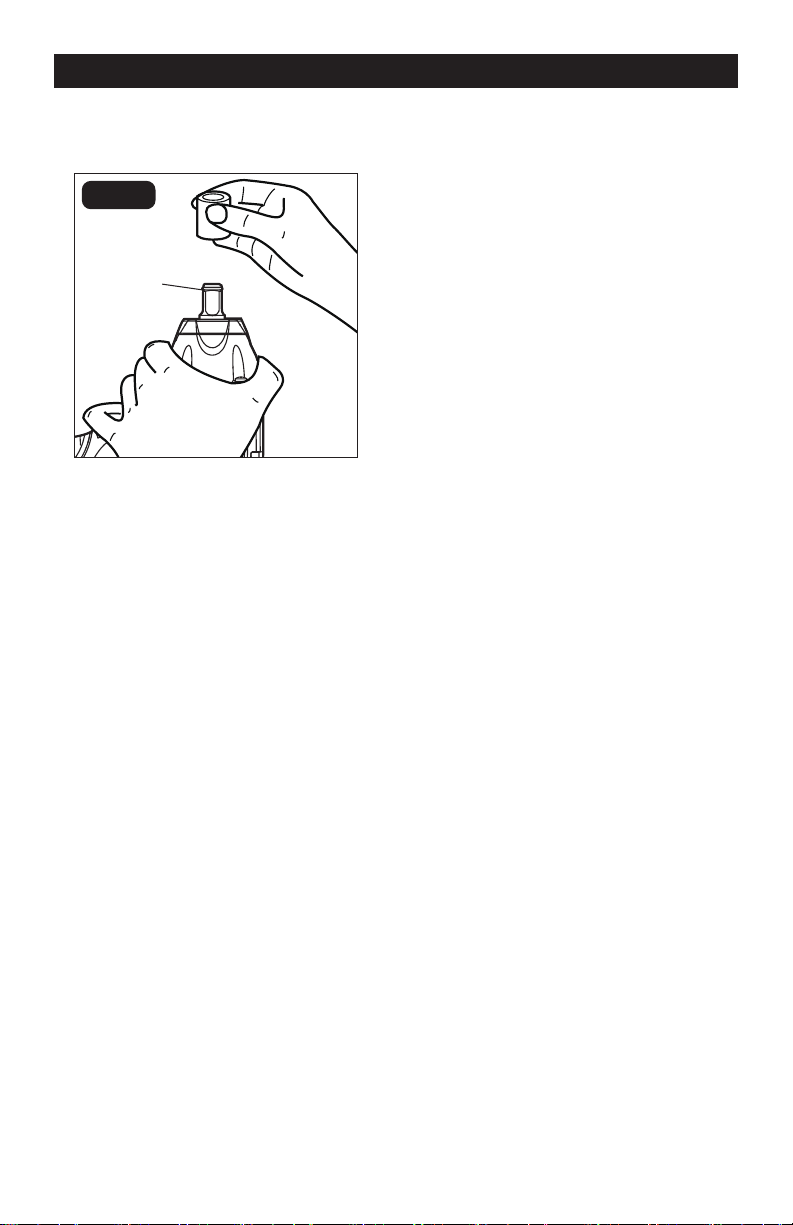
THE SOCKET (FIG. 7)
FIG. 7
Friction Ring
NOTICE: The friction ring, with certain
plasticity and strength, helps to prevent
the socket from disengaging from the
output drive of the impact wrench during
the operation.
Always use the correct size socket for bolts
and nuts. An incorrect socket will result
in inaccurate and inconsistent fastening
torque and/or damage to the bolt or nut.
1. Lock the trigger switch by placing the
direction-of-rotation selector in the OFF
(center) position.
2. To install the socket, push it onto the
output drive of the tool until it locks into
place.
3. To remove the socket, simply pull it off.
INSTALLING FASTENERS
NOTICE: Always keep the Impact Wrench
at a right angle to the fastener to avoid
damaging the fastener head.
To fasten:
1. Start threading the fastener by hand
onto or into its threaded counterpart
(e.g. nut onto bolt, or bolt into nut or
threaded hole).
2. With the proper impact socket securely
mounted to the Impact Wrench, slide the
impact socket onto the nut or bolt head.
3. Place the direction-of-rotation selector
in the FORWARD position, and select
a suitable speed or the auto-stop
function. Hold the tool firmly while
depressing the trigger switch. The
impact socket will turn the fastener and
the impacting action will begin when the
fastener encounters resistance.
To loosen:
1. With the proper impact socket securely
mounted to the wrench, slide the impact
socket onto the bolt head.
2. Place the direction-of-rotation selector
in the REVERSE position. Hold the
tool firmly while depressing the trigger
switch. The tool will start to impact
immediately.
3. Once the fastener has “broken loose,”
it will start to unthread. Be careful that
you do not allow a fastener to spin
freely once it is no longer engaged with
its threaded counterpart, as it may be
thrown out of the socket.
IMPACTING TIPS
The proper fastening torque may differ
depending on the type or size of the bolt, the
material of the workpiece to be fastened, etc.
NOTICE: Hold the tool straight along the
axis of the bolt or nut.
NOTICE: Excessive fastening torque may
damage the bolt/nut or socket. Before
starting your job, always perform a
test operation to determine the proper
fastening time for your bolt or nut.
Practice with various fasteners, noting the
length of time required to reach the desired
torque. Check the tightness with a hand-
torque wrench. If the fasteners are too tight,
reduce the impacting time. If they are not
tight enough, increase the impacting time.
Loading ...
Loading ...
Loading ...