Hinweis: Dieses Produkt ist nur für gut isolierte
Räume oder für den gelegentlichen Gebrauch
geeignet.
Note: This product is only suitable for well
insulated spaces or occasional use.
Nota: Este producto está indicado únicamente en
lugares abrigados o para una utilización punctual.
Remarque : Ce produit ne peut être utilisé que
dans des locaux bien isolés ou de manière
occasionnelle.
Nota: Questo prodotto è adatto solo per spazi
ben isolati o uso occasionale.
Let op! Dit artikel is alleen geschikt voor goed
geïsoleerde ruimtes en voor incidenteel gebruik.
10034390 10034391
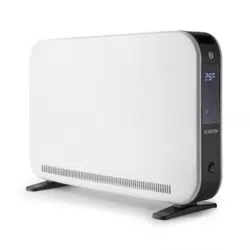
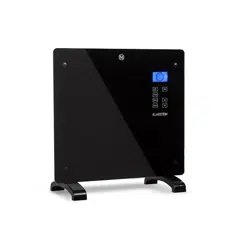
Bornholm Smart
Glaskonvektor
Glass Convector Heater
Radiateur convecteur vitré
Convector de cristal
Convettore in vetro
Glasconvector

3
INHALT
TECHNISCHE DATEN
Sehr geehrter Kunde,
wir gratulieren Ihnen zum Erwerb Ihres Klarstein Gerätes. Lesen Sie die folgenden
Anschluss- und Anwendungshinweise sorgfältig durch und befolgen Sie diese, um
möglichen technischen Schäden vorzubeugen. Für Schäden, die durch Missachtung
der Sicherheitshinweise und unsachgemäßen Gebrauch entstehen, übernehmen
wir keine Haftung. Scannen Sie den QR-Code, um Zugriff auf die aktuellste
Bedienungsanleitung und weitere Informationen rund um das Produkt zu erhalten.
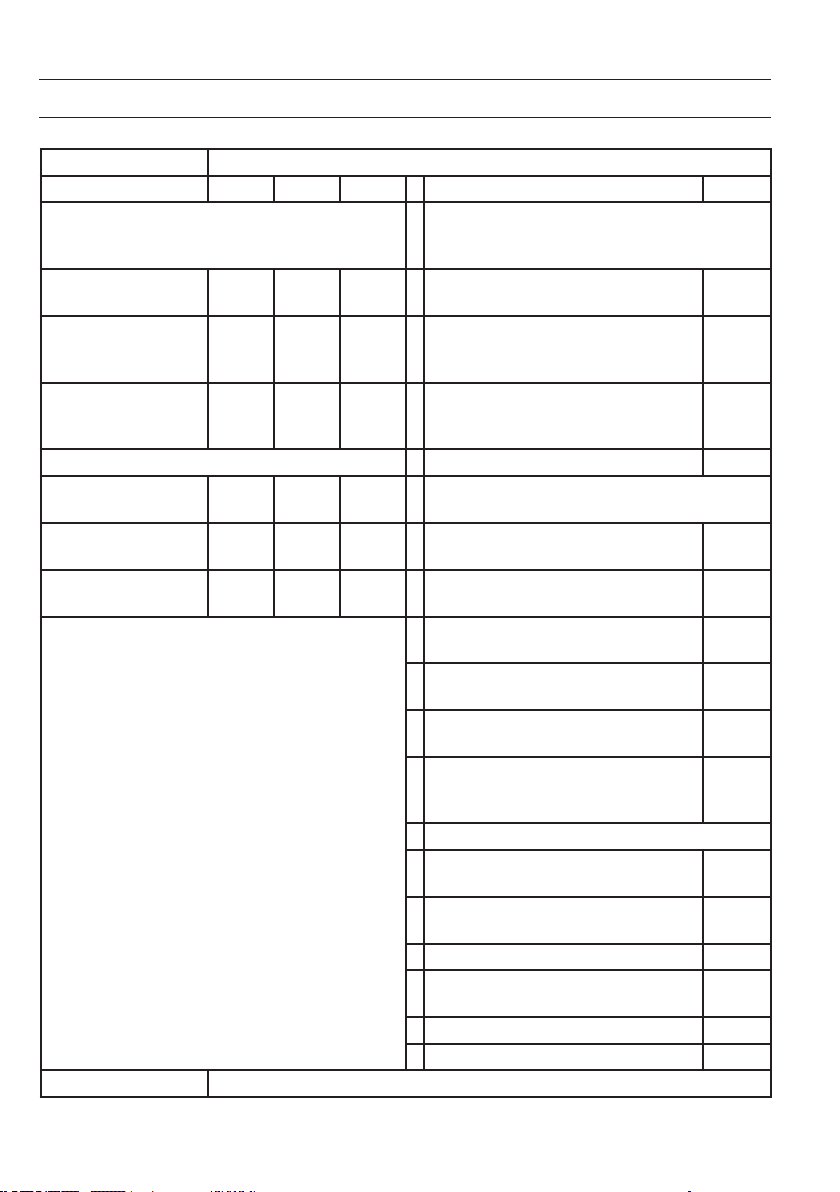
Artikelnummer 10034390, 10034391
Stromversorgung 220-240 V ~ 50 Hz
Leistungsaufnahme 1000 W (niedrige Stufe)
2000 W (hohe Stufe)
Technische Daten 3
Produktdatenblatt 4
Sicherheitshinweise 5
Geräteübersicht 7
Montage 8
Bedienfeld 9
Bedienung 10
Gerätesteuerung per Smartphone 12
Reinigung 13
Hinweise zur Entsorgung 13
Konformitätserklärung 14
4
PRODUKTDATENBLATT
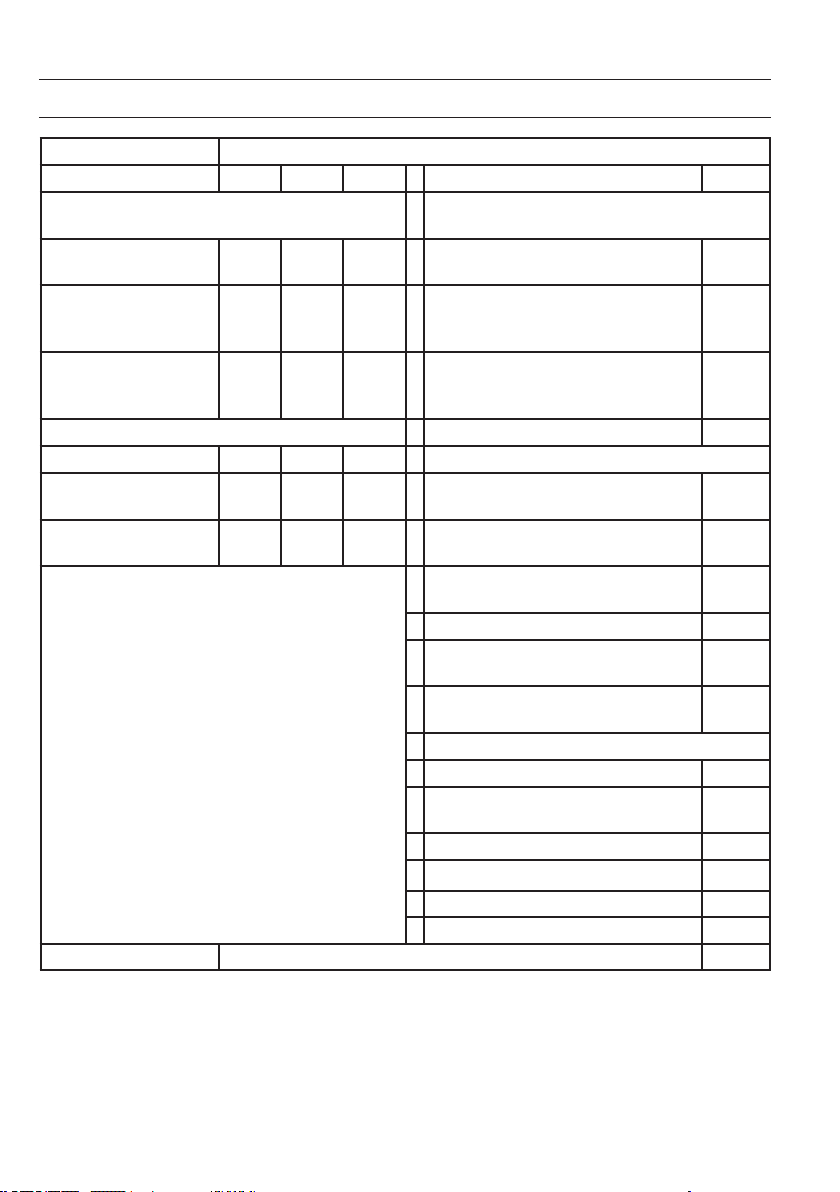
Modellkennung(en) 10034390, 10034391
Angabe Symbol Wert Einheit Angabe Einheit
Wärmeleistung Nur bei elektrischen Speicher-Einzelraumheizgeräten:
Art der Regelung der Wärmezufuhr
Nennwärmeleistung P
nom
2,0 kW Manuelle Regelung der Wärmezufuhr mit
integriertem Thermostat
Nein
Mindestwärmeleistung P
min
1,0 kW Manuelle Regelung der Wärmezufuhr
mit Rückmeldung der Raum- und/oder
Außentemperatur
Nein
Maximale kontinuierliche
Wärmeleistung
P
max
1,98 kW Elektronische Regelung der Wärmezufuhr
mit Rückmeldung der Raum- und/oder
Außentemperatur
Nein
Hilfsstromverbrauch
Wärmeabgabe mit Gebläseunterstützung Nein
Bei Nennwärmeleistung el
max
1,985 kW
Art der Wärmeleistung/Raumtemperaturkontrolle
Bei Mindestwärmeleistung el
min
0,979 kW Einstuge Wärmeleistung, keine
Raumtemperaturkontrolle
Nein
Im Bereitschaftszustand el
SB
0,04 W Zwei oder mehr manuell einstellbare Stufen,
keine Raumtemperaturkontrolle
Nein
Raumtemperaturkontrolle mit mechanischem
Thermostat
Nein
Mit elektronischer Raumtemperaturkontrolle Nein
Mit elektronischer Raumtemperaturkontrolle und
Tageszeitregelung
Ja
Mit elektronischer Raumtemperaturkontrolle und
Wochentagsregelung
Nein
Sonstige Regelungsoptionen
Raumtemperaturkontrolle mit Präsenzerkennung Nein
Raumtemperaturkontrolle mit Erkennung offener
Fenster
Ja
Mit Fernbedienungsoption Nein
Mit adaptiver Regelung des Heizbeginns Nein
Mit Betriebszeitbegrenzung Nein
Mit Schwarzkugelsensor Nein
Kontaktangaben Chal-Tec GmbH, Wallstraße 16, 10179, Berlin, Deutschland

5
SICHERHEITSHINWEISE
Lesen und befolgen Sie die folgenden Sicherheitshinweise, selbst wenn Sie sich mit dem Gerät vertraut fühlen. Bewahren
Sie die Bedienungsanleitung zum künftigen Nachschlagen auf.
Bei der Verwendung eines elektrischen Gerätes müssen die Sicherheitshinweise befolgt werden, einschließlich der
Folgenden:
• Das Gerät kann von Kindern ab 8 Jahren und Personen mit eingeschränkten physischen, sensorischen oder geistigen
Fähigkeiten oder mit mangelnder Erfahrung und/oder mangelndem Wissen nur dann verwendet werden, wenn sie
durch eine für ihre Sicherheit zuständige Person beaufsichtigt werden oder in die sichere Verwendung des Geräts
eingewiesen wurden und die mit dem Gerät verbundenen Gefahren verstanden haben.
• Verwenden Sie ausschließlich die Spannung, die auf dem Typenschild des Gerätes angegeben ist.
• Behindern Sie den Luftstrom am Luftein- oder -auslass in keiner Weise, da das Gerät überhitzen und zu einer
Brandgefahr werden kann.
• Decken Sie die Lüftungsschlitze und die Luftein- und - ausgänge nicht ab, indem Sie das Gerät an einer Fläche
anbringen. Alle Gegenstände müssen mindestens 1 Meter Abstand nach vorne, zu den Seiten und nach hinten
haben.
• Stellen Sie das Gerät nicht in der Nähe einer Wärmequelle auf.
• Betreiben Sie das Gerät nicht in einer Umgebung, in der Benzin, Farbe oder andere brennbare Stoffe gelagert
werden.
• Dieses Gerät wird während der Benutzung heiß. Lassen Sie nackte Haut nicht die heißen Oberäche berühren. Vor
dem Bewegen ausschalten und abkühlen lassen.
• Verwenden Sie das Gerät nicht, um Wäsche zu trocknen.
• Führen Sie keine Fremdkörper und Metallgegenstände in das Innere des Gerätes oder die Lüftungsschlitze ein, da
dies einen Stromschlag, Brand oder eine Gerätebeschädigung verursachen kann.
• Das Gerät nicht in Flüssigkeiten tauchen oder in das Geräteinnere Wasser laufen lassen, da dies zu einer
Stromschlaggefahr führt.
• Greifen Sie nicht nach einem Gerät, dass ins Wasser gefallen ist. Strom im Haushalt ausschalten und sofort den
Netzstecker ziehen.
• Betreiben Sie das Gerät nicht mit einem beschädigten Netzkabel, Netzstecker, nachdem das Gerät eine
Fehlfunktion hatte, fallen gelassen wurde oder in irgendeiner Weise beschädigt wurde. Geben Sie das Gerät einer
Elektrofachkraft zur Untersuchung, elektrischen oder mechanischen Justierung, Wartung oder Reparatur.
• Bedienen Sie das Gerät nicht mit nassen Händen.
• Der häugste Grund für eine Überhitzung ist die Ablagerung von Staub und Fusseln am Gerät. Gewährleisten Sie,
dass diese Ablagerungen regelmäßig entfernt werden, indem Sie den Netzstecker ziehen und die Luftöffnungen und
den Grill absaugen.
• Vor dem Reinigen immer den Netzstecker ziehen. Zur Reinigung keine Scheuermittel verwenden. Mit einem feuchten
(nicht nassen) Tuch, das nur in eine Seifenlauge getaucht wurde, reinigen.
• Schließen Sie das Gerät nicht an die Stromversorgung an, bevor es vollständig zusammengebaut und montiert
wurde.
• Das Gerät ist nicht für den Außengebrauch bestimmt.
• Dieses Gerät ist nach IP24 gegen Spritzwasser geschützt und somit auch für die Aufstellung in Badezimmern/
Feuchträumen geeignet. Verwenden Sie das Gerät aber nicht in der unmittelbaren Umgebung einer Badewanne,
einer Dusche, eines Schwimmbeckens oder anderen Flüssigkeiten und stellen Sie sicher, dass keine stromführenden
Teile mit Wasser in Kontakt treten können .
• Immer in der aufrechten Lage betreiben.
• Vor dem Bewegen ausschalten und abkühlen lassen.

6
• Nicht mit einem aufgewickelten Kabel betreiben, da die Bildung von Wärme wahrscheinlich ist und ausreicht, um
eine Gefahr darzustellen.
• Die Verwendung eines Verlängerungskabels wird bei diesem Gerät nicht empfohlen.
• Entfernen Sie nicht den Netzstecker aus der Steckdose, bevor das Gerät ausgeschaltet ist.
• Ziehen Sie nicht den Netzstecker aus der Steckdose, indem Sie am Netzkabel ziehen. Immer am Stecker anfassen.
• Ziehen Sie den Netzstecker, wenn das Gerät nicht in Benutzung ist.
• Dieses Gerät eignet sich nicht zur Benutzung auf Langhaarteppichen oder Flokativorlegern.
• Lassen Sie das Netzkabel während des Betriebs nicht mit heißen Oberächen in Berührung kommen.
• Verlegen Sie das Netzkabel nicht unter Teppichen, Vorlegern, Läufern usw. Legen Sie das Netzkabel außerhalb von
Gehbereichen aus, so dass niemand darüber stolpert.
• Das Netzkabel nicht verdrehen, verbiegen oder um das Gerät wickeln, da dies dazu führt, dass die Kabelisolierung
schwächer wird und bricht. Achten Sie immer darauf, dass das gesamte Netzkabel von der Kabelaufwicklung
abgewickelt ist.
• Nicht im Freien oder auf einem nassen Untergrund stehend verwenden.
• Nicht einlagern, solange das Gerät noch warm ist.
• Dieses Gerät eignet sich nicht zur Benutzung durch kleine Kinder oder gebrechliche Personen ohne Betreuung.
• Kleine Kinder müssen beaufsichtigt werden, so dass sie mit dem Gerät nicht spielen.
• Das Gerät darf nicht unter Wandsteckdosenanschlüssen betrieben werden.
• Verwenden Sie das Gerät nicht mit einer Programmierung, Zeitschaltuhr oder einem anderen Gerät, das die Heizung
ein- oder ausschaltet. Denn es besteht eine Brandgefahr, wenn die Heizung abgedeckt oder falsch aufgestellt wurde.
• Alle Gehäuseabdeckungen dieses Gerätes haben den Zweck, den direkten Zugang zu den Heizelementen zu
verhindern und müssen angebracht sein, wenn das Gerät eingeschaltet ist.
• Die Heizung nicht abdecken! Überlastungsgefahr!
• Um die Gefahr eines Stromschlags zu vermeiden, das Gerät und das Netzkabel nicht in Wasser tauchen, dem
Regen, der Feuchtigkeit oder anderen Flüssigkeit aussetzen, als der, die zum Betrieb des Geräts notwendig sind.
• Das Schutzgitter gewährt kleinen Kindern und gebrechlichen Personen keinen vollständigen Schutz.
• Wenn das Netzkabel beschädigt ist, muss es von einem qualizierten Elektriker ersetzt werden, um Gefahren
abzuwenden.
• Verwenden Sie das Gerät nur zu dem vorbestimmten Zweck, wie in der Bedienungsanleitung beschrieben.
Jeder andere Gebrauch wird nicht empfohlen und kann zu einem Brand, einem Stromschlag oder einer anderen
Personenverletzung führen.
• Das Gerät ist nur für den Hausgebrauch und nicht für geschäftliche oder industrielle Zwecke bestimmt.
7
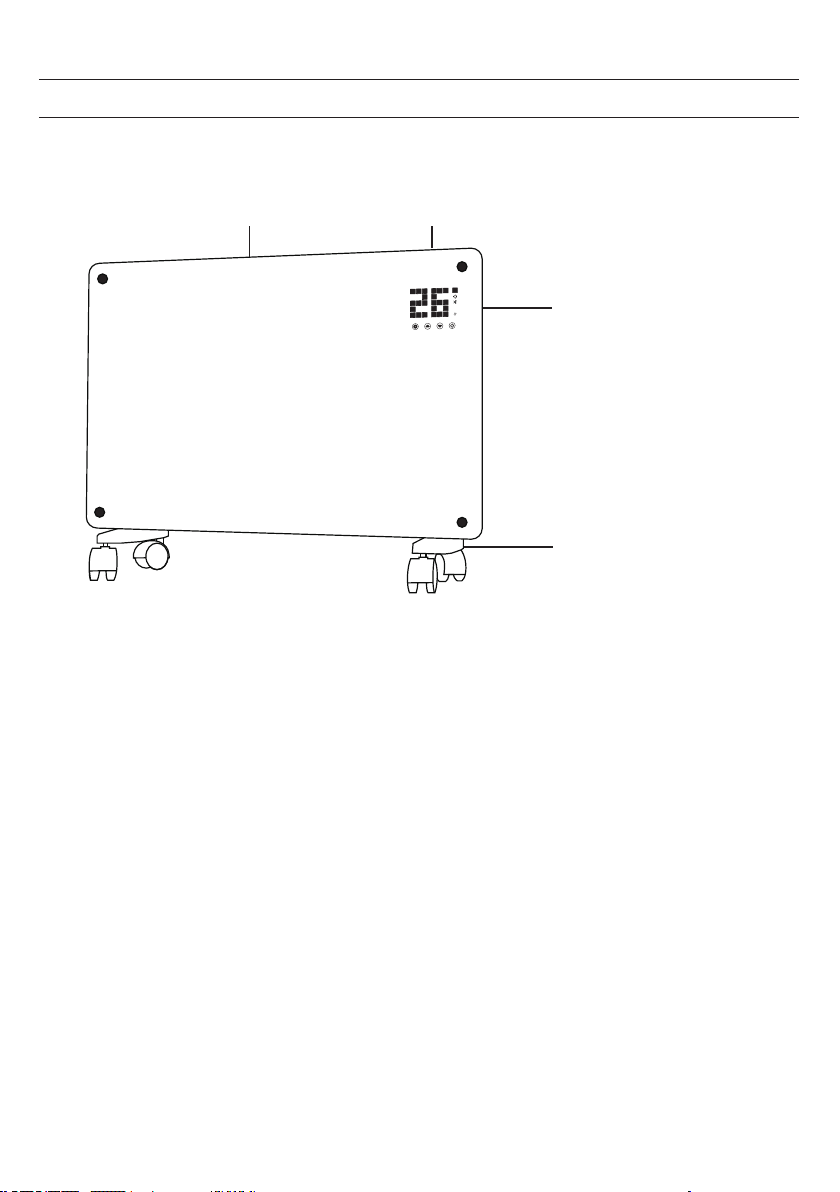
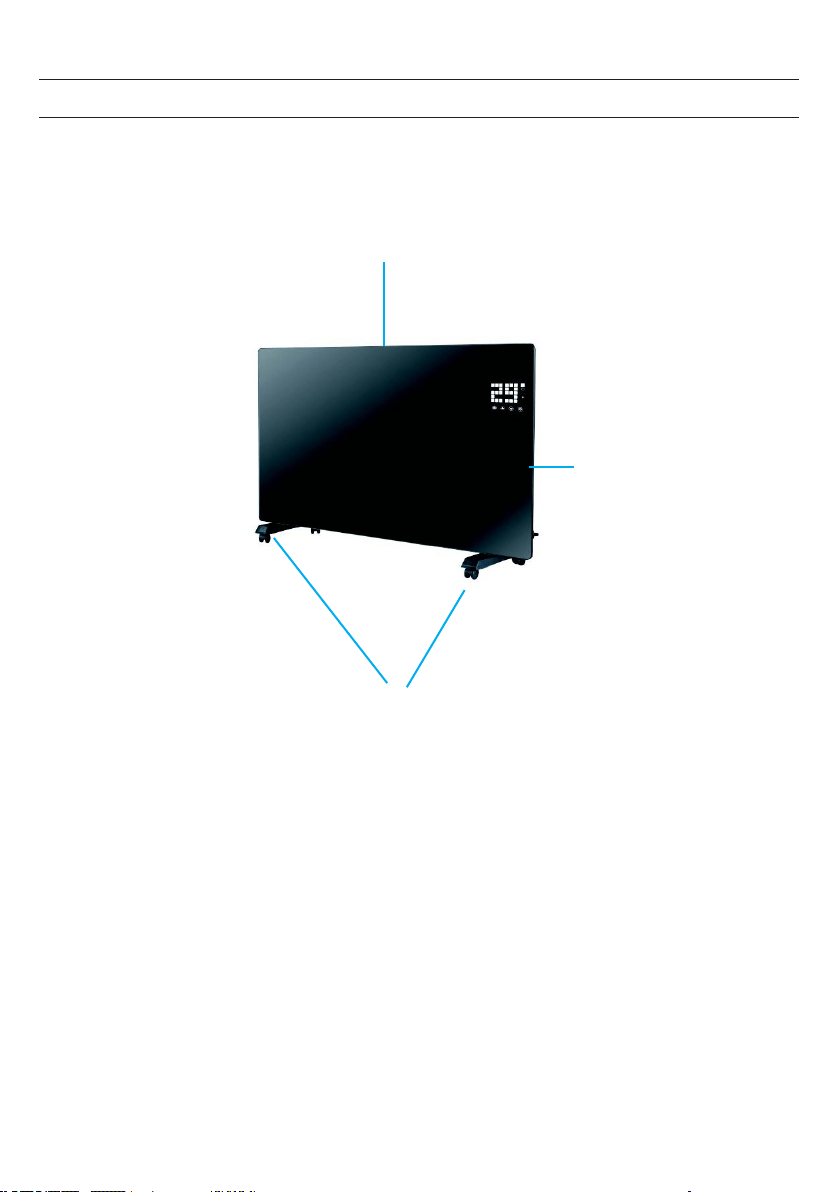
GERÄTEÜBERSICHT
Luftauslass Bedienfeld
Schalter
Füße mit Rollen

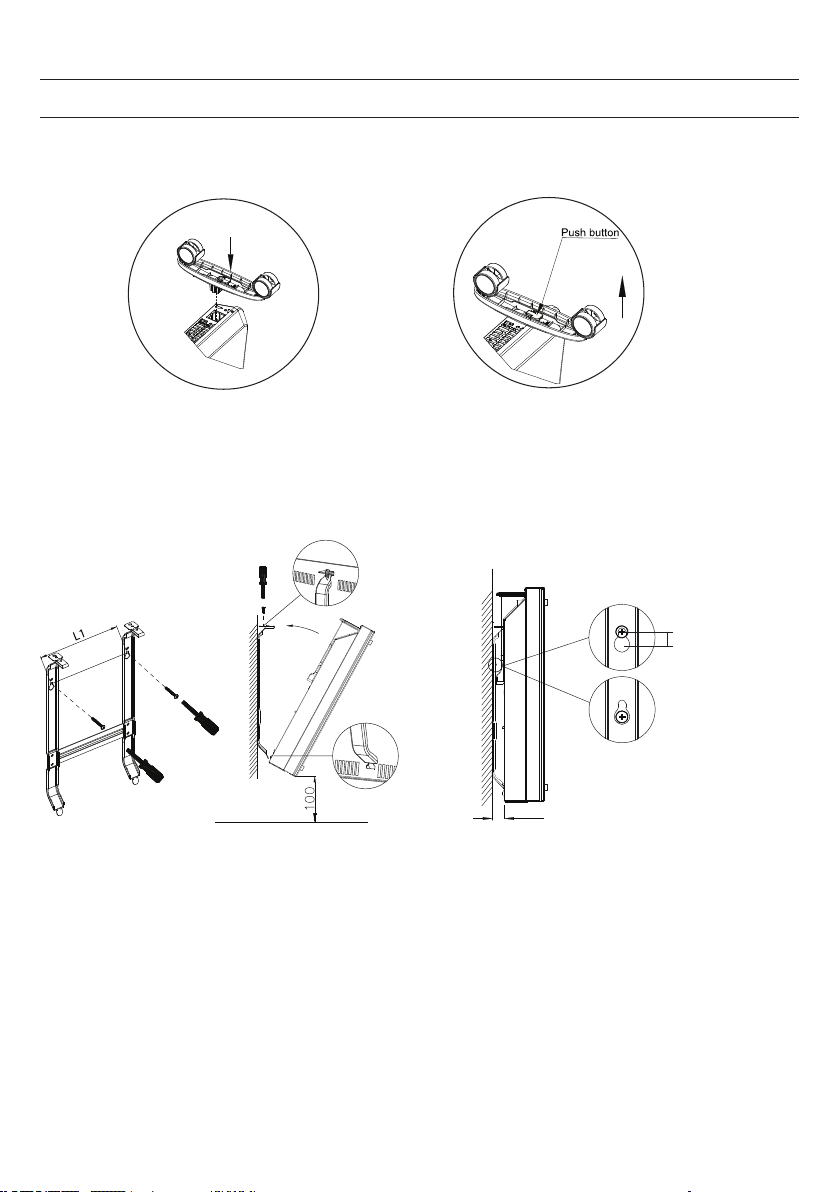
8
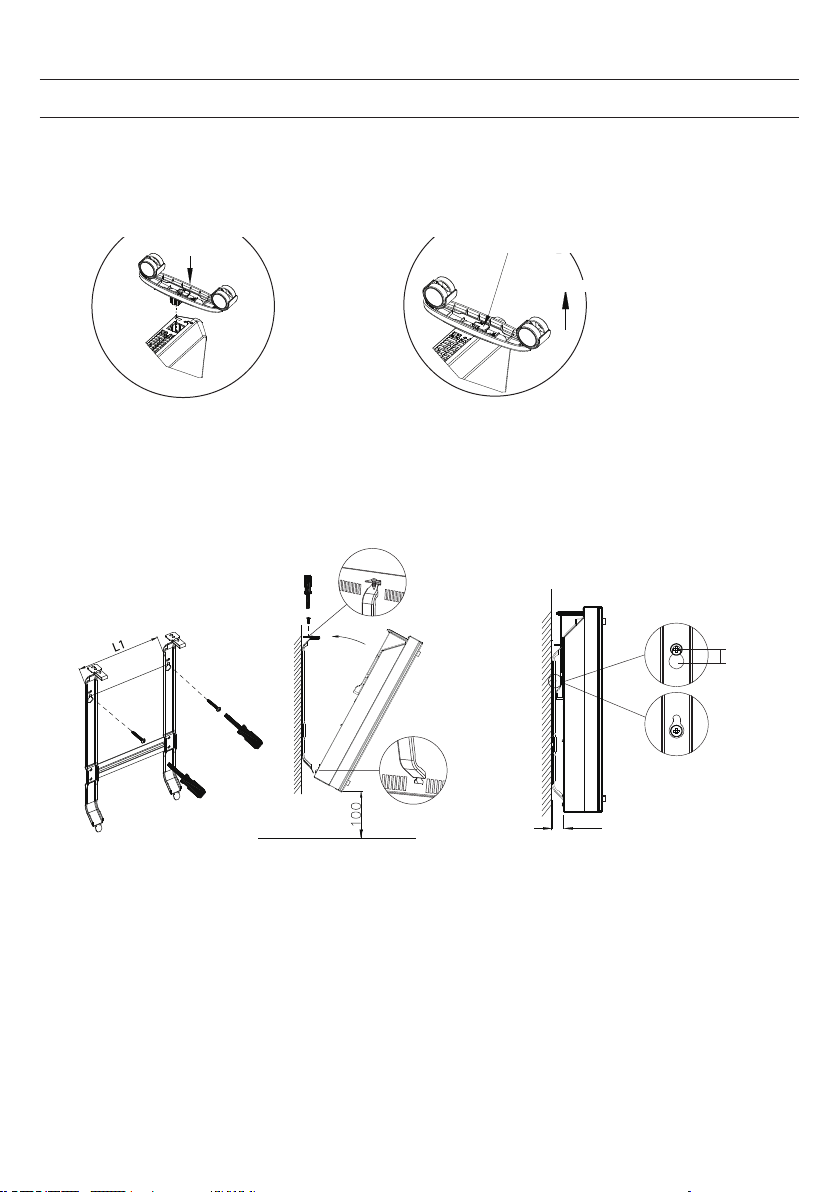
MONTAGE
i
f the installation is complete,
it’s will hear a sound click.
press the button up,
take down the caster
Freistehende Montage mit Rollen
Wenn die Montage abeschlossen ist
hören Sie einen Klick
Knopf drücken, um die Rollen
abzunehmen
Rollen montieren Rollen entfernen
Knopf drücken
Schieben
Schieben
Wall mounted mode
Take down the heater from wall
Pull up the heater 10mm
then take down the heate
r
10mm
20
Wall mounted mode
Take down the heater from wall
Pull up the heater
10mm
then take down the
heate
r
10mm
20
Wandmontage
Von der Wand herunternehmen
Heizer 10 mm
hochziehen und dann
abnehmen

9
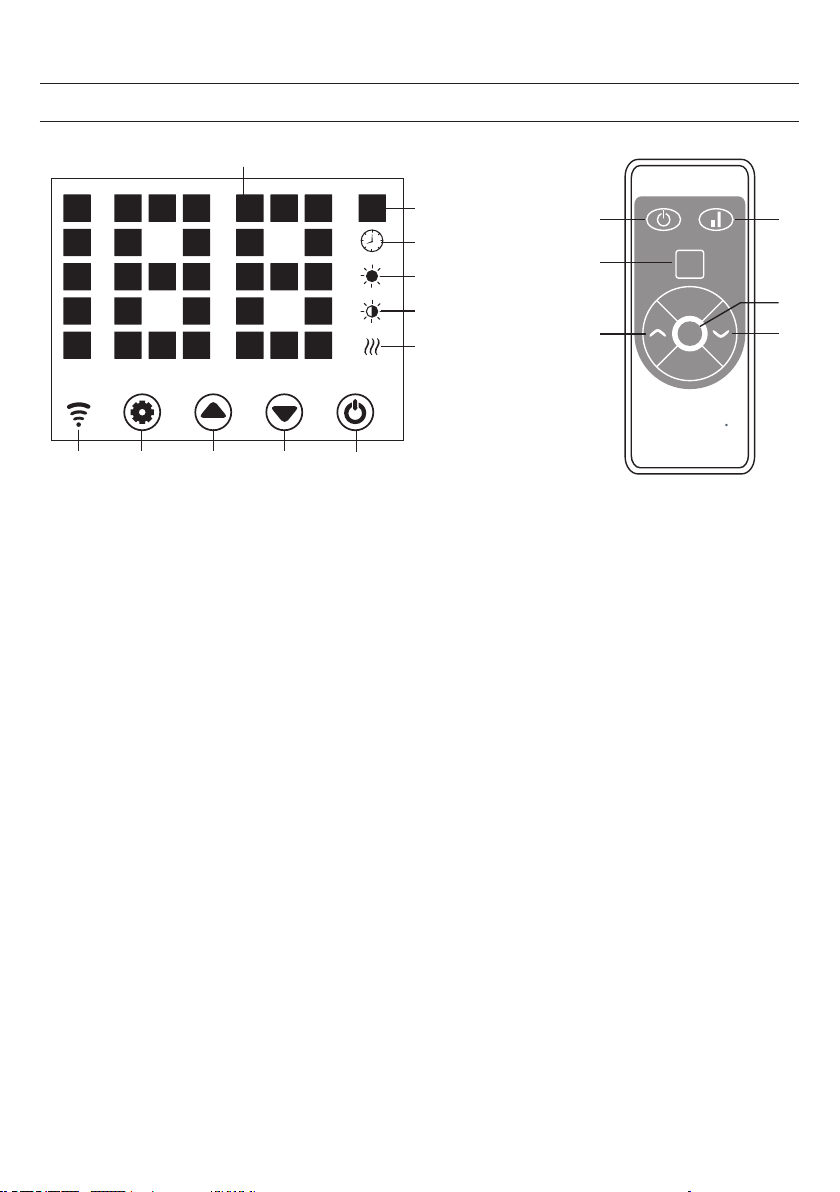
BEDIENFELD
1 2 3 4
Set
4
2
11
3
1
1
2
5
6
7
8
9
10
ECO
13
Anzeige
1 Taste: Einstellungen
2 Taste :Wert hoch
3 Taste: Wert runter
4 Taste: Ein/Aus
5 Betriebsleuchte: Heizelement
6 Anzeige: niedrige Heizstufe
7 Anzeige: hohe Heizstufe
8 Anzeige: Timer
9 Anzeige: Temperatur
10 LED-Ziffernanzeige
11 Taste: LED-Anzeige deaktivieren
12 Taste: Heizstufe hoch/runter
13 Anzeige: Wi
wenn verbunden: an
wenn Verbindung fehlgeschlagen: aus
Bedienfeld

10
Inbetriebnahme
1. Nehmen Sie das Gerät vorsichtig aus dem Karton. Heben Sie den Karton für die Lagerung außerhalb der Saison
auf.
2. Achten Sie darauf, dass die Ein/Aus-Taste ausgeschaltet ist, bevor Sie das Gerät anschließen.
3. Die Heizung muss nach der Montageanleitung vollständig zusammengebaut und montiert sein.
4. Es ist besser, denselben elektrischen Anschluss nicht mit anderen leistungshungrigen Geräten zu nutzen, um eine
Überlastung des Stromkreislaufs zu vermeiden.
Einschalten
Das Gerät an die Stromversorgung anschließen. Die Betriebslampe geht an einem kurzen Brummen an. Das Gerät mit der
Ein/Aus-Taste (4) einschalten.
Nun leuchtet in der Anzeige die aktuelle Raumtemeratur auf. Die werkseitig voreingestellte Temperatur ist 35 °C.
Einstellen der Temperatur
Drücken Sie Einstellungstaste (1). Die Zahlen „10“ und „9“ blinken.
Dann die Pfeiltasten (2) und (3) drücken, um die Temperatur um 1 °C zu erhöhen oder zu verringern.
Einstellung des Timers
Einschaltzeit: Im ausgeschalteten Zustand zweimal die Taste (1) drücken, um den Timer auf 1-24 Stunden einzustellen.
Drücken Sie die Tasten (2) und (3), um die Temperatur einzustellen. Nach der Einstellung wird die Umgebungstemperatur
angezeigt. Die Anzeige (8) leuchtet bei laufendem Timer auf und geht aus, wenn der Timer abgelaufen ist.
Ausschaltzeit: Im Heizbetrieb die Taste (1) drücken, um den Timer auf 1-24 Stunden einzustellen. Nach der Einstellung
wird die Umgebungstemperatur angezeigt. Die Anzeige (8) leuchtet bei laufendem Timer auf und geht aus, wenn der
Timer abgelaufen ist. Dann stellt das Gerät den Heizbetrieb ein.
Einstellung der Heizstufe
a. Im Betriebsmodus wechselt die Taste (2) zwischen hoher Heizstufe und Heizstopp (Anzeige (7) leuchtet bei
hoher Heizstufe auf und geht bei ausgeschaltetem Heizen aus).
b. Im Betriebsmodus schaltet die Taste (3) zwischen niedriger Heizung und ausgeschalteter Heizung hin und
her (die Anzeige 6 leuchtet bei niedriger Heizstufe und geht bei ausgeschaltem Zustand aus).
c. Im Betriebsmodus wechselt die Taste (12) zwischen Off/Low/High Heating. Bei hoher Heizstufe leuchtet die
Anzeige (7), bei niedriger Heizstufe leuchtet die Anzeige (6).
BEDIENUNG

11
Kindersicherung
Drücken Sie im Heizbetrieb die Tasten (2) und (3) gleichzeitig. Die Kindersicherung ist nun aktiv und das System
ist gesperrt. Es können keine Einstellungen vorgenommen werden. Nach 5 Sekunden erscheint in der Anzeige die
Umgebungstemperatur.
Zum Entsperren die Tasten (2) und (3) für 3 Sekunden gedrückt halten.
Aktivierung der Anzeige
Wenn das Gerät in Betrieb ist, ist die Anzeige ausgeschaltet. Mit einem Druck auf das Bedienfeld geht die Anzeige an.
ECO-Funktion (Nachtmodus)
Im Heizbetrieb die Tasten (1) und (2) für 3 Sekunden gedrückt halten (bzw. die Taste ECO auf der Fernbedienung), damit
die ECO-Funktion eingeschaltet wird. In diesem Betriebsmodus werden nur die Anzeigen (5), (6), (7) oder (8) angezeigt,
je nach vorher gewählter Einstellung.
Anzeigewechsel der Temperatur in Grad Celsius oder Fahrenheit
Halten Sie die Taste für die Einstellungen (1) und die Pfeiltaste „Hoch“ (2) 10 Sekunden lang gleichzeitig gedrückt.
Funktion zur Erkennung geöffneter Fenster
Wenn die Temperatur innerhalb von 2 Minuten um 3 °C oder mehr sinkt, wird die Funktion zur Erkennung geöffneter
Fenster ausgelöst. Das Gerät hört auf zu heizen und die Anzeige (9) blinkt. Drücken Sie die Taste (4), um das Gerät
auszuschalten. Wenn Sie das Gerät nun wieder einschalten, ist die Funktion zur Erkennung geöffneter Fenster deaktiviert.
WLAN zurücksetzen
Halten Sie die Taste (1) im Heizbetrieb 3 Sekunden lang gedrückt. Die WLAN-Einstellungen werden zurückgesetzt und
die entsprechende Anzeige blinkt schnell (zweimal pro Sekunde).
Ausschalten
Die Ein/Aus-Taste (4) gedrückt halten. Die Betriebslampe leuchtet auf.
12
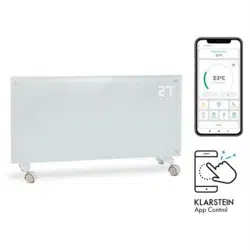
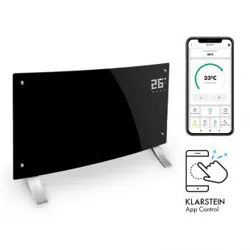
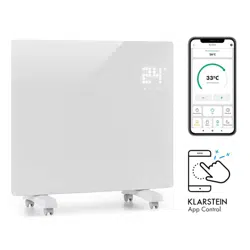
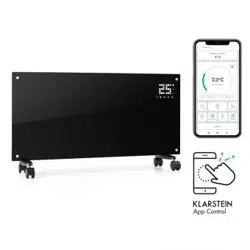
GERÄTESTEUERUNG PER SMARTPHONE
Wenn Sie Ihr Klarstein-Gerät in Ihr heimisches WLAN einbinden, können Sie es ganz bequem über die dazugehörige
Klarstein-App bedienen. Die App ermöglicht es Ihnen, nicht nur das Gerät über Ihr Smartphone fernzusteuern, sondern
bietet Ihnen zudem Zugang zu Rezepten und weiterführenden Informationen.
Gehen Sie folgendermaßen vor, um Ihr Smartphone mit Ihrem Klarstein-Gerät zu verbinden:
1 Laden Sie zuerst die Klarstein-App herunter, indem Sie mit Ihrem Smartphone den QR-Code scannen (siehe unten)
oder laden Sie diese direkt aus dem App Store oder bei Google Play herunter.
2 Versichern Sie sich, dass Ihr Smartphone mit demselben WLAN-Netzwerk verbunden ist, mit dem Ihr Klarstein-Gerät
verbunden werden soll.
3 Öffnen Sie die Klarstein-App.
4 Melden Sie sich mit Ihrem Konto an. Wenn Sie noch keinen Account haben, registrieren Sie sich in der Klarstein-App.
5 Folgen Sie den Anweisungen der App.
App-Download
Verwenden Sie die Scan-Funktion Ihres Handys, um den QR-Code zu scannen, und speichern Sie die App auf Ihrem
Smartphone.
Hinweis: Weitere Hinweise zur Bedienung der App und Hilfestellungen zur Herstellung der Verbindung mit Ihrem Gerät
liefert Ihnen die App, sobald Sie sie das erste Mal öffnen.
iOS Android
13
REINIGUNG
Es ist sehr einfach, das Gerät hinten zu reinigen. Zum Reinigen der Rückseite halten Sie den Konvektorheizer mit beiden
Händen an den Seiten fest und ziehen ihn nach vorn.
Nach der Reinigung stellen Sie den Heizer wieder an den Platz zurück.
Lagerung
Wenn Sie das Gerät für längere Zeit nicht nutzen, wird empfohlen, es zu reinigen und es (vorzugsweise im
Originalkarton) an einem kühlen und trockenen Ort zu lagern.
HINWEISE ZUR ENTSORGUNG
Bendet sich die linke Abbildung (durchgestrichene Mülltonne auf Rädern) auf dem Produkt, gilt
die Europäische Richtlinie 2012/19/EU. Diese Produkte dürfen nicht mit dem normalen Hausmüll
entsorgt werden. Informieren Sie sich über die örtlichen Regelungen zur getrennten Sammlung
elektrischer und elektronischer Gerätschaften. Richten Sie sich nach den örtlichen Regelungen und
entsorgen Sie Altgeräte nicht über den Hausmüll. Durch die regelkonforme Entsorgung der Altgeräte
werden Umwelt und die Gesundheit ihrer Mitmenschen vor möglichen negativen Konsequenzen
geschützt. Materialrecycling hilft, den Verbrauch von Rohstoffen zu verringern.
Das Produkt enthält Batterien, die der Europäischen Richtlinie 2006/66/EG unterliegen und nicht
mit dem normalen Hausmüll entsorgt werden dürfen. Bitte informieren Sie sich über die örtlichen
Bestimmungen zur gesonderten Entsorgung von Batterien. Durch regelkonforme Entsorgung schützen
Sie die Umwelt und die Gesundheit Ihrer Mitmenschen vor negativen Konsequenzen.
Fehlerbebung bei Verbindungsproblemen
Wenn Ihr Klarstein-Gerät im WLAN nicht gefunden werden kann, überprüfen Sie folgendes:
• Ist das Gerät eingesteckt?
• Ist die WiFi-Funktion des Smartphones aktiviert?
• Ist die WiFi-Funktion des Klarstein-Gerätes aktiviert? (Befolgen Sie die Anweisungen in der App.)
• Ist das WLAN-Passwort korrekt eingegeben worden?
• Benden sich Router, Klarstein-Gerät und Smartphone während des Kopplungsversuches in unmittelbarer Nähe?
(Idealerweise nicht mehr als 5 m voneinander entfernt.)
• Falls sie in den Einstellungen ihres WLAN-Routers das 2,4-GHz-Band deaktiviert haben, aktivieren Sie dieses in
Ihren Routereinstellungen.
Hinweis: Für weitere Hilfestellungen folgen Sie den Anweisungen der App beim Verbindungsaufbau.

14
KONFORMITÄTSERKLÄRUNG
Hersteller: Chal-Tec GmbH, Wallstraße 16, 10179 Berlin, Deutschland
Dieses Produkt entspricht den folgenden Europäischen Richtlinien:
2009/125/EG (ErP)
2014/53/EU (RED)
2011/65/EU (RoHS)
Die vollständige Konformitätserklärung des Herstellers nden
Sie unter folgendem Link.
Scannen Sie dazu diesen QR-Code oder geben Sie die URL
ein.
https://use.berlin/10034390

15
TECHNICAL DATA
Dear Customer,
Congratulations on purchasing this equipment. Please read this manual carefully and
take care of the following hints to avoid damages. Any failure caused by ignoring the
items and cautions mentioned in the instruction manual are not covered by our war-
ranty and any liability. Scan the QR code to get access to the latest user manual and
other information about the product.
Item number 10034390, 10034391
Power supply 220-240 V ~ 50 Hz
Power 1000 W (low heating)
2000 W (high heating)
CONTENTS
Technical Data 15
Product Data Sheet 16
Safety Instructions 17
Product Overview 19
Installation 20
Control Panel 21
Operation 22
Device Control by Smartphone 24
Cleaning 25
Disposal Considerations 25
Declaration of Conformity 26
16
PRODUCT DATA SHEET
Model identier(s): 10034390, 10034391
Item Symbol Value Unit Item Unit
Heat output Type of heat input, for electric storage local space
heaters only
Nominal heat output P
nom
2.0 kW manual heat charge control, with integrated
thermostat
NO
Minimum heat output P
min
1.0 kW manual heat charge control with room and/or
outdoor temperature feedback
NO
Maximum continuous heat
output
P
max
1.98 kW electronic heat charge control with room and/or
outdoor temperature feedback
NO
Auxiliary electricity consumption
fan assisted heat output NO
At nominal heat output el
max
1.985 kW
Type of heat output/room temperature control (select
one)
At minimum heat output el
min
0.979 kW single stage heat output and no room
temperature control
NO
In standby mode el
SB
0.04 W Two or more manual stages, no room
temperature control
NO
with mechanic thermostat room temperature
control
NO
with electronic room temperature control NO
electronic room temperature control plus day
timer
YES
electronic room temperature control plus week
timer
NO
Other control options (multiple selections possible)
room temperature control, with presence
detection
NO
room temperature control, with open window
detection
YES
with distance control option NO
with adaptive start control NO
with working time limitation NO
with black bulb sensor NO
Contact details Chal-Tec GmbH, Wallstraße 16, 10179, Berlin, Germany
17
SAFETY INSTRUCTIONS
Read and follow all the instructions in this manual even if you feel you are familiar with the product, and nd a place
to keep it handy for future reference. Read all instructions before using this appliance and keep them for future refer-
ence.
When using any electrically powered product, basic safety precautions should always be followed, including the
following:
• This appliance can be used by children aged from 8 years and above and persons with reduced physical, sensory
or mental capabilities or lack of experience and knowledge if they have been given supervision or instruction
concerning use of the appliance in a safe way and understand the hazards involved.
• Use only the voltage specied on the rating plate of the heater.
• Do not cover or restrict airow to the inlet or exhaust grilles in any manner as the appliance may overheat and
become a re risk.
• Do not cover grilles, block entry or exhaust of airow by placing appliance against any surface. Keep all object at
least 1 meter from the front, side and rear of the appliance.
• Do not place the appliance close to a radiant heat source.
• Do not operate in areas where gasoline, paint or other ammable liquids are used or stored.
• This appliance heats up when in use. To avoid burns, do not let bare skin touch hot surface.
• Switch off and let cooling before moving.
• Do not use the appliance to dry clothes.
• Do not insert or allow foreign object or metal utensils to enter any ventilation or exhaust opening, as this may cause
an electric shock, re or damage to the appliance.
• Do not immerse in liquid or allow running into the interior of the appliance, as this could create an electrical shock
hazard.
• Do not reach for an appliance that has fallen into water. Switch of at supply and unplug immediately.
• Do not operate any appliance with a damaged cord, plug or after the appliance malfunctions or has been dropped
or damaged in any manner. Return to a qualied electrical person for examination, electrical or mechanical
adjustment, service or repair.
• Do not operate appliance with wet hands.
• The most common cause of overheating is deposits of dust or uff in the appliance. Ensure these deposits are
removed regularly by unplugging the appliance and vacuum cleaning air vents and grilles.
• Do not use this appliance in a window as rain may cause electric shock.
• Do not use a abrasive cleaning products on this appliance. Clean with a damp cloth (not wet) rinsed in hot soapy
water only. Always remove plug from the mains supply before cleaning.
• Do not connect the appliance to the mains voltage until completely assembled and adjusted..
• This appliance is not intended for use in outdoor locations.
• This device is protected against splash water according to IP24, and therefore also suitable for installation in
bathrooms / wet rooms. However, do not use the device in the immediate vicinity of a bathtub, shower, swimming
pool or other uids, and ensure that no live parts can come into contact with water.
• Always operate upright.
• Switch off and let cooling before moving.
• Do not operate with cord set coiled up as a build up of heat is likely, which could be sufcient to become a hazard.
• The use of an extension cord with this appliance is not recommended.
• Do not remove plug from power socket until the appliance has been switched off.
• Do not remove plug from power socket by pulling the supply cord-always grip plug.
• Always unplug appliance when not in use.

18
• CAUTION: This product is NOT suitable to be used on long pile carpets or Flokati rugs.
• Do not allow cord to come in contact with heated surface during operation.
• Do not run cord under carpeting, throw rugs or runners etc. Arrange cord away from trafc areas so that it will not be
tripped over.
• Do not twist, kink or wrap the cord around the appliance, as this may cause the insulation to weaken and split.
Always ensure that all cord has been removed from any cord storage area.
• Do not use outdoors or whilst standing on a damp oor.
• Do not store appliance while it is still hot.
• This appliance is not intended for use by young children or inrm persons without supervision.
• Young children should be supervised to ensure they do not play with the appliance.
• The appliance must not be located immediately below a socket-outlet.
• Do not use this appliance with another programmer, timer or any other device that switches the heater on
automatically, since a re risk exists if the appliance is covered or positioned incorrectly.
• All covers of this appliance is intended to prevent direct access to the heating elements and must be in place when
the appliance is in use.
• WARNING: In order to avoid overloading, do not cover the heater.”
• To reduce the risk of electric shock, do not immerse or expose the product or exible cord to rain, moisture or any
liquid other than those necessary for correct operation of the product.
• The reguard does not give full protection for young children and for inrm persons.
• If the supply cord is damaged, it must be replaced by a qualied electrical persons in order to avoid a hazard.
• Do not use this appliance outdoors or on wet surfaces Avoid spilling liquid on the appliance
• CAUTION: In order to avoid a hazard due to inadvertent resetting of the thermal cutout, this appliance must not be
supplied through an external switching device, such a timer, or connected to a circuit that is regularly on and off by
the utility.”
• Use this appliance only as described in this manual. Any other use is not recommended by the manufacturer and
may cause re, electric shock or injury.
• This appliance is intended for household use only and not for commercial or industrial use.
19
PRODUCT OVERVIEW
air outlet
switch
castor wheel stand
20
INSTALLATION
Wall mounted mode
Take down the heater from wall
Pull up the heater 10mm
then take down the heate
r
10mm
20
i
f the installation is complete,
it’s will hear a sound click.
press the button up,
take down the caster
21
CONTROL PANEL
1 2 3 4
Set
4
2
11
3
1
1
2
5
6
7
8
9
10
ECO
13
1 Setting button
2 Up button
3 Down button
4 Power button
5 Heating element working indicator
6 Low heating indicator
7 High heating indicator
8 Timer indicator
9 Temperature indicator (°C)
10 LED number display
11 LED screen on-off button
12 Low/high heating selection
13 Wi indicator
(if connected ok, wi indicator light is on;
if failed, it ashes)

22
Starting
1. Take out the heater from the carton carefully. Please save the carton for off-season storage.
2. Make sure the power switch is in the OFF position before plugging it in.
3. Ensure the heater is fully assembled according to the Mounting Guide .
4. It is better not to use the same electric outlet with other high wattage electrical appliances in order to avoid
overloading your circuit.
Turn on
Plug in and turn on power switch, heater is in standby with buttons 1/2/3/4 on.
Press button (4), heater turns on, display shows current area temperature.
Setting the temperature
Press button (1), temp. indicator ashes and its setting is activated. By pressing buttons (2) & (3), we select desired
temp. and save it. Heater is heating, display shows current temperature and button 5 lights on.
Setting timer
Timer Start Heating Time
In off-heating mode, press (1) twice to set timer (0 H to 24 H), and button (2) & (3) to set temperature. After setting,
it shows area temperature. Indicator (8) lights on in timer period and off when timer ends, then heater starts heating
at high level.
Timer Stop Heating Time
In heating mode (high or low level), press (1) twice to set timer and button (2) & (3) to set temperature. After setting,
it shows area temperature. Indicator (8) lights on in timer period and off when timer ends. Then heater stops heating.
High/Low Heat Selection
a. In working mode, button (2) shifts between high heating and stop heating (indicator (7) lights on when high
heating and off when off heating).
b. In working mode, button (3) runs between low heating and off heating(indicator (6) lights on when low
heating and off when off heating).
c. In working mode, button 12 shifts among Off/Low/High heating, indicator 7 lights on in high heating,
indicator 6 lights on in low heat, and no light is on when off heating).
Child-lock function
In heating mode, press both (2) & (3) for 3 s, child lock function acts and system is locked, no setting could be done.
After 5 s, display shows area temperature. Unlock: Press both (2) & (3) for 3 s.
OPERATION

23
Display buttons activation
Display buttons are off when unit is working, touch the panel below display, they are on.
ECO function(night mode)
In heating mode, press (1) & (3) for 3 s (press ECO on RC), ECO function runs. In this mode, display shows only
some indicator ((5) or (6) or (7) or (8), depending on which setting has been done before ECO runs).
Switching The Display Between Degrees Fahrenheit And Celsius
Press the keys (1) & (2) (the two keys on the left) simultaneously for about 10 seconds.
Switching the display between degrees Fahrenheit and Celsius
Press the keys SET and UP (the two keys on the left) simultaneously for about 10 seconds.
Open-window Detection
If temperature decreases 3 °C or more in 2 min, open-window detection acts and, unit stops heating, indicator (9)
ashes. Press button (4), turn off heater then turn on again,.open-window detection is closed.
WIFI Reset
In heating mode, press button (1) for 3 s, WIFI setting is reset with its indicatior blinking rapidly (twice per second).
Turn off
Press button (4), turn off the heater.

24
DEVICE CONTROL BY SMARTPHONE
If you integrate the device into your home WiFi, you can conveniently operate it via the associated Klarstein app. The app
not only allows you to remotely control the device via your smartphone, but also gives you access to recipes and additional
information.
Follow these steps to connect your smartphone to your Klarstein device:
1 Download the Klarstein app rst by scanning the QR code with your smartphone (see below), or download it directly
from App Store or Google Play.
2 Make sure your smartphone is connected to the same WiFi network that your Klarstein device is to be connected to.
3 Open the Klarstein app.
4 Sign in to your account. If you do not have an account, sign up in the Klarstein app.
5 Follow the instructions from the app.
App Download
Use the scan function of your smartphone to scan the QR code and save the app on your smartphone.
Note: The app provides further information on how to use the app and help on how to connect to your device as soon
as you open it for the rst time.
iOS Android
25
CLEANING
Cleaning
It is very easy to clean behind it. Hold two sides of the heater ,after upwards pull the heater forwards. then you can
clean behind. After cleaning, the heater must be xed in the normal position.
Storage
If you do not plan to use the heater for extended periods of time, it is recommended that the heater is cleaned and
then stored (preferably in its original packaging) in a cool dry place.
DISPOSAL CONSIDERATIONS
According to the European waste regulation 2012/19/EU this symbol on the product
or on its packaging indicates that this product may not be treated as household waste.
Instead it should be taken to the appropriate collection point for the recycling of
electrical and electronic equipment. By ensuring this product is disposed of correctly,
you will help prevent potential negative consequences for the environment and human
health, which could otherwise be caused by inappropriate waste handling of this
product. For more detailed information about recycling of this product, please contact
your local council or your household waste disposal service.
Your product contains batteries covered by the European Directive. 2006/66/EC,
which cannot be disposed of with normal household waste. Please check local rules
on separate collection of batteries. The correct disposal of batteries helps prevent
potentially negative consequences on the environment and human health.
Troubleshooting connection problems
If your Klarstein device cannot be found in the WLAN, check the following:
• Is the device plugged in?
• Is the WiFi feature of my phone enabled?
• Is the WiFi function of the Klarstein device activated? (Follow the instructions in the app.)
• Has the WLAN password been entered correctly?
• Are the router, Klarstein device and smartphone in the immediate vicinity during the connection attempt? (Ideally no
more than 5 m apart.)
• If you have deactivated the 2.4 GHz band in the settings of your wireless router, activate it in your router settings.
Note: For further help, follow the instructions in the app when setting up the connection.
26
DECLARATION OF CONFORMITY
Producer:
Chal-Tec GmbH, Wallstraße 16, 10179 Berlin, Germany.
This product is conform to the following European Directives:
2011/65/EU (RoHS)
2009/125/EC (ErP)
2015/53/EU (RED)
The complete declaration of conformity of the manufacturer
can be found at the following link.
Scan this QR code or enter the URL.
https://use.berlin/10034390

27
SOMMAIRE
FICHE TECHNIQUE
Chère cliente, cher client,
Toutes nos félicitations pour l’acquisition de ce nouvel appareil. Veuillez lire
attentivement et respecter les instructions de ce mode d’emploi an d’éviter d’éventuels
dommages. Nous ne saurions être tenus pour responsables des dommages dus au
non-respect des consignes et à la mauvaise utilisation de l’appareil. Scannez le
QR-Code pour obtenir la dernière version du mode d‘emploi et des informations
supplémentaires concernant le produit.
Numéro d'article 10034390, 10034391
Alimentation 220-240 V ~ 50 Hz
Consommation 1000 W (niveau bas)
2000 W (niveau haut)
Fiche technique 27
Fiche de données produit 28
Consignes de sécurité 29
Aperçu de l‘appareil 31
Montage 32
Panneau de commande 33
Utilisation 34
Contrôle de l‘appareil par smartphone 36
Nettoyage 37
Informations sur le recyclage 37
Déclaration de conformité 38
28
FICHE DE DONNÉES PRODUIT
Référence (s) du produit 10034390 10034391
Donnée Symbole Valeur Unité Donnée Unité
Puissance calorique Uniquement pour les radiateurs électriques à
accumulation : Type de régulation de l'apport de chaleur
Puissance calorique
nominale
Pnom
2,0
kW Régulation manuelle de l'apport de chaleur
avec thermostat intégré
Non
Puissance calorique
minimale (indicative)
Pmin
1,0
kW Régulation manuelle de l'apport de chaleur
avec indication de la température de la pièce
et/ou de l'extérieur
Non
Puissance maximale
continue de chauffage
Pmax
1,98
kW Régulation électronique de l'apport de chaleur
avec indication de la température de la pièce
et/ou de l'extérieur
Non
Consommation de courant auxiliaire
Apport de chaleur assisté par ventilateur Non
A puissance calorique
nominale (moteur de
ventilateur)
elmax
1,985
kW
Type de chauffage/contrôle de la température de la
pièce
A puissance calorique
minimale (moteur de
ventilateur)
elmin
0,979
kW Chauffage à une seule vitesse, pas de contrôle
de la température ambiante
Non
En mode veille elSB
0,04
W Deux vitesses ou plus réglables manuellement,
pas de contrôle de la température ambiante
Non
Contrôle de la température ambiante par
thermostat mécanique
Non
Contrôle électronique de la température
ambiante
Non
Contrôle électronique de la température
ambiante et régulation par jour
Oui
Contrôle électronique de la température
ambiante et régulation par semaine
Non
Autres options de régulation
Contrôle de la température ambiante avec
détection de présence
Non
Contrôle de la température ambiante avec
détection de fenêtre ouverte
Oui
Avec option télécommande Non
Avec contrôle du démarrage du chauffage Non
Avec limitation de la durée de fonctionnement Non
Avec globe noir capteur de température Non
Coordonnées de contact Chal-Tec GmbH, Wallstraße 16, 10179, Berlin, Allemagne

29
CONSIGNES DE SÉCURITÉ
Lisez et suivez les précautions de sécurité ci-dessous, même si vous vous sentez à l‘aise avec l‘appareil.
Conservez le mode d‘emploi pour vous y référer ultérieurement. Lorsque vous utilisez un appareil électrique, les
consignes de sécurité doivent être respectées, y compris les suivantes :
• Les enfants âgés de 8 ans ou plus, les personnes ayant une décience mentale, sensorielle ou physique ne sont
autorisés à utiliser l‘appareil que s‘ils ont été parfaitement familiarisés avec les fonctions et les précautions de sécurité
par une personne responsable de leur sécurité et s‘ils ont bien compris les risques encourus.
• Utilisez uniquement la tension indiquée sur la plaque signalétique de l‘appareil.
• N‘obstruez pas le ux d‘entrée ou de sortie d‘air car l‘appareil peut surchauffer et présenter un risque d‘incendie.
• Ne couvrez pas les fentes de ventilation et les entrées et sorties d‘air en xant l‘appareil contre une surface. Tous les
objets doivent être à au moins 1 mètre de l‘avant, des côtés et de l‘arrière de l‘appareil.
• Ne placez pas l‘appareil près d‘une source de chaleur.
• N‘utilisez pas l‘appareil dans un environnement où de l‘essence, de la peinture ou d‘autres substances inammables
sont entreposées.
• Cet appareil devient chaud pendant l‘utilisation. Ne touchez pas la surface chaude avec la peau nue. Éteignez et
laissez refroidir l‘appareil avant de le déplacer.
• N‘utilisez pas l‘appareil pour sécher le linge.
• N‘insérez aucun objet étranger ou objet métallique à l‘intérieur de l‘appareil ou dans les fentes de ventilation, car
cela pourrait provoquer un choc électrique, un incendie ou des dommages à l‘appareil.
• Ne plongez pas l‘appareil dans des liquides et ne laissez pas l‘eau couler à l‘intérieur car cela crée un risque de
choc électrique.
• Ne touchez pas un appareil tombé dans l‘eau. Coupez l‘électricité de la maison et débranchez immédiatement la
che secteur.
• Ne faites pas fonctionner l‘appareil avec un cordon d‘alimentation ou une che d‘alimentation endommagés, après
un dysfonctionnement de l‘appareil ou lorsque celui-ci a fait une chute ou est endommagé de quelque façon que ce
soit. Conez l‘appareil à un électricien pour examen, réglage électrique ou mécanique, entretien ou réparation.
• N‘utilisez pas l‘appareil avec les mains mouillées.
• La raison la plus courante de surchauffe est l‘accumulation de poussière et de peluches sur l‘appareil. Retirez
régulièrement ces dépôts débranchant la che secteur et en passant l‘aspirateur sur les ouvertures d‘air et la grille.
• Débranchez toujours la che secteur avant de nettoyer l‘appareil. N‘utilisez pas d‘abrasifs pour le nettoyage.
Nettoyez l‘appareil avec un chiffon humidié (non trempé) uniquement dans de l‘eau savonneuse.
• Ne connectez pas l‘appareil à l‘alimentation avant de l‘avoir complètement assemblé et installé.
• L‘appareil n‘est pas destiné à une utilisation en extérieur.
• Cet appareil est protégé contre les projections d‘eau selon IP24 et convient donc pour une installation dans les
salles de bains / pièces humides. Cependant, n‘utilisez pas l‘appareil à proximité immédiate d‘une baignoire, d‘une
douche, d‘une piscine ou d‘autres liquides et assurez-vous qu‘aucune partie conductrice ne puisse entrer en contact
avec de l‘eau.
• Utilisez toujours l‘appareil en position verticale.
• Éteignez et laissez refroidir l‘appareil avant de le déplacer.
• Ne faites pas fonctionner l‘appareil avec son câble enroulé car cela peut générer une chaleur sufsante pour
présenter un danger.
• L‘utilisation d‘une rallonge n‘est pas recommandée pour cet appareil.
• Ne débranchez pas la che de la prise avant d‘éteindre l‘appareil.
• Ne retirez pas la che d‘alimentation de la prise en tirant sur le cordon d‘alimentation. Tirez toujours la che.
• Débranchez la che secteur lorsque l‘appareil n‘est pas utilisé.

30
• Cet appareil ne convient pas pour une utilisation sur des tapis à poils longs ou les descentes de lit à poils longs.
• Ne laissez pas le cordon d‘alimentation entrer en contact avec des surfaces chaudes pendant le fonctionnement.
• Ne placez pas le cordon d‘alimentation sous une moquette, un tapis, tapis de couloir, etc. Placez le cordon
d‘alimentation hors des zones de passage an que personne ne puisse trébucher dessus.
• Ne tordez pas, ne pliez pas ou n‘enroulez pas le cordon d‘alimentation car cela pourrait l‘affaiblir et casser
l‘isolation du câble. Assurez-vous toujours que l‘ensemble du cordon d‘alimentation est déroulé de l‘enrouleur de
cordon.
• Ne pas utiliser à l‘extérieur ou debout sur une surface humide.
• Ne pas ranger l‘appareil encore chaud.
• Cet appareil ne convient pas aux enfants en bas âge ou aux personnes fragiles non accompagnées.
• Surveillez les jeunes enfants an qu‘ils ne jouent pas avec l‘appareil.
• L‘appareil ne doit pas être utilisé sous une prise murale.
• N‘utilisez pas l‘appareil avec une programmation, une minuterie ou tout autre appareil qui allume ou éteint le
radiateur. Il existe un risque d‘incendie si le radiateur est couvert ou au mauvais endroit.
• Tous les caches de boîtier de cet appareil ont pour but d‘empêcher l‘accès direct aux éléments chauffants et doivent
être xés lorsque l‘appareil est allumé.
• Ne couvrez pas le radiateur ! Risque de surcharge !
• Pour éviter tout risque de choc électrique, ne plongez pas l‘appareil et le cordon d‘alimentation dans l‘eau et ne les
exposez pas à la pluie, à l‘humidité ou à tout liquide autre que ceux nécessaires au fonctionnement de l‘appareil.
• La grille de protection n‘offre pas une protection complète pour les jeunes enfants et les personnes fragiles.
• Si le cordon d‘alimentation est endommagé, il doit être remplacé par un électricien qualié pour éviter tout danger.
• N‘utilisez l‘appareil qu‘aux ns décrites dans le mode d‘emploi. Toute autre utilisation est déconseillée et peut
entraîner un incendie, un choc électrique ou d‘autres blessures.
• L‘appareil est destiné à un usage domestique uniquement et non à des ns commerciales ou industrielles.

31
APERÇU DE L‘APPAREIL
Sortie d‘air
Panneau de
commande
Interrupteur
Pieds avec roulettes

32
MONTAGE
i
f the installation is complete,
it’s will hear a sound click.
press the button up,
take down the caster
Installation sur pied avec roulettes
Vous entendrez un clic lorsque le
montage sera réalisé.
Appuyez sur le bouton pour retirer les
roulettes
Montage des roulettes Démontage des roulettes
Appuyez sur le bouton
Tirez
Enfoncez
Wall mounted mode
Take down the heater from wall
Pull up the heater 10mm
then take down the heate
r
10mm
20
Wall mounted mode
Take down the heater from wall
Pull up the heater
10mm
then take down the
heate
r
10mm
20
Installation murale
Pour démonter l‘appareil du mur
Soulevez le radiateur de
10 mm puis retirez-le

33
PANNEAU DE COMMANDE
1 2 3 4
Set
4
2
11
3
1
1
2
5
6
7
8
9
10
ECO
13
Afchage
1 Touche : réglages
2 Touche : augmenter la valeur
3 Touche: réduire la valeur
4 Touche : marche/arrêt
5 Témoin de marche : élément chauffant
6 Voyant : bas niveau de chauffage
7 Voyant : niveau de chauffage élevé
8 Afchage : minuterie
9 Afchage: température
10 Afchage LED numérique
11 Touche : désactiver l'afchage LED
12 Touche : augmenter / diminuer le niveau de
chauffage
13 Témoin : Wi connecté : allumé si la connexion a
échoué: éteint

34
Mise en marche
1. Retirez délicatement l‘appareil de l‘emballage. Conservez l‘emballage pour le stockage hors saison.
2. Assurez-vous que la touche marche / arrêt est sur arrêt avant de connecter l‘appareil.
3. Le radiateur doit être entièrement assemblé et installé conformément aux instructions de montage.
4. Il est préférable de ne pas utiliser la même prise électrique que d‘autres appareils énergivores pour éviter de
surcharger le circuit.
Pour allumer l'appareil
Connectez l‘appareil à l‘alimentation. Le témoin de fonctionnement s‘allume avec un bref bourdonnement. Allumez
l‘appareil avec la touche Marche / Arrêt (4).
La température ambiante actuelle s‘afche maintenant sur l‘écran. La température préréglée en usine est de 35 °C.
Réglage de la température
Appuyez sur la touche de réglage (1). Les chiffres „10“ et „9“ clignotent.
Appuyez ensuite sur les touches échées (2) et (3) pour augmenter ou diminuer la température de 1 °C.
Réglage de la minuterie
Heure de mise en marche : l'appareil étant éteint, appuyez deux fois sur la touche (1) pour régler la minuterie sur 1 à
24 heures. Appuyez sur les touches (2) et (3) pour régler la température. Après le réglage, la température ambiante
s'afche. L'indicateur (8) s'allume lorsque la minuterie fonctionne et s'éteint lorsque la minuterie est expirée.
Heure d'arrêt : appuyez sur la touche (1) en mode chauffage pour régler la minuterie sur 1-24 heures. Après le réglage,
la température ambiante s'afche. L'indicateur (8) s'allume lorsque la minuterie fonctionne et s'éteint lorsque la minuterie
est expirée. L'appareil cesse alors de chauffer.
Réglage du niveau de chauffage
a. En mode de fonctionnement, la touche (2) bascule entre le niveau de chauffage élevé et l'arrêt du
chauffage (le voyant (7) s'allume lorsque le niveau de chauffage est élevé et s'éteint lorsque le chauffage
est arrêté).
b. En mode de fonctionnement, la touche (3) bascule entre le chauffage bas et le chauffage éteint (le voyant
(6) s'allume lorsque le niveau de chauffage est bas et s'éteint lorsque l'état est désactivé).
c. En mode de fonctionnement, la touche (12) bascule entre Arrêt / Chauffage bas / élevé. Lorsque le niveau
de chauffage est élevé, le voyant (7) s'allume.
UTILISATION

35
Verrouillage parental
En mode chauffage, appuyez simultanément sur les touches (2) et (3). Le verrouillage parental est maintenant actif et
le système est verrouillé. Aucun réglage ne peut être effectué. La température ambiante apparaît sur l‘afchage après
5secondes.
Pour déverrouiller, appuyez et maintenez les touches (2) et (3) pendant 3 secondes.
Activation de l'afchage
L‘afchage est éteint lorsque l‘appareil fonctionne. L‘écran s‘allume lorsque vous appuyez sur le panneau de commande.
Fonction ECO (mode nuit)
En mode chauffage, maintenez les touches (1) et (2) pendant 3 secondes (ou la touche ECO de la télécommande) pour
activer la fonction ECO. Dans ce mode de fonctionnement, seuls les indicateurs (5), (6), (7) ou (8) sont actifs en fonction
du réglage précédemment sélectionné.
Afchage de la température en degrés Celsius ou Fahrenheit
Appuyez simultanément sur la touche des réglages (1) et la touche èche vers le haut (2) pendant 10 secondes.
Fonction détection de fenêtre ouverte
Si la température baisse de 3 °C ou plus en 2 minutes, la fonction de détection de fenêtre ouverte se déclenche.
L‘appareil arrête de chauffer et le voyant (9) clignote. Appuyez sur la touche (4) pour éteindre l‘appareil. Lorsque vous
rallumez l‘appareil, la fonction de détection des fenêtres ouvertes est désactivée.
Réinitialisation du Wi
En mode chauffage, appuyez sur la touche (1) et maintenez-la pendant 3 secondes. Les paramètres Wi sont réinitialisés
et le voyant correspondant clignote rapidement (deux fois par seconde).
Pour éteindre l'appareil
Maintenez la touche marche / arrêt (4). Le témoin de fonctionnement s‘éteint.

36
CONTRÔLE DE L‘APPAREIL PAR SMARTPHONE
Si vous connectez votre appareil Klarstein à votre Wi domestique, vous pouvez facilement le contrôler en utilisant
l‘application Klarstein associée. L‘application vous permet non seulement de contrôler l‘appareil à distance depuis votre
smartphone, mais vous donne également accès à des recettes et à des informations supplémentaires.
Suivez les étapes ci-dessous pour connecter votre smartphone à votre appareil Klarstein :
1 Téléchargez d‘abord l‘application Klarstein en scannant le code QR avec votre smartphone (voir ci-dessous) ou
téléchargez-la directement depuis l‘App Store ou Google Play.
2 Assurez-vous que votre smartphone est connecté au même réseau Wi que votre appareil Klarstein.
3 Ouvrez l‘application Klarstein.
4 Connectez-vous à votre compte. Si vous n‘avez pas encore de compte, inscrivez-vous dans l‘application Klarstein.
5 Suivez les instructions de l‘application.
Téléchargement de l‘application
Utilisez la fonction scanner de votre téléphone mobile pour numériser le code QR et enregistrer l‘application sur votre
smartphone.
Remarque : Vous obtiendrez plus d‘indications sur l‘utilisation de l‘application et de l‘aide pour établir une connexion
avec votre appareil au premier démarrage de celle-ci.
iOS Android

37
NETTOYAGE
L‘arrière de l‘appareil se nettoie très facilement : tenez le radiateur par les côtés avec les deux mains et tirez-le vers
l‘avant.
Après le nettoyage, remettez le radiateur en place.
Stockage
Si vous ne comptez pas utiliser l‘appareil pendant une longue période, il est recommandé de le nettoyer et de le ranger
(de préférence dans le carton d‘origine) dans un endroit frais et sec.
INFORMATIONS SUR LE RECYCLAGE
Vous trouverez sur le produit l’image ci-contre (une poubelle sur roues, barrée d‘une croix), ce qui
indique que le produit se trouve soumis à la directive européenne 2012/19/UE. Renseignez-vous sur
les dispositions en vigueur dans votre région concernant la collecte séparée des appareils électriques
et électroniques. Respectez-les et ne jetez pas les appareils usagés avec les ordures ménagères.
La mise en rebut correcte du produit usagé permet de préserver l’environnement et la santé. Le
recyclage des matériaux contribue à la préservation des ressources naturelles.
Ce produit contient des piles qui sont soumises à la directive européenne 2006/66/CE selon
laquelle elles ne doivent pas être éliminées avec les ordures ménagères. Renseignez-vous sur les
dispositions en vigueur concernant la mise en rebut séparée des piles. La mise au rebut correcte du
produit usagé permet de préserver l’environnement et la santé.
Résolution des problèmes de connexion
Si votre appareil Klarstein est introuvable sur le Wi, vériez les points suivants :
• L‘appareil est-il branché ?
• La fonction Wi du smartphone est-elle activée ?
• La fonction Wi de l‘appareil Klarstein est-elle activée ? (Suivez les instructions de l‘application)
• Le mot de passe Wi a-t-il été saisi correctement ?
• Le routeur, l‘appareil Klarstein et le smartphone sont-ils à proximité immédiate lors de la tentative de connexion ?
(Idéalement pas plus de 5 m de distance)
• Si vous avez désactivé la bande 2,4 GHz dans les paramètres de votre routeur Wi, activez-la dans les
paramètres de votre routeur.
Remarque : Pour plus d‘assistance, suivez les instructions de l‘application lors de l‘établissement d‘une connexion.

38
DÉCLARATION DE CONFORMITÉ
Fabricant : Chal-Tec GmbH, Wallstraße 16, 10179 Berlin, Allemagne.
Ce produit est conforme aux directives européennes suivantes :
2009/125/CE (ErP)
2014/53/UE (RED)
2011/65/UE (RoHS)
La déclaration complète de conformité du fabricant est
accessible par le lien suivant.
Pour y accéder, scannez ce QR-code ou saisissez l‘URL.
https://use.berlin/10034390

39
CONTENIDO
DATOS TÉCNICOS
Estimado cliente,
Le felicitamos por la compra de su producto Klarstein. Por favor, lea atentamente
las siguientes instrucciones de conexión y uso y sígalas para evitar posibles daños
técnicos. No asumimos ninguna responsabilidad por los daños causados por
el incumplimiento de las instrucciones de seguridad y el uso indebido. Escanea
el código QR para acceder a las últimas instrucciones de funcionamiento y otra
información sobre el producto.
Número de artículo 10034390, 10034391
Fuente de alimentación 220-240 V ~ 50 Hz
Consumo de energía 1000 W (etapa baja)
2000 W (etapa alta)
Datos técnicos 39
Hoja de datos del producto 40
Instrucciones de seguridad 41
Descripción del producto 43
Montaje 44
Panel de control 45
Funcionamiento 46
Control del dispositivo a través de un smartphone 48
Limpieza 49
Declaración de conformidad 50
40
HOJA DE DATOS DEL PRODUCTO
Número de artículo 10034390 10034391
Indicación Símbolo Valor Unidad Indicación Unidad
Salida de calor Sólo para calentadores eléctricos: Tipo de control de
entrada de calor
Salida de calor nominal Pnom
2,0
kW Control manual del suministro de calor con
termostato integrado
No
Salida mínima de calor Pmin
1,0
kW Control manual del suministro de calor con
indicación de la temperatura ambiente y/o
exterior
No
Máxima salida de calor
continuo
Pmax
1,98
kW Control electrónico del suministro de calor con
indicación de la temperatura ambiente y/o
exterior
No
Consumo de energía auxiliar
Suministro de calor asistido por ventilador No
Salida de calor nominal elmax
1,985
kW
Tipo de calefacción/control de la temperatura
ambiente
Mínima salida de calor elmin
0,979
kW Calefacción de una sola velocidad, sin control
de la temperatura ambiente
No
Modo de espera elSB
0,04
W Dos o más velocidades ajustables manualmente,
sin control de la temperatura ambiente
No
Control de la temperatura ambiente con
termostato mecánico
No
Control electrónico de la temperatura ambiente No
Control electrónico de la temperatura ambiente
y regulación diaria
Sí
Control electrónico de la temperatura ambiente
y regulación semanal
No
Otras opciones de control
Control de la temperatura ambiente con
detección de presencia
No
Control de la temperatura ambiente con
detección de ventana abierta
Sí
Con la opción de control remoto No
Con el control adaptativo del inicio de la
calefacción
No
Con limitación de tiempo de funcionamiento No
Con el sensor de temperatura globo negro No
Datos de contacto Chal-Tec GmbH, Wallstraße 16, 10179, Berlín, Alemania

41
INSTRUCCIONES DE SEGURIDAD
Lea y siga las siguientes instrucciones de seguridad, aunque esté familiarizado con el dispositivo. Guarde el manual de
instrucciones para futuras consultas. Cuando utilice un aparato eléctrico, siga las instrucciones de seguridad, incluyendo
las siguientes:
• Este aparato puede ser utilizado por niños mayores de 8 años y por personas con capacidades físicas, sensoriales
o mentales reducidas o con falta de experiencia y/o conocimientos sólo si están supervisados por una persona
responsable de su seguridad o han sido instruidos en el uso seguro del aparato y han comprendido los riesgos que
conlleva.
• Utilice únicamente el voltaje indicado en la placa de identicación del dispositivo.
• No obstruya el ujo de aire en la entrada o salida de aire de ninguna manera, ya que la unidad se sobrecalentará
y puede provocar un incendio.
• No cubra las ranuras de ventilación y las entradas y salidas de aire colocando la unidad cerca de alguna
supercie. Todos los objetos deben estar al menos a 1 metro de distancia de la parte delantera, lateral y trasera del
vehículo.
• No coloque el dispositivo cerca de una fuente de calor.
• No utilice la unidad en un entorno en el que se almacene gasolina, pintura u otras sustancias inamables.
• Este aparato se calienta durante su uso. No deje que la piel desnuda toque la supercie caliente. Antes de moverlo,
deje que se enfríe.
• No use el aparato para secar ropa.
• No introduzca ningún cuerpo extraño u objeto metálico en el interior del aparato o en las ranuras de ventilación, ya
que podría provocar una descarga eléctrica, fuego o daños en el equipo.
• No sumerja el aparato en líquidos ni permita que el agua corra hacia el interior del aparato, ya que esto puede
causar una descarga eléctrica.
• No toque un dispositivo que haya caído en el agua. Apague la electricidad en el hogar y desenchúfelo
directamente.
• No utilice la unidad con un cable de alimentación dañado, enchufe dañado o después de que la unidad haya
funcionado mal, se haya caído o dañado de alguna manera. Lleve la unidad a un electricista cualicado para su
examen, el ajuste eléctrico o mecánico, el mantenimiento o la reparación.
• No maneje el aparato con las manos húmedas.
• La causa más común del sobrecalentamiento es el polvo y los depósitos de pelusa en el aparato. Asegúrese de
eliminar estos depósitos regularmente desenchufándolo de la red y limpiando las aberturas de aire y aspirando las
rejillas.
• Desconecte siempre el enchufe antes de limpiarlo. No utilice limpiadores abrasivos para la limpieza. Utilice un paño
limpio húmedo (no mojado) que sólo haya sido sumergido en agua jabonosa.
• No conecte la unidad a la fuente de alimentación antes de que esté completamente montada.
• La unidad no está destinada para ser utilizada en el exterior.
• Esta unidad está protegida contra las salpicaduras de agua de acuerdo con el IP24 y por lo tanto también
es adecuada para su instalación en baños o habitaciones húmedas. Sin embargo, no utilice la unidad en las
inmediaciones de una bañera, ducha, piscina u otros líquidos y asegúrese de que ninguna parte viva pueda entrar
en contacto con el agua.
• Siempre colocarlo en posición vertical.
• Apáguelo y deje que se enfríe antes de moverlo.
• No ponga el cable enrollado, ya que la formación de calor es probable y suciente para constituir un peligro.
• No se recomienda el uso de un alargador para esta unidad.
• No desenchufe el cable de alimentación de la toma de corriente hasta que la unidad esté apagada.

42
• No retire el enchufe de la toma de corriente tirando del cable de alimentación. Siempre agarre el enchufe.
• Desenchúfelo cuando la máquina no esté en uso.
• Esta unidad no es adecuada para su uso en alfombras de pelo largo o alfombras de otación.
• No permita que el cable de alimentación entre en contacto con supercies calientes durante el funcionamiento.
• No pase el cable de alimentación debajo de alfombras, tapetes, alfombrillas, etc. Ponga el cable de alimentación
fuera de zonas de paso para que nadie se tropiece con él.
• No retuerza, doble o envuelva el cable de alimentación alrededor de la unidad ya que esto causará que el cable
se debilite y se rompa. Siempre asegúrese de que todo el cable de alimentación esté desconectado del enrollador
de cable.
• No lo use en el exterior o en una supercie húmeda.
• No lo guarde mientras el dispositivo esté todavía caliente.
• Este aparato no es apto para ser utilizado por niños pequeños o personas enfermas sin supervisión.
• Los niños pequeños deben ser supervisados para que no jueguen con el aparato.
• El aparato no debe ser operado bajo los enchufes de la pared.
• No utilice el aparato con ningún tipo de programador, temporizador u otro dispositivo que pueda dañar el sistema
de calefacción o que se encienda o se apague. Existe un riesgo de incendio si el calentador está cubierto o mal
instalado.
• Todas las cubiertas de la carcasa de este dispositivo tienen el propósito de impedir el acceso directo a los elementos
calientes para eso deben estar en su lugar cuando se encienda el aparato.
• ¡No cubra el calentador! ¡Peligro de sobrecarga!
• Para evitar el riesgo de una descarga eléctrica, no sumerja el aparato ni el cable de alimentación en agua, no
exponga la unidad a la lluvia, la humedad o cualquier otro líquido que no sea el necesario para el funcionamiento
de la unidad.
• La rejilla protectora no ofrece una protección completa para los niños pequeños ni para las personas enfermas.
• Si el cable de alimentación está dañado, debe ser sustituido por un electricista cualicado para evitar riesgos.
• Utilice el aparato sólo para el n previsto, tal y como se describe en el manual de instrucciones.
• Cualquier otro uso no es recomendable y puede provocar un incendio, descargas eléctricas u otros daños
personales.
• El dispositivo está destinado únicamente al uso doméstico y no a nes comerciales o industriales.

43
DESCRIPCIÓN DEL PRODUCTO
Salida de
aire
Panel de control
Interruptor
Pies con ruedas
44
MONTAJE
i
f the installation is complete,
it’s will hear a sound click.
press the button up,
take down the caster
Instalación independiente con ruedas
Cuando llegue al tope oirá un click. Presiona el botón para quitar las
ruedas
Montar los ruedines Quitar los rudines
Presiona el botón
Deslizar
Presiona la tecla
Wall mounted mode
Take down the heater from wall
Pull up the heater 10mm
then take down the heate
r
10mm
20
Wall mounted mode
Take down the heater from wall
Pull up the heater
10mm
then take down the
heate
r
10mm
20
Instalación mural
Para quitar la unidad de la pared
Levante el radiador 10
mm y retírelo.

45
PANEL DE CONTROL
1 2 3 4
Set
4
2
11
3
1
1
2
5
6
7
8
9
10
ECO
13
Pantalla
1 Tecla: Ajustes
2 Tecla :Valor arriba
3 Tecla: Valor abajo
4 Tecla: On/Off
5 Luz de funcionamiento: Elemento calefactor
6 Indicador: nivel de calentamiento bajo
7 Indicador: alto nivel de calentamiento
8 Indicador: Temporizador
9 Indicador: temperatura
10 Pantalla numérica de LED
11 Tecla: Desactivar la pantalla LED
12 Tecla: Subir/bajar el nivel de calor
13 Pantalla: Wi
cuando se conecta: encendido
si la conexión falla: apagado
46
Puesta en marcha
1. Retire cuidadosamente el dispositivo de la caja. Guarde la caja para metr fuera de la temporada.
2. Asegúrese de que el botón de encendido/apagado esté apagado antes de conectar el aparato.
3. El calentador debe estar completamente montado e instalado de acuerdo con las instrucciones de instalación.
4. Es mejor no utilizar la misma conexión eléctrica con otros aparatos que requieran mucha energía para evitar la
sobrecarga del circuito eléctrico
Encendido
Conecte el dispositivo a la fuente de alimentación. La indicador de funcionamiento se enciende con un breve zumbido.
Encienda la unidad con el botón de encendido/apagado (4).
La temperatura ambiente actual se ilumina en la pantalla. La temperatura jada en fábrica es de 35 °C.
Ajustar la temperatura
Presione el botón de ajuste (1). Los números "10" y "9" parpadean.
A continuación, pulse las teclas de echa (2 y 3) para aumentar o disminuir la temperatura en 1 °C.
Ajustar el temporizador
Tiempo de encendido: En el estado de apagado, presione el botón (1) dos veces para ajustar el temporizador a
1-24 horas. Presione los botones (2) y (3) para ajustar la temperatura. Después del ajuste, se visualiza la temperatura
ambiente. La pantalla (8) se enciende cuando el temporizador está en marcha y se apaga cuando el temporizador ha
caducado.
Tiempo de apagado: En el modo de calefacción, pulse el botón (1) para ajustar el temporizador a 1-24 horas. Después
del ajuste, se visualiza la temperatura ambiente. La pantalla (8) se enciende cuando el temporizador está en marcha y
se apaga cuando el temporizador ha expirado. La unidad entonces deja de funcionar como calefacción.
Ajustar el nivel de calentamiento
a. En el modo de funcionamiento, la tecla 2 cambia entre el nivel de calefacción alto y la parada de la
calefacción (el indicador 7 se enciende en el nivel de calefacción alto y se apaga cuando se apaga la
calefacción).
b. En el modo de funcionamiento, la tecla 3 conmuta entre el nivel de calefacción bajo y la calefacción
apagada (el indicador 6 se enciende en el nivel de calefacción bajo y se apaga cuando se apaga la
calefacción).
c. En el modo de funcionamiento, el botón 12 cambia entre Apagado/Bajo/Alto Calentamiento. Cuando el
nivel de calentamiento es alto, el 7º se ilumina y el 6º.
FUNCIONAMIENTO

47
Control parental
En el modo de calefacción, presione los botones (2) y (3) simultáneamente. El seguro para niños está ahora activo y
el sistema está bloqueado. No se pueden hacer ajustes. Después de 5 segundos la pantalla muestra la temperatura
ambiente.
Para desbloquear, mantenga los botones (2) y (3) pulsados durante 3 segundos.
Activar la pantalla
Cuando la unidad está en funcionamiento, la pantalla se apaga. Presione el panel de control para encender la pantalla.
Función ECO (modo nocturno)
En el modo de calefacción, mantenga pulsados los botones (1) y (2) durante 3 segundos (o el botón ECO del mando
a distancia) para activar la función ECO. En este modo de funcionamiento, sólo se muestran las pantallas (5), (6), (7) o
(8), dependiendo del ajuste previamente seleccionado.
Mostrar el cambio de temperatura en grados Celsius o Fahrenheit
Mantenga pulsados el botón de ajustes (1) y el botón de la echa hacia arriba (2) simultáneamente durante 10
segundos.
Función de detección de ventanas abiertas
Si la temperatura baja 3 °C o más en 2 minutos, se activa la función de detección de ventana abierta. La unidad deja de
calentarse y la pantalla (9) parpadea. Presione el botón (4) para apagar el aparato. Si ahora enciende el aparato de
nuevo, la función de detección de ventanas abiertas se desactiva.
Reiniciar W-Lan
Presione y mantenga presionado el botón (1) durante 3 segundos en el modo de calentamiento. Los ajustes de la W-Lan
se reajustan y la pantalla correspondiente parpadea rápidamente (dos veces por segundo).
Apagar
Mantenga el botón de encendido/apagado (4) presionado. La lámpara de operación se enciende.

48
CONTROL DEL DISPOSITIVO A TRAVÉS DE UN SMARTPHONE
Si integra su dispositivo Klarstein en la WLAN de su casa, podrá manejarlo muy cómodamente a través de la
correspondiente aplicación Klarstein. La aplicación no sólo te permite controlar a distancia el dispositivo a través de tu
smartphone, sino que también te da acceso a recetas y a más información.
Proceda de la siguiente manera para conectar su smartphone al dispositivo Klarstein:
1 Primero descargue la aplicación Klarstein escaneando el código QR con su smartphone (ver más abajo) o
descárguela directamente de la App Store o de Google Play.
2 Asegúrese de que su smartphone esté conectado a la misma red WLAN que su dispositivo Klarstein.
3 Abre la aplicación Klarstein.
4 Entre con su cuenta. Si aún no tiene una cuenta, regístrese en la aplicación Klarstein.
5 Siga las instrucciones de la aplicación.
Descarga de aplicaciones
Utilice la función de escaneo de tu teléfono para escanear el código QR y guardar la aplicación en tu smartphone.
Nota: La primera vez que abra la aplicación, le proporcionará más instrucciones sobre cómo usarla y le ayudará a
conectarse al dispositivo.
iOS Android
49
LIMPIEZA
Es muy fácil limpiar la parte trasera de la unidad. Para limpiar la parte trasera, sostenga el calentador de convección
con ambas manos a los lados y tire de él hacia adelante.
Después de la limpieza, vuelva a poner el calentador en su sitio.
Almacenamiento
Si no utiliza la unidad durante un período de tiempo prolongado, se recomienda limpiarla y guardarla (preferiblemente
en la caja original) en un lugar fresco y seco.
RETIRADA DEL APARATO
Si el aparato lleva adherida la ilustración de la izquierda (el contenedor de basura tachado)
entonces rige la normativa europea, directiva 2012/19/UE. Estos productos no pueden depositarse
en los contenedores destinados a la basura común. Infórmese sobre las leyes territoriales que
regulan la recogida separada de aparatos eléctricos y electrónicos. Guíese por las regulaciones
locales y no deseche el aparato como un residuo doméstico. Una retirada de aparatos conforme a
las leyes contribuye a proteger el medio ambiente y a las personas a su alrededor frente a posibles
consecuencias perjudiciales para la salud. El reciclaje ayuda a reducir el consumo de materias
primas.
El producto contiene pilas sujetas a la Directiva Europea 2006/66/CE, según la cual estas
no pueden depositarse en los contenedores destinados a la basura común. Infórmese sobre la
normativa vigente sobre la eliminación de pilas. Una gestión adecuada de estos residuos previene
consecuencias potencialmente negativas para el medio ambiente y la salud de las personas.
Solución de problemas de conexión
Si su dispositivo Klarstein no se encuentra en la WLAN, compruebe lo siguiente:
• ¿Está el dispositivo conectado?
• ¿Está activada la función WiFi del smartphone?
• ¿Está activada la función WiFi del dispositivo de Klarstein? (Siga las instrucciones de la aplicación)
• ¿Se ha introducido correctamente la contraseña de la WLAN?
• ¿Están el router, el dispositivo Klarstein y el smartphone en las inmediaciones durante el intento de
emparejamiento?
• (Idealmente no más de 5 m de distancia)
• Si ha desactivado la banda de 2,4 GHz en los ajustes de su router WLAN, actívelo en su
• Conguración del router.
Remarque : Pour plus d‘assistance, suivez les instructions de l‘application lors de l‘établissement d‘une connexion.

50
DECLARACIÓN DE CONFORMIDAD
Fabricante: Chal-Tec GmbH, Wallstraße 16, 10179 Berlin, Alemania
Este producto cumple con las siguientes directivas europeas:
2009/125/CE (ErP)
2014/53/UE (RED)
2011/65/UE (RoHS)
La declaración de conformidad completa del fabricante
puede encontrarse en el siguiente enlace. Por favor, escanea
este código QR o introduce la URL:
https://use.berlin/10034390

51
INDICE
DATI TECNICI
Gentile Cliente,
La ringraziamo per aver acquistato il dispositivo. La preghiamo di leggere
attentamente le seguenti istruzioni per l’uso e di seguirle per evitare possibili danni
tecnici. Non ci assumiamo alcuna responsabilità per danni scaturiti da una mancata
osservazione delle avvertenze di sicurezza e da un uso improprio del dispositivo.
Scansionare il codice QR seguente, per accedere al manuale d’uso più attuale e per
ricevere informazioni sul prodotto.
Numero articolo 10034390, 10034391
Alimentazione 220-240 V ~ 50 Hz
Potenza assorbita 1000 W (livello basso)
2000 W (livello alto)
Dati tecnici 51
Scheda del prodotto 52
Avvertenze di sicurezza 53
Descrizione del dispositivo 55
Montaggio 56
Pannello di controllo 57
Utilizzo 58
Controllo del dispositivo con smartphone 60
Pulizia 61
Smaltimento 61
Dichiarazione di conformità 62
52
SCHEDA DEL PRODOTTO
Numero articolo 10034390 10034391
Voce Simbolo Valore Unità Voce Unità
Potenza riscaldante Solo per dispositivi elettrici di accumulo di calore per
locali singoli
Tipo di regolazione dell’afusso di calore
Potenza riscaldante
nominale
2,0
kW Regolazione manuale dell’afusso di calore con
termostato integrato
No
Potenza riscaldante minima Pmin
1,0
kW Regolazione manuale dell’afusso di calore con
avviso di ritorno della temperatura esterna e/o
ambiente
No
Potenza riscaldante
continua massima
Pmax
1,98
kW Regolazione elettronica dell’afusso di calore
con avviso di ritorno della temperatura esterna
e/o ambiente
No
Consumi ausiliari di energia
Rilascio di calore con supporto della ventola No
Per potenza riscaldante
nominale
elmax
1,985
kW
Tipo di potenza riscaldante/controllo della
temperatura ambiente
Per potenza riscaldante
minima
elmin
0,979
kW Potenza riscaldante a un livello, nessun controllo
della temperatura ambiente
No
In standby elSB
0,04
W Due o più livelli regolabili manualmente, nessun
controllo della temperatura ambiente
No
Controllo della temperatura ambiente con
termostato meccanico
No
Con controllo della temperatura ambiente
elettronico
No
Con controllo della temperatura ambiente
elettronico e regolazione dell’ora del giorno
Sì
Con controllo della temperatura ambiente
elettronico e regolazione del giorno della
settimana
No
Ulteriori opzioni di regolazione
Controllo della temperatura ambiente con
rilevamento di presenza
No
Controllo della temperatura ambiente con
rilevamento nestra aperta
Sì
Con opzione telecomando No
Con regolazione adattiva dell’avvio del
riscaldamento
No
Con limitazione della durata di funzionamento No
Con sensore a globo nero No
Informazioni di contatto Chal-Tec GmbH, Wallstraße 16, 10179, Berlino, Germania

53
AVVERTENZE DI SICUREZZA
Leggere e rispettare le seguenti avvertenze di sicurezza, anche se si ha l’impressione di avere condenza con il
dispositivo. Conservare il manuale d’uso per future consultazioni. Durante l’utilizzo di dispositivi elettrici è necessario
rispettare le avvertenze di sicurezza, incluse le seguenti:
• Questo dispositivo può essere utilizzato da bambini maggiori di 8 anni e da persone con limitate capacità siche,
sensoriali o mentali o da persone con esperienza e conoscenze insufcienti, solo se sono stati informati sulle funzioni
del dispositivo e sull’utilizzo sicuro da una persona responsabile della loro sicurezza e sono consapevoli dei rischi e
dei pericoli connessi.
• Utilizzare solo tensione equivalente a quella indicata sulla targhetta del dispositivo.
• Non impedire in alcun modo il usso d’aria in entrata e in uscita, altrimenti possono risultare surriscaldamenti e
conseguenti incendi.
• Non coprire i punti di ingresso e uscita dell’aria e le aperture di ventilazione montando il dispositivo su una
supercie. Tutti gli oggetti devono essere ad almeno 1 metro di distanza sulla parte frontale, posteriore e sui lati.
• Non posizionare il dispositivo vicino a una fonte di calore.
• Non utilizzare il dispositivo in ambienti in cui vengono conservati benzina, vernici o altri materiali inammabili.
• Il dispositivo diventa estremamente caldo durante l’utilizzo. Evitare il contatto tra pelle nuda e superci. Spegnere e
far raffreddare il dispositivo prima di spostarlo.
• Non utilizzare il dispositivo per asciugare biancheria.
• Non inserire corpi estranei o oggetti metallici all’interno del dispositivo o delle aperture di ventilazione, altrimenti
possono risultare scosse elettriche, incendi o danni al dispositivo.
• Non immergere il dispositivo in liquidi e non lasciare che acqua penetri al suo interno, altrimenti si corre il rischio di
scosse elettriche.
• Non cercare di afferrare un dispositivo che è caduto in acqua. Spegnere il circuito elettrico di casa e staccare
immediatamente la spina.
• Non utilizzare il dispositivo con cavo di alimentazione o spina danneggiati, dopo un malfunzionamento, dopo che
è stato fatto cadere o è stato danneggiato in qualche modo. Far controllare il dispositivo da un elettricista qualicato
per regolazioni elettriche o meccaniche, manutenzione o riparazione.
• Non utilizzare il dispositivo con le manu bagnate.
• Il motivo più frequente di surriscaldamento è l’accumulo di polvere e peluzzi sul dispositivo. Garantire la regolare
rimozione di questi accumuli staccando la spina e aspirando le aperture di ventilazione e la griglia.
• Staccare sempre la spina prima della pulizia. Non utilizzare prodotti abrasivi per la pulizia. Pulire solo con un panno
inumidito (non bagnato) con una soluzione saponosa.
• Non collegare il dispositivo alla rete elettrica prima di averlo assemblato e installato completamente.
• Il dispositivo non è adatto all’uso all’aperto.
• Questo dispositivo è protetto dagli spruzzi d’acqua secondi IP24 e può quindi essere posizionato in bagni/
locali umidi. Non utilizzare però il dispositivo nelle immediate vicinanze di vasche, docce, piscine e altri liquidi e
assicurarsi che i componenti che trasmettono corrente non possano entrare in contatto con l’acqua.
• Utilizzarlo sempre in posizione verticale.
• Spegnerlo e lasciarlo raffreddare prima di spostarlo.
• Non utilizzarlo con il cavo arrotolato, dato che è plausibile che si generi calore e questo è sufciente a
rappresentare un pericolo.
• Non si consiglia l’utilizzo di una prolunga con questo dispositivo.
• Non staccare la spina dalla presa prima di aver spento il dispositivo.
• Non staccare la spina tirando il cavo, ma impugnando saldamente la spina stessa.
• Staccare la spina se non si utilizza il dispositivo.

54
• Questo dispositivo non è adatto all’uso su tappeti a pelo lungo o okati.
• Non lasciare che il cavo di alimentazione entri in contatto con superci bollenti durante l’utilizzo.
• Non far passare il cavo di alimentazione sotto a tappeti, zerbini, passatoie, ecc. Posizionare il cavo fuori dalle zone
di passaggio, in modo da non rischiare di inciampare.
• Non arrotolare il cavo di alimentazione, non piegarlo e non avvolgerlo intorno al dispositivo, altrimenti si rischia
l’indebolimento e la rottura dell’isolamento del cavo. Assicurarsi sempre di srotolare completamente il cavo.
• Non utilizzare all’aperto o su fondi bagnati.
• Non stoccare il dispositivo nché è ancora caldo.
• Questo dispositivo non è adatto all’utilizzo da parte di bambini piccoli o persone in età molto avanzata senza la
dovuta supervisione.
• Tenere sotto controllo i bambini piccoli per assicurarsi che non giochino con il dispositivo.
• Il dispositivo non può essere utilizzato sotto a prese elettriche a muro.
• Non utilizzare il dispositivo con una programmazione, un timer esterno o un altro dispositivo che spegne o
accende il convettore. In caso contrario, si corre il rischio di incendi se il convettore è coperto o non è posizionato
correttamente.
• Tutte le coperture dell’alloggiamento di questo dispositivo servono a evitare l’accesso diretto agli elementi riscaldanti
e devono essere sempre installate se il dispositivo è acceso.
• Non coprire il convettore! Pericolo di sovraccarico!
• Per evitare il rischio di scosse elettriche, non immergere il dispositivo e il cavo di alimentazione in acqua, non esporli
a pioggia, umidità o altri liquidi, diversi da quelli necessari per il funzionamento del dispositivo.
• La griglia protettiva non offre una tutela completa di bambini piccoli e persone in età avanzata,
• Se il cavo di alimentazione è danneggiato deve essere sostituito da un elettricista qualicato, in modo da evitare
pericoli.
• Utilizzare il dispositivo solo per gli scopi previsti, secondo quanto descritto nel manuale d’uso. Ogni utilizzo diverso
è sconsigliato e può causare incendi, scosse elettriche o altre lesioni a persone.
• Il dispositivo è adatto solo a uso casalingo e non per scopi commerciali o industriali.

55
DESCRIZIONE DEL DISPOSITIVO
Uscita
dell’aria
Pannello di
controllo
Interruttore
Piedi con rotelle

56
MONTAGGIO
i
f the installation is complete,
it’s will hear a sound click.
press the button up,
take down the caster
Montaggio a posizionamento libero con
rotelle
Quando il montaggio è terminato si
sente un clic.
Premere il tasto per togliere le rotelle
Montare le rotelle Togliere le rotelle
Premere il tasto
Tirare
Inserire
Wall mounted mode
Take down the heater from wall
Pull up the heater 10mm
then take down the heate
r
10mm
20
Wall mounted mode
Take down the heater from wall
Pull up the heater
10mm
then take down the
heate
r
10mm
20
Montaggio a parete
Rimuovere l´apparecchio dalla
parete
Sollevare il convettore di
10 mm e poi
staccarlo.

57
PANNELLO DI CONTROLLO
1 2 3 4
Set
4
2
11
3
1
1
2
5
6
7
8
9
10
ECO
13
Schermo
1 Tasto: impostazioni
2 Tasto: aumentare valore
3 Tasto: diminuire valore
4 Tasto: on/off
5 Spia di funzionamento: elemento riscaldante
6 Indicazione: livello riscaldante basso
7 Indicazione: livello riscaldante alto
8 Indicazione: timer
9 Indicazione: temperatura
10 Indicazione numerica a LED
11 Tasto: disattivare l’indicazione LED
12 Tasto: aumentare/diminuire il livello riscaldante
13 Indicazione: Wi-Fi
se connesso: on
se la connessione non è riuscita: off

58
Messa in funzione
1. Togliere il dispositivo dalla scatola facendo attenzione. Conservare la scatola per stoccare il dispositivo nei
periodi di non utilizzo.
2. Assicurarsi che il tasto On/Off sia spento prima di collegare il dispositivo.
3. Assemblare e montare completamente il dispositivo seguendo le indicazioni del manuale d’uso.
4. È meglio non utilizzare la stessa connessione elettrica di altri dispositivi con potenza assorbita elevata, in modo
da evitare un sovraccarico del circuito elettrico.
Accensione
Collegare il dispositivo all’alimentazione elettrica. La spia di funzionamento si accende con un breve ronzio. Accendere il
dispositivo con On/Off (4).
Ora sullo schermo si illumina la temperatura ambiente attuale. La temperatura predenita in fabbrica è di 35 °C.
Impostare la temperatura
Premere il tasto delle impostazioni (1). Le cifre “10” e “9” lampeggiano.
Premere i tasti freccia (2 e 3) per alzare o abbassare la temperatura di 1 °C.
Impostare il timer
Tempo no all’accensione: a dispositivo acceso, premere due volte il tasto (1) per impostare il timer su 1-24 ore.
Premere i tasti (2) e (3) per impostare la temperatura. Terminata l’impostazione, viene mostrata la temperatura ambiente.
L’indicazione (8) si illumina a timer in funzione e si spegne quando è giunto al termine.
Tempo no allo spegnimento: a dispositivo in funzione di riscaldamento, premere due volte il tasto (1) per impostare il
timer su 1-24 ore.
Premere i tasti (2) e (3) per impostare la temperatura. Terminata l’impostazione, viene mostrata la temperatura ambiente.
L’indicazione (8) si illumina a timer in funzione e si spegne quando è giunto al termine. Il dispositivo interrompe la
funzione di riscaldamento.
Impostare il livello riscaldante
a. In modalità di funzionamento il tasto 2 permette di cambiare tra livello riscaldante alto e arresto della
funzione riscaldante (indicazione 7 si illumina durante il livello riscaldante alto e si spegne se la funzione di
riscaldamento è spenta).
b. In modalità di funzionamento il tasto 3 permette di passare avanti e indietro tra livello riscaldante basso
e funzione riscaldante spenta (indicazione 6 si illumina durante il livello riscaldante basso e si spegne a
dispositivo spento).
c. In modalità di funzionamento, il tasto 12 passa tra livello riscaldante Off/Basso/Alto. In caso di livello alto
si illumina l’indicazione 7, in caso di livello basso si illumina 6 e se la funzione riscaldante è spenta, non si
illumina alcuna indicazione.
UTILIZZO

59
Sicura per i bambini
In modalità di riscaldamento, premere contemporaneamente (2) e (3). La sicura per i bambini è attiva e l’impianto è
bloccato. Non è possibile effettuare impostazioni. Dopo 5 secondi, sullo schermo compare la temperatura ambiente.
Per sbloccare tenere premuti i tasti (2) e (3) per 3 secondi.
Attivare lo schermo
Se il dispositivo è in funzione, lo schermo è spento. Premendo una volta sul pannello di controllo, si accende lo schermo.
Funzione ECO (modalità notturna)
Tenere premuti i tasti (1) e (2) per 3 secondi in funzione di riscaldamento (oppure premere ECO sul telecomando), in
modo da accendere la funzione ECO. In questa modalità vengono mostrate solo le indicazioni (5), (6), (7) o (8), in base
all’impostazione selezionata.
Selezionare l’indicazione della temperatura in gradi Celsius o Fahrenheit
Tenere premuti contemporaneamente per 10 secondi i tasti per le impostazioni (1) e il tasto freccia “In alto” (2).
Funzione di rilevamento nestra aperta
Se la temperatura scende di 3 °C o più nel giro di 2 minuti, viene attivata la funzione di rilevamento nestra aperta.
Il dispositivo smette di scaldare e l’indicazione (9) lampeggia. Premere il tasto (4) per spegnere il dispositivo, Se si
riaccende il dispositivo, la funzione di rilevamento nestra aperta è disattivata.
Resettare il Wi-Fi
Tenere premuto per 3 secondi il tasto (1) in modalità di riscaldamento. Le impostazioni del Wi-Fi vengono resettate e la
relativa indicazione lampeggia rapidamente (due volte al secondo).
Spegnimento
Tenere premuto il tasto On/Off (4). La spia di funzionamento si illumina.
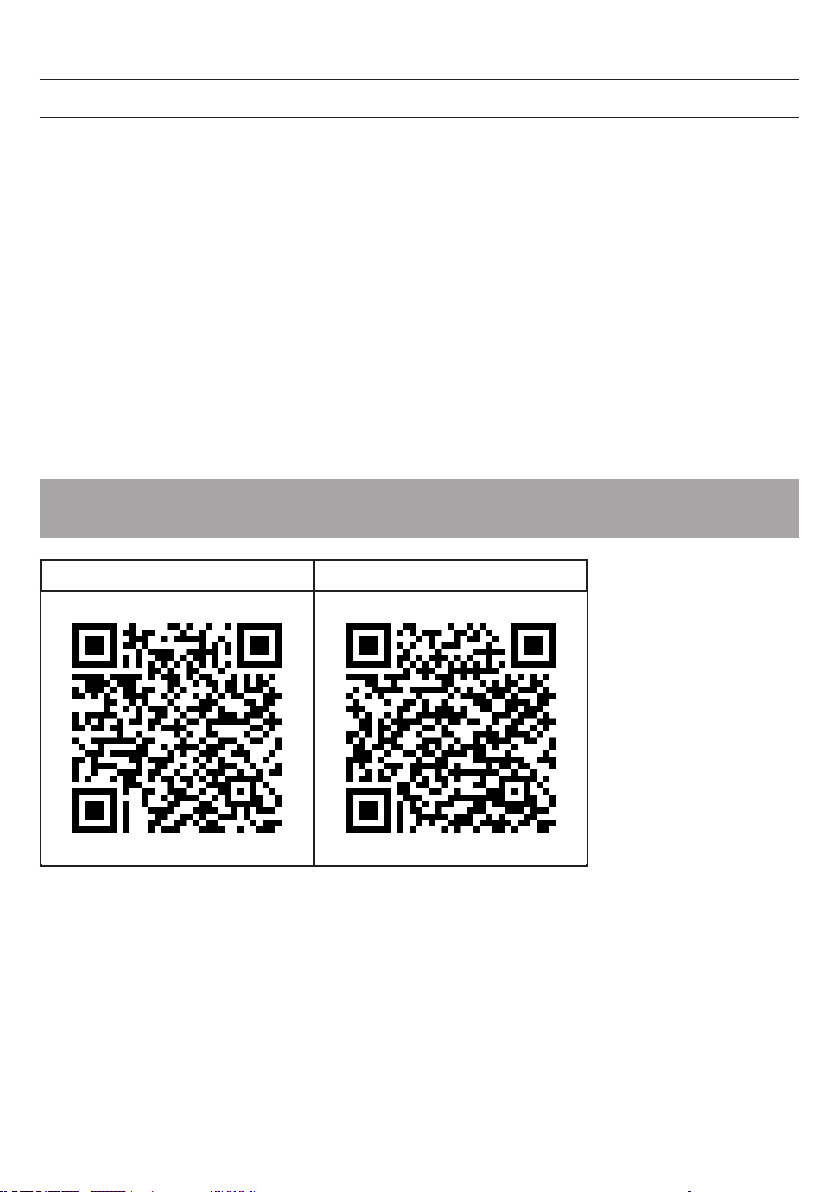
60
CONTROLLO DEL DISPOSITIVO CON SMARTPHONE
Se si collega il dispositivo Klarstein con la rete Wi-Fi di casa, è possibile controllarlo comodamente con l’apposita app
di Klarstein. La app permette non solo di gestire il dispositivo dallo smartphone, ma anche di accedere a ricette e ulteriori
informazioni.
Procedere in questo modo per collegare lo smartphone con il dispositivo Klarstein:
1 Scaricare la app di Klarstein scansionando il codice QR (v. sotto) con lo smartphone o scaricandola direttamente da
App Store o Google Play.
2 Assicurarsi che lo smartphone sia collegato con la stessa rete Wi-Fi con cui si connetterà il dispositivo Klarstein.
3 Aprire la app di Klarstein.
4 Registrarsi con il proprio account. Se non si ha un account, basta registrarsi nella app di Klarstein.
5 Seguire le indicazioni dell’app.
Scaricare la app
Utilizzare la funzione apposita dello smartphone per scansionare il codice QR e salvare la app sullo smartphone.
Nota: ulteriori indicazioni sull’utilizzo dell’app e supporto per stabilire la connessione con il dispositivo sono offerti
dalla app quando la si apre per la prima volta.
iOS Android
61
PULIZIA
Pulire il retro del dispositivo è facilissimo. Per pulire il retro, tenere il convettore saldamente con entrambe le mani e
tirarlo in avanti.
Dopo la pulizia, riposizionare il dispositivo.
Conservazione
Se il dispositivo non viene utilizzato per lunghi periodi di tempo, si consiglia di pulirlo e (idealmente nella scatola
originale) e conservarlo in un luogo fresco e asciutto.
SMALTIMENTO
Se sul prodotto è presente la gura a sinistra (il bidone dei riuti con le ruote), si applica la direttiva
europea 2012/19/UE. Questi prodotti non possono essere smaltiti con i riuti normali. Informarsi
sulle disposizioni vigenti per la raccolta di dispositivi elettrici ed elettronici. Attenersi alle disposizioni
vigenti e non smaltire i vecchi dispositivi con i riuti domestici. Grazie al corretto smaltimento dei
vecchi dispositivi si tutela il pianeta e la salute delle persone da possibili conseguenze negative. Il
riciclo di materiali aiuta a diminuire il consumo di materie prime.
Il prodotto contiene batterie che sono soggette alla direttiva europea 2006/66/CE e non possono
essere smaltite con i normali riuti domestici. Preghiamo di informarvi sulle regolamentazioni
vigenti sullo smaltimento delle batterie. Grazie al corretto smaltimento dei vecchi dispositivi si tutela
l’ambiente e la salute delle persone da conseguenze negative.
Correzione degli errori per problemi di connessione
Se il dispositivo Klarstein non può essere trovato nella rete Wi-Fi, controllare i seguenti punti:
• La spina del dispositivo è collegata?
• La funzione Wi-Fi dello smartphone è attivata?
• La funzione Wi-Fi del dispositivo Klarstein è attivata? (seguire le indicazioni nell’app)
• La password della rete Wi-Fi è stata inserita correttamente?
• Il router, il dispositivo Klarstein e lo smartphone si trovano vicini tra loro durante il tentativo di connessione?
(idealmente a non più di 5 m di distanza)
• Se è stata disattivata la banda 2,4 GHz nelle impostazioni del router Wi-Fi, attivarla nuovamente.
Nota: per ulteriore supporto, seguire le indicazioni dell’app per stabilire la connessione.

62
DICHIARAZIONE DI CONFORMITÀ
Produttore: Chal-Tec GmbH, Wallstraße 16, 10179 Berlino, Germania.
Questo prodotto è conforme alle seguenti direttive europee:
2009/125/CE (ErP)
2014/53/UE (RED)
2011/65/UE (RoHS)
La dichiarazione di conformità completa del produttore è
disponibile al seguente link. Scansionare questo codice QR o
inserire l’URL.
https://use.berlin/10034390

63
INHOUDSOPGAVE
TECHNISCHE GEGEVENS
Geachte klant,
hartelijk gefeliciteerd met de aanschaf van dit apparaat. Lees de hierna volgende
handleiding aandachtig door en volg de instructies op om schade te voorkomen.
Voor schade veroorzaakt door het niet in acht nemen van de instructies of door onjuist
gebruik nemen wij geen verantwoordelijkheid. Scan de QR code voor toegang tot
de meest actuele gebruikershandleiding en voor meer informatie rondom het artikel.
Artikelnummer 10034390, 10034391
Stroomvoorziening 220-240 V ~ 50 Hz
Verbruik 1000 W (lage stand)
2000 W (hoge stand)
Productgegevens 66
Veiligheidsinstructies 67
Overzicht apparaat 69
Montage 70
Controlepaneel 71
Bediening 72
Bediening per smartphone 74
Reiniging 75
Instructies voor afvoer 75
Conformiteitsverklaring 76
64
PRODUCTGEGEVENS
Artikelidenticatie 10034390, 10034391
Aanduiding Symbol Waarde Eenheid Aanduiding Eenheid
Warmtevermogen Alleen voor individuele elektrische ruimteverwarmers:
regulering van de warmtetoevoer
Nominaal warmtevermogen P
nom
2,0 kW Handmatige regeling van de warmtetoevoer
met ingebouwde thermostaat
n.v.t.
Minimaal warmtevermogen
(richtwaarde)
P
min
1,0 kW Handmatige regeling van de warmtetoevoer
met terugmelding van de kamer- en/ of externe
temperatuur
n.v.t.
Maximaal continue
warmtevermogen
P
max
1,98 kW Elektronische regeling van de warmtetoevoer
met terugmelding van de kamer- en/ of externe
temperatuur
n.v.t.
Hulpenergieverbruik
Warmteafgifte met ondersteuning van een
ventilator
n.v.t.
Bij nominaal warmtevermogen
(ventilator motor)
el
max
1,985 kW
Type warmtevermogen / Kamertemperatuurcontrole
Bij minimaal warmtevermogen
(ventilator motor)
el
min
0,979 kW Enkele warmtestand, geen
kamertemperatuurcontrole
nee
In stand-by modus el
SB
0,04 kW Twee of meer handmatig in te stellen standen,
geen kamertemperatuurcontrole
nee
Controle kamertemperatuur met mechanische
thermostaat
nee
Met elektronische kamertemperatuurcontrole nee
Met elektronische kamertemperatuurcontrole en
tijdregulering
nee
Met elektronische kamertemperatuurcontrole en
weekdagregulering
ja
Overige reguleringsopties
Kamertemperatuurcontrole met
aanwezigheidsherkenning
nee
Kamertemperatuurcontrole met open raam
detectie
ja
Met afstandsbedieningsoptie nee
Met adaptieve regeling van de start van de
verwarming
nee
Met bedrijfstijdbegrenzing nee
Met elektronische sensor nee
Contactinformatie Chal-Tec GmbH, Wallstraße 16, 10179, Berlijn, Duitsland

65
VEILIGHEIDSINSTRUCTIES
Lees en volg de volgende veiligheidsinstructies, zelfs als u zich vertrouwd voelt met het apparaat. Bewaar
deze handleiding als naslagwerk voor toekomstig gebruik. Bij gebruik van een elektrisch apparaat moeten de
veiligheidsmaatregelen in acht worden genomen, waaronder de volgenden:
• Kinderen vanaf 8 jaar en personen met een beperkte lichamelijke, sensorische of geestelijke gezondheid of
beperkte ervaring en/ of kennis mogen het apparaat alleen gebruiken wanneer ze door een voor hun veiligheid
verantwoordelijk persoon gecontroleerd worden of uitvoerig met de veiligheidsvoorschriften en functies vertrouwd
zijn gemaakt en het met het aparaat verbonden gevaar hebben begrepen.
• Controleer voor de ingebruikname of de spanning op het stopcontact overeenkomt met het vermogen van het
apparaat zoals dit op het typeplaatje staat vermeld en sluit het apparaat alleen aan als dit het geval is.
• Belemmer de luchtstroom van de luchtaan- en afvoer op geen enkele wijze om oververhitting en brandgevaar te
voorkomen.
• Bedek de ventilatiesleuven en de luchtaan- en afvoer niet wanneer u het apparaat aan een oppervlak bevestigd.
Alle objecten moeten zich op minimaal 1 meter afstand van het apparaat bevinden.
• Plaats het apparaat niet in de nabijheid van een warmtebron.
• Gebruik het apparaat niet in een omgeving waar benzine, verf of andere brandbare stoffen worden opgeslagen.
• Het apparaat wordt heet tijdens het gebruik. Vermijd aanraking door de blote huid. Voor het verplaatsen
uitschakelen en laten afkoelen.
• Gebruik het apparaat niet om was te drogen.
• Plaats geen vreemde of metalen objecten binnenin het apparaat of de ventilatiesleuven aangezien dit een elektrische
schok, brand of beschadiging van het apparaat kan veroorzaken.
• Dompel het apparaat niet in vloeistof onder en laat geen vloeistof in het apparaat lopen daar dit een elektrische
schok kan veroorzaken.
• Grijp niet naar het apparaat wanneer het in het water is gevallen. Schakel de stroom in het gehele huishouden uit en
haal vervolgens de stekker uit het stopcontact.
• Gebruik het apparaat niet met een beschadigde stroomkabel of stekker wanneer het apparaat een storing had, is
gevallen of op welke wijze dan ook is beschadigd. Breng het apparaat naar een gekwaliceerde elektricien voor
onderzoek, elektrische of mechanische afstelling, onderhoud of reparatie.
• Gebruik het apparaat niet met natte handen.
• De meest voorkomende reden van oververhitting is de ophoping van stof en pluis in het apparaat. Let erop dat dit
regelmatig verwijderd wordt door de stekker uit het stopcontact te nemen en de ventilatieopeningen en de grill met
een stofzuiger schoon te zuigen.
• Neem voordat u het apparaat schoonmaakt altijd de stekker uit het stopcontact en laat het apparaat, indien nodig,
volledig afkoelen. Gebruik voor het reinigen geen schuurmiddel. Met een vochtige (niet natte) doek die in
zeepsop is gedompeld en goed uitgeknepen schoonmaken.
• Sluit het apparaat niet op het stroomnet aan voordat het volledig gemonteerd en geïnstalleerd is.
• Het apparaat is niet voor gebruik buitenshuis bestemd.
• Dit apparaat is conform IP24 tegen spatwater beschermd en dus ook geschikt voor gebruik in badkamers en andere
vochtige ruimtes. Gebruik het apparaat desondanks niet in de directe nabijheid van een badkuip, douche, zwembad
of andere vloeistoffen en zorg ervoor dat geen stroomvoerende delen in contact met water kunnen komen.
• Gebruik het toestel altijd rechtopstaand.
• Voordat het apparaat verplaatst wordt altijd eerst uitschakelen en laten afkoelen.
• Niet met opgerolde kabel gebruiken. Hiermee loopt u het risico dat warmte zich ophoopt wat een gevaar vormt.
• Het gebruik van verlengsnoeren wordt bij dit apparaat niet aanbevolen.
• Neem de stekker niet uit het stopcontact voordat het apparaat uitgeschakeld is.

66
• Neem de stekker niet uit het stopcontact door aan het snoer te trekken. Altijd de stekker in de hand nemen.
• Neem de stekker uit het stopcontact wanneer u het apparaat niet gebruikt.
• Dit apparaat is niet geschikt voor gebruik op langharige tapijten of okati tapijten van wol of synthetische vezels.
• Zorg ervoor dat de stroomkabel tijdens het gebruik niet in contact komt met hete oppervlaktes.
• Leg de stroomkabel niet onder vloerbedekking, tapijt, kleden, lopers, enz. Leg de stroomkabel niet in doorgangen
waar iemand erover kan struikelen.
• De stroomkabel niet verdraaien, verbuigen of om het apparaat wikkelen waardoor de kabelisolatie kan verzwakken
en breken. Let er altijd op dat de hele stroomkabel afgewikkeld is.
• Niet buitenshuis of staand op een natte ondergrond gebruiken.
• Niet verplaatsen zolang het apapraat nog warm is.
• Dit apparaat is niet geschikt voor gebruik door kleine kinderen of kwetsbare personen zonder toezicht.
• Kleine kinderen onder toezicht houden om te voorkomen dat ze met het apparaat spelen.
• Het apparaat niet onder een wandcontactdoos plaatsen en/of gebruiken.
• Gebruik het apparaat niet met een programmering, tijdschakelaar of andere apparaat dat het toestel aanzet en
uitschakelt. Er bestaat brandgevaar wanneer de verwarming afgedekt of incorrect geplaatst wordt.
• Alle afdekkingen in de behuizing van dit apparaat hebben het specieke doel de directe toegang tot de
verwarmingselementen te voorkomen en moeten op hun plaats zitten wanneer het apparaat wordt aangezet.
• De verwarming niet afdekken! Gevaar voor overbelasting!
• Om het risico op een elektrische schok te voorkomen het apparaat en de stroomkabel niet in water onderdompelen
of blootstellen aan regen, vocht of andere vloeistoffen dan die, die voor het gebruik van het apparaat noodzakelijk
zijn.
• Het beschermende rooster garandeert geen volledige bescherming voor kleine kinderen en kwetsbare personen.
• Wanneer de stroomkabel beschadigd is moet hij door een gekwaliceerde elektricien worden vervangen om
gevaarlijke situaties te vermijden.
• Gebruik het apparaat uitsluitend voor het voorbestemde doel zoals beschreven in deze gebruikershandleiding. Ieder
ander gebruik wordt afgeraden en kan brand, een elektrische schok of ander soort letsel aan personen tot gevolg
hebben.
• Het apparaat is uitsluitend bestemd voor gebruik in een conventioneel huishouden en niet voor zakelijke of
industriele doeleinden.

67
OVERZICHT APPARAAT
Luchtafvoer
Controlepaneel
Schakelaar
Pootjes met zwenkwieltjes

68
MONTAGE
i
f the installation is complete,
it’s will hear a sound click.
press the button up,
take down the caster
Vrijstaande montage met zwenkwieltjes
Wanneer de montage afgesloten is
hoort u een klik.
Druk op de knop om de wieltjes weg
te halen.
Wieltjes monteren Wieltjes verwijderen
Knop drukken
Schuiven
Schuiven
Wall mounted mode
Take down the heater from wall
Pull up the heater 10mm
then take down the heate
r
10mm
20
Wall mounted mode
Take down the heater from wall
Pull up the heater
10mm
then take down the
heate
r
10mm
20
Wandmontage
Van de wand nemen
Verwarming 10 mm
omhoog trekken en dan
weghalen
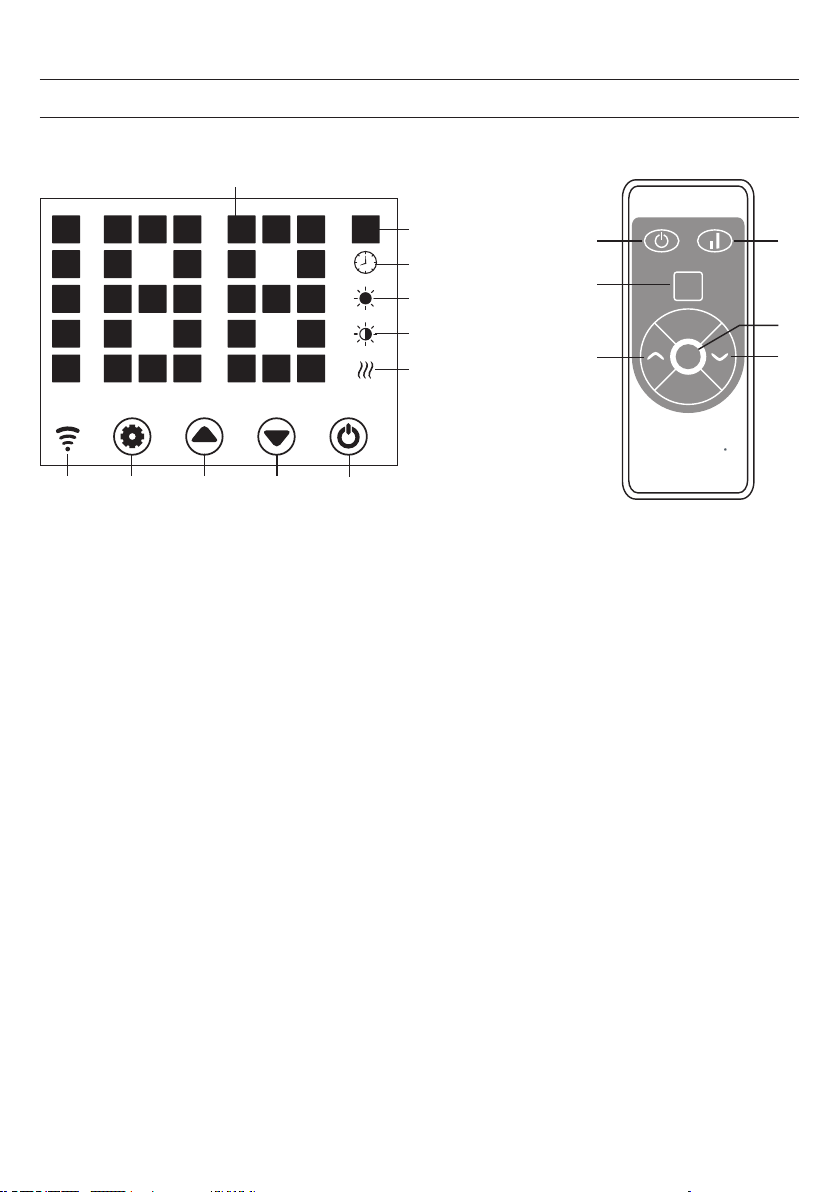
69
CONTROLEPANEEL
1 2 3 4
Set
4
2
11
3
1
1
2
5
6
7
8
9
10
ECO
13
Display:
1 toets: instellingen
2 toets: waarde omhoog
3 toets: waarde omlaag
4 toets: Aan / Uit
5 bedrijfslampje: verwarmingselement
6 weergave: lage verwarmingsstand
7 weergave: hoge verwarmingsstand
8 weergave: timer
9 weergave: temperatuur
10 ledweergave cijfers
11 toets: ledweergave uit
12 toets:verwarmingsstand omhoog/ omlaag
13 weergave: wi
verbonden: aan
verbinding mislukt: uit

70
Ingebruikname
1. Neem het apparaat voorzichtig uit de doos. Bewaar de doos zodat u deze buiten het seizoen kunt gebruiken om
het toestel in te bewaren.
2. Let erop dat het apparaat op Uit staat voordat u het aansluit.
3. De verwarming moet volledig conform de montagehandleiding worden gemonteerd en geïnstalleerd.
4. Het is aan te raden het stopcontact niet met andere energieverslindende apparaten te gebruiken om een
overbelasting van het energiecircuit te voorkomen.
Aanzetten
De stekker in het stopcontact doen. Het bedrijfslampje gaat met een kort brommend geluid aan. Het apparaat aanzetten
met de Aan / Uit toets (4).
U ziet in het display nu de actuele kamertemperatuur. De fabrieksinstelling is 35°C.
Instellen van de temperatuur
Druk op de instellingstoets (1). De getallen ‘10’ en ‘9’ knipperen.
Druk op de pijltjestoesten (2) en (3) om de temperatuur met 1°C te verhogen of te verlagen.
Instellen van de timer
Inschakeltijd: in gedeactiveerde toestand tweemaal toets (1) indrukken om de timer op 1-24 uur in te stellen. Druk op de
toesten (2) en (3) om de temperatuur in te stellen. Na het instellen wordt de omringende temperatuur weergegeven. Het
display (8) licht op wanneer de timer geactiveerd is en gaat uit wanneer de timer afgelopen is.
Uitschakeltijd: in verwarmingsmodus toets (1) drukken om de timer op 1-24 uur in te stellen. Na het instellen wordt de
omringende temperatuur weergegeven. Het display (8) licht op wanneer de timer geactiveerd is en gaat uit wanneer de
timer afgelopen is. Het toestel schakelt vervolgens de verwarmingsmodus in.
Instellen van de verwarmingsmodus
a. In de bedrijfsmodus wisselt toets (2) tussen hoog verwarmingsniveau en verwarmingsstop (indicator (7) licht
op bij hoog verwarmingsniveau en gaat uit wanneer de verwarming uitgeschakeld is).
b. In de bedrijfsmodus schakelt toets (3) tussen gering verwarmingsniveau en uitgeschakelde verwarming
heen en weer (indicator 6 licht op bij gering verwarmingsniveau en gaat uit wanneer de verwarming in
uitgeschakelde toestand is).
c. In de bedrijfsmodus wisselt toets (12) tussen Off/ Low/ High heating. Bij een hoog verwarmingsniveau licht
de indicator (7) op en bij gering verwarmingsniveau licht de indicator (6) op.
BEDIENING

71
Kinderslot
Druk in verwarmingsmodus de toetsen (2) en (3) tegelijk in. Het kinderslot is nu actief en het systeem is geblokkeerd. Er
kunnen geen instellingen worden uitgevoerd. Na 5 seconden verschijnt in het display de omgevingstemperatuur.
Voor het vrijgeven de toetsen (2) en (3) gedurende 3 seconden ingedrukt houden.
Activering display
Wanneer het apparaat in gebruik is is het display uitgeschakeld. Met een druk op het controlepaneel wordt het display
actief.
ECO functie (nachtmodus)
In verwarmingsmodus de toetsen (1) en (2) gedurende 3 seconden ingedrukt houden (of de toets ECO op de
afstandsbediening) om de ECO functie in te schakelen. In deze bedrijfsmodus worden alleen de indicators (5), (6), (7) of
(8) weergegeven, afhankelijk van de eerder gekozen instelling.
Wijzigen van de temperatuurweergave in graden Celsius of Fahrenheit
Houdt de toets voor de instellingen (1) en de pijltjestoets ‘hoog’ (2) gedurende 10 seconden tegelijk ingedrukt.
Open raam detectie
Wanneer de temperatuur binnen 2 minuten met 3°C of meer daalt wordt de open raam detectie actief. Het apparaat
stopt met verwarmen en de indicator (9) knippert. Druk op toets (4) om het apparaat uit te zetten. Wanneer u het
apparaat nu weer aanzet is de open raam detectie gedeactiveerd.
Wi resetten
Houdt toets (1) in verwarmingsmodus gedurende 3 seconden ingedrukt. De wi instellingen worden gereset en de
bijbehorende indicator knippert snel (2 x per seconde).
Uitschakelen
De Aan / Uit toets (4) ingedrukt houden. Het bedrijfslampje licht op.
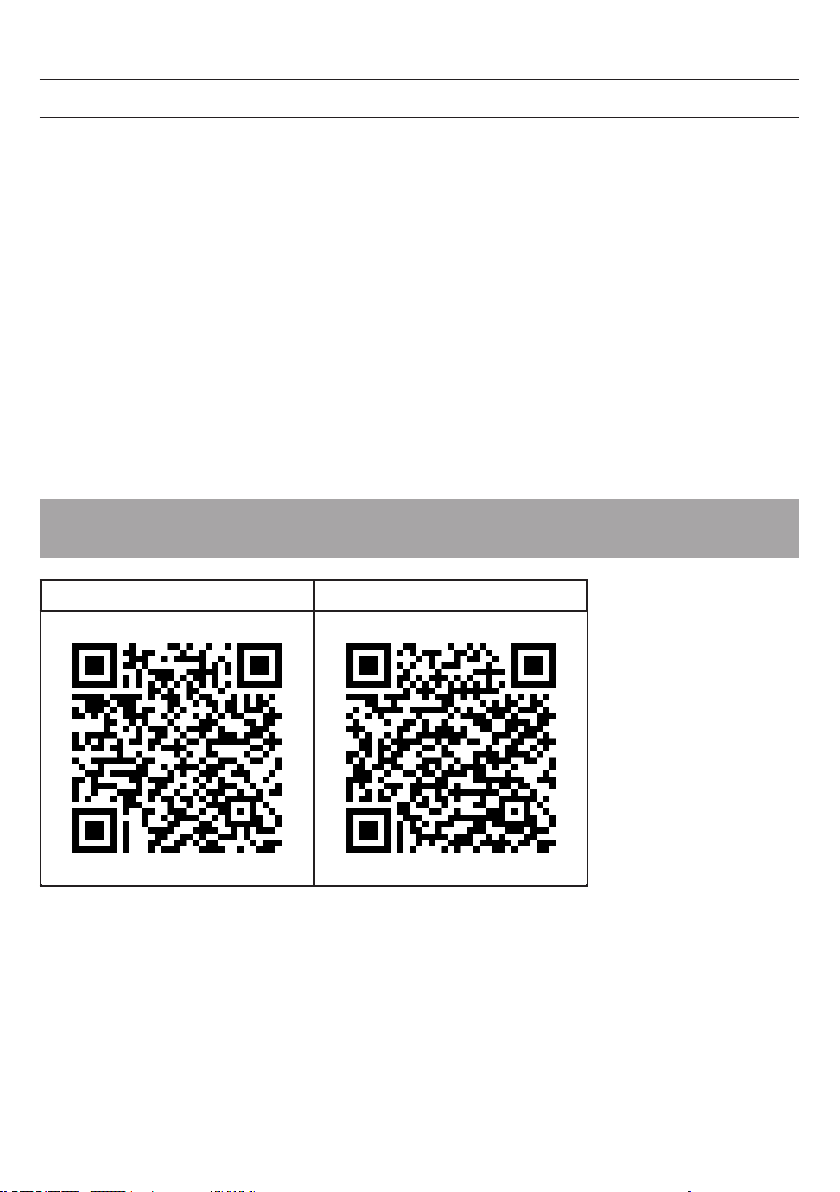
72
BEDIENING PER SMARTPHONE
Wanneer u uw Klarstein toestel met uw wi netwerk thuis verbindt, kunt u het heel eenvoudig via de daarbij horende
Klarstein app bedienen. De app maakt het u niet alleen mogelijk het apparaat via uw smartphone te bedienen maar biedt
daarnaast toegang tot, bijvoorbeeld, recepten en andere uitgebreide informatie.
Ga als volgt te werk om uw smartphone met uw Klarstein apparaat te verbinden:
1 Download eerst de Klarstein app door met uw smartphone de onderstaande QR code te scannen of download deze
direct vanuit de App store of via Google Play.
2 Verzeker uzelf ervan dat uw smartphone met hetzelfde wi netwerk verbonden is als waarmee u uw Klarstein
apparaat wilt verbinden.
3 Open de Klarstein app.
4 Meldt u zich met uw account aan. Wanneer u nog geen account heeft registreert u zich in de Klarstein app.
5 Volg de aanwijzingen in de app.
App download
Gebruik de scan-functie van uw mobiele telefoon om de QR code te scannen en sla de app in uw smartphone op.
Tip: Verdere informatie met betrekking tot het gebruik van de app en ondersteuning voor het tot stand brengen van een
verbinding met uw toestel vindt u in de app zodra u die voor het eerst opent.
iOS Android

73
REINIGING
Het is heel eenvoudig de achterkant van het apparaat schoon te maken. Hiervoor houdt u de convectorverwarming
met beide handen aan de zijkanten vast en trekt u deze naar voren. Na het schoonmaken zet u het toestel weer op zijn
plaats.
Opslag
Wanneer u het toestel gedurende langere tijd niet gebruikt, raden wij aan het te reinigen en (bij voorkeur in de originele
verpakking) op een koele, droge plaats neer te zetten.
INSTRUCTIES VOOR AFVOER
Wanneer het hier links afgebeelde symbool zich op het artikel bevindt (doorgestreepte vuilcontainer
op wielen) geldt de Europese richtlijn 2012/19/EU. Deze artikelen mogen niet met het reguliere
huisvuil worden afgevoerd. Informeer naar de correcte regeling aangaande de gescheiden
inzameling van elektrische en elektronische apparaten in uw gemeente. Voer oude apparaten niet af
via het huisvuil. Door een correcte afvoer van oude apparaten conform de regels wordt zowel het
milieu als de gezondheid van uw medemens beschermd tegen de mogelijke negatieve gevolgen.
Materiaalrecycling helpt het verbruik van ruwe grondstoffen te verminderen.
Dit artikel bevat batterijen die onder de Europese richtlijn 2006/ 66/ EG vallen en niet met het
normale huisvuil mogen worden weggegooid. Informeer naar de plaatselijke regelgeving inzake de
gescheiden afvoer van batterijen. Door de batterijen volgens de voorschriften af te voeren beschermt
u het milieu en de gezondheid van uw medemensen tegen negatieve consequenties.
Probleemoplossing bij verbindingsproblemen
Wanneer uw Klarstein apparaat niet in uw wi systeem wordt gevonden controleert u het volgende:
• Is het apparaat aangesloten?
• Is de wi functie van de smartphone geactiveerd?
• Is de wi functie van het Klarstein apparaat geactiveerd? (volg de aanwijzingen in de app)
• Is het wi wachtwoord correct ingevoerd?
• Zijn de router, het Klarstein apparaat en de smartphone tijdens de koppelingspoging in directe nabijheid van elkaar?
(in het meest ideale geval niet meer dan 5 m van elkaar verwijdert)
• Wanneer in de instellingen van uw wi router de 2,4 Ghz band gedeactiveerd is activeert u deze in de
routerinstellingen.
Tip: Voor meer ondersteuning volgt u de instructies van de app bij het tot stand brengen van een verbinding.
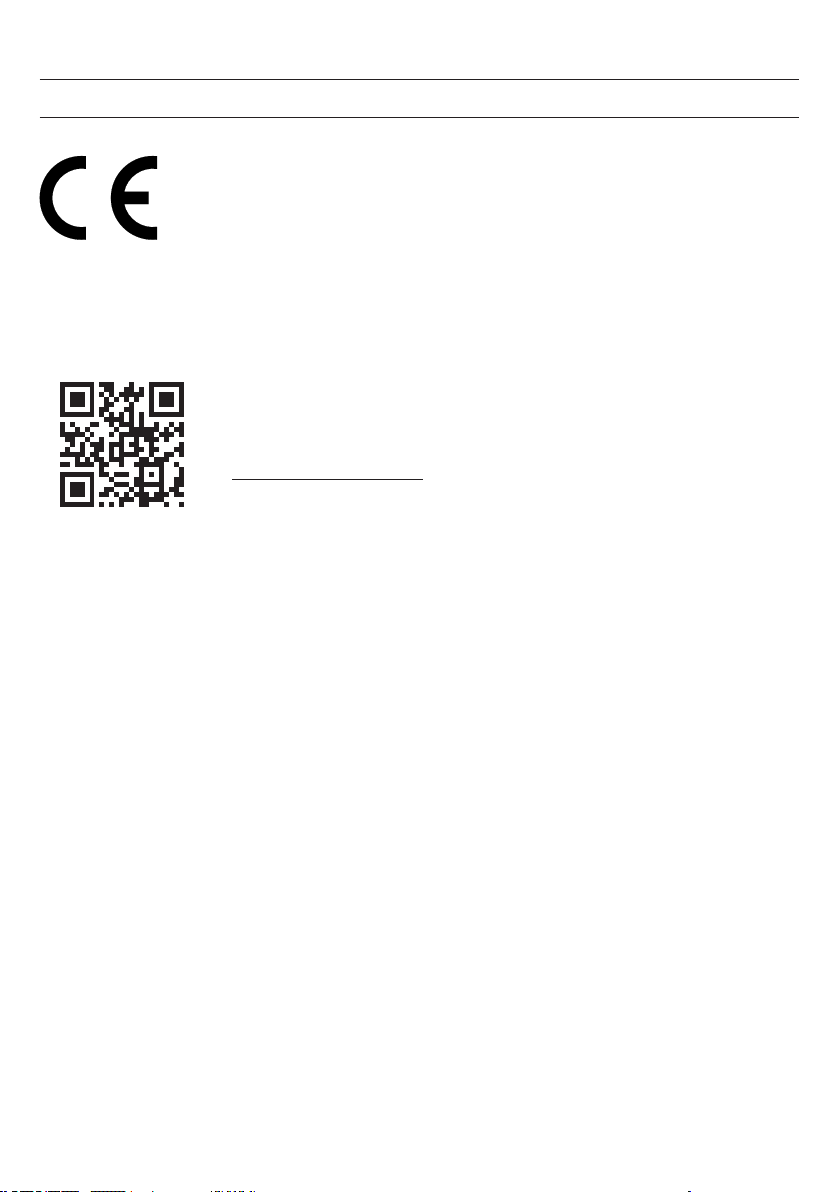
74
CONFORMITEITSVERKLARING
Fabrikant: Chal-Tec GmbH, Wallstraße 16, 10179 Berlijn, Duitsland.
Dit product voldoet aan de volgende Europese richtlijnen:
2009/125/EG (ErP)
2014/53/EU (RED)
2011/65/EU (RoHS)
De volledige conformiteitsverklaring van de fabrikant vindt u
onder de volgende link.
Scan daarvoor de QR code of voeg de URL in:
https://use.berlin/10034390