BORNHOLM
SINGLE SMART
Konvektions-Heizung
Convection Heater
Radiador de convección
Radiateur convecteur
Radiatore a convezione
Hinweis: Dieses Produkt ist nur für gut isolierte Räume
oder für den gelegentlichen Gebrauch geeignet.
Note: This product is only suitable for well insulated
spaces or occasional use.
Nota: Este producto está indicado únicamente en
lugares abrigados o para una utilización punctual.
Remarque : Ce produit ne peut être utilisé que dans
des locaux bien isolés ou de manière occasionnelle.
Advertencia: Questo prodotto è adatto solo per spazi
ben isolati o uso occasionale.
www.klarstein.com
10035235 10035236


3
DE
Sehr geehrter Kunde,
wir gratulieren Ihnen zum Erwerb Ihres Gerätes. Lesen Sie
die folgenden Hinweise sorgfältig durch und befolgen Sie
diese, um möglichen Schäden vorzubeugen. Für Schäden,
die durch Missachtung der Hinweise und unsachgemäßen
Gebrauch entstehen, übernehmen wir keine Haftung. Scannen
Sie den folgenden QR-Code, um Zugriff auf die aktuellste
Bedienungsanleitung und weitere Informationen rund um das
Produkt zu erhalten.
INHALTSVERZEICHNIS
Produktdatenblatt4
Sicherheitshinweise5
Geräteübersicht7
Montage8
Bedienfeld und Fernbedienung9
Bedienung10
Gerätesteuerung per Smartphone12
Reinigung und Pege13
Hinweise zur Entsorgung14
Konformitätserklärung14
TECHNISCHE DATEN
Artikelnummer 10035235,10035236
Stromversorgung 220-240 V ~ 50/60 Hz
Leistung
500 W (niedrige Stufe)
1000 W (hohe Stufe)
WLAN Standard
802.11 b/g/n
WLAN Frequenz
2,4 GHz
WLAN Sendeleistung (max.)
20 dBm
English 15
Español 27
Français 39
Italiano 51
4
DE
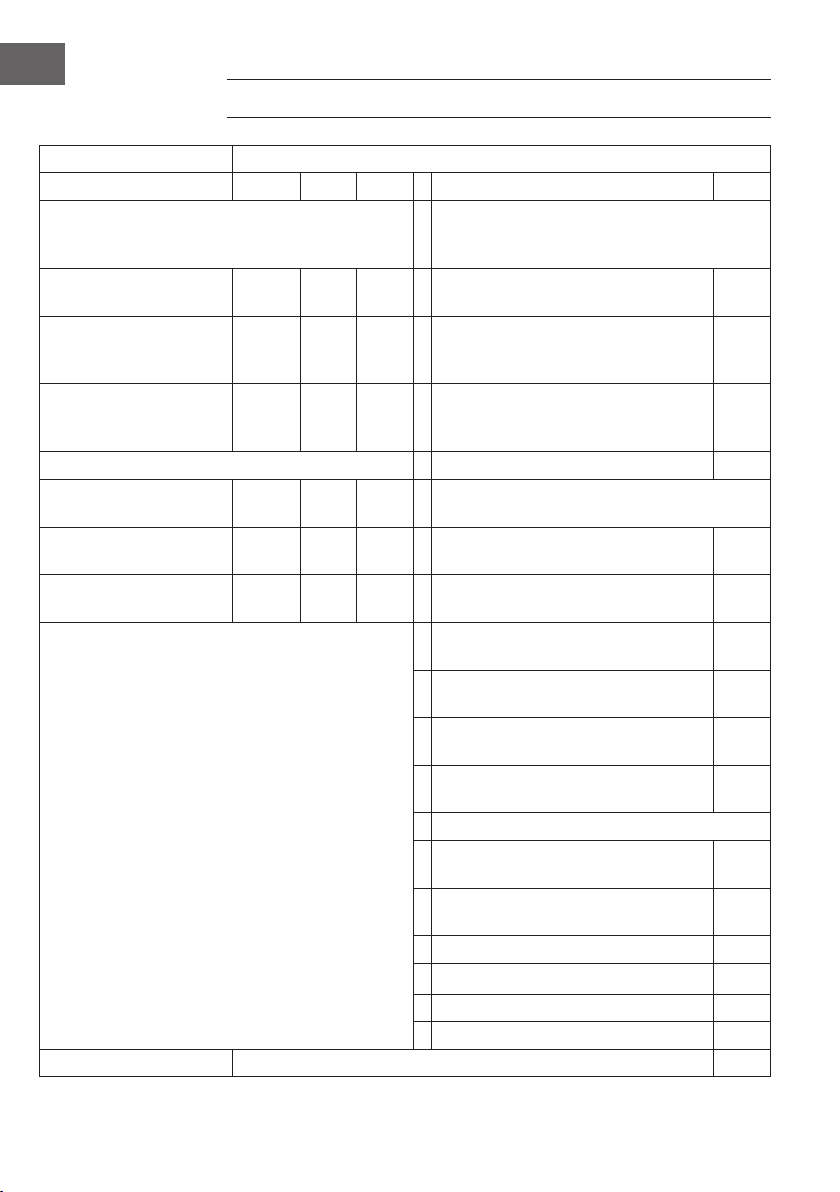
PRODUKTDATENBLATT
Modellkennung(en) 10035235,10035236
Angabe Symbol Wert Einheit Angabe Einheit
Wärmeleistung Nur bei elektrischen Speicher-Einzelraumheizgeräten:
Art der Regelung der Wärmezufuhr
Nennwärmeleistung P
nom
1,0 kW Manuelle Regelung der Wärmezufuhr mit
integriertem Thermostat
Nein
Mindestwärmeleistung P
min
0,5 kW Manuelle Regelung der Wärmezufuhr
mit Rückmeldung der Raum- und/oder
Außentemperatur
Nein
Maximale kontinuierliche
Wärmeleistung
P
max,c
1,0 kW Elektronische Regelung der Wärmezufuhr
mit Rückmeldung der Raum- und/oder
Außentemperatur
Nein
Hilfsstromverbrauch
Wärmeabgabe mit Gebläseunterstützung Nein
Bei Nennwärmeleistung el
max
0,956 kW
Art der Wärmeleistung/Raumtemperaturkontrolle
Bei Mindestwärmeleistung el
min
0,486 kW Einstuge Wärmeleistung, keine
Raumtemperaturkontrolle
Nein
Im Bereitschaftszustand el
SB
0,37 W Zwei oder mehr manuell einstellbare Stufen,
keine Raumtemperaturkontrolle
Nein
Raumtemperaturkontrolle mit mechanischem
Thermostat
Nein
Mit elektronischer Raumtemperaturkontrolle Nein
Mit elektronischer Raumtemperaturkontrolle und
Tageszeitregelung
Ja
Mit elektronischer Raumtemperaturkontrolle und
Wochentagsregelung
Nein
Sonstige Regelungsoptionen
Raumtemperaturkontrolle mit Präsenzerkennung Nein
Raumtemperaturkontrolle mit Erkennung offener
Fenster
Ja
Mit Fernbedienungsoption Nein
Mit adaptiver Regelung des Heizbeginns Nein
Mit Betriebszeitbegrenzung Nein
Mit Schwarzkugelsensor Nein
Kontaktangaben Chal-Tec GmbH, Wallstraße 16, 10179, Berlin, Deutschland

5
DE
SICHERHEITSHINWEISE
• Prüfen Sie vor der Benutzung die angegebene Spannung auf dem Typenschild
und schließen Sie das Gerät nur an Steckdosen an, die der Spannung des Geräts
entsprechen.
• Falls das Netzkabel beschädigt ist, lassen Sie es von einer ausgebildeten Fachkraft
ersetzen.
• Stellen Sie die Heizung nicht direkt unter einer Steckdose auf.
• Halten Sie einen Meter Abstand zu brennbaren Materialien wie Möbeln,
Vorhängen oder Ähnlichem ein.
• Die Gehäuseabdeckungen dieses Gerätes haben den Zweck, den direkten Zugang
zu den Heizelementen zu verhindern und müssen angebracht sein, wenn das Gerät
eingeschaltet wird.
• Decken Sie die Heizung nicht ab, um ein Überhitzen zu vermeiden.
• Behindern Sie den Luftstrom am Luftein- oder -auslass in keiner Weise, da das
Gerät überhitzen und zu einer Brandgefahr werden kann. Decken Sie die Luftein-
und -auslässe nicht ab.
• Der häugste Grund für eine Überhitzung ist die Ablagerung von Staub und Fusseln
am Gerät. Gewährleisten Sie, dass diese Ablagerungen regelmäßig entfernt
werden. Schalten Sie das Gerät aus, ziehen Sie den Netzstecker und saugen Sie
die Luftein- und -auslässe mit einem Staubsauger ab.
• Verwenden Sie das Gerät nicht, um Wäsche zu trocknen.
• Schließen Sie das Gerät nicht an die Stromversorgung an, bevor es vollständig
zusammengebaut und montiert wurde.
• Das Gerät darf nur in aufrechter Lage betrieben werden.
• Dieses Gerät eignet sich nicht zur Benutzung auf Langhaarteppichen oder
Flokativorlegern.
• Die Verwendung eines Verlängerungskabels wird bei diesem Gerät nicht
empfohlen.
• Bevor Sie das Gerät bewegen, schalten Sie es aus und lassen Sie es abkühlen.
• Ziehen Sie den Netzstecker aus der Steckdose, wenn das Gerät nicht in Benutzung
ist. Ziehen Sie dabei niemals am Netzkabel, sondern fassen Sie immer am Stecker
an. Schalten Sie immer zuerst das Gerät aus, bevor Sie den Netzstecker aus der
Steckdose ziehen.
• Führen Sie keine Fremdkörper und Metallgegenstände in das Innere des Gerätes
oder die Lüftungsschlitze ein, da dies einen Stromschlag, Brand oder eine
Beschädigung des Gerätes zur Folge haben kann.
• Das Gerät ist nicht für den kommerziellen Gebrauch, sondern nur für Gebrauch im
Haushalt und in ähnlichen Umgebungen vorgesehen.
• Benutzen Sie das Gerät nicht, wenn das Netzkabel oder der Netzstecker
beschädigt sind, wenn es Fehlfunktionen aufweist, es fallen gelassen oder in
irgendeiner Form beschädigt wurde.
• Reparaturen dürfen nur von ausgebildeten Fachkräften durchgeführt werden.
• Falsch oder eigenständig ausgeführte Reparaturen stellen ein Verletzungsrisiko dar.
• Verlegen Sie das Netzkabel nicht unter Teppichen, Vorlegern oder Läufern.
• Legen Sie das Netzkabel außerhalb von Gehbereichen aus, so dass niemand
darüber stolpert.
6
DE
• Achten Sie darauf, dass das Netzkabel nicht über scharfe Kanten verläuft oder mit
heißen Ober ächen in Berührung kommt.
• Verdrehen und verbiegen Sie das Netzkabel nicht und wickeln Sie es nicht um das
Gerät, da dies dazu führt, dass die Kabelisolierung schwächer wird und bricht.
Achten Sie immer darauf, dass das gesamte Netzkabel von der Kabelaufwicklung
abgewickelt ist.
• Benutzen Sie das Gerät nicht mit einem externen Timer, einer ferngesteuerten
Steckdose oder einem anderen Gerät, das die Heizung automatisch ein- und
ausschaltet.
• Tauchen Sie das Gerät und das Netzkabel nicht in Wasser oder andere
Flüssigkeiten und lassen Sie keine Feuchtigkeit in das Geräteinnere eindringen.
• Greifen Sie nicht nach einem Gerät, dass ins Wasser gefallen ist. Schalten Sie
den Strom im Haushalt aus und ziehen Sie unmittelbar den Netzstecker aus der
Steckdose.
• Dieses Gerät ist nach IP24 gegen Spritzwasser geschützt und somit auch für die
Benutzung in Badezimmern und Feuchträumen geeignet. Verwenden Sie das Gerät
aber nicht in der unmittelbaren Umgebung einer Badewanne, einer Dusche, eines
Schwimmbeckens oder anderer Flüssigkeiten und stellen Sie sicher, dass keine
stromführenden Teile mit Wasser in Kontakt kommen können.
• Benutzen Sie das Gerät nicht im Freien. Stellen Sie das Gerät nicht auf einen nassen
Untergrund.
• Benutzen Sie das Gerät nicht mit nassen Händen.
• Stellen Sie das Gerät nicht in der Nähe einer Wärmequelle auf. Benutzen Sie das
Gerät nicht auf oder in der Nähe heißer Ober ächen.
• Betreiben Sie das Gerät nicht in einer Umgebung, in der Benzin, Farbe oder andere
brennbare Stoffe gelagert werden.
• Ziehen Sie vor der Reinigung den Stecker aus der Steckdose und lassen Sie das
Gerät vollständig abkühlen.
• Benutzen Sie zur Reinigung keine Scheuermittel.
• Verstauen Sie das Gerät nicht, solange es noch warm ist.
• Verwenden Sie nur Zubehör, das vom Hersteller ausdrücklich dafür zugelassen ist.
• Benutzen Sie das Gerät außerhalb der Reichweite von Kindern. Kinder dürfen das
Gerät nur unter Aufsicht bedienen.
• Das Schutzgitter gewährt kleinen Kindern und gebrechlichen Personen keinen
vollständigen Schutz.
• Dieses Gerät kann von Kindern ab 8 Jahren sowie von Personen mit verringerten
physischen, sensorischen und geistigen Fähigkeiten oder Mangel an Erfahrung
und/oder Wissen benutzt werden, wenn sie beaufsichtigt werden oder im sicheren
Gebrauch des Gerätes unterwiesen wurden und die daraus resultierenden
Gefahren verstanden haben.
• Reinigung und Wartung durch den Benutzer dürfen nicht von Kindern
vorgenommen werden, es sei denn, sie sind 8 Jahre oder älter und werden
beaufsichtigt.
• Kinder dürfen nicht mit dem Gerät spielen.
VORSICHT
Verbrennungsgefahr! Einige Geräteteile können sehr heiß werden.
Achten Sie darauf, dass Sie oder Ihre Kinder sich nicht daran
verbrennen.
7
DE
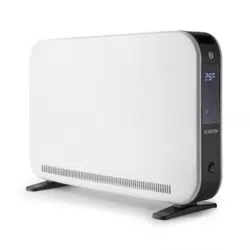
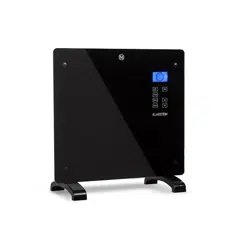
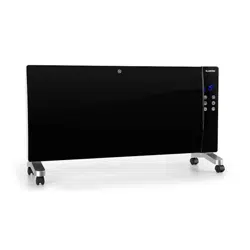
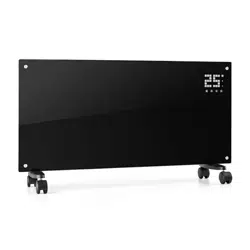
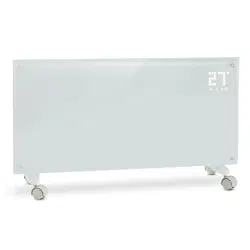
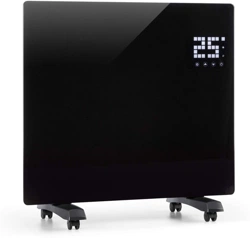
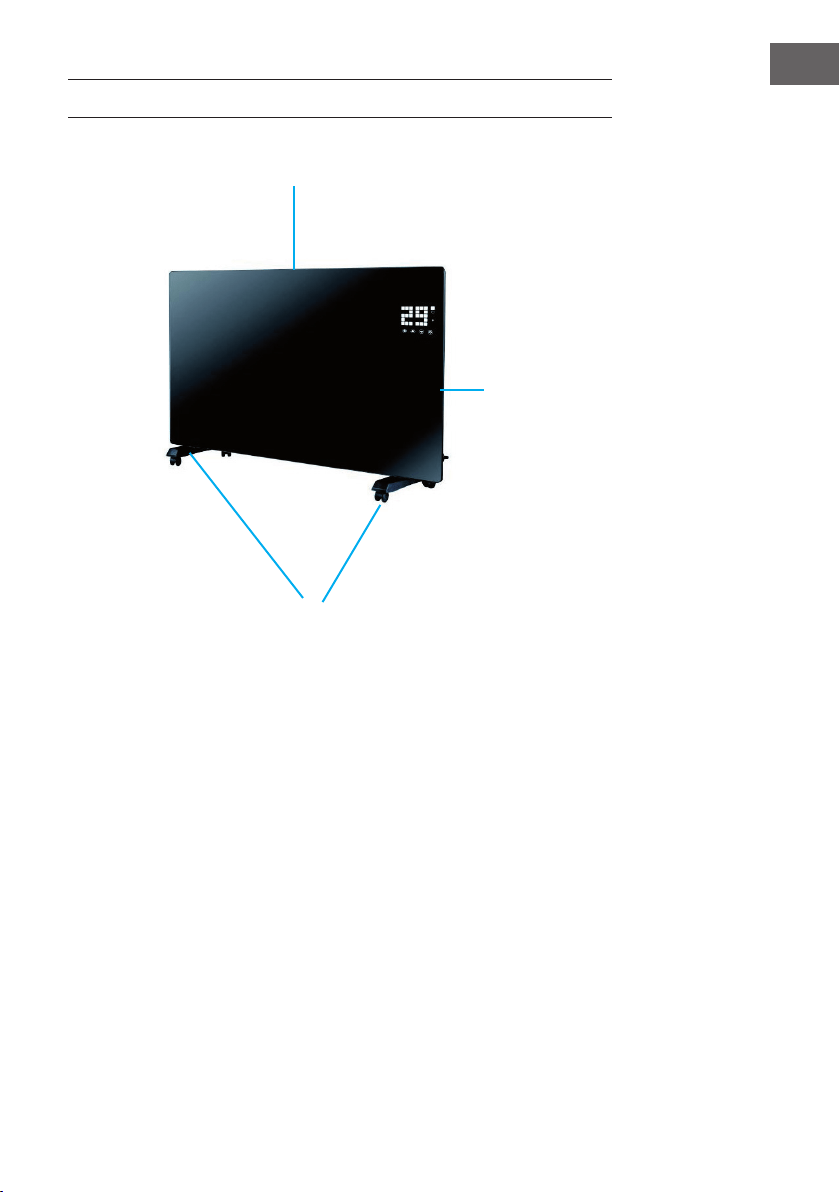
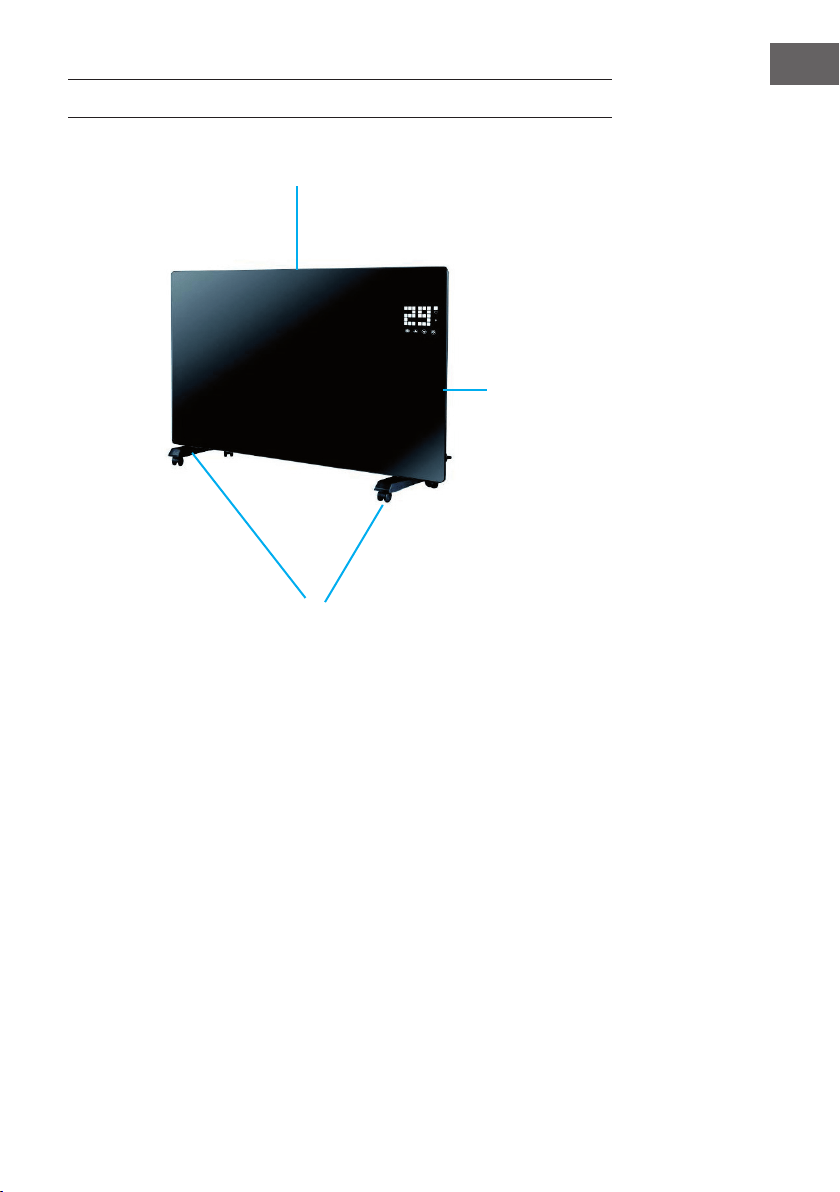
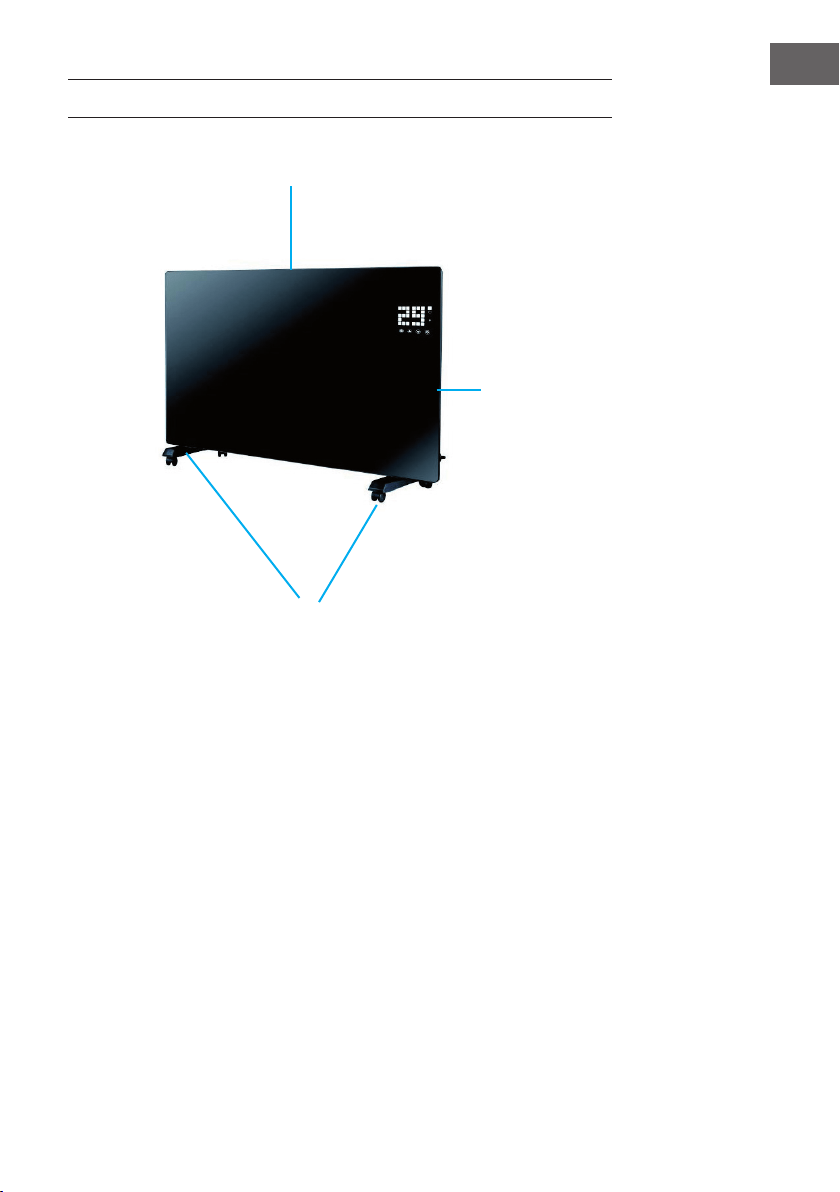
GERÄTEÜBERSICHT
Luftauslass
Schalter
Füße mit Rollen

8
DE
MONTAGE
Freistehende Montage mit Rollen
Rollen montieren Rollen entfernen
Wenn die Montage abgeschlossen ist,
hören Sie einen Klick
Knopf drücken, um die Rollen
abzunehmen
Wandmontage Von der Wand abnehmen
Den Heizer 5 mm hochziehen
und dann 10mm nach links
bewegen, um den Heizer
abzunehmen
Schieben
Schieben
Knopfdrücken

9
DE
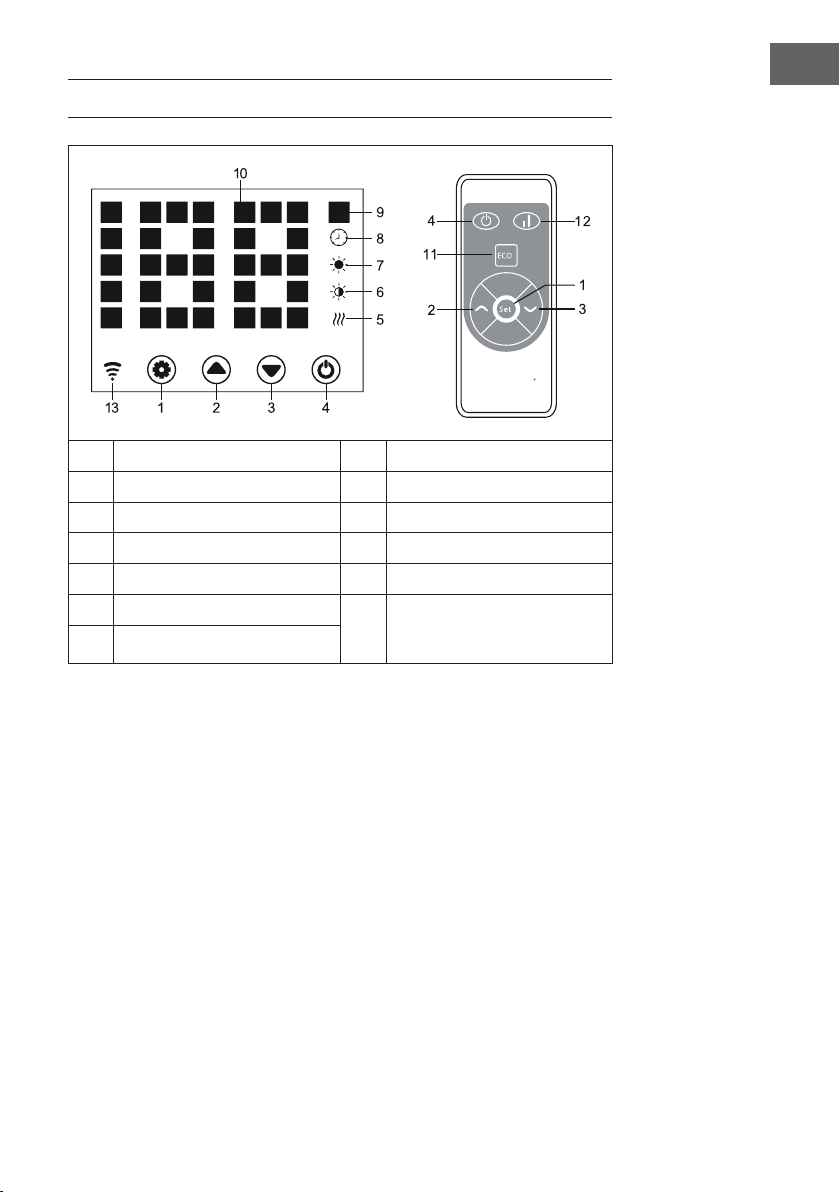
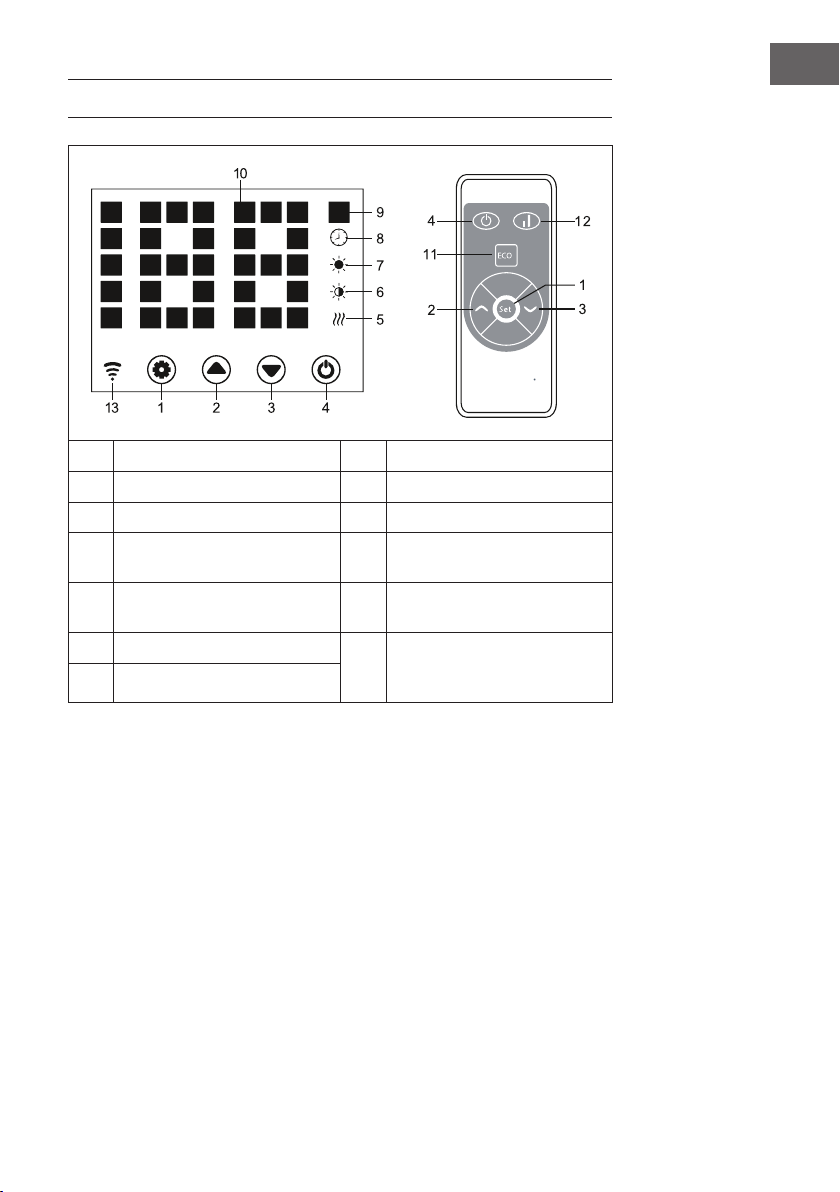
BEDIENFELD UND FERNBEDIENUNG
1
Taste: Einstellungen
8
Anzeige: Timer
2
Taste: Wert hoch
9
Anzeige: Temperatur
3
Taste: Wert runter
10
LED-Ziffernanzeige
4
Taste: Ein/Aus
11
Taste: LED-Anzeige deaktivieren
5
Betriebsleuchte: Heizelement
12
Taste: Heizstufe hoch/runter
6
Anzeige: niedrige Heizstufe
13
Anzeige: WiFi
Verbunden: an
Verbindung fehlgeschlagen: aus
7
Anzeige: hohe Heizstufe

10
DE
BEDIENUNG
Inbetriebnahme
1. Nehmen Sie das Gerät vorsichtig aus dem Karton. Heben Sie den Karton für die
Lagerung außerhalb der Saison auf.
2. Achten Sie darauf, dass die Ein/Aus-Taste ausgeschaltet ist, bevor Sie das Gerät
anschließen.
3. Die Heizung muss gemäß der Montageanleitung vollständig zusammengebaut und
montiert sein.
4. Es ist besser, denselben elektrischen Anschluss nicht mit anderen leistungshungrigen
Geräten zu nutzen, um eine Überlastung des Stromkreislaufs zu vermeiden.
Einschalten
Schließen Sie das Gerät an die Stromversorgung an. Die Betriebslampe geht nach
einem kurzen Brummen an. Das Gerät mit der Ein/Aus-Taste (4) einschalten. Nun
leuchtet in der Anzeige die aktuelle Raumtemperatur auf. Die werkseitig voreingestellte
Temperatur ist 35 °C.
Einstellen der Temperatur
Drücken Sie Einstellungstaste (1). Die Zahlen „10“ und „9“ blinken. Dann die Pfeiltasten
(2) und (3) drücken, um die Temperatur um 1 °C zu erhöhen oder zu verringern.
Einstellung des Timers
Einschaltzeit: Im ausgeschalteten Zustand zweimal die Taste (1) drücken, um den Timer
auf 1-24 Stunden einzustellen. Drücken Sie die Tasten (2) und (3), um die Temperatur
einzustellen. Nach der Einstellung wird die Umgebungstemperatur angezeigt. Die
Anzeige (8) leuchtet bei laufendem Timer auf und geht aus, wenn der Timer abgelaufen
ist.
Ausschaltzeit: Im Heizbetrieb die Taste (1) drücken, um den Timer auf 1-24 Stunden
einzustellen. Nach der Einstellung wird die Umgebungstemperatur angezeigt. Die
Anzeige (8) leuchtet bei laufendem Timer auf und geht aus, wenn der Timer abgelaufen
ist. Dann stellt das Gerät den Heizbetrieb ein.
Einstellung der Heizstufe
a. Im Betriebsmodus schaltet die Taste (2) zwischen hoher Heizstufe (HIGH) und
Heizstopp (OFF) um. Die Anzeige (7) leuchtet bei hoher Heizstufe auf und geht bei
ausgeschaltetem Heizen aus.
b. Im Betriebsmodus schaltet die Taste (3) zwischen niedriger Heizstufe (LOW) und
Heizstopp (OFF) um. Die Anzeige (6) leuchtet bei niedriger Heizstufe und geht bei
ausgeschaltem Heizen aus.

11
DE
c. Im Betriebsmodus schaltet die Taste (12) zwischen niedriger Heizstufe (LOW),
hoher Heizstufe (HIGH) und Heizstopp (OFF) um. Bei hoher Heizstufe leuchtet die
Anzeige (7), bei niedriger Heizstufe leuchtet die Anzeige (6).
Kindersicherung
Drücken Sie im Heizbetrieb die Tasten (2) und (3) gleichzeitig. Die Kindersicherung
ist nun aktiv und das System ist gesperrt. Es können keine Einstellungen vorgenommen
werden. Nach 5 Sekunden erscheint in der Anzeige die Umgebungstemperatur.
Zum Entsperren die Tasten (2) und (3) für 3 Sekunden gedrückt halten.
Aktivierung der Anzeige
Wenn das Gerät in Betrieb ist, wird die Anzeige ausgeschaltet. Mit einem Druck auf das
Bedienfeld geht die Anzeige an.
ECO-Funktion (Nachtmodus)
Halten Sie Im Heizbetrieb die Tasten (1) und (2) für 3 Sekunden gedrückt (bzw. die
Taste ECO auf der Fernbedienung), damit die ECO-Funktion eingeschaltet wird. In
diesem Betriebsmodus werden nur die Anzeigen (5), (6), (7) oder (8) angezeigt, je
nach vorher gewählter Einstellung.
Anzeigewechsel der Temperatur in Grad Celsius oder Fahrenheit
Halten Sie die Taste für die Einstellungen (1) und die Pfeiltaste „Hoch“ (2) 10 Sekunden
lang gleichzeitig gedrückt.
Funktion zur Erkennung geöffneter Fenster
Wenn die Temperatur innerhalb von 2 Minuten um 3 °C oder mehr sinkt, wird die
Funktion zur Erkennung geöffneter Fenster ausgelöst. Das Gerät hört auf zu heizen und
die Anzeige (9) blinkt. Drücken Sie die Taste (4), um das Gerät auszuschalten. Wenn
Sie das Gerät nun wieder einschalten, ist die Funktion zur Erkennung geöffneter Fenster
deaktiviert.
WLAN zurücksetzen
Halten Sie die Taste (1) im Heizbetrieb 3 Sekunden lang gedrückt. Die WLAN-
Einstellungen werden zurückgesetzt und die entsprechende Anzeige blinkt schnell
(zweimal pro Sekunde).
Ausschalten
Halten Sie die Ein/Aus-Taste (4) gedrückt. Die Betriebslampe leuchtet auf.
12
DE
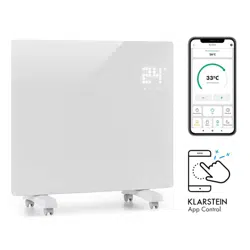
GERÄTESTEUERUNG PER SMARTPHONE
Wenn Sie Ihr Klarstein-Gerät in Ihr heimisches WLAN einbinden, können Sie es ganz
bequem über die dazugehörige Klarstein-App bedienen. Die App ermöglicht es Ihnen,
nicht nur das Gerät über Ihr Smartphone fernzusteuern, sondern bietet Ihnen zudem
Zugang zu Rezepten und weiterführenden Informationen.
Gehen Sie folgendermaßen vor, um Ihr Smartphone mit Ihrem Klarstein-Gerät zu
verbinden:
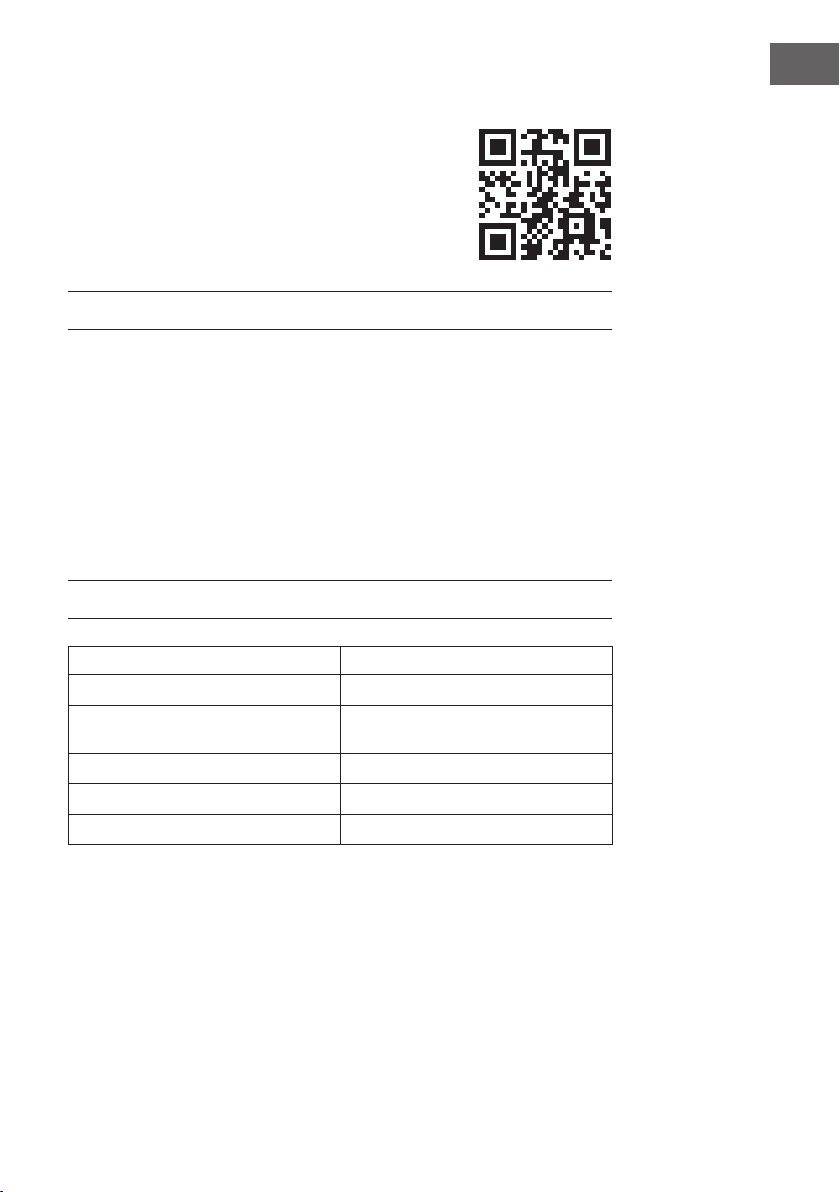
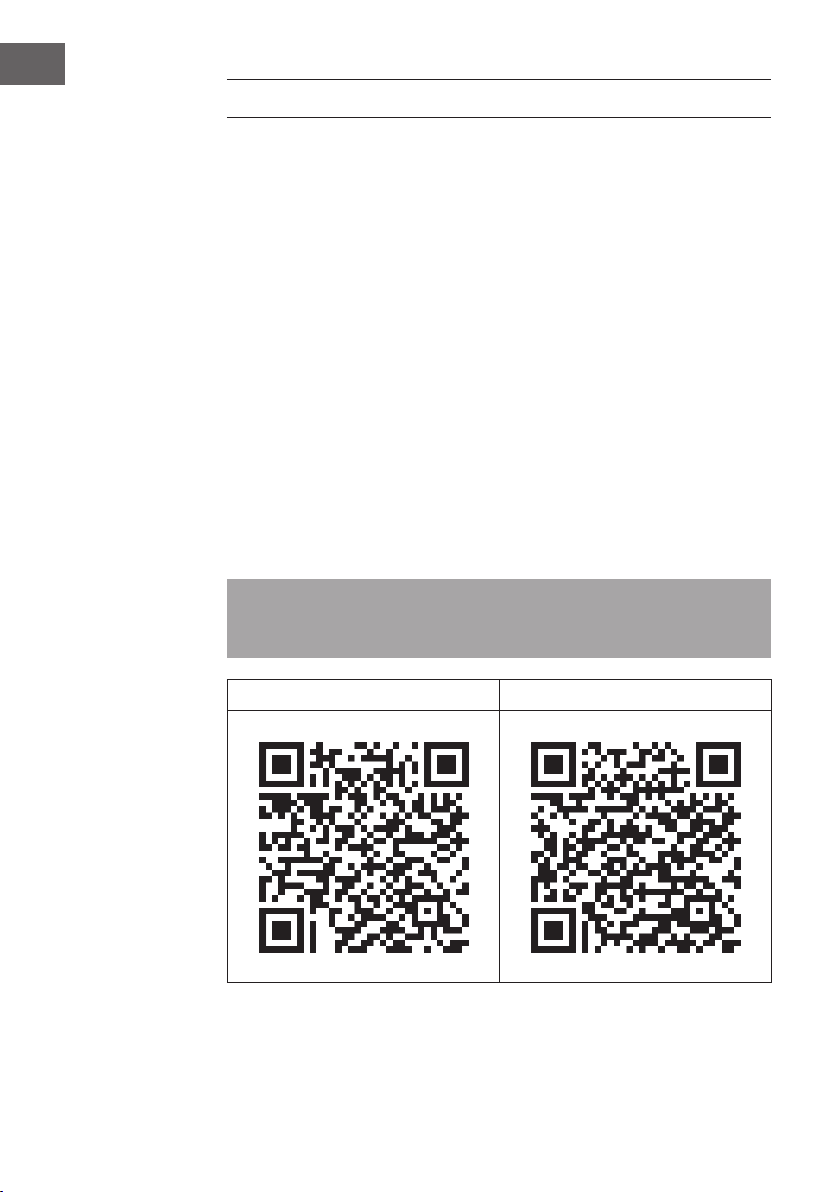
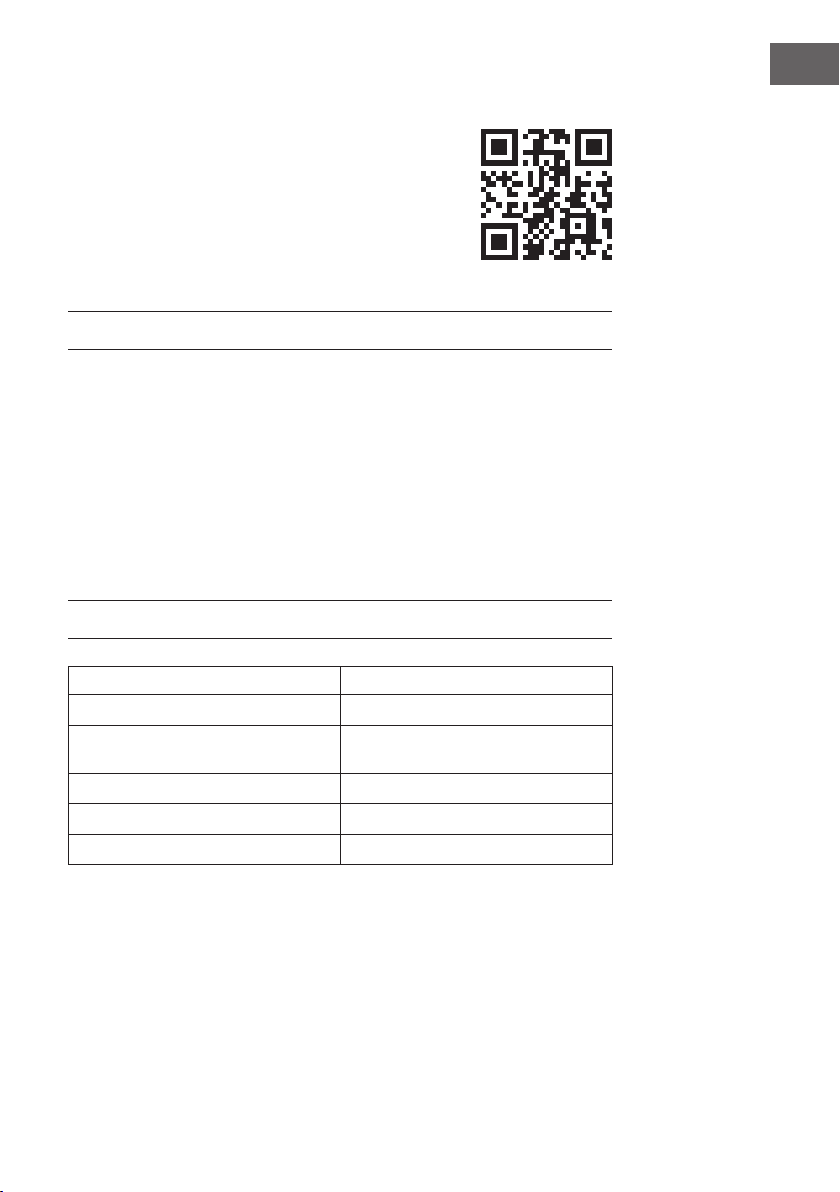
1 Laden Sie zuerst die Klarstein-App herunter, indem Sie mit Ihrem Smartphone den
QR-Code scannen (siehe unten) oder laden Sie diese direkt aus dem App Store
oder bei Google Play herunter.
2 Versichern Sie sich, dass Ihr Smartphone mit demselben WLAN-Netzwerk
verbunden ist, mit dem Ihr Klarstein-Gerät verbunden werden soll.
3 Öffnen Sie die Klarstein-App.
4 Melden Sie sich mit Ihrem Konto an. Wenn Sie noch keinen Account haben,
registrieren Sie sich in der Klarstein-App.
5 Folgen Sie den Anweisungen der App.
App-Download
Verwenden Sie die Scan-Funktion Ihres Handys, um den QR-Code zu scannen, und
speichern Sie die App auf Ihrem Smartphone.
Hinweis: Weitere Hinweise zur Bedienung der App und Hilfestellungen zur
Herstellung der Verbindung mit Ihrem Gerät liefert Ihnen die App, sobald Sie sie das
erste Mal öffnen.
iOS Android
13
DE
Fehlerbehebung bei Verbindungsproblemen
Wenn Ihr Klarstein-Gerät im WLAN nicht gefunden werden kann, überprüfen Sie
Folgendes:
• Ist das Gerät eingesteckt?
• Ist die WLAN-Funktion des Smartphones aktiviert?
• Ist die WLAN-Funktion des Klarstein-Gerätes aktiviert? (Befolgen Sie die
Anweisungen in der App.)
• Ist das WLAN-Passwort korrekt eingegeben worden?
• Benden sich Router, Klarstein-Gerät und Smartphone während des
Kopplungsversuches in unmittelbarer Nähe? (Idealerweise nicht mehr als 5 m
voneinander entfernt.)
• Falls Sie in den Einstellungen ihres WLAN-Routers das 2,4-GHz-Band deaktiviert
haben, aktivieren Sie dieses in Ihren Routereinstellungen.
Hinweis: Für weitere Hilfestellungen folgen Sie den Anweisungen der App beim
Verbindungsaufbau.
REINIGUNG UND PFLEGE
Hinweis: Schalten Sie das Gerät aus und ziehen Sie den Stecker aus der Steckdose.
Warten Sie, bis das Gerät vollständig abgekühlt ist, bevor Sie es reinigen.
• Benutzen Sie zur Reinigung der Lüftungsschlitze und Gitter einen Staubsauger.
• Entfernen Sie Staub auf den Außenächen mit einem feuchten (nicht nassen) Tuch.
• Verwenden Sie keine scharfen Reinigungsmittel oder Scheuermittel.
• Besprühen Sie das Gerät nicht mit Flüssigkeiten und tauchen Sie es nicht in Wasser
oder andere Flüssigkeiten.
• Öffnen Sie niemals das Gehäuse der Heizung.

14
DE
HINWEISE ZUR ENTSORGUNG
Wenn es in Ihrem Land eine gesetzliche Regelung zur
Entsorgung von elektrischen und elektronischen Geräten
gibt, weist dieses Symbol auf dem Produkt oder auf der
Verpackung darauf hin, dass dieses Produkt nicht im
Hausmüll entsorgt werden darf. Stattdessen muss es zu
einer Sammelstelle für das Recycling von elektrischen
und elektronischen Geräten gebracht werden. Durch
regelkonforme Entsorgung schützen Sie die Umwelt und die
Gesundheit Ihrer Mitmenschen vor negativen Konsequenzen.
Informationen zum Recycling und zur Entsorgung dieses
Produkts, erhalten Sie von Ihrer örtlichen Verwaltung oder
Ihrem Hausmüllentsorgungsdienst.
Dieses Produkt enthält Batterien. Wenn es in Ihrem Land
eine gesetzliche Regelung zur Entsorgung von Batterien
gibt, dürfen die Batterien nicht im Hausmüll entsorgt werden.
Informieren Sie sich über die örtlichen Bestimmungen zur
Entsorgung von Batterien. Durch regelkonforme Entsorgung
schützen Sie die Umwelt und die Gesundheit Ihrer
Mitmenschen vor negativen Konsequenzen.
KONFORMITÄTSERKLÄRUNG
Hersteller:
Chal-Tec GmbH, Wallstraße 16, 10179 Berlin, Deutschland.
Importeur für Großbritannien:
Chal-Tec UK limited
Unit 6 Riverside Business Centre
Brighton Road
Shoreham-by-Sea
BN43 6RE
United Kingdom
Die vollständige Konformitätserklärung des Herstellers nden
Sie unter folgendem Link:
use.berlin/10035235

15
EN
Dear Customer,
Congratulations on purchasing this device. Please read the
following instructions carefully and follow them to prevent
possible damages. We assume no liability for damage caused
by disregard of the instructions and improper use. Scan the QR
code to get access to the latest user manual and more product
information.
CONTENTS
Product Data Sheet16
Safety Instructions17
Product Overview19
Installation20
Control Panel and Remote Control21
Operation22
Device Control by Smartphone24
Cleaning and Care25
Disposal Considerations26
Declaration of Conformity26
TECHNICAL DATA
Item number 10035235,10035236
Power supply 220-240 V ~ 50/60 Hz
Power consumption
500 W (low heating)
1000 W (high heating)
WiFi standard
802.11 b/g/n
WiFi frequency
2,4 GHz
WiFi radio-frequency power (max.)
20 dBm
16
EN
PRODUCT DATA SHEET
Model identier(s): 10035235,10035236
Item Symbol Value Unit Item Unit
Heat output Type of heat input, for electric storage local space
heaters only
Nominal heat output P
nom
1.0 kW manual heat charge control, with integrated
thermostat
No
Minimum heat output P
min
0.5 kW manual heat charge control with room and/or
outdoor temperature feedback
No
Maximum continuous heat
output
P
max,c
1.0 kW electronic heat charge control with room and/
or outdoor temperature feedback
No
Auxiliary electricity consumption
fan assisted heat output
No
At nominal heat output el
max
0.956 kW
Type of heat output/room temperature control (select
one)
At minimum heat output el
min
0.486 kW single stage heat output and no room
temperature control
No
In standby mode el
SB
0.37 W Two or more manual stages, no room
temperature control
No
with mechanic thermostat room temperature
control
No
with electronic room temperature control No
electronic room temperature control plus day
timer
Yes
electronic room temperature control plus week
timer
No
Other control options (multiple selections possible)
room temperature control, with presence
detection
No
room temperature control, with open window
detection
Yes
with distance control option No
with adaptive start control No
with working time limitation No
with black bulb sensor No
Contact details Chal-Tec GmbH, Wallstraße 16, 10179, Berlin, Germany

17
EN
SAFETY INSTRUCTIONS
• Before use, check the voltage specied on the rating plate and only connect the
appliance to sockets that match the voltage of the appliance.
• If the power cord is damaged, have it replaced by a trained professional.
• Do not place the heater directly under a power socket.
• Keep a distance of one metre from any inammable materials such as furniture,
curtains or similar.
• The purpose of the housing covers of this appliance is to prevent direct access to the
heating elements and they must be in place when the appliance is switched on.
• Do not cover the heater to prevent it from overheating.
• Do not obstruct the air ow at the air inlet or outlet in any way, as the appliance
may overheat and become a re hazard. Do not cover the air inlets or outlets.
• The most common reason for overheating is the build-up of dust and lint on
the appliance. Ensure that these deposits are removed regularly. Switch off the
appliance, disconnect the power cord and vacuum the air inlets and outlets with a
vacuum cleaner.
• Do not use the appliance to dry laundry.
• Do not connect the appliance to the power supply until it is fully assembled and
installed.
• The appliance must only be operated in an upright position.
• This appliance is not suitable for use on long hair carpets or okati rugs.
• The use of an extension cord is not recommended with this appliance.
• Before moving the appliance, switch it off and allow it to cool down.
• Unplug the power cord from the wall socket when the appliance is not in use. Never
pull on the power cord when doing this, always grasp the plug. Always switch off
the appliance before disconnecting the power cord from the power socket.
• Do not insert any foreign objects or metal objects inside the appliance or into the
ventilation slots as this may result in electric shock, re or damage to the appliance.
• The appliance is intended for use in the home and similar environments only. It is not
intended for commercial use.
• Do not use the appliance if the power cord or plug is damaged, malfunctions, has
been dropped or damaged in any way.
• Repairs may only be carried out by trained specialists.
• Incorrectly or independently performed repairs pose a risk of injury.
• Do not lay the power cord under carpets, rugs or oor coverings.
• Lay out the power cord clear of walking areas so that no one trips over it.
18
EN
• Make sure that the power cord does not run over sharp edges or come into contact
with hot surfaces.
• Do not twist, bend or wrap the power cord around the appliance as this will cause
the cord insulation to weaken and break. Always make sure that the entire power
cord is unwound from the cord winder.
• Do not use the appliance with an external timer, a remote-controlled socket or any
other device that automatically switches the heating on and off.
• Do not immerse the appliance or the power cord in water or other liquids and do
not allow moisture to enter the interior of the appliance.
• Do not reach for an appliance that is immersed in water. Switch off the electricity in
the household and immediately disconnect the power cord from the wall socket.
• This appliance has IP24 protection against splashing water and is therefore suitable
for use in bathrooms and damp rooms. However, do not use the appliance in the
immediate vicinity of a bathtub, shower, swimming pool or other liquids and ensure
that no live parts can come into contact with water.
• Do not use the device outdoors. Do not place the device on a wet surface.
• Do not use the device with wet hands.
• Do not place the device near a heat source. Do not use the appliance on or near
hot surfaces
• Do not operate the appliance in an environment where petrol, paint or other
ammable substances are stored.
• Before cleaning, unplug the appliance from the wall outlet and allow it to cool
completely.
• Do not use abrasive cleaners for cleaning.
• Do not store the appliance while it is still warm.
• Only use accessories that are expressly approved for this purpose by the
manufacturer.
• Use the appliance out of the reach of children. Children may only operate the
device under supervision.
• The protective grille does not provide complete protection for small children and
fragile individuals.
• This device may only be used by children from the age of 8 and up or by persons
with reduced physical, sensory and mental capabilities or a lack of experience and
/ or knowledge if they are supervised or have been instructed in the safe use of the
device and have understood the resulting dangers.
• Cleaning and user maintenance should not be done by children unless they are 8
years of age or older and are supervised.
• Children must not play with the device.
CAUTION
Risk of burns! Some parts of the appliance can become very hot. Be
careful not to burn yourself or your children with it.
19
EN
PRODUCT OVERVIEW
Air outlet
Switch
Castor wheel stand

20
EN
INSTALLATION
Free-standing assembly with rollers
Assemble rollers Removing rollers
When assembly is complete you will hear
a clicking sound
Press the button to remove the rolls
Wall installation Detaching from the wall
Pull up the heater 5 mm and
then move 10mm to the left
to detach the heater
Push
Push
Pressbutton
21
EN
CONTROL PANEL AND REMOTE CONTROL
1
Button: Settings
8
Display: Timer
2
Button: Value high
9
Display: Temperature
3
Button: Value down
10
LED digital display
4
Button: On/Off
11
Button: Deactivate LED display
5
Operating light: Heating element
12
Button: Heating level up/down
6
Display: low heating level
13
Display: WiFi
Connected: on
Connection failed: off
7
Display: high heating level

22
EN
OPERATION
Commissioning
1. Carefully remove the appliance from the box. Save the carton for storage during
the off-season.
2. Make sure that the on/off button is switched off before connecting the appliance.
3. The heater must be fully assembled and mounted according to the assembly
instructions.
4. It is better not to use the same electrical connection with other power-hungry
appliances to avoid overloading the circuit.
Switch on
Connect the appliance to a power supply. The operating light turns on after a short
humming sound. Switch on the appliance with the on/off button (4). The current room
temperature now lights up in the display. The factory preset temperature is 35 °C.
Setting the temperature
Press the settings button (1). The numbers "10" and "9" will start ashing. Then press the
arrow keys (2) and (3) to increase or decrease the temperature by 1 °C.
Setting the timer
Switch-on time: When the appliance is switched off, press the button (1) twice to set the
timer to 1-24 hours. Press buttons (2) and (3) to set the temperature. After the settings
have been made, the ambient temperature is displayed. The indicator (8) lights up when
the timer is running and switches off when the timer has expired.
Switch-off time: In heating mode, press the button (1) to set the timer to 1-24 hours. After
the settings have been made, the ambient temperature is displayed. The indicator (8)
lights up when the timer is running and switches off when the timer has expired. Then the
appliance stops the heating operation.
Setting the heating level
a. In operating mode, the button (2) switches between a high heating level (HIGH)
and a heating stop (OFF). The indicator (7) lights up when the heating level is high
and switches off when the heating is OFF.
b. In operating mode, button (3) switches between a low heating level (LOW) and a
heating stop (OFF). The indicator (6) lights up at a low heating level and switches
off when heating is switched off.
c. In operating mode, the button (12) switches between a low heating level (LOW),
a high heating level (HIGH) and a heating stop (OFF). At a high heating level the
indicator (7) lights up, at a low heating level the indicator (6) lights up.

23
EN
Child safety lock
In heating mode, press the buttons (2) and (3) simultaneously. The child lock is now
active and the system is locked. No settings can be made. After 5 seconds the display
will show the ambient temperature.
To unlock, keep buttons (2) and (3) pressed for 3 seconds.
Activating the display
When the appliance is in operation, the display is switched off. Pressing the control
panel activates the display.
ECO function (night mode)
In heating mode, press and hold buttons (1) and (2) for 3 seconds (or the ECO button
on the remote control) to switch on the ECO function. In this operating mode, only the
indicators (5), (6), (7) or (8) are displayed, depending on the previously selected
setting.
Display temperature changes in Celsius or Fahrenheit.
Press and hold the settings button (1) and the up arrow button (2) simultaneously for 10
seconds.
Open window detection function
If the temperature drops by 3 °C or more within 2 minutes, the open window detection
function is triggered. The appliance will stop heating and the indicator (9) will ash.
Press the button (4) to switch off the appliance. If you then switch on the appliance
again, the open window detection function is deactivated.
Resetting the Wi-Fi
Press and hold the button (1) for 3 seconds in heating mode The Wi-Fi settings are reset
and the corresponding indicator ashes quickly (twice per second).
Switch off
Press and hold the On/Off button (4). The operating lamp lights up.
24
EN
DEVICE CONTROL BY SMARTPHONE
If you integrate the device into your home WiFi, you can conveniently operate it via the
associated Klarstein app. The app not only allows you to remotely control the device via
your smartphone, but also gives you access to recipes and additional information.
Follow these steps to connect your smartphone to your Klarstein device:
1 Download the Klarstein app rst by scanning the QR code with your smartphone
(see below), or download it directly from App Store or Google Play.
2 Make sure your smartphone is connected to the same WiFi network that your
Klarstein device is to be connected to.
3 Open the Klarstein app.
4 Sign in to your account. If you do not have an account, sign up in the Klarstein app.
5 Follow the instructions from the app.
App Download
Use the scan function of your smartphone to scan the QR code and save the app on
your smartphone.
Note: The app provides further information on how to use the app and help on how
to connect to your device as soon as you open it for the rst time.
iOS Android

25
EN
Troubleshooting connection problems
If your Klarstein device cannot be found in the WLAN, check the following:
• Is the device plugged in?
• Is the WiFi feature of my phone enabled?
• Is the WiFi function of the Klarstein device activated? (Follow the instructions in the
app)
• Has the WLAN password been entered correctly?
• Are the router, Klarstein device and smartphone in the immediate vicinity during the
connection attempt? (Ideally no more than 5 m apart)
• If you have deactivated the 2.4 GHz band in the settings of your wireless router,
activate it in your router settings.
Note: For further help, follow the instructions in the app when setting up the
connection.
CLEANING AND CARE
Note: Switch off the appliance and remove the plug from the socket. Wait until the
appliance has cooled down completely before cleaning it.
• Use a vacuum cleaner to clean the ventilation slots and grilles.
• Remove dust from the exterior surfaces with a damp (not wet) cloth.
• Do not use harsh cleaning agents or abrasive cleaners.
• Do not spray or immerse the device in water or any other liquid.
• Never open the heater housing.

26
EN
DISPOSAL CONSIDERATIONS
If there is a legal regulation for the disposal of electrical
and electronic devices in your country, this symbol on the
product or on the packaging indicates that this product must
not be disposed of with household waste. Instead, it must be
taken to a collection point for the recycling of electrical and
electronic equipment. By disposing of it in accordance with
the rules, you are protecting the environment and the health of
your fellow human beings from negative consequences. For
information about the recycling and disposal of this product,
please contact your local authority or your household waste
disposal service.
This product contains batteries. If there is a legal regulation
for the disposal of batteries in your country, the batteries must
not be disposed of with household waste. Find out about local
regulations for disposing of batteries. By disposing of them in
accordance with the rules, you are protecting the environment
and the health of your fellow human beings from negative
consequences.
DECLARATION OF CONFORMITY
Manufacturer:
Chal-Tec GmbH, Wallstrasse 16, 10179 Berlin, Germany.
Importer for Great Britain:
Chal-Tec UK limited
Unit 6 Riverside Business Centre
Brighton Road
Shoreham-by-Sea
BN43 6RE
United Kingdom
The complete declaration of conformity of the manufacturer
can be found at the following link:
use.berlin/10035235
27
ES
Estimado cliente:
Le felicitamos por la adquisición de este producto. Lea
atentamente las siguientes instrucciones y sígalas para evitar
posibles daños. No asumimos ninguna responsabilidad por los
daños causados por el incumplimiento de las instrucciones y el
uso inadecuado. Escanee el siguiente código QR para obtener
acceso a la última guía del usuario y más información sobre el
producto.
ÍNDICE
Hoja de datos del producto28
Indicaciones de seguridad29
Vista general del aparato31
Montaje32
Panel de control y mando a distancia33
Puesta en marcha34
Control del dispositivo por smartphone36
Limpieza y cuidado37
Indicaciones sobre la retirada del aparato38
Declaración de conformidad38
DATOS TÉCNICOS
Número de artículo 10035235,10035236
Suministro eléctrico 220-240 V ~ 50/60 Hz
Consumo
500 W (potencia baja)
1000 W (potencia alta)
WiFi estándar
802.11 b/g/n
WiFi frecuencia
2,4 GHz
WiFi potencia de radiofrecuencia (max.)
20 dBm
28
ES
HOJA DE DATOS DEL PRODUCTO
Denominación del modelo 10035235,10035236
Dato Símbolo Valor Unidad Dato Unidad
Potencia térmica Solo con disposítivos de acumulación de calor
eléctricos para abastecimiento local: Tipo de
regulación del abastecimiento de calor
Potencia térmica nominal P
nom
1,0 kW Regulación manual del abastecimiento de
calor con termostato integrado:
no
Potencia térmica mínima P
min
0,5 kW Regulación manual de abastecimiento de
calor con aviso de temperatura ambiente y/o
exterior
no
Potencia térmica continua
máxima
P
max,c
1,0 kW Regulación electrónica de abastecimiento de
calor con aviso de temperatura ambiente y/o
exterior
no
Consumo de corriente auxiliar
Disípación de calor con ventilación auxiliar no
Con potencia térmica
nominal
el
max
0,956 kW
Tipo de potencia térmica/control de temperatura
ambiente
Con potencia térmica
mínima
el
min
0,486 kW Potencia térmica de un solo nivel, sín control
de temperatura ambiente
no
En modo de espera el
SB
0,37 W Dos o más niveles regulables manualmente,
sín control de temperatura ambiente
no
Control de temperatura ambiente con
termostato mecánico
no
Con control electrónico de temperatura
ambiente
no
Con control de temperatura ambiente y
regulación del momento del día
sí
Con control de temperatura ambiente y
regulación del día de la semana
no
Otras opciones de regulación
Control de temperatura ambiente con
detección de presencia
no
Control de temperatura ambiente con
detección de ventanas abiertas
sí
Con opción de control remoto no
Con regulación adaptable del comienzo de la
calefacción
no
Con limitación de tiempo de funcionamiento no
Con sensor de bulbo negro no
Información de contacto Chal-Tec GmbH, Wallstraße 16, 10179, Berlín (Alemania)

29
ES
INDICACIONES DE SEGURIDAD
• Antes de su utilización, compruebe la tensión indicada en la placa técnica del
aparato y conéctelo solamente a tomas de corriente con la misma tensión.
• Si el cable de alimentación está dañado, contacte con un servicio técnico
cualicado para su sustitución.
• No coloque el calefactor justo bajo la toma de corriente.
• Mantenga un metro de distancia con materiales inamables, como muebles,
cortinas o similares.
• Las cubiertas de la carcasa de este aparato tienen la nalidad de impedir el
acceso directo a los elementos calefactores y deben estar colocadas cuando el
aparato se pone en marcha.
• No tape el calefactor para evitar un sobrecalentamiento.
• No obstaculice la corriente de aire en la entrada o salida de aire, pues podría
sobrecalentar el aparato y ocasionar un peligro de incendio. No tape las entradas
y salidas de aire.
• El motivo más frecuente de un sobrecalentamiento es la acumulación de polvo y
pelusas en el aparato. Asegúrese de que los sedimentos se retiren con frecuencia.
Apague el aparato, desconecte el enchufe y aspire las entradas y salidas de aire
con una aspiradora.
• No utilice el aparato para secar prendas de ropa.
• No conecte el aparato al suministro eléctrico antes de que esté completamente
ensamblado y montado.
• El aparato solamente debe ponerse en funcionamiento en posición vertical.
• Este aparato no está diseñado para utilizar sobre alfombras de pelo largo o okati.
• No se recomienda utilizar un cable alargador con este aparato.
• Antes de desplazar el aparato, apáguelo y deje que se enfríe.
• Desenchufe el aparato de la toma de corriente cuando ya no lo utilice. No tire
nunca del cable de alimentación, tire siempre directamente del enchufe. Apague el
aparato completamente antes de desconectar el enchufe de la toma de corriente.
• No introduzca objetos extraños ni objetos de metal en el interior del aparato ni en
las ranuras de ventilación, pues puede causar una descarga eléctrica, un incendio
o una avería en el aparato.
• Este aparato no está indicado para uso comercial, sino para uso doméstico o
entornos similares.
• No utilice el aparato si el cable de alimentación o el enchufe tienen daños, si
presenta fallos en el funcionamiento, si se ha dejado caer o si ha sufrido cualquier
tipo de daño.
• Las reparaciones deberán ser realizadas solamente por personal formado.
• Las reparaciones erróneas o por cuenta propia suponen un riesgo de lesiones.
• No pase el cable de alimentación por debajo de alfombras o felpudos.
• Coloque el cable fuera de zonas de paso para evitar que nadie tropiece con él.
30
ES
• Asegúrese de que el cable de alimentación no pase por cantos a lados ni entre en
contacto con super cies calientes.
• No retuerza ni doble el cable de alimentación ni lo enrolle alrededor del aparato,
ya que esto debilita el aislamiento del cable y podría romperse. Asegúrese siempre
de que todo el cable de alimentación esté desplegado.
• No utilice el aparato con un temporizador externo, una toma de corriente con
control remoto u otro aparato que encienda y apague automáticamente la
calefacción.
• No sumerja el aparato ni el cable de alimentación en agua u otros líquidos ni deje
que ningún líquido penetre en su interior.
• No toque el aparato si se ha caído al agua. Desconecte el suministro eléctrico de
su vivienda y desconecte el enchufe de la toma de corriente inmediatamente.
• Este aparato cuenta con una protección IP24 contra salpicaduras y, por tanto,
puede emplearse en cuartos de baño y salas con humedad. No obstante, no utilice
el aparato cerca de una bañera, una ducha, una piscina o cualquier líquido y
asegúrese de que ninguna pieza que conduzca electricidad entre en contacto con
el agua.
• No utilice el aparato al aire libre. No coloque el aparato sobre una super cie
húmeda.
• No utilice el aparato con las manos mojadas.
• No coloque el aparato cerca de una fuente de calor. No utilice el aparato encima
o cerca de super cies calientes.
• No ponga en marcha el aparato en un entorno donde se almacene gasolina,
pintura u otras sustancias in amables.
• Desenchufe el aparato y deje que se enfríe totalmente antes de limpiarlo.
• No utilice productos abrasivos para la limpieza.
• No almacene el aparato mientras todavía esté caliente.
• Utilice solamente accesorios que hayan sido expresamente autorizados por el
fabricante.
• Utilice el aparato fuera del alcance de los niños. Los niños solo podrán utilizar el
aparato bajo supervisión.
• La rejilla de protección no garantiza su ciente protección para los niños pequeños
y las personas impedidas.
• Este aparato puede ser utilizado por niños a partir de 8 años y por personas con
capacidades físicas, sensoriales o mentales reducidas o con falta de experiencia
y/o conocimientos, siempre que se les supervise o instruya sobre cómo usar el
aparato de forma segura y entiendan los peligros que conlleva.
• La limpieza y el mantenimiento no deben ser realizados por niños, a menos que
tengan 8 años o más y sean supervisados.
• No permita que los niños jueguen con el aparato.
ATENCIÓN
¡Peligro de quemaduras! Algunos componentes del aparato pueden
alcanzar temperaturas muy elevadas. Asegúrese de que ni usted ni los
niños se quemen.
31
ES
VISTA GENERAL DEL APARATO
Salida de aire
Interruptor
Pies de apoyo con ruedas

32
ES
MONTAJE
Montaje para soporte de pie con ruedas
Montaje de ruedas Desmontaje de ruedas
Al acabar el montaje oirá un clic Apriete el botón para quitar las ruedas
Montaje en pared Retirar de la pared
Mover el calefactor 5 mm
hacia arriba y 10mm hacia
la izquierda para retirarlo
Deslizar
Deslizar
Apretarel botón

33
ES
PANEL DE CONTROL Y MANDO A DISTANCIA
1
Botón: ajustes
8
Indicador: temporizador
2
Botón: aumentar valor
9
Indicador: temperatura
3
Botón: reducir valor
10
Indicador numérico LED
4
Botón: ON/OFF
11
Botón: desactivar indicador LED
5
Indicador luminoso: elemento
calefactor
12
Botón: nivel de calefacción
arriba/abajo
6
Indicador: nivel de calefacción
bajo
13
Indicador: conexión wi
activada
Error en la conexión: desactivada
7
Indicador: nivel de calefacción
alto

34
ES
PUESTA EN MARCHA
Puesta en funcionamiento
1. Extraiga con cuidado el aparato de la caja. Conserve la caja para almacenar el
aparato al nal de la temporada.
2. Asegúrese de que el botón on/off esté apagado antes de conectar el aparato.
3. El calefactor debe estar completamente montado y ensamblado según las
instrucciones.
4. Se recomienda no compartir la toma eléctrica con otros aparatos que consuman
mucha potencia para evitar una sobrecarga en el circuito eléctrico.
Encendido
Conecte el aparato a la red eléctrica. El indicador luminoso de funcionamiento se
enciende tras un zumbido breve. Encienda el aparato con el botón on/off (4). Ahora en
la pantalla aparecerá la temperatura ambiente actual. La temperatura predeterminada
de fábrica es 35°C.
Congurar la temperatura
Presione el botón de ajuste (1). Los números "10" y "9" parpadean. Posteriormente,
presione los botones de dirección (2) y (3) para aumentar o reducir 1°C la
temperatura.
Conguración del temporizador
Hora de encendido: con el aparato apagado, pulse dos veces el botón (1) para
congurar el temporizador en un periodo de 1 a 24 horas. Pulse las teclas (2) y (3)
para seleccionar la temperatura. Tras la conguración, se muestra la temperatura
ambiente. La pantalla (8) se ilumina con el temporizador en funcionamiento y se apaga
cuando el temporizador nalice.
Hora de apagado: con el aparato en marcha, pulse el botón (1) para congurar
el temporizador en un periodo de 1 a 24 horas. Tras la conguración, se muestra
la temperatura ambiente. La pantalla (8) se ilumina con el temporizador en
funcionamiento y se apaga cuando el temporizador nalice. Posteriormente, el aparato
detiene el funcionamiento.
Conguración del nivel de calefacción
a. En modo funcionamiento, la tecla (2) se utiliza para cambiar entre el nivel de
calefacción elevado (HIGH) y detener la calefacción (OFF). El indicador (7) se
ilumina con el nivel de calefacción elevado y se apaga cuando se detiene la
calefacción.
b. En modo funcionamiento, la tecla (3) se utiliza para cambiar entre el nivel de
calefacción bajo (LOW) y detener la calefacción (OFF). El indicador (6) se ilumina
con el nivel de calefacción bajo y se apaga cuando se detiene la calefacción.

35
ES
c. En modo funcionamiento, la tecla (12) se utiliza para cambiar entre el nivel de
calefacción bajo (LOW), alto (HIGH) y detener la calefacción (OFF). Con el nivel
de calefacción elevado, el indicador (7) se ilumina, mientras que con el nivel de
calefacción bajo, se ilumina el indicador (6).
Seguridad para niños
Pulse simultáneamente los botones (2) y (3) en modo funcionamiento. La seguridad
para niños está activada y el sistema está bloqueado. No puede realizarse ningún
ajuste. Tras 5 segundos aparece en pantalla la temperatura ambiente.
Para desbloquear, mantener presionados los botones (2) y (3) durante 3 segundos.
Activar la pantalla
Con el aparato en marcha, la pantalla se apaga. La pantalla vuelve a encenderse al
presionar el panel de control.
Función ECO (modo noche)
Con el funcionamiento de calefacción, mantenga pulsados los botones (1) y (2)
durante 3 segundos (o el botón ECO en el mando a distancia) para que se active la
función ECO. En este modo de funcionamiento se muestran solo los indicadores (5),
(6), (7) o (8), según el ajuste seleccionado.
Cambio en la visualización de la temperatura en Celsius o Fahrenheit
Mantenga pulsados para el ajuste el botón (1) y el botón de dirección "arriba" (2)
durante 10 segundos.
Función de detección de ventana abierta
Si la temperatura se reduce 3°C o más en 2 minutos, se activará la función de
detección de ventana abierta. El aparato deja de calentar y el indicador (9) parpadea.
Pulse el botón (4) para apagar el aparato. Si vuelve a encender el aparato, la función
de detección de ventana abierta queda desactivada.
Restablecer el wi
Mantenga el botón (1) presionado 3 segundos en modo funcionamiento. Los ajustes de
wi se restablecerán y el indicador correspondiente parpadea rápidamente (dos veces
por segundo).
Apagar
Mantenga pulsado el botón on/off (4). El indicador de funcionamiento se enciende.
36
ES
CONTROL DEL DISPOSITIVO POR SMARTPHONE
Si conecta el aparato a su red WLAN doméstica, podrá controlarlo cómodamente
mediante la App correspondiente de Klarstein. La App le permite no solo controlar el
aparato mediante su smartphone, sino que también le ofrece acceso a recetas y otra
información adicional.
Proceda del siguiente modo para conectar su smartphone al dispositivo Klarstein.
1 Descargue primero la App de Klarstein escaneando el código QR con su
smartphone (véase más abajo) o descárguelo directamente de la App Store o de
Google Play.
2 Asegúrese de que su smartphone esté conectado a la misma red WiFi a la que
debe conectarse su dispositivo Klarstein.
3 Abra la App de Klarstein.
4 Inicie sesión con su cuenta. Si aún no tiene una cuenta, regístrese en la aplicación
Klarstein.
5 Siga las instrucciones que aparecerán en la app.
Descarga la aplicación
Utilice la función de escaneado de su teléfono para escanear el código QR y guarde
la app en su smartphone.
Nota: La aplicación proporciona más información sobre cómo usar la aplicación y
ayuda sobre cómo conectarse al dispositivo tan pronto como se abre por primera
vez.
iOS Android

37
ES
Solución de problemas de conexión
Si su dispositivo Klarstein no se encuentra en la WLAN, compruebe lo siguiente:
• ¿Está enchufado el dispositivo?
• ¿Está activada la función WiFi de mi teléfono?
• ¿Está activada la función WiFi del dispositivo Klarstein? (Sigue las instrucciones de
la aplicación)
• ¿Se ha introducido correctamente la contraseña WLAN?
• ¿Están el router, el dispositivo Klarstein y el smartphone en las inmediaciones
durante el intento de conexión? (Idealmente no más de 5 m de separación)
• Si ha desactivado la banda de 2,4 GHz en la conguración de su encaminador
inalámbrico, actívela en la conguración de su encaminador.
Nota: Para obtener más ayuda, sigue las instrucciones de la aplicación al congurar
la conexión.
LIMPIEZA Y CUIDADO
Nota: apague el aparato y desconecte el enchufe de la toma de corriente. Espere a
que el aparato se haya enfriado por completo antes de limpiarlo.
• Para la limpieza de las ranuras de ventilación y rejillas, utilice una aspiradora.
• Retire el polvo de las supercies exteriores con un paño húmedo (no mojado).
• No utilice productos de limpieza agresivos ni abrasivos.
• Nunca sumerja el aparato en agua ni en ningún otro líquido ni lo pulverice con
líquidos.
• Nunca abra la carcasa de la calefacción.
38
ES
INDICACIONES SOBRE LA RETIRADA DEL
APARATO
Si en su país existe una disposición legal relativa a la
eliminación de aparatos eléctricos y electrónicos, este
símbolo estampado en el producto o en el embalaje
advierte que no debe eliminarse como residuo doméstico.
En lugar de ello, debe depositarse en un punto de recogida
de reciclaje de aparatos eléctricos y electrónicos. Una
gestión adecuada de estos residuos previene consecuencias
potencialmente negativas para el medio ambiente y la salud
de las personas. Puede consultar más información sobre el
reciclaje y la eliminación de este producto contactando con
su administración local o con su servicio de recogida de
residuos.
Este producto contiene baterías. Si en su país existe una
disposición legal relativa a la eliminación de baterías, estas
no deben eliminarse como residuo doméstico. Infórmese
sobre la normativa vigente relacionada con la eliminación de
baterías. Una gestión adecuada de estos residuos previene
consecuencias potencialmente negativas para el medio
ambiente y la salud de las personas.
DECLARACIÓN DE CONFORMIDAD
Fabricante:
Chal-Tec GmbH, Wallstraße 16, 10179 Berlín, Alemania.
Importador para Gran Bretaña:
Chal-Tec UK limited
Unit 6 Riverside Business Centre
Brighton Road
Shoreham-by-Sea
BN43 6RE
United Kingdom
Puede descargar la declaración de conformidad completa del
fabricante en el siguiente enlace:
use.berlin/10035235

39
FR
Chère cliente, cher client,
Toutes nos félicitations pour l’acquisition de ce nouvel appareil.
Veuillez lire attentivement et respecter les instructions de ce mode
d’emploi an d’éviter d’éventuels dommages. Nous ne saurions
être tenus pour responsables des dommages dus au non-respect
des consignes et à la mauvaise utilisation de l’appareil. Scannez
le QR-Code pour obtenir la dernière version du mode d‘emploi
et des informations supplémentaires concernant le produit.
SOMMAIRE
Fiche de données produit40
Consignes de sécurité41
Aperçu de l‘appareil43
Montage44
Télécommande et panneau de commande45
Fonctionnement46
Contrôle de l‘appareil par smartphone48
Nettoyage et entretien49
Informations sur le recyclage50
Déclaration de conformité50
FICHE TECHNIQUE
Numéro d’article 10035235,10035236
Alimentation 220-240 V ~ 50/60 Hz
Puissance consomme
500 W (basse puissance)
1000 W (haut puissance)
WiFi standard
802.11 b/g/n
WiFi fréquence
2,4 GHz
WiFi puissance de radiofréquence (max.)
20 dBm
40
FR
FICHE DE DONNÉES PRODUIT
Référence (s) du produit 10035235,10035236
Donnée Symbole Valeur Unité Donnée Unité
Puissance calorique Uniquement pour les radiateurs électriques à
accumulation : Type de régulation de l‘apport de
chaleur
Puissance calorique
nominale
P
nom
1,0 kW Régulation manuelle de l‘apport de chaleur
avec thermostat intégré
Non
Puissance calorique
minimale
P
min
0,5 kW Régulation manuelle de l‘apport de chaleur
avec indication de la température de la pièce
et/ou de l‘extérieur
Non
Puissance maximale
continue de chauffage
P
max,c
1,0 kW Régulation électronique de l‘apport de chaleur
avec indication de la température de la pièce
et/ou de l‘extérieur
Non
Consommation de courant auxiliaire
Apport de chaleur assisté par ventilateur Non
A puissance calorique
nominale
el
max
0,956 kW
Type de chauffage/contrôle de la température de
la pièce
A puissance calorique
minimale
el
min
0,486 kW Chauffage à une seule vitesse, pas de contrôle
de la température ambiante
Non
En mode veille el
SB
0,37 W Deux vitesses ou plus réglables manuellement,
pas de contrôle de la température ambiante
Non
Contrôle de la température ambiante par
thermostat mécanique
Non
Contrôle électronique de la température
ambiante
Non
Contrôle électronique de la température
ambiante et régulation par jour
Oui
Contrôle électronique de la température
ambiante et régulation par semaine
Non
Autres options de régulation
Contrôle de la température ambiante avec
détection de présence
Non
Contrôle de la température ambiante avec
détection de fenêtre ouverte
Oui
Avec option télécommande Non
Avec contrôle du démarrage du chauffage Non
Avec limitation de la durée de fonctionnement Non
Avec globe noir capteur de température Non
Coordonnées de contact Chal-Tec GmbH, Wallstraße 16, 10179, Berlin, Allemagne

41
FR
CONSIGNES DE SÉCURITÉ
• Avant utilisation, vériez la tension sur l'étiquette de l'appareil et connectez
l'appareil uniquement à des prises qui correspondent à sa tension.
• Si le cordon d'alimentation est endommagé, faites-le remplacer par un spécialiste
qualié.
• Ne placez pas le radiateur directement sous la prise.
• Gardez une distance d'un mètre avec des matériaux inammables tels que des
meubles, des rideaux ou similaires.
• Les caches du boîtier de cet appareil sont conçus pour empêcher l'accès direct aux
éléments chauffants et doivent être en place lorsque l'appareil est allumé.
• Ne couvrez pas le radiateur pour éviter la surchauffe.
• N'obstruez en aucun cas le ux d'air à l'entrée ou à la sortie, car l'appareil peut
surchauffer et créer un risque d'incendie. Ne couvrez pas les entrées et sorties d'air.
• La cause la plus fréquente de surchauffe est l'accumulation de poussière et de
peluches sur l'appareil. Éliminez ces dépôts régulièrement. Éteignez l'appareil,
débranchez la che d'alimentation et aspirez les entrées et sorties d'air avec un
aspirateur.
• N'utilisez pas l'appareil pour sécher du linge.
• Ne connectez pas l'appareil à l'alimentation électrique tant qu'il n'a pas été
entièrement assemblé et installé.
• L'appareil ne doit être utilisé qu'en position verticale.
• Cet appareil ne convient pas pour une utilisation sur un tapis à poils longs ou
okati.
• L'utilisation d'une rallonge n'est pas recommandée avec cet appareil.
• Avant de déplacer l'appareil, éteignez-le et laissez-le refroidir.
• Lorsque vous n'utilisez plus l'appareil, débranchez la che de la prise. Ne tirez
jamais sur le câble secteur mais sur la che elle-même. Retirez toujours la che de
la prise avant de nettoyer l'appareil.
• N'insérez pas d'objets étrangers ou métalliques à l'intérieur de l'appareil ou dans
les fentes d'aération, car cela pourrait entraîner un choc électrique, un incendie ou
endommager l'appareil.
• L'appareil n'est pas destiné à un usage commercial, mais uniquement à un usage
domestique et à des environnements similaires.
• N'utilisez pas l'appareil si le cordon d'alimentation ou la che est endommagé,
défectueux, si l'appareil est tombé ou endommagé de quelque façon que ce soit.
• Les réparations ne peuvent être effectuées que par des spécialistes qualiés.
• Les réparations effectuées de manière incorrecte ou de manière indépendante
représentent un risque de blessure.
• Ne faites pas passer le câble secteur sous une moquette ou un tapis.
• Installez le cordon d'alimentation hors des zones de passage an que personne ne
puisse trébucher dessus.
42
FR
• Assurez-vous que le cordon d'alimentation ne passe pas sur des bords tranchants
ou n'entre pas en contact avec des surfaces chaudes.
• Ne pas tordre, plier ou enrouler le cordon d'alimentation autour de l'appareil, car
cela affaiblirait et briserait l'isolation du câble. Assurez-vous de toujours dérouler
entièrement le cordon d'alimentation.
• N'utilisez pas l'appareil avec une minuterie externe, une prise télécommandée ou
tout autre dispositif permettant d'allumer et d'éteindre automatiquement le radiateur.
• Ne plongez pas l'appareil ou le cordon d'alimentation dans l'eau ou d'autres
liquides et ne laissez pas l'humidité pénétrer à l'intérieur de l'appareil.
• Ne touchez pas un appareil qui est tombé dans l'eau. Coupez l'électricité dans la
maison et débranchez immédiatement la che de la prise de courant.
• Cet appareil est protégé contre les projections d'eau selon IP24 et convient donc
également pour une utilisation dans les salles de bains et les pièces humides.
Cependant, n'utilisez pas l'appareil à proximité immédiate d'une baignoire, d'une
douche, d'une piscine ou d'autres liquides et assurez-vous qu' aucune pièce sous
tension ne peut entrer en contact avec de l'eau.
• N'utilisez pas l'appareil à l'extérieur. N'installez jamais l'appareil sur une surface
mouillée.
• N'utilisez pas l'appareil avec les mains mouillées.
• Ne placez pas l'appareil à proximité d'une source de chaleur. N'utilisez pas
l'appareil sur ou à proximité de surfaces chaudes.
• N'utilisez pas l'appareil dans un lieu où de l'essence, de la peinture ou d'autres
substances in ammables sont stockées.
• Avant le nettoyage, débranchez la che de la prise et laissez l'appareil refroidir
complètement.
• N'utilisez pas de produits abrasifs pour le nettoyage.
• Ne rangez pas l'appareil tant qu'il est encore chaud.
• N'utilisez que des accessoires expressément approuvés par le fabricant.
• Utilisez l'appareil hors de portée des enfants. Les enfants ne sont autorisés à utiliser
l'appareil que sous surveillance.
• La grille de protection n'offre pas une protection complète pour les jeunes enfants et
les personnes fragiles.
• Les enfants à partir de 8 ans et les personnes souffrant de handicaps mentaux,
sensoriels et physiques ne peuvent utiliser l'appareil que s'ils ont été parfaitement
familiarisés avec les fonctions et les précautions de sécurité par une personne
responsable et s'ils comprennent les risques associés.
• Le nettoyage et la maintenance par l'utilisateur ne doivent pas être effectués par
des enfants sauf s'ils sont âgés de plus de 8 ans et sont sous surveillance.
• Les enfants ne sont pas autorisés à jouer avec l'appareil.
ATTENTION
Risque de brûlure ! Certaines parties de l'appareil peuvent être très
chaudes. Faites attention à ne pas vous brûler vous-même ni vos
enfants.

43
FR
APERÇU DE L‘APPAREIL
Sortie d‘air
Interrupteur
Pieds avec roulettes

44
FR
MONTAGE
Installation sur pied avec des roulettes
Installation des roulettes Démontage des roulettes
Une fois l'assemblage terminé, vous
entendrez un clic
Appuyez sur le bouton pour retirer les
roulettes
Montage mural Pour retirer l'appareil du mur
Soulevez le radiateur de
5mm puis déplacez de
10 mm vers la gauche pour
le retirer
Poussez
Poussez
Appuyez sur le bouton
45
FR
TÉLÉCOMMANDE ET PANNEAU DE COMMANDE
1
Touche : Réglages
8
Afchage : minuterie
2
Touche : augmenter la valeur
9
Afchage : température
3
Touche : diminuer la valeur
10
Afchage numérique LED
4
Touche : marche / arrêt
11
Touche : désactiver l'afchage
LED
5
Voyant de marche : élément
chauffant
12
Touche : niveau de chauffage
haut / bas
6
Afchage : niveau bas
13
Afchage : WiFi
connecté : activé
Échec de la connexion : désactivé
7
Afchage : niveau haut

46
FR
FONCTIONNEMENT
Mise en marche
1. Retirez délicatement l'appareil de la boîte. Conservez le carton pour un stockage
hors saison.
2. Assurez-vous que le bouton d'alimentation est éteint avant de connecter l'appareil.
3. Le radiateur doit être entièrement assemblé et installé conformément aux instructions
d'installation.
4. Il est préférable de ne pas partager la même connexion électrique avec d'autres
appareils énergivores pour éviter de surcharger le circuit électrique.
Allumer
Branchez l'appareil à l'alimentation. Le témoin de fonctionnement s'allume après un
bref bourdonnement. Allumez l'appareil avec la touche de marche / arrêt (4). La
température ambiante actuelle s'allume maintenant à l'écran. La température réglée par
défaut est de 35°C.
Réglage de la température
Appuyez sur la touche de réglage (1). Les chiffres "10" et "9" clignotent. Appuyez
ensuite sur les touches échées (2) et (3) pour augmenter ou diminuer la température de
1°C.
Réglage de la minuterie
Minuterie de démarrage : l'appareil éteint, appuyez deux fois sur la touche (1) pour
régler la minuterie sur 1-24 heures. Appuyez sur les touches (2) et (3) pour régler la
température. Après le réglage, la température ambiante s'afche. Le voyant (8) s'allume
lorsque la minuterie est en cours et s'éteint lorsque la minuterie est écoulée.
Minuterie d'arrêt : l'appareil en marche, appuyez sur la touche (1) pour régler la
minuterie sur 1-24 heures. Après le réglage, la température ambiante s'afche. Le
voyant (8) s'allume lorsque la minuterie est en cours et s'éteint lorsque la minuterie est
écoulée. Ensuite, l'appareil arrête de chauffer.
Réglage du niveau de chauffage
a. En mode de fonctionnement, la touche (2) bascule entre le niveau de chauffage
élevé (HIGH) et l'arrêt du chauffage (OFF). Le voyant (7) s'allume lorsque le niveau
de chauffage est élevé et s'éteint lorsque le radiateur est éteint.
b. En mode de fonctionnement, la touche (3) bascule entre le niveau de chauffage
bas (LOW) et l'arrêt du chauffage (OFF). Le voyant (6) s'allume lorsque le niveau
de chauffage est bas et s'éteint lorsque le radiateur est éteint.

47
FR
c. En mode de fonctionnement, la touche (12) bascule entre le niveau de chauffage
bas (LOW), le niveau de chauffage élevé (HIGH) et le chauffage éteint (OFF).
Le voyant (7) s'allume lorsque le niveau de chauffage est élevé et le voyant (6)
s'allume lorsque le niveau de chauffage est faible.
Verrouillage parental
En mode chauffage, appuyez simultanément sur les touches (2) et (3). Le verrouillage
parental est maintenant actif et le système est verrouillé. Aucun réglage ne peut être
effectué. Après 5 secondes, la température ambiante s'afche à l'écran.
Pour déverrouiller, maintenez les touches (2) et (3) pendant 3 secondes.
Activation de l'afchage
Lorsque l'appareil est en marche, l'afchage est éteint. L'afchage s'allume lorsque vous
appuyez sur le panneau de commande.
Fonction ECO (mode nuit)
En mode chauffage, maintenez les touches (1) et (2) pendant 3 secondes (ou le
bouton ECO de la télécommande) pour activer la fonction ECO. Dans ce mode de
fonctionnement, seuls les voyants (5), (6), (7) ou (8) s'afchent, selon le réglage
précédemment sélectionné.
Changement d'afchage de la température en degrés Celsius ou Fahrenheit
Appuyez simultanément sur la touche de réglage (1) et la èche vers le haut (2) et
maintenez-les pendant 10 secondes.
Fonction de détection de fenêtre ouverte
Lorsque la température baisse de 3°C ou plus en 2 minutes, la fonction de détection
de fenêtre ouverte se déclenche. L'appareil arrête de chauffer et le voyant (9) clignote.
Appuyez sur la touche (4) pour éteindre l'appareil. Lorsque vous rallumez l'appareil, la
fonction de détection de fenêtre ouverte est désactivée.
Réinitialisation du Wi
Maintenez la touche (1) pendant 3 secondes en mode chauffage. Les paramètres
WiFi sont réinitialisés et le voyant correspondant clignote rapidement (deux fois par
seconde).
Éteindre
Maintenez la touche Marche / Arrêt (4). Le témoin de fonctionnement s'allume.

48
FR
CONTRÔLE DE L‘APPAREIL PAR SMARTPHONE
Si vous connectez l‘appareil à votre réseau Wi-Fi domestique, vous pouvez l‘utiliser
facilement via l‘application Klarstein associée. L‘application vous permet non seulement
de contrôler à distance l‘appareil via votre smartphone, mais vous donne également
accès à des recettes et à des informations supplémentaires.
Procédez comme suit pour connecter votre smartphone avec votre appareil Klarstein :
1 Téléchargez d‘abord l‘application Klarstein en scannant le code QR avec votre
smartphone (voir ci-dessous) ou téléchargez-le directement depuis l‘App Store ou
Google Play.
2 Assurez-vous que votre smartphone est connecté au même réseau WiFi que votre
appareil Klarstein.
3 Ouvrez l‘application Klarstein.
4 Connectez-vous avec votre compte. Si vous n‘avez pas encore de compte,
inscrivez-vous dans l‘application Klarstein.
5 Suivez les indications de l‘application.
Téléchargement de l‘application
Utilisez la fonction de scan de votre téléphone portable pour scanner le QR Code et
télécharger l‘application sur votre smartphone.
Remarque : L‘application fournit des informations supplémentaires sur la façon
d‘utiliser l‘application et de l‘aide sur la façon de se connecter à votre appareil dès
que vous l‘ouvrez pour la première fois.
iOS Android

49
FR
Dépannage des problèmes de connexion
Si votre appareil Klarstein ne se trouve pas dans le WLAN, vériez les points suivants :
• L‘appareil est-il branché ?
• La fonction WiFi de mon téléphone est-elle activée ?
• La fonction WiFi de l‘appareil Klarstein est-elle activée ? (Suivez les instructions
dans l‘application)
• Le mot de passe WLAN a-t-il été saisi correctement ?
• Le routeur, l‘appareil Klarstein et le smartphone se trouvent-ils à proximité
immédiate pendant la tentative de connexion ? (Idéalement, pas plus de 5 m de
distance)
• Si vous avez désactivé la bande des 2,4 GHz dans les paramètres de votre routeur
sans l, activez-la dans les paramètres de votre routeur.
Remarque : Pour plus d‘aide, suivez les instructions de l‘application lors de la
conguration de la connexion.
NETTOYAGE ET ENTRETIEN
Remarque : Éteignez l‘appareil et débranchez la che de la prise. Attendez que
l‘appareil refroidisse complètement avant de le nettoyer.
• Utilisez un aspirateur pour nettoyer les fentes d‘aération et la grille.
• Enlevez la poussière sur les surfaces extérieures avec un chiffon humide (non
mouillé).
• N‘utilisez pas de nettoyants chimiques ou de solvants agressifs.
• Ne pas vaporiser ni immerger l‘appareil dans l‘eau ou tout autre liquide.
• N‘ouvrez jamais le boîtier du radiateur.

50
FR
INFORMATIONS SUR LE RECYCLAGE
S‘il existe une réglementation pour l‘élimination ou le
recyclage des appareils électriques et électroniques dans
votre pays, ce symbole sur le produit ou sur l‘emballage
indique que cet appareil ne doit pas être jeté avec les
ordures ménagères. Vous devez le déposer dans un point
de collecte pour le recyclage des équipements électriques
et électroniques. La mise au rebut conforme aux règles
protège l‘environnement et la santé de vos semblables des
conséquences négatives. Pour plus d‘informations sur le
recyclage et l‘élimination de ce produit, veuillez contacter
votre autorité locale ou votre service de recyclage des
déchets ménagers.
Ce produit contient des piles. S‘il existe une réglementation
pour l‘élimination ou le recyclage des piles dans votre pays,
vous ne devez pas les jeter avec les ordures ménagères.
Renseignez-vous sur les dispositions locales relatives à la
collecte des piles usagées. La mise au rebut conforme aux
règles protège l‘environnement et la santé de vos semblables
des conséquences négatives.
DÉCLARATION DE CONFORMITÉ
Fabricant :
Chal-Tec GmbH, Wallstraße 16, 10179 Berlin, Allemagne.
Importateur pour la Grande Bretagne :
Chal-Tec UK limited
Unit 6 Riverside Business Centre
Brighton Road
Shoreham-by-Sea
BN43 6RE
United Kingdom
La déclaration complète de conformité du fabricant est
accessible par le lien suivant :
use.berlin/10035235
51
IT
Gentile cliente,
La ringraziamo per aver acquistato il dispositivo. La preghiamo
di leggere attentamente le seguenti istruzioni per l’uso e di
seguirle per evitare possibili danni. Non ci assumiamo alcuna
responsabilità per danni scaturiti da una mancata osservazione
delle avvertenze di sicurezza e da un uso improprio del
dispositivo. Scansionare il codice QR seguente, per accedere
al manuale d’uso più attuale e per ricevere informazioni sul
prodotto.
INDICE
Scheda informativa del prodotto52
Avvertenze di sicurezza53
Panoramica del dispositivo55
Montaggio56
Pannello di controllo e telecomando57
Utilizzo58
Gestione tramite smartphone60
Pulizia e manutenzione61
Avviso di smaltimento62
Dichiarazione di conformità62
DATI TECNICI
Numero articolo 10035235,10035236
Alimentazione 220-240 V ~ 50/60 Hz
Consumo
500 W (potenza bassa)
1000 W (potenza alta)
WiFi standard
802.11 b/g/n
WiFi frequenza
2,4 GHz
WiFi potenza a radiofrequenza (max.)
20 dBm
52
IT
SCHEDA INFORMATIVA DEL PRODOTTO
Identicazione del modello (i) 10035235,10035236
Indicazione Simbolo Valore Unità Indicazione Unità
Potenza termica Solo per gli apparecchi per il riscaldamento
d‘ambiente locale elettrici ad accumulo: Tipo di
controllo dell´apporto termico
Potenza termica nominale P
nom
1,0 kW Controllo manuale del carico termico con
termostato integrato
no
Potenza termica minima P
min
0,5 kW Controllo manuale del carico termico con
riscontro della temperatura ambiente e/o
esterna
no
Potenza termica massima
continua
P
max,c
1,0 kW Controllo elettronico del carico termico con
riscontro della temperatura ambiente e/o
esterna
no
Consumo di elettricità ausiliaria
Potenza termica con supporto del ventilatore no
Per la potenza termica
nominale
el
max
0,956 kW
Tipo di potenza termica / controllo della
temperatura ambiente
Per la potenza termica minima el
min
0,486 kW Potenza termica di un solo livello, senza
controllo della temperatura ambiente
no
In modalità di attesa el
SB
0,37 W Due o più livelli impostabili manualmente,
senza controllo della temperatura ambiente
no
Con controllo della temperatura ambiente
tramite termostato meccanico
no
Con controllo elettronico della temperatura
ambiente
no
Controllo elettronico della temperatura
ambiente e timer giornaliero
si
Controllo elettronico della temperatura
ambiente e timer settimanale
no
Altre opzioni di controllo
Controllo della temperatura ambiente con
rilevamento di presenza
no
Controllo della temperatura ambiente con
rilevamento di nestre aperte
si
Con opzione telecomando no
Con controllo di avvio adattabile no
Con limitazione del tempo di funzionamento no
Con sensore lampada nero no
Informazioni di contatto Chal-Tec GmbH, Wallstraße 16, 10179, Berlino, Germania

53
IT
AVVERTENZE DI SICUREZZA
• Prima dell'utilizzo, vericare la tensione sulla targhetta del dispositivo e collegarlo
solo a prese con tensione equivalente.
• Se il cavo d'alimentazione è danneggiato, farlo sostituire da un tecnico qualicato.
• Non la stufa direttamente sotto a una presa elettrica.
• Tenere almeno un metro di distanza da materiali inammabili come mobili, tende
o simili.
• Le coperture sull'alloggiamento del dispositivo servono a impedire l'accesso diretto
agli elementi riscaldanti e devono essere installate quando il dispositivo è acceso.
• Per evitare il surriscaldamento non coprire la stufa.
• Non impedire in alcun modo il usso d’aria in entrata e in uscita, altrimenti possono
risultare surriscaldamenti e conseguenti incendi. Non coprire i punti di ingresso e
uscita dell’aria.
• La causa principale di un surriscaldamento è l'accumulo di polvere e pelucchi sul
dispositivo. Assicurarsi di rimuoverli regolarmente. Spegnere il dispositivo, staccare
la spina dalla presa elettrica e pulire i punti di ingresso e uscita dell'aria con un
aspirapolvere.
• Non utilizzare il dispositivo per asciugare la biancheria.
• Non collegare il dispositivo all'alimentazione prima di averlo assemblato e montato
completamente.
• Il dispositivo può essere utilizzato solo in posizione verticale.
• Questo dispositivo non è adatto all'uso su tappeti a pelo lungo o passatoie in
occato.
• Non si consiglia l'uso di una prolunga con questo dispositivo.
• Prima di spostare il dispositivo, spegnerlo e lasciarlo raffreddare.
• Quando non si usa più il dispositivo, staccare la spina dalla presa. Non tirare il
cavo, ma impugnare sempre la spina stessa. Spegnere sempre il dispositivo, prima
di togliere la spina dalla presa.
• Non inserire corpi estranei e oggetti metallici nel dispositivo o nelle sue fessure
di ventilazione, altrimenti possono risultare scosse elettriche, incendi o danni al
dispositivo.
• Il dispositivo non è adatto a uso commerciale, ma solo domestico e in contesti
simili.
• Non utilizzare il dispositivo se cavo o spina sono danneggiati, se presenta
malfunzionamenti, se è caduto o se è stato danneggiato in qualche modo.
• Eventuali riparazioni devono essere eseguite solo da personale qualicato.
• Riparazioni errate o realizzate autonomamente possono rappresentare un rischio
di lesione.
• Non far passare il cavo di alimentazione sotto a tappeti o passatoie.
• Non far passare il cavo da zone di passaggio, in modo che nessuno rischi di
inciamparvi.

54
IT
• Assicurarsi che il cavo d'alimentazione non passi su bordi taglienti e che non entri in
contatto con super ci bollenti.
• Non piegare o arrotolare il cavo e non avvolgerlo intorno al dispositivo, altrimenti
l'isolamento si indebolisce e potrebbe rompersi. Assicurarsi sempre che il cavo sia
completamente srotolato dall'avvolgicavo.
• Non utilizzare il camino con un timer esterno, una presa di corrente con comando
a distanza o un altro dispositivo che accende e spegne la stufa automaticamente.
• Non immergere dispositivo e cavo in acqua o altri liquidi e non permettere a
umidità di penetrare all'interno del dispositivo.
• Non cercare di afferrare un dispositivo che è caduto in acqua. Disattivare la
corrente in tutta la casa dal quadro elettrico e staccare immediatamente la spina
dalla presa elettrica.
• Questo dispositivo è protetto dagli spruzzi d'acqua in conformità con IP24 ed è
quindi adatto anche all'uso in bagni e locali umidi. Non utilizzare però il dispositivo
nelle immediate vicinanze di vasche, docce, piscine o altri liquidi e assicurarsi, che
nessun componente che trasmette corrente entri in contatto con l'acqua.
• Non utilizzare il dispositivo all’aperto. Non utilizzare il dispositivo su fondi bagnati.
• Non toccare il dispositivo con le mani bagnate.
• Non posizionare il dispositivo vicino a fonti di calore. Non utilizzare il dispositivo
sopra o vicino a super ci bollenti.
• Non utilizzare il dispositivo in ambienti in cui vengono conservate benzina, vernice
o altre sostanze in ammabili.
• Prima della pulizia, staccare la spina e lasciar raffreddare completamente il
dispositivo.
• Non utilizzare prodotti abrasivi per la pulizia.
• Non mettere via il dispositivo nché è caldo.
• Utilizzare solo accessori espressamente autorizzati dal produttore.
• Utilizzare il dispositivo fuori dalla portata dei bambini. I bambini possono usare il
dispositivo solo con la dovuta supervisione.
• La griglia non assicura una protezione totale a bambini o persone che necessitano
di particolare tutela.
• Questo dispositivo può essere utilizzato da bambini a partire da 8 anni e da
persone con limitate capacità siche, psichiche e sensoriali o con conoscenza e/o
esperienza insuf cienti, solo se sono tenuti sotto controllo o se sono stati istruiti sulle
modalità di utilizzo sicuro del dispositivo e comprendono i rischi che ne risultano.
• Pulizia e manutenzione da parte dell'utente non possono essere realizzate
da bambini, a meno che siano maggiori di 8 anni e siano costantemente
supervisionati.
• I bambini non devono giocare con il dispositivo.
ATTENZIONE
Pericolo di ustioni! Alcuni componenti possono diventare estremamente
caldi. Assicurarsi che i bambini non si ustionino.

55
IT
PANORAMICA DEL DISPOSITIVO
Uscita dell‘aria
Interruttore
Piedi con ruote

56
IT
MONTAGGIO
Posizionamento libero con rotelle
Montare le rotelle Staccare le rotelle
Terminato il montaggio, si sente un clic. Premere il tasto per staccare le rotelle.
Montaggio a parete. Staccarla dalla parete
Sollevare la stufa di 5 mm
e spostarla poi a sinistra di
10mm per staccarla.
Spostare
Spostare
Premere il tasto

57
IT
PANNELLO DI CONTROLLO E TELECOMANDO
1
Tasto: impostazioni
8
Indicazione: timer
2
Tasto: aumentare il valore
9
Indicazione: temperatura
3
Tasto: diminuire il valore
10
Schermo numerico LED
4
Tasto: on/off
11
Tasto: disattivare schermo LED
5
Spia operativa: elemento
riscaldante
12
Tasto: aumentare/diminuire il
livello riscaldante
6
Indicazione: livello riscaldante
basso
13
Indicazione: Wi-Fi
collegato: on
Collegamento non riuscito: off
7
Indicazione: livello riscaldante
alto

58
IT
UTILIZZO
Messa in funzione
1. Togliere il dispositivo dalla scatola facendo attenzione. Conservare la scatola per
mettere via il dispositivo durante le stagioni calde.
2. Prima di collegare il dispositivo, assicurarsi che il tasto on/off sia spento.
3. La stufa deve essere completamente assemblata e installata nel rispetto del
manuale di montaggio.
4. Si sconsiglia l'utilizzo della stessa connessione elettrica usata per altri dispositivo
con elevati consumi di corrente, in modo da evitare di sovraccaricare il circuito
elettrico.
Accensione
Collegare il dispositivo all'alimentazione. La spia operativa si accende dopo un breve
ronzio. Accendere il dispositivo con On/Off (4). Ora si illumina l'indicazione della
temperatura attuale nella stanza. La temperatura predenita è di 35 °C.
Impostare la temperatura
Premere il tasto delle impostazioni (1). I numeri "10" e "9" lampeggiano. Premere i tasti
freccia (2) e (3) per aumentare o diminuire la temperatura di 1 °C.
Impostare il timer
Ora di accensione: a dispositivo acceso, premere (1) due volte per impostare il timer
su 1-24 ore. Premere i tasti (2) e (3) per regolare la temperatura. Dopo l'impostazione,
viene mostrata la temperatura ambiente. L'indicazione (8) si accende a timer in funzione
e si spegne quando scade.
Ora di spegnimento: a dispositivo in modalità di riscaldamento, premere (1) per
impostare il timer su 1-24 ore. Dopo l'impostazione, viene mostrata la temperatura
ambiente. L'indicazione (8) si accende a timer in funzione e si spegne quando scade. Il
dispositivo avvia la funzione riscaldante.
Impostare il livello riscaldante
a. In modalità di funzionamento, il tasto (2) permette di cambiare tra livello elevato
(HIGH) e arresto della funzione (OFF). L'indicazione (7) si illumina se il livello alto
è attivo e si spegne se la funzione riscaldante è spenta.
b. In modalità di funzionamento, il tasto (3) permette di cambiare tra livello basso
(HIGH) e arresto della funzione (OFF). L'indicazione (6) si illumina se il livello
basso è attivo e si spegne se la funzione riscaldante è spenta.
c. In modalità di funzionamento, il tasto (12) permette di cambiare tra livello basso
(LOW), livello alto (HIGH) e arresto della funzione (OFF). Se è attivo il livello alto
si illumina l’indicazione (7) e se è attivo quello basso si accende l’indicazione (6).

59
IT
Sicura per bambini
In modalità di riscaldamento, premere contemporaneamente (2) e (3). La sicura per
bambini è attiva e il sistema è bloccato. Non è possibile effettuare impostazioni. Dopo 5
secondi compare la temperatura ambiente sullo schermo.
Per sbloccare il dispositivo, premere (2) e (3) per 3 secondi.
Attivare lo schermo
Quando il dispositivo è in funzione, lo schermo si spegne. Premendo il pannello di
controllo si accende lo schermo.
Funzione ECO (modalità notturna)
In modalità di riscaldamento, tenere premuti per 3 secondi (1) e (2) (oppure
premere ECO sul telecomando) per accendere la funzione ECO. In questa modalità,
compaiono solo le indicazioni (5), (6), (7) o (8) in base all'impostazione selezionata in
precedenza.
Selezionare l'indicazione della temperatura in Celsius o Fahrenheit
Tenere premuti contemporaneamente per 10 secondi il tasto delle impostazioni (1) e il
tasto freccia (In alto) (2).
Funzione di rilevamento nestra aperta
Se la temperatura scende di 3°C o più entro 2 minuti, si attiva la funzione di
rilevamento nestra aperta. Il dispositivo smette di scaldare e lampeggia l'indicazione
(9). Premere (4) per spegnere il dispositivo. Quando si riaccende il dispositivo, la
funzione di rilevamento nestra aperta è disattivata.
Resettare il Wi-Fi
In modalità di riscaldamento, tenere premuto (1) per 3 secondi. Le impostazioni Wi-Fi
vengono resettate e l'indicazione corrispondente lampeggia rapidamente (due volte al
secondo).
Spegnimento
Tenere premuto On/Off (4). La spia operativa si accende.
60
IT
GESTIONE TRAMITE SMARTPHONE
Se si collega l‘apparecchio al WiFi, è possibile gestirlo comodamente con la relativa
applicazione Klarstein. L‘app non solo consente di controllare l´apparecchio da
remoto dal proprio smartphone, ma consente anche di accedere a ricette e ad altre
informazioni.
Per collegare il telefono al dispositivo Klarstein, procedere come segue:
1 Per prima cosa scaricare l‘app Klarstein scansionando il codice QR con lo
smartphone (vedere sotto) o scaricarla direttamente dall‘App Store o da Google
Play.
2 Accertarsi che lo smartphone sia connesso alla stessa rete WiFi a cui deve
collegarsi il dispositivo Klarstein.
3 Aprire l‘applicazione Klarstein.
4 Accedere con il proprio account. Se non si possiede ancora un account, registrarsi
nell‘app Klarstein.
5 Seguire le istruzioni contenute nell‘App.
App-Download
Utilizzare la funzione di scansione del telefono per eseguire la scansione del codice
QR e salvare l‘applicazione sullo smartphone.
Nota: L‘applicazione fornisce ulteriori informazioni su come utilizzarla e su come
connettersi al dispositivo non appena viene aperta per la prima volta.
iOS Android
61
IT
Risoluzione dei problemi di connessione
Se il dispositivo Klarstein non si trova nella WLAN, controllare quanto segue:
• Il dispositivo è collegato?
• La funzione WiFi del telefono è abilitata?
• La funzione WiFi del dispositivo Klarstein è attivata? (Seguire le istruzioni nell‘app)
• La password WLAN è stata immessa correttamente?
• Il router, il dispositivo Klarstein e lo smartphone sono nelle immediate vicinanze
durante il tentativo di connessione? (Idealmente a non più di 5 m di distanza)
• Se la banda da 2,4 GHz è stata disattivata nelle impostazioni del router wireless,
attivarla nelle impostazioni del router.
Nota: Per ulteriori informazioni, seguire le istruzioni nell‘app quando si congura la
connessione.
PULIZIA E MANUTENZIONE
Nota: spegnere il dispositivo e staccare la spina dalla presa. Attendere che il
dispositivo si sia completamente raffreddato prima di pulirlo.
• Usare un aspirapolvere per pulire fessure di ventilazione e griglia.
• Rimuovere la polvere dalle superci esterne con un panno umido (non bagnato).
• Non utilizzare detergenti aggressivi o prodotti abrasivi.
• Non spruzzare liquidi sul dispositivo e non immergerlo in acqua o altri liquidi.
• Non aprire mai l‘alloggiamento della stufa.

62
IT
AVVISO DI SMALTIMENTO
Se nel proprio paese si applicano le regolamentazioni
inerenti lo smaltimento di dispositivi elettrici ed elettronici,
questo simbolo sul prodotto o sulla confezione segnala che
questi prodotti non possono essere smaltiti con i ri uti normali
e devono essere portati a un punto di raccolta di dispositivi
elettrici ed elettronici. Grazie al corretto smaltimento dei
vecchi dispositivi si tutela il pianeta e la salute delle persone
da possibili conseguenze negative. Informazioni riguardanti il
riciclo e lo smaltimento di questi prodotti si ottengono presso
l’amministrazione locale oppure il servizio di gestione dei
ri uti domestici.
Il prodotto contiene batterie. Se nel proprio paese si
applicano le regolamentazioni inerenti lo smaltimento di
batterie, non possono essere smaltite con i normali ri uti
domestici. Preghiamo di informarvi sulle regolamentazioni
vigenti sullo smaltimento delle batterie. Grazie al corretto
smaltimento dei vecchi dispositivi si tutela l’ambiente e la
salute delle persone da conseguenze negative.
DICHIARAZIONE DI CONFORMITÀ
Produttore:
Chal-Tec GmbH, Wallstraße 16, 10179 Berlino, Germania.
Importatore per la Gran Bretagna:
Chal-Tec UK limited
Unit 6 Riverside Business Centre
Brighton Road
Shoreham-by-Sea
BN43 6RE
United Kingdom
La dichiarazione di conformità completa del produttore è
disponibile al seguente link:
use.berlin/10035235