11-
IN-ONE DELUXE
MULTI COOKER +
SOUS VIDE
MODEL#GMC680

© 2016 Gourmia
www.Gourmia.com
The Steelstone Group
Brooklyn, NY
All rights reserved. No portion of this manual may be reproduced by any means whatsoever
without written permission from The Steelstone Group, except for the inclusion of quotations in a
media review.
Although every precaution has been taken in the preparation of this manual, The Steelstone
Group assumes no responsibility for errors or omissions. Nor is any liability assumed for damages
resulting from the use of the information contained herein. Although every eort has been made
to ensure that the information contained in this manual is complete and accurate, The Steelstone
Group is not engaged in rendering professional advice or services to the individual consumer;
further, The Steelstone Group shall not be held responsible for any loss or damage allegedly
arising from any information or suggestion in this manual.
10 9 8 7 6 5 4 3 2 1
Printed in China
Welcome to
delicious & easy
meals from Gourmia!
With your pur
chase of the 11-in-One Deluxe Multi Cooker + Sous Vide, you are
ready to enjoy the most delectable, mouth-watering foods ever! Why? Your Multi Cooker
truly makes so many kinds of cooking absolutely simple, from tender beef roasts and
steamed sh llets to hearty slow cooked soups and stews, the 11-in-One Deluxe Multi
Cooker + Sous Vide is essentially your all-in-one chef’s assistant. Gourmet cooking is as
easy as pressing a few buttons, with preset times and temperatures ready to sauté, bake,
roast, steam, sous vide and stew all your favorite meals to perfection.
In addition to the v
ersatile cooking methods, the sous vide feature adds
a gourmet touch t
o your Deluxe Multi Cooker. The ancient art of sous vide is one of
simplicity: a heated water bath cooks food to perfection using leisurely cook times and
low cooking temperatures. The results? Perfectly tender, mouth-watering cuts of meat,
crisp-tender vegetables that retain all their nutrients and ripe sweetness, fruit that oers
natural sweetness from the tree and soups, sauces, combination meals and much, much
more!
One of the best featur
es of your 11-in-One Deluxe Multi Cooker + Sous
Vide is the easy opera
ting control panel that oers clear selections. The pages of this
manual give you full and complete instructions for all the functions and features of your
Deluxe Multi Cooker. Inside, you’ll nd helpful cooking guides, information on cooking
methods and complete step-by-step instructions for assembling, operating, cleaning
and maintaining your 11-in-One Deluxe Multi Cooker + Sous Vide. Please read all safety
instructions and complete directions carefully for safe usage at all times.
Thank you f
or your purchase! We hope you will enjoy all the innovative
products br
ought to you by our family at Gourmia.
5
SAFETY FIRST
p. 6
FEATURES & FUNCTIONS p. 9
PRE-PROGRAMMED CONTROL PANEL p. 13
BEFORE FIRST USE & ASSEMBLY p. 15
STEP-BY
-STEP COOKING p. 17
Bake Mode p. 21
Sauté M
ode p. 22
Roast Mode p
. 23
Sous V
ide Mode p. 24
Yogurt M
ode p. 26
Manual Mode p
. 27
Slow Cook M
ode p. 28
Keep War
m Mode p. 29
Rice M
ode p. 29
Stew M
ode p. 30
Steam M
ode p. 31
MAINTENANCE p
. 33
GOURMIA IN YOUR KITCHEN! p. 34
WARRANTY & SERVICE p. 37
TABLE OF CONTENTS

SAFETY FIRST
SAFETY FIRST
76
IMPORTANT SAFEGUARDS
When opera
ting this electric appliance, basic safety instructions should
always be followed. Refer to the following for these instructions.
1. READ ALL SAFETY & USA
GE INSTRUCTIONS BEFORE USING DELUXE MULTI
COOKER + SOUS VIDE.
2. EXERCISE EXTREME C
AUTION: AVOID ELECTRICAL SHOCK. DO NOT
immerse cord, plugs or the 11-in-One Multi Cooker base or lid in water or
other liquid.
3. Do not touch the M
ulti Cooker Base, the Removable Cooking Pot, or the
contents inside the Removable Cooking Pot while the Multi Cooker is working.
Use potholders, oven mitts or tongs to remove food or food bags and avoid
hot water spills.
4. Do not open the Multi C
ooker Lid during cooking. Opening the Lid causes the
cooking temperature to drop and also increases the cooking time as a result.
Use pot holders if the Lid must be opened and stand well away from any
escaping steam.
5. Do not place metal pla
tes, trays or other metal objects in the Multi Cooker, as it
may cause re and/or short circuit damage.
6. UNPLUG the Multi C
ooker from outlet when not in use or before cleaning.
Allow the Multi Cooker to cool before cleaning. Do not let cord hang over edge
of table or counter or touch hot surfaces.
7. Children should never use the M
ulti Cooker; close supervision is required when
appliance is used near children.
8. Operat
e the Multi Cooker on a level surface well away from any hot gas or
electrical burner, heat source, combustible spray cans or pressurized items.
The Multi Cooker must be level for optimal performance.
9. Do not opera
te the Multi Cooker outdoors.
10. Never opera
te the Multi Cooker with a damaged cord or plug or one that has
malfunctioned or been damaged in any way. Immediately contact Customer
Service for analysis.
11. DO NOT add unauthoriz
ed accessory attachments. Such use may result in
electric shock, injury or re.
FOR HOUSEHOLD USE ONLY
Electric
al Polarized Plug: This Deluxe
Multi Cooker has a polarized plug (one
blade is wider than the other). To reduce
the risk of electrical shock, the plug is
intended to be used by inserting it into
the electrical outlet only one way. If the
plug does not t securely into the outlet,
turn the plug and re-insert. Do not modify
this plug. If the plug does not t the outlet
securely, call a qualied electrician for
assistance. DO NOT use this plug with
extension cords of any kind.
12. Use only fact
ory cord supplied; NEVER add extension cords. When done using,
press Start/Stop to turn OFF, then pull plug from outlet.
13. Do not use the Multi C
ooker for any use other than intended. Do not use on a
stovetop.
SAVE THESE INSTR
UCTIONS
99
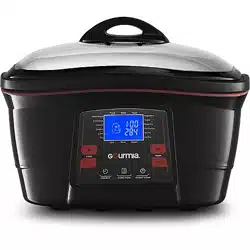
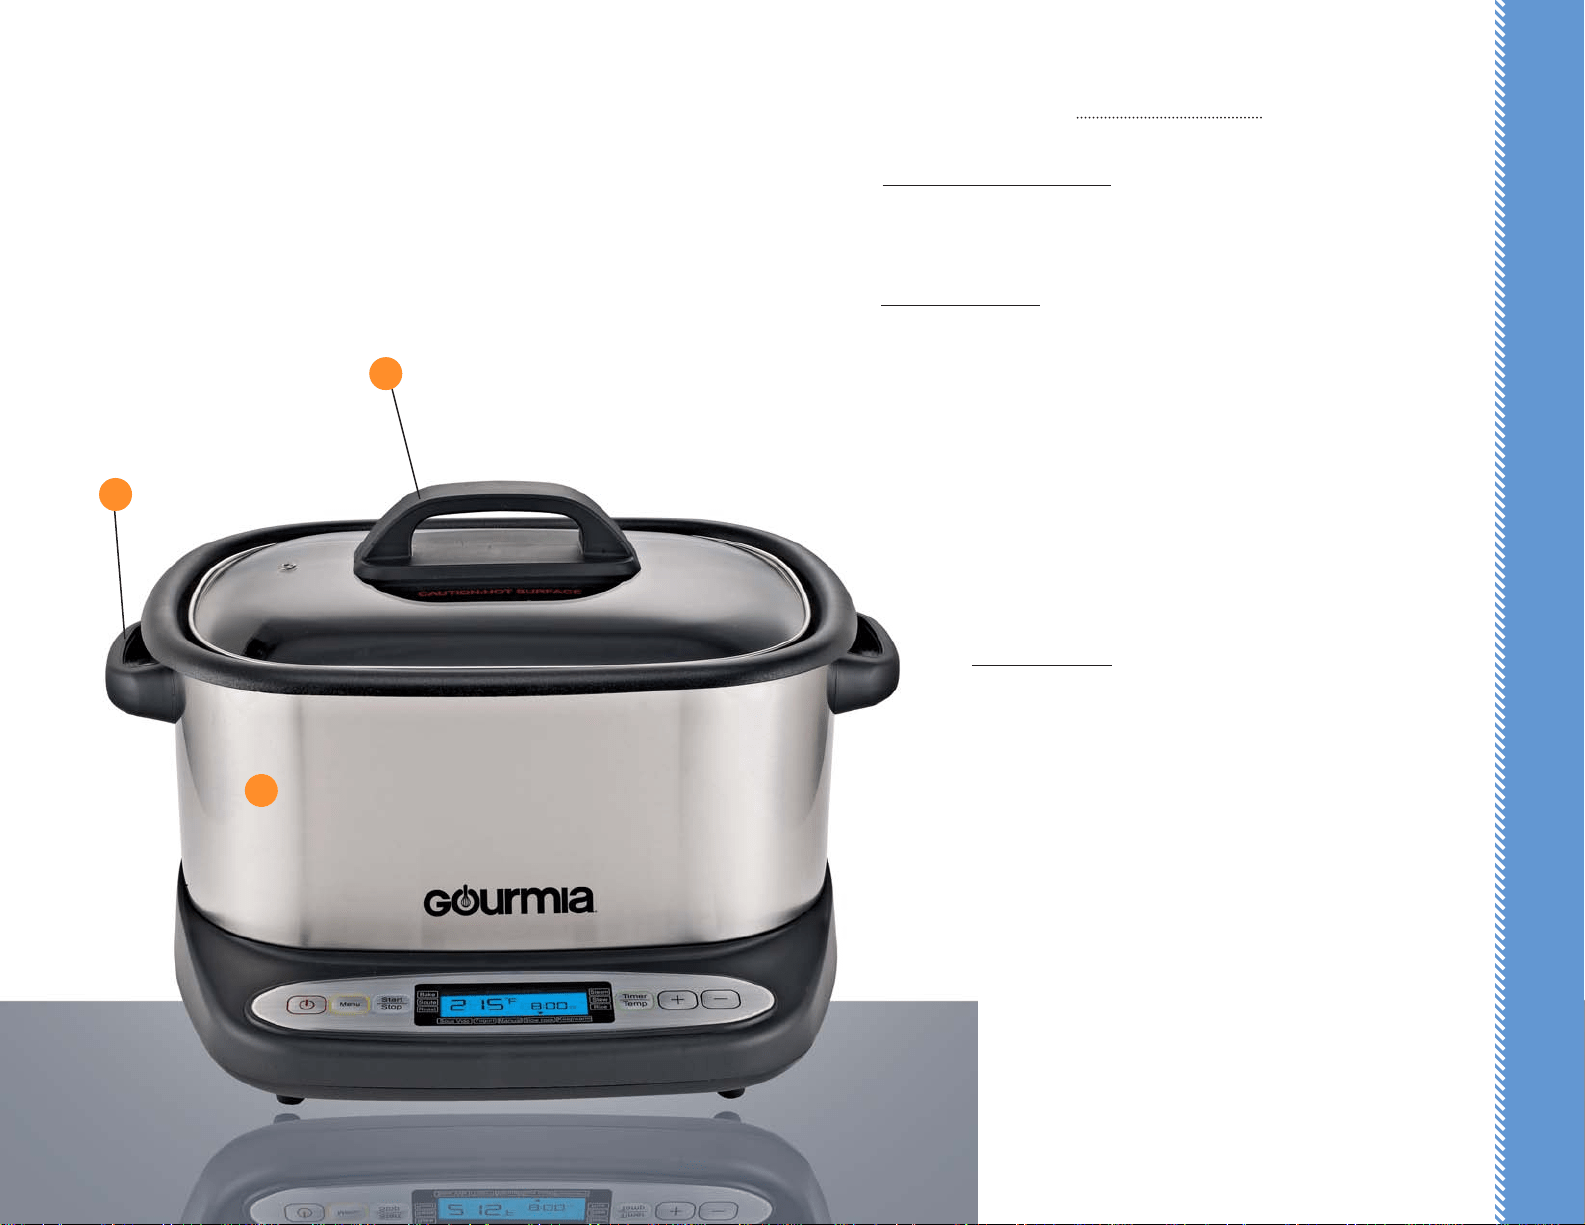
FEATURES & FUNCTIONS
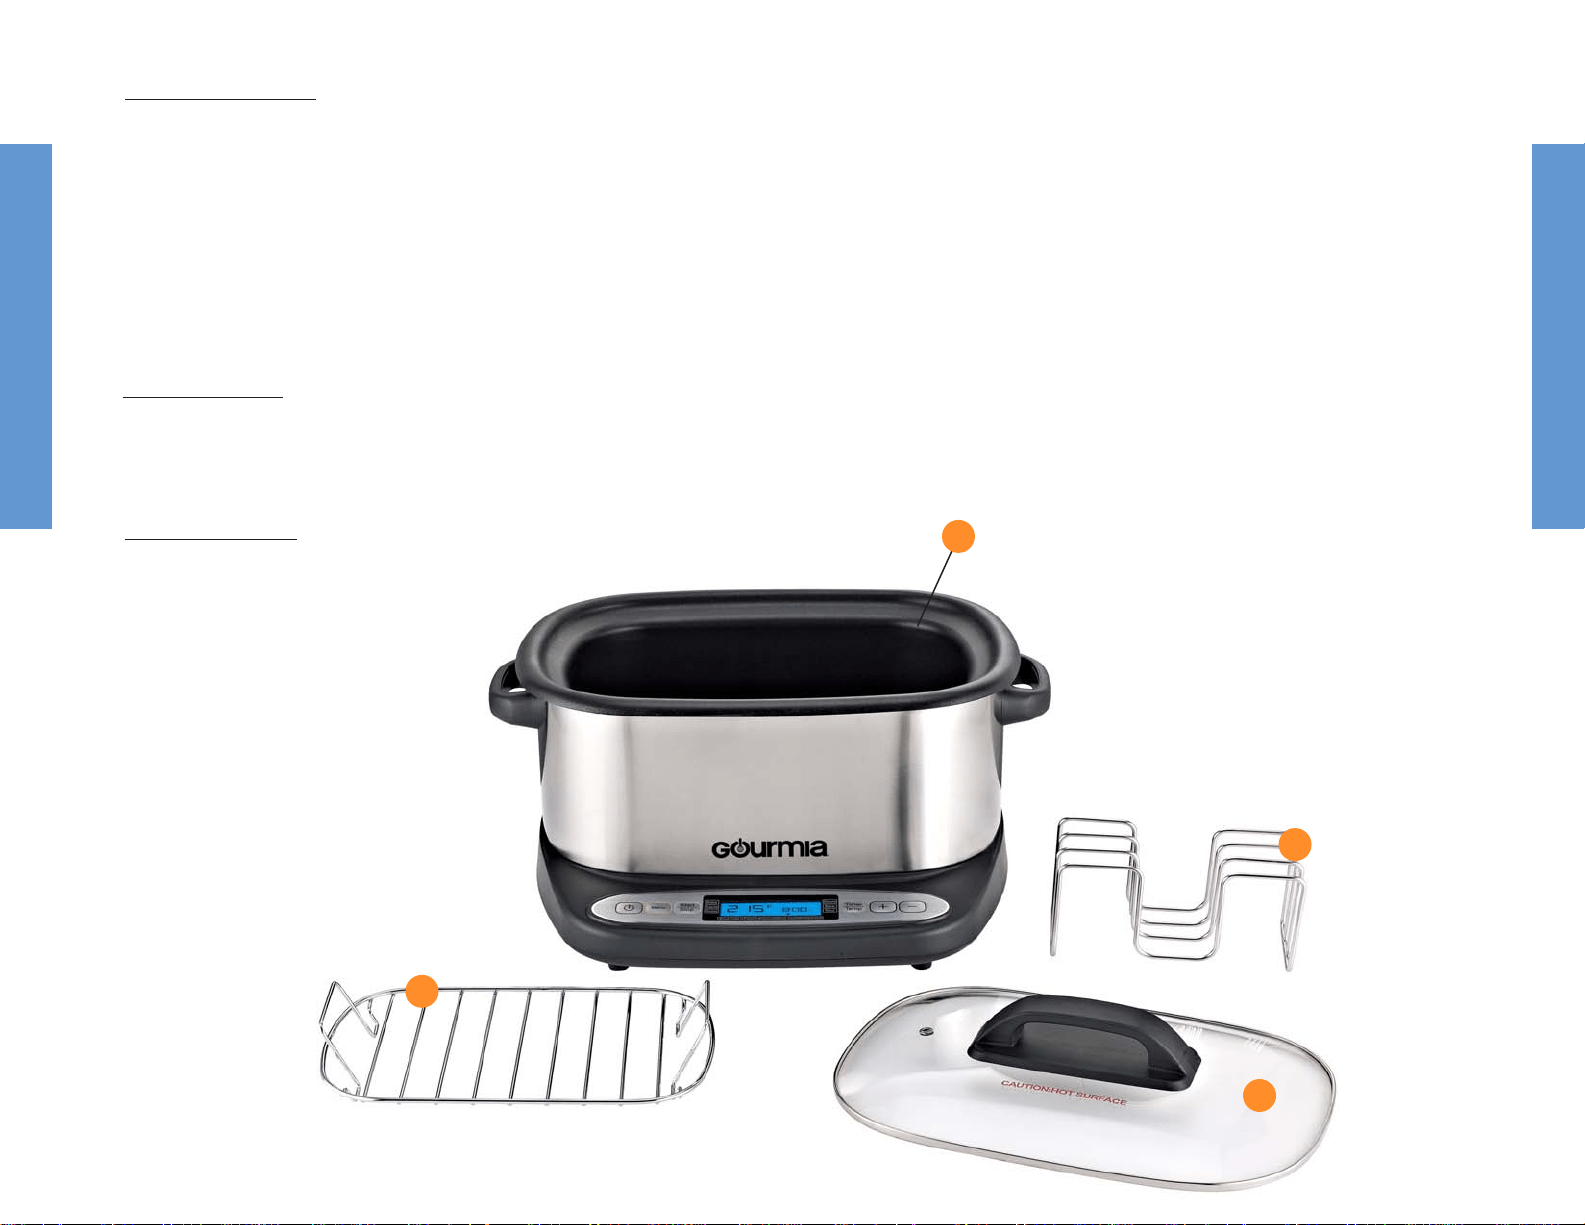
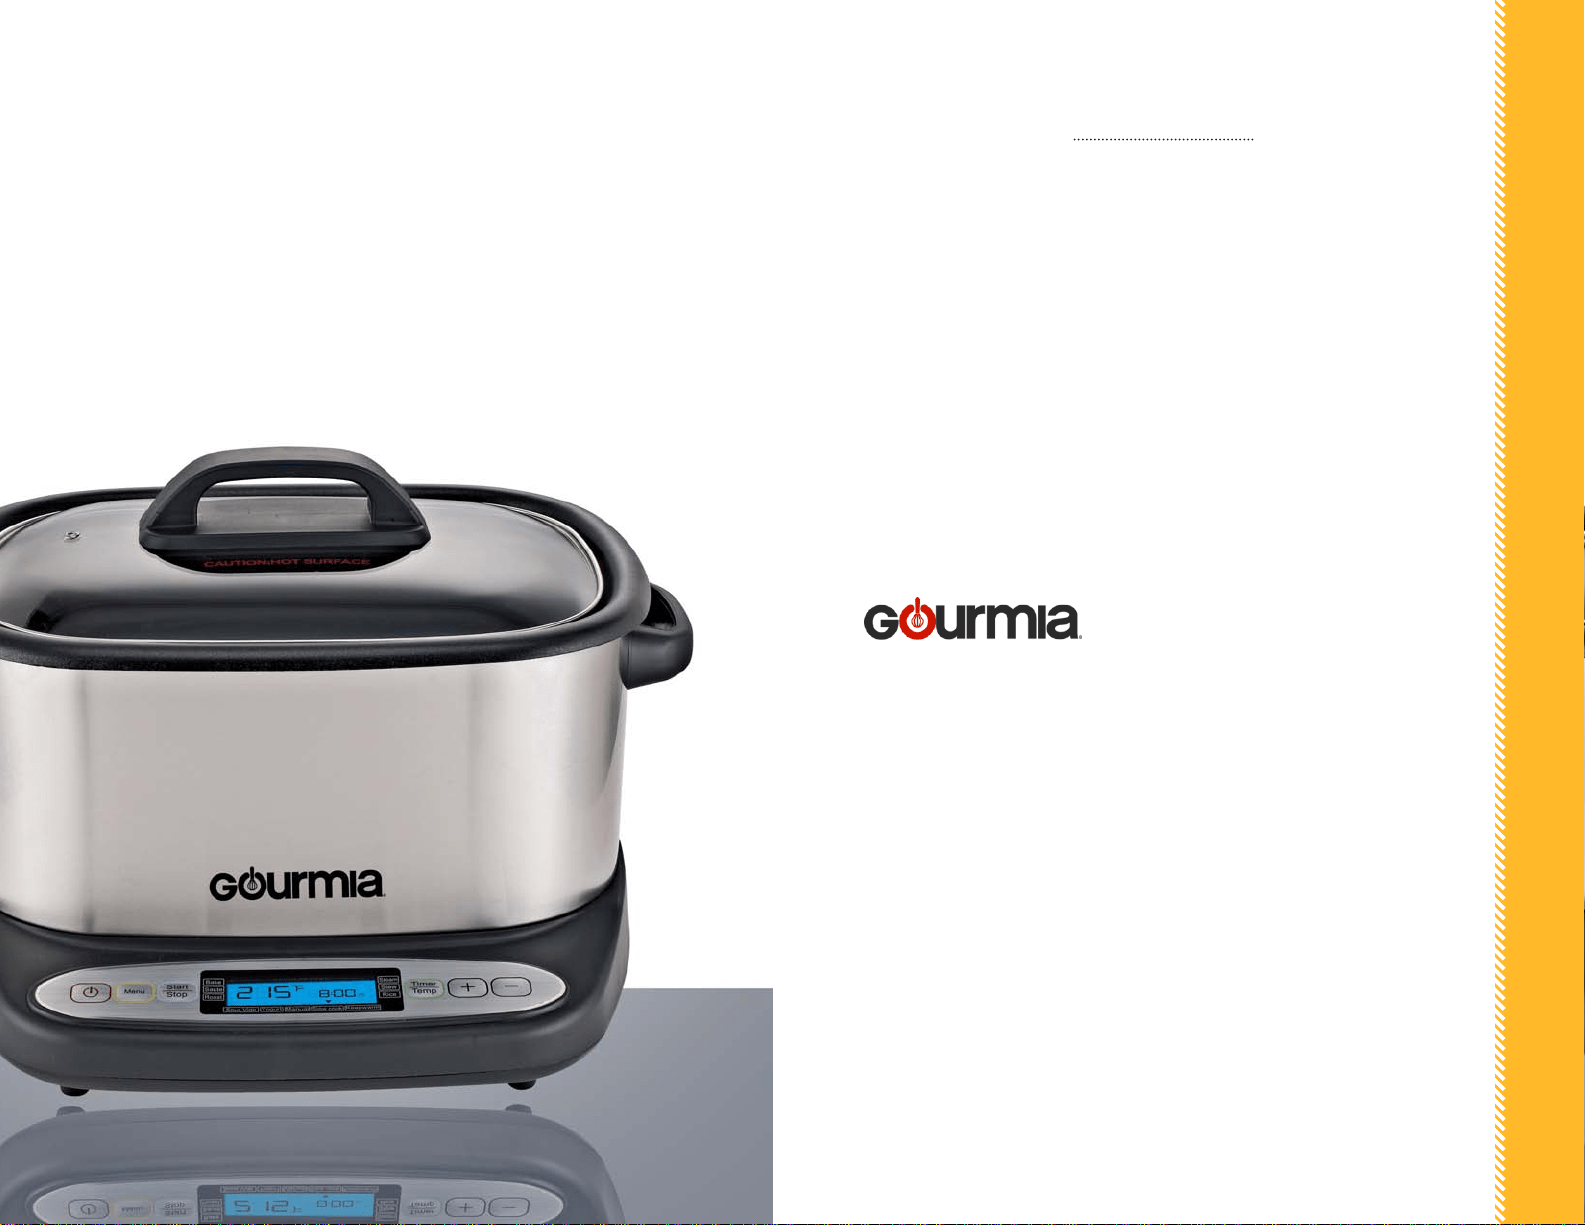
A. Multi C
ooker + Sous Vide Base: The Multi Cooker Base is equipped with EasyLift
Handles and houses the heating unit and Pre-programmed Control Panel. The
Base holds the Removable Cooking Pot and the Tempered Glass Lid.
B. Tempered Glass Lid: An important feature of the Deluxe Multi Cooker +
Sous Vide is the heat-resistant Tempered Glass Lid. Designed with a full viewing
window, the Lid allows observation of the cooking process without opening the
Lid. Opening the Lid while cooking is not recommended, as it reduces the oven
temperature and causes a subsequent increase in cooking times.
To open the Lid after cooking, use the handle on top to lift the Lid up and away
from your face. Care should be taken when opening the Lid, as the collected
steam may be hot. Use pot holders, if needed, to open the Lid and stand well
away from any escaping steam. Place the Lid on a water-resistant surface. Remove
the hot food or hot food bags with tongs.
C. Easy Lift Handles: The engineered EasyLift Handles on the
Deluxe Multi Cooker Base allow for the safe movement of the Base,
particularly when cleaning or moving after use. The Deluxe Multi
Cooker Base should only be moved while it is unplugged and cool to
the touch. The EasyLift Handles allow the user to safely grasp both
handles and remove food or liquids as needed.
8
FEATURES & FUNCTIONS
A
C
B
FEATURES & FUNCTIONS
FEATURES & FUNCTIONS
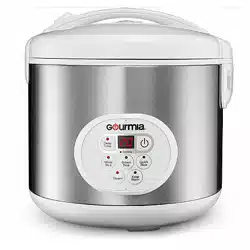
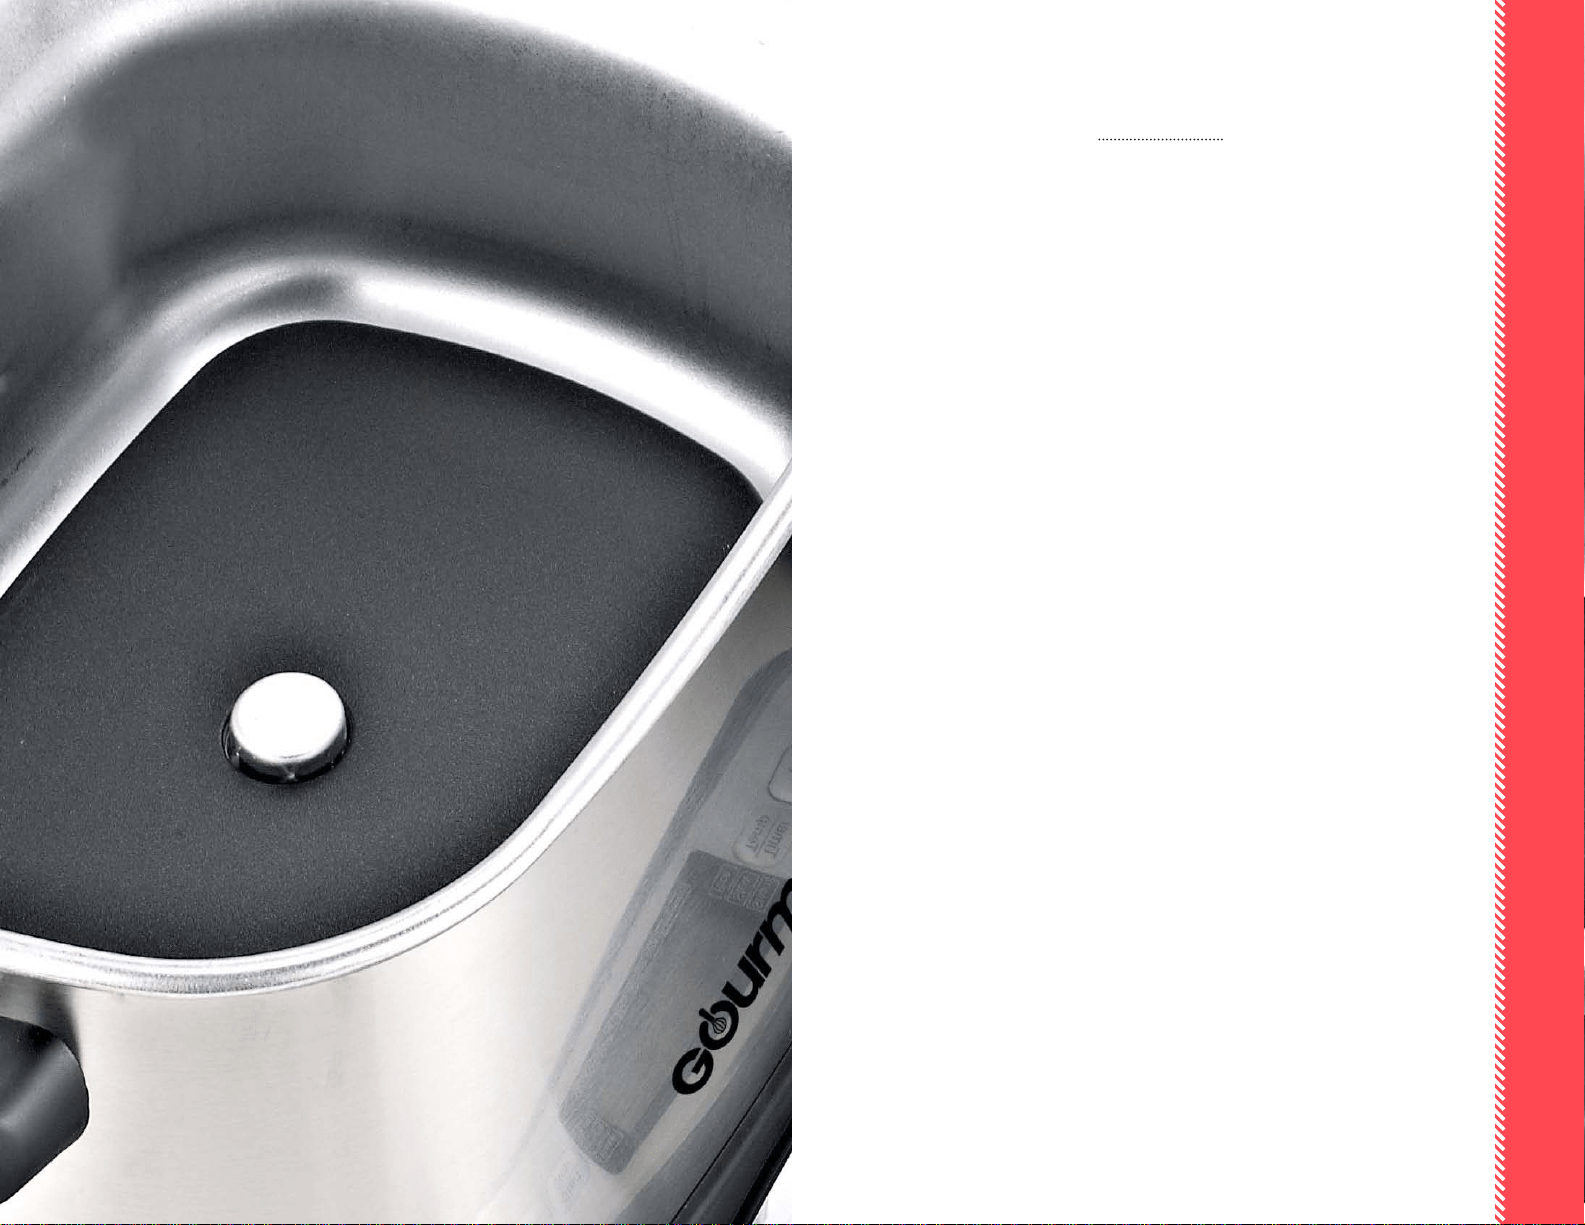
D. R
emovable Cooking Pot: The die cast aluminum Removable Cooking Pot holds the
Sous Vide Rack or the Steaming/Baking Rack. The Removable Cooking Pot has a wide
wrap-around lip for easy lifting and movement and the interior is nonstick for easy
clean-up.
When using the Deluxe Multi Cooker for sous vide cooking, the Sous Vide Rack should
be placed rst into the Removable Cooking Pot, water added, and then lled food
bags should be positioned on the Sous Vide Rack. Food should always be placed in
prepared bags for cooking and always placed on the Rack in the Removable Cooking
Pot.
E. Small Sous Vide Rack: When using the Sous Vide Mode, a Rack must be used for
circulation. The Small Sous Vide Rack holds smaller-sized lled food bags upright for
optimal results. When using the Sous Vide Mode for larger cuts of meat or seafood, the
lled food bags may be placed on the Steaming/Baking Rack (F) as an alternative.
F. Baking/Steaming Rack: This versatile Rack can be used in either the High or Low
position for baking or, steaming. It can also be used when cooking larger cuts of meat
or seafood using the Sous Vide Mode.
B
D
E
F
1110
1313
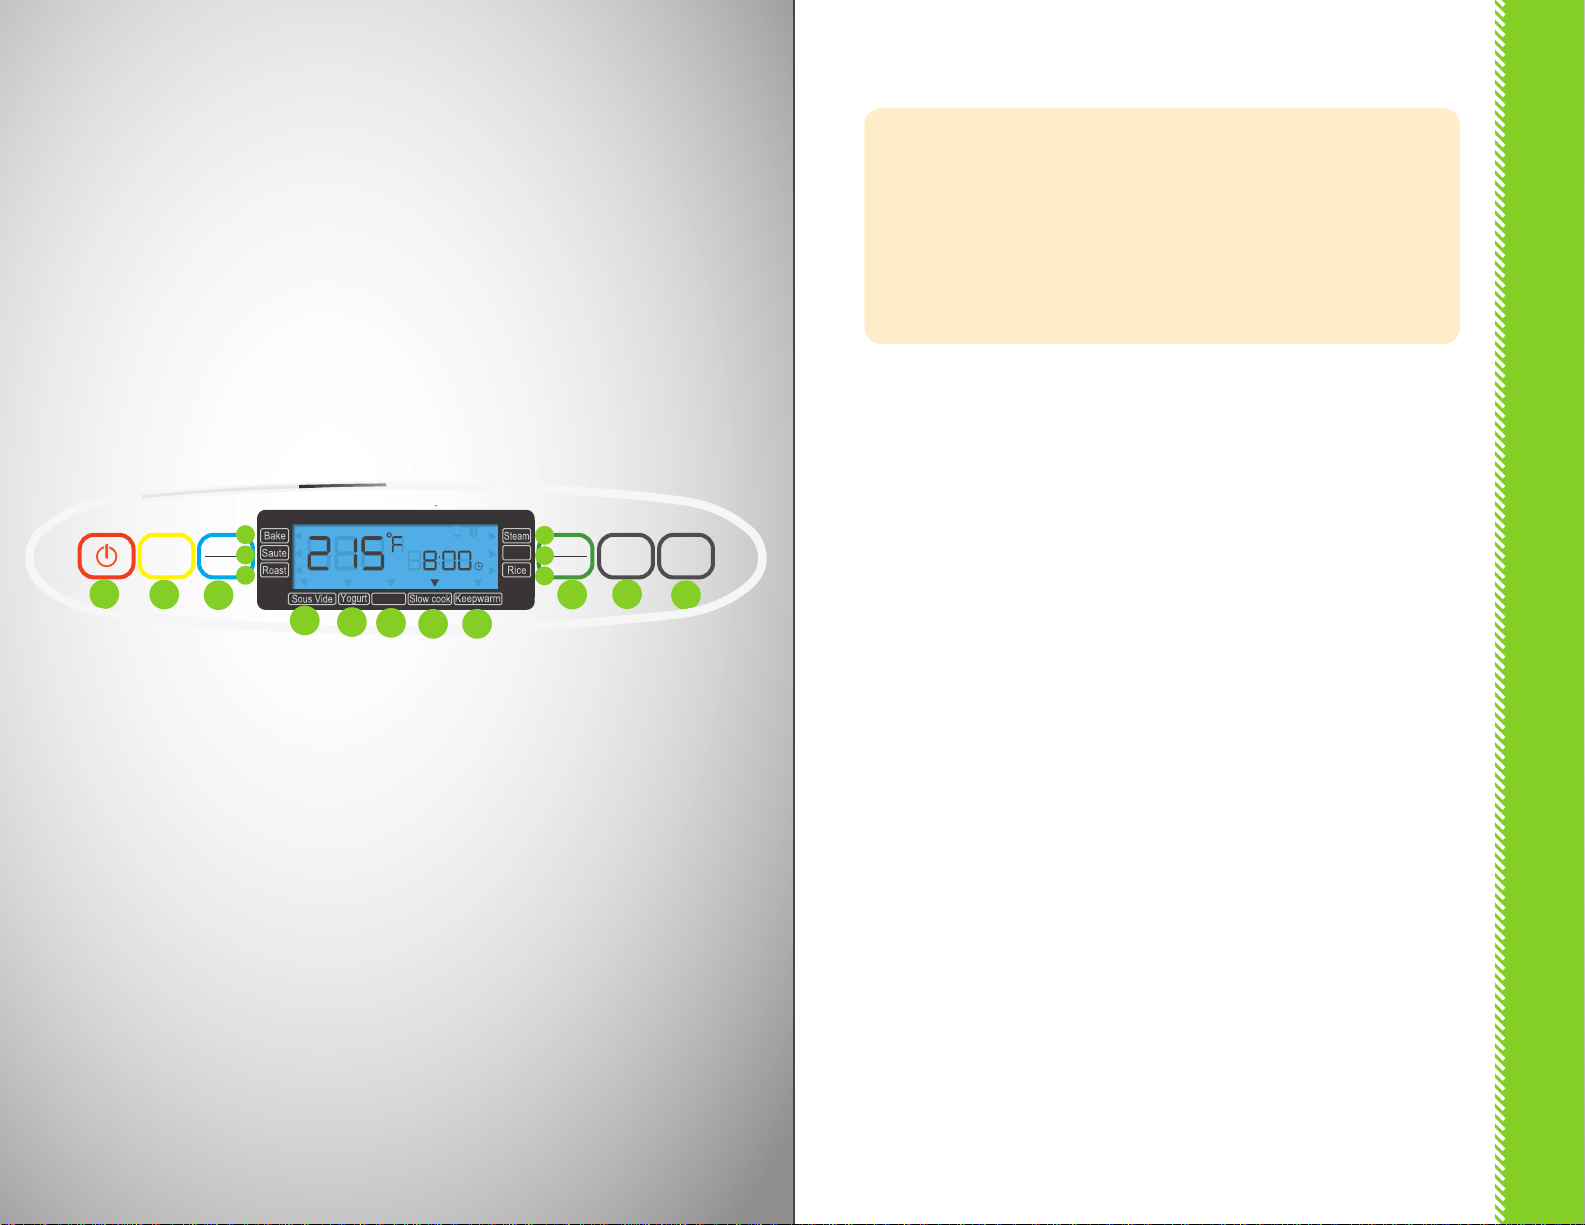
THE PRE-PROGRAMMED CONTROL PANEL The Con
trol Panel houses
the “brains” of the 11-in-One Deluxe Multi Cooker + Sous Vide. The panel
features the LCD Display that shows Temperature and Time and it includes
the Modes that have been pre-programmed with optimal times and
temperatures for each style of cooking in that Mode. The Manual Setting and
Keep Warm function are also included on the Control Panel.
PRE-PROGRAMMED CONTROL PANEL
A.
Pow
er Button – Press to turn the Multi Cooker On and O.
B.
Menu Button – P
ress to view the cooking functions on the LCD Display.
C.
Timer/Temp Butt
on - Press to set the time and temperature to either
increase/decrease time and temperature on pre-programmed Modes,
or to set a custom Manual Cook time/temperature.
D.
+ Button – Pr
ess to increase time and/or temperature.
E. – Button – Pr
ess to decrease time and/or temperature.
F.
Start/S
top Button – Press to start and/or stop the cooking function.
G.
Bake Button
H.
Sauté Butt
on
I.
Roast Button
J.
Steam Butt
on
K. Stew Butt
on
L.
Rice Butt
on
M.
Sous Vide
Button
N.
Yogurt Butt
on
O.
Manual Button – P
ress to select your custom Cooking time and
temperature.
P.
Slow Cook Butt
on
Q.
Keep War
m Button – Press to select time for Keep Warm feature.
:: G – O: Press to select pre-programmed Mode of your choice ::
A
B
C
D
EF
12
Timer
Temp
Start
Stop
Menu
+
-
Stew
Manual
M
N
O
P Q
G
H
I
J
K
L

15
BEFORE FIRST USE & ASSEMBLY
1.
Before using the Deluxe Multi Cooker for the rst time, wipe the interior
and exterior of the Base, the Removable Cooking Pot, and Tempered Glass
Lid with a damp cloth and mild soap. Dry with a soft towel.
2.
Place the R
emovable Cooking Pot into the Deluxe Multi Cooker Base. If
steaming or cooking sous vide, place the appropriate Rack in the Cooking
Pot.
3. Add ingr
edients to the Removable Cooking Pot.
4.
Place the
Tempered Glass Lid on the Removable Cooking Pot. Do not add
aluminum foil or close or obstruct the small vent on top of the Lid.
5.
Plug the Delux
e Multi Cooker cord into the wall outlet.
6.
Press the Power Button to turn On.
15
BEFORE USE & ASSEMBLY
14
1717
STEP-BY-STEP COOKING
Inside your Deluxe Multi Cooker
, there are 10 Cooking Modes, including a
Manual Mode and the Keep Warm feature. There are also options to increase
or decrease cooking times and temperatures and even, if desired, change
Cooking Modes during the cooking process!
The 10 Cook
ing Modes in your Deluxe Multi Cooker are only the starting
place to create delicious and amazing dishes. With various times and
temperatures already preset by the factory, you can either use the Cooking
Modes in a simple 1-2-3 Step process, or you can start with a Cooking Mode
and add or subtract times and temperatures to include additional cooking
choices from there. Note that, for some Modes, temperatures and/or times
have been preset and cannot be changed.
The following Cooking Modes and Methods can all be utilized in the Deluxe
Multi Cooker and we encourage you to try dierent dishes and classic
favorites here, as well. The sky is the limit with your Deluxe Multi Cooker!
I. C
OOK WITH PRE-PROGR
AMMED COOKING MODE
II. COOK WITH PRE-PROGRAMMED COOKING MODE & INCREASE/
DECREASE TIM E OR TEMPERATURE.
III. CHANGE COOKING MODE DURING THE COOKING PROCESS.
*
Press Menu Butt
on until LCD Display indicates desired Cooking Mode.
*
The arro
w pointing to the Cooking Mode will ash for 8 seconds.
*
At the same time, the LCD Displa
y will indicate the pre-programmed Time and
Temperature for the Cooking Mode selected. The preset temperatures for Slow
Cook, Keep Warm, Rice, Yogurt, Stew or Steam cannot be changed.
* At the end of the 8-second cy
cle, the pre-programmed Cooking Time and
Temperature will automatically start and the Timer will indicate the countdown.
(NOTE: In Sous Vide mode, timer will not start until water reaches temperature.
When water temperature is reached, unit will beep 3 times. Press start and timer
will start.)
* When the Display Timer reaches the reading, “0:00” the Deluxe Multi Cooker will
automatically turn 0.
I. COOK WITH PRE-PROGR
AMMED COOKING MODE
STEP-BY-STEP COOKING

STEP-BY-STEP COOKING
STEP-BY
-STEP COOKING
II. COOK WITH PRE-PR
OGRAMMED COOKING MODE &
INCREASE/DECREASE TIME OR TEMPERATURE
III. CHANGE COOKING MODE DURING THE C
OOKING PROCESS
The cooking Time and/or Temperature can be adjusted either before the start of
cooking or during the cooking process:
a) Press the Timer/Temp Button once. The temperature will ash on the Display.
Press the + Button to increase the temperature or the – Button to decrease the
temperature.
b) Press the Timer/Temp Button once again. The Time will ash on the Display.
Press the + Button to increase the Time or the – Button to decrease the Time.
c) When the LCD Display stops ashing, the Deluxe Multi Cooker will begin the
cooking process with the adjusted time and temperature.
NOTE: The preset temperatures for Slow Cook, Keep Warm, Yogurt, Rice, Stew and
Steam Modes cannot be changed.
*
Press the S
tart/Stop Button
*
Press Menu Button repeatedly until the desired Cooking Mode is displayed.
*
The new Cook
ing Mode will automatically begin in 8 seconds with the pre-
programmed Time and Temperature.
*
Adjust time and temper
ature as desired (see Option 2).
TIP: The Start/Stop Button may be pressed at any time during any cooking process,
either pre-programmed or manually set, to stop the cooking process and turn O the
Multi Cooker.
1918

STEP-BY-STEP COOKING
STEP-BY
-STEP COOKING
BAKE MODE
Preset Temp Preset Time
Optional
Temp Range
Optional
Time Range
320°F 2 hrs 230 - 420°F 30 min – 4 hrs
With the versa
tile nature of the Deluxe Multi Cooker, you can easily and
eortlessly bake in y
our Cooker. Here are some handy hints for baking:
• Use the Bake Mode t
o cook foods at 320°F for 2 hours or increase the time
and temperature as desired.
• ALWA
YS use the Removable Cooking Pot for baking. Place prepared
ingredients in the Removable Cooking Pot and watch carefully during baking
to avoid burning.
• Steamed desser
ts turn out beautifully in the Deluxe Multi Cooker. Place the
Steaming/Baking Rack in the bottom of the Removable Cooking Pot (or use
a stainless steel rack of your choice). Pour at least 3 cups water into the Pot
to ensure the Pot does not become dry during baking. Place a heat-proof
dish with your prepared ingredients onto the rack. Place the Lid on top and
steam per your recipe. Watch to ensure the Pot has enough water to operate
correctly and, if needed, carefully add water.
• Baked foods in the Delux
e Multi Cooker will cook faster than normal; watch
carefully to avoid burning.
• The heating elemen
t is close to the bottom of the Removable Cooking Pot. If
baking a heavy-density food, such as cheesecake, use lower temperatures to
ensure the bottom does not burn before the top of the baked food is cooked.
2120

300 - 425°F
STEP-BY-STEP COOKING
STEP-BY
-STEP COOKING
SAUTÈ MODE
Preset Temp Preset Time
Optional
Temp Range
Optional
Time Range
390°F 10 min 375 - 425°F 5 min – 2 hrs
ROAST MODE
Preset Temp Preset Time
Optional
Temp Range
Optional
Time Range
355°F 1 hr 30 min – 3 hrs
The sauté method of c
ooking is one where foods are cooked quickly with
continual stir
ring. When cooks sauté, they are typically mixing and softening
aromatics such as onions, garlic, carrots and herbs via quick, high heat. Although
it may be tempting to skip this step and merely toss ingredients together, this
part of your meal brings out all the delicious avors of your foods. The following
hints and tips will help make your sautés wonderfully avorful and cooked to
perfection:
• Pour 1-2 tablespoons oil int
o the Removable Cooking Pot before adding
foods. Add uniformly chopped onions, garlic, celery, carrots, herbs and other
ingredients as desired.
• Use a long-handled wooden or hea
t-proof spoon or spatula to consistently
turn and move the food around in the heated Pot. The foods can easily burn,
so remember to turn them.
• Select t
ender cuts of meat and cut or slice them very thinly and uniformly for
best results.
• Add sauces
, wine, soy sauce or small amounts of broth as needed. Do not
add large amounts of liquid all at once; pour slowly to avoid splattering.
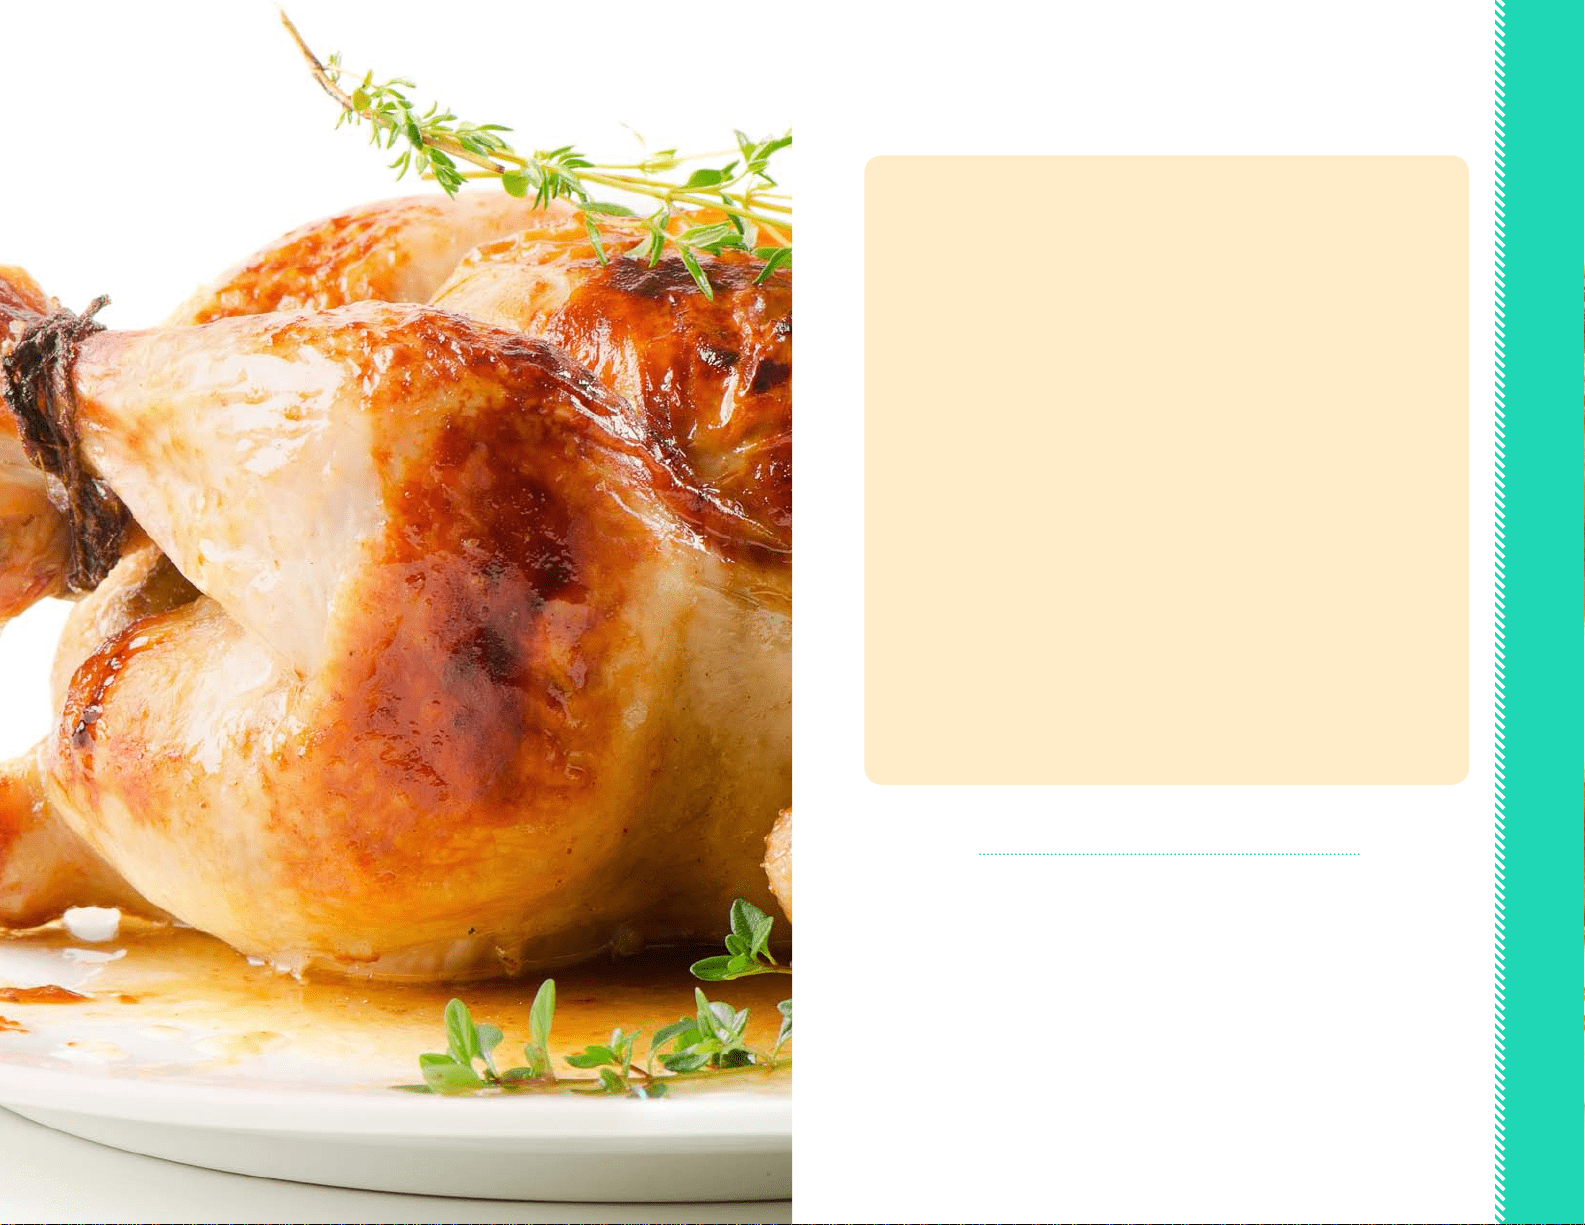
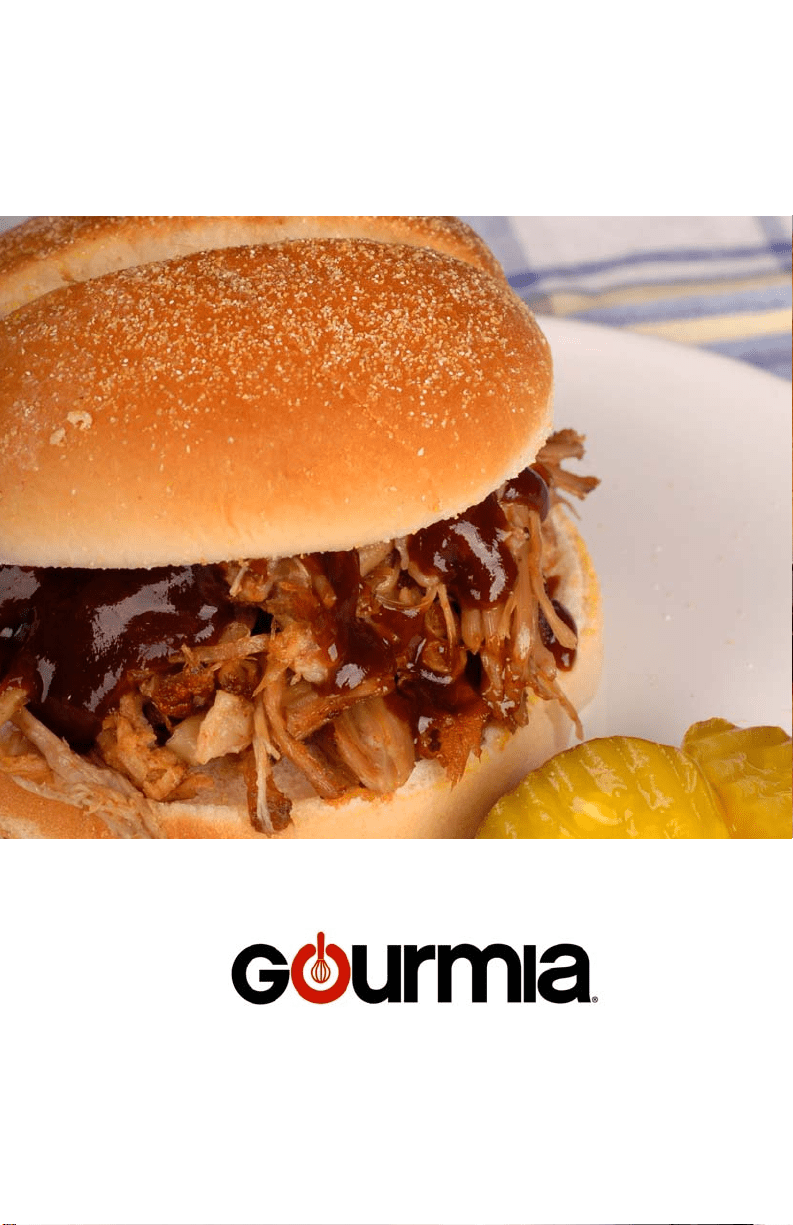
The most tender and delicious lar
ge cuts of meat can be easily prepared
using your Delux
e Multi Cooker. Beef cuts such as chuck roasts and round tip
roasts are economical, yet hearty and satisfying when cooked to perfection in the
Roast Mode. Try a whole prepared chicken, stued with herbs and orange slices,
a pork shoulder roast with garlic slices or a bone-in ham slathered with honey…
no matter what cut you choose, your Roast Mode will make it super easy. The
following hints and tips will help along the way:
• Alwa
ys use an instant-read meat thermometer to ensure your meat has
cooked to the proper temperature.
• Make sure bef
ore cooking that your cut of meat ts the Removable Cooking
Pot with the Lid securely in place. Place a bed of sliced onions on the bottom
of the Pot, resting the roast on top, for superior avor. Or create a bed of
quartered potatoes or sliced lemons for poultry. The options are endless and
the meat will be juicy and tender when ready to eat.
• Pour 1-2 tablespoons canola oil in the Remo
vable Cooking Pot. Cover with
cleaned and quartered carrots, onions, potatoes or turnips and place meat
on top of the vegetables. Add 2-3 cups broth and roast your one-dish dinner
until hot and deliciously hearty.
• When done cook
ing, move the roast to a cutting board and wrap or tent with
aluminum foil to rest for 10 minutes. This will allow the meat juices to settle.
Slice and serve after resting.
• If you
’d like to make gravy, use the Sauté Mode to quickly heat the liquid in
the Removable Cooking Pot after removing the roast. Stir and add ½ cup
water mixed with 1-2 tablespoons cornstarch or our to thicken the gravy.
Add seasonings to avor and continue stirring and heating for 5 minutes.
2322

perfec
tion in 4 to 24 hours. Sear quickly when done and serve with root
30min-72 hrs
STEP-BY-STEP COOKING
STEP-BY
-STEP COOKING
SOUS VIDE MODE
Preset Temp Preset Time
Optional
Temp Range
Optional
Time Range
130°F 8 hrs 115 - 205°F
The art of sous vide c
ooking is truly an art! It is simple in nature, yet this
cooking method is of
ten used by gourmet chefs to prepare the most complex,
rich entrées and vegetables. Because the foods are cooked at low temperatures
for longer times, the texture and avors are authentically and naturally good-for-
you and avorful. Beef, poultry, sh and pork are fork-tender when done, with
rich and inviting textures. Vegetables retain all their nutrients when cooked sous
vide, so many of the natural sugars are retained, oering delightfully sweet and
nutritious side dishes. In fact, everything about sous vide says, “naturally good-for
you!”
• Be sure t
o refer to the Cooking Guide in your Recipe Book for full sous vide
cooking information.
• The thickness of mea
t, poultry and sh will determine the length of cooking
time. Use an instant-read thermometer after removing from the cooking bag
to guarantee that a safe-food temperature is indicated.
• Food safet
y in handling and cooking is always a priority. When unsure
of doneness, add 30 minutes to the cook time to pasteurize eggs and/or
poultry.
• Searing af
ter cooking gives foods a crispy texture and an appealing visual
picture. When meat is done, toss butter into a smoking-hot skillet and
quickly sear the cooked meat for 30 seconds on each side. This gives the
meat a caramel color and an appetizing outer appearance.
• Some tough cuts of beef and por
k can be cooked sous vide to tender
vegetables.
• Vegetables will cook fast
er if they are thinly sliced or cut in small pieces; or if
left whole, they will take more time to become tender. Either way, the natural
sweetness and full nutrient value adds to the delight in sous vide vegetables.
• Fruit can be cooked sous vide t
o make toppings, purees, syrups and such.
Cook for 2-2½ hours at 160°F and let cool in the bag before using.
• To prep mea
t, poultry and sh before cooking, add seasonings or rubs before
bagging. Vacuum seal or use the Water Displacement Method to remove the
water from the bag before cooking (see following).
• To av
oid the cooked protein that surfaces in sous vide chicken and sh,
called “albumin,” brine the chicken or sh for one hour in lightly salted water,
drain and pat dry.
• ALWA
YS use a BPA-free vacuum-sealed bag when cooking foods more than
8 hours.
• Use a vacuum-sealed bag or use the
“Water Displacement Method” for foods
cooked fewer than 8 hours.
Wat
er Displacement Method
1. Fill a large plastic c
ontainer with cool water.
2. Prep y
our food to be cooked and place food in a BPA-free
plastic freezer bag. Do not seal.
3. Slowly immerse the food-lled bag in
to the water. This
will force the air out as the bag is immersed.
4. Continue immersing the bag un
til just before the water
reaches the top of the bag.
5. With the bag in the wa
ter, close or zip to seal, forcing out
all remaining air as much as possible.
2524
STEP-BY-STEP COOKING
STEP-BY
-STEP COOKING
YOGURT MODE
Preset Temp Preset Time
Optional
Temp Range
Optional
Time Range
non-adjustable 8 hrs non-adjustable 4 hrs – 12 hrs
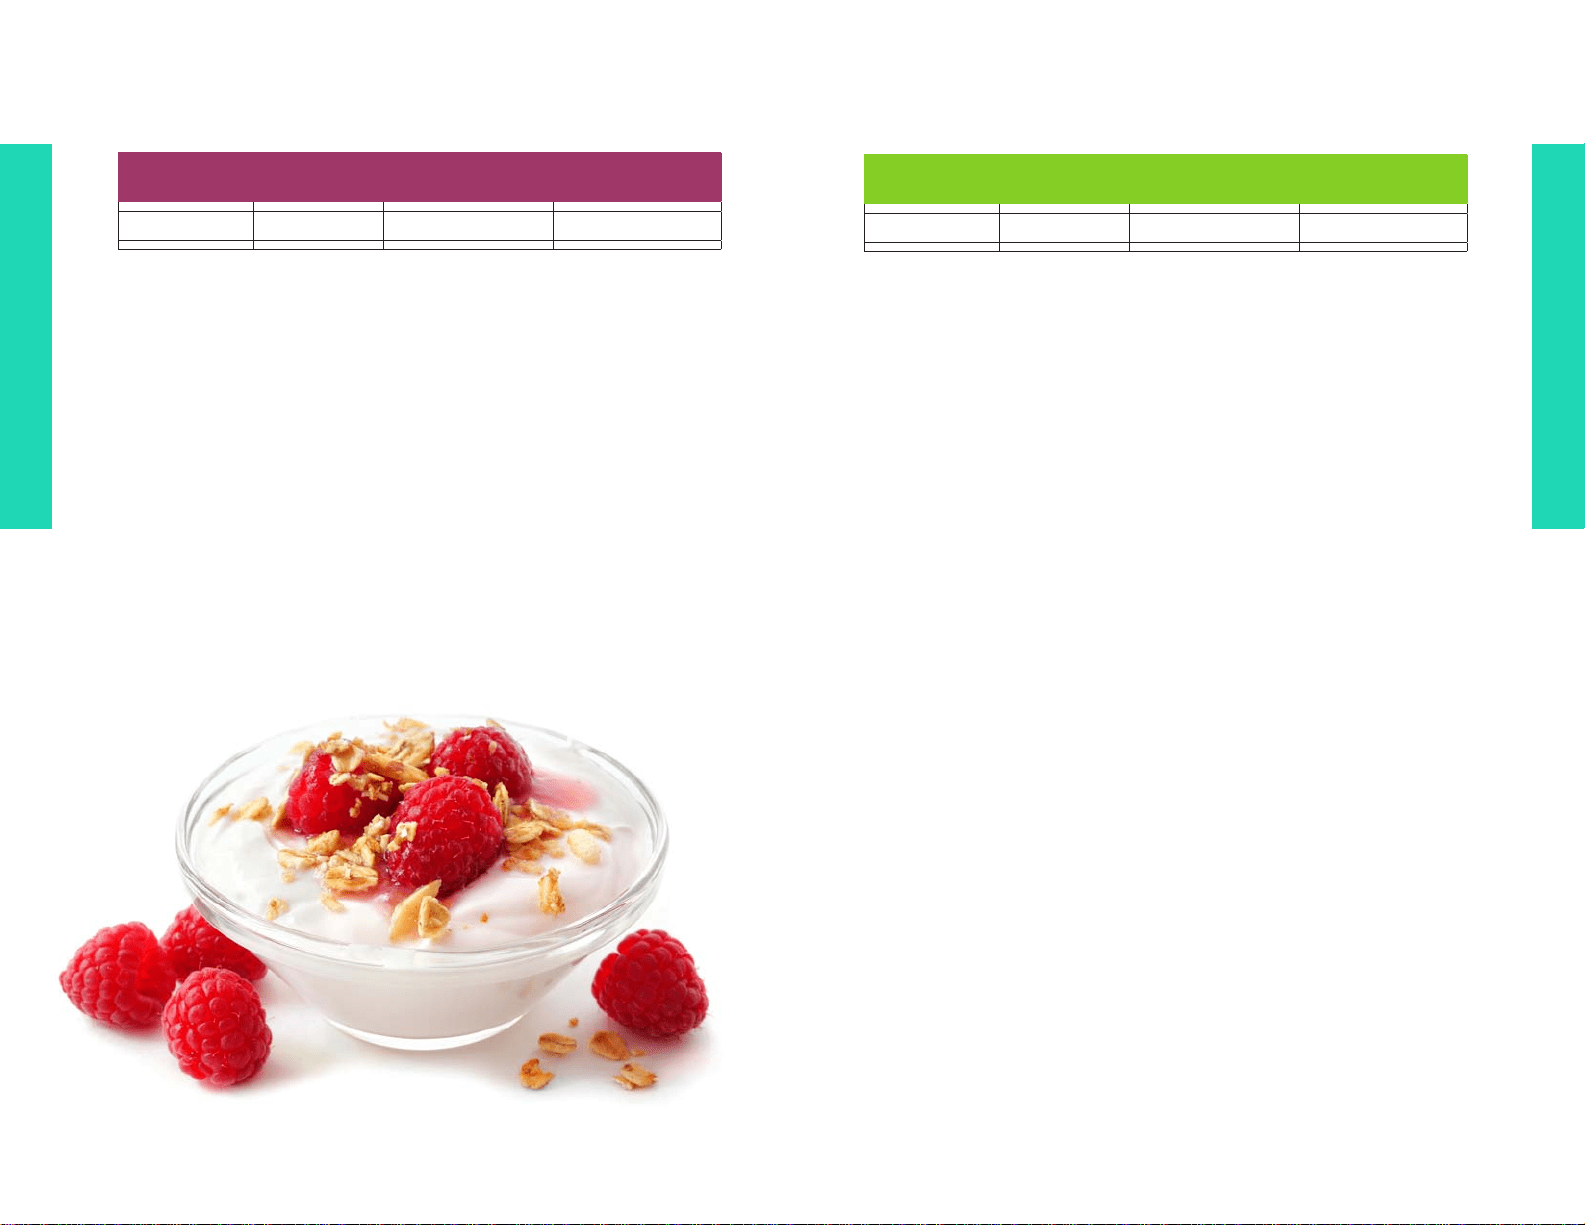
Homemade yogurt is a tar
t and tangy treat that is incredibly easy to make in
the Deluxe M
ulti Cooker. Use this Cooking Mode for a minimum of 8 hours and up
to 12 hours to make thick, creamy and rich homemade yogurt.
• Place the R
emovable Cooking Pot into the Base. Fill up to halfway with water,
depending on how many jars of yogurt you will be cooking. Place the lled
and lidded jars of yogurt into the water bath in the Removable Cooking Pot
and set the Yogurt Mode for cooking.
• Follow y
our recipe directions carefully to ensure complete success. Remove
jars when done and cool, then refrigerate until using.
MANUAL MODE
Preset Temp Preset Time
Optional
Temp Range
Optional
Time Range
210°F 30 min 175 - 425°F 5 min – 12 hrs
Cooking in the M
anual Mode oers a wide range of temperatures and times
from which to choose
. With both very low and high temperatures and times of 5
minutes to 12 hours, you can select just about any combination for your favorite
recipes.
• Because the Delux
e Multi Cooker is smaller than typical ovens, be sure to
check foods early in the cooking process to ensure foods do not over-cook.
• ALWA
YS use the Removable Cooking Pot when using any Mode. Add a small
amount of oil or butter if heating and mixing vegetables.
• The Manual M
ode is place where you can explore and create new recipes
or rene classics and family favorites. Enjoy your energy savings using the
economical Deluxe Multi Cooker!
2726

STEP-BY-STEP COOKING
29
SLOW COOK MODE
Preset Temp Preset Time
Optional
Temp Range
Optional
Time Range
212°F 6 hrs non-adjustable 4 hrs – 12 hrs
Slow cooked meals are the favorite of every busy cook. Although many
people already hav
e favorite recipes, some easy hints and tips follow:
• ALWA
YS use the Removable Cooking Pot for all Cooking Modes.
• Slow cooked f
oods don’t need much liquid, but there should be at least ½
cup in the Removable Cooking Pot to start.
•
Foods will cook o
ver a long period of time and excess moisture will self-create
liquid, however check occasionally during the cooking period to ensure the
contents of the Pot do not become dry. If so, carefully open the Glass Tempered
Lid and add a small amount of liquid.
•
Fill the Remo
vable Cooking Pot at least halfway with food for best slow-cooking
results.
•
Cut all ingr
edients into uniform sizes for best results.
•
Use cuts of meat with a high fa
t content to help break down the connective tissue
of meat and make it tender. Select pot roasts, chuck steak or roast, cross-rib roasts
or meaty chops or ribs.
•
Seafood and shellsh should not be added t
o a slow-cooked dish until the last
1-1½ hours of cooking. Refer to your recipe for directions.
•
Do not place fr
ozen, unthawed meat or seafood into the Removable Cooking Pot
for slow-cooking.
•
Carefully check saf
ety information regarding cooking meats and the Keep Warm
feature. It is unhealthful and potentially dangerous to allow cooked foods to
stand at a low temperature for long periods of time. Refer to www.foodsafety.gov
for full details regarding food safety.
KEEP WARM MODE
Preset Temp Preset Time
Optional
Temp Range
Optional
Time Range
155°F 2 hrs non-adjustable 1 hr – 4 hrs
RICE MODE
Preset Temp Preset Time
Optional
Temp Range
Optional
Time Range
212°F non-adjustable non-adjustable non-adjustable
The Keep W
arm Mode is a great way to “heat and hold” foods until everyone
is ready to ea
t. The Deluxe Multi Cooker oers this convenience for up to 4 hours.
Refer t
o the safety information at: www.foodsafety.gov for full details
regarding the pr
ocess of safely keeping food warm.
Your Delux
e Multi Cooker will prepare rice perfectly! Because there are many
types of ric
e, refer to your package instructions for exact measurements of rice-to-
liquid for best results. Try inventive and fun rice dishes – risotto, jambalaya, Cajun
shrimp and rice, rice pudding, and other favorites.
•
ALWA
YS use the Removable Cooking Pot when making rice. Do not pre-soak rice,
but rinse it in water, if desired. Add salt, if desired.
•
To make uy long gr
ain white rice perfectly, use a 3:1 ratio, as in 3 cups water to
1 cup rice. Add 1 tablespoon butter to the rice before cooking to help keep rice
from sticking and to add a depth of rich avor.
•
Add the Keep W
arm Mode for up to 4 hours, if desired. Rice will hold safely for this
length of time at a low warm temperature.
2928

STEP-BY-STEP COOKING
STEP-BY
-STEP COOKING
STEW MODE
Preset Temp Preset Time
Optional
Temp Range
Optional
Time Range
188°F 2 hrs non-adjustable 2 hrs – 4 hrs
STEAM MODE
Preset Temp Preset Time
Optional
Temp Range
Optional
Time Range
212°F 30 min non-adjustable 20 min – 90 min
Stew pr
actically cooks itself inside your Deluxe Multi Cooker! Use the Stew
Mode to set the time and w
alk away until it’s done. Here are some handy tips for
usage:
• ALWA
YS use the Removable Cooking Pot. Select cuts of meat such as chuck
roast and chuck steak that will become tender within the cooking time. Meat
should be no more than 2-inches thick and cut into 1-inch cubes.
• Add fro
zen, thawed mixed vegetables for a quick addition to stew. Spread
the vegetables around the meat pieces.
• Try easy classic r
ecipes such as Coq au Vin, a superbly simple dish of stewed
chicken thighs with mushrooms and a wine sauce. The Stew Mode will cook
everything perfectly. Serve over rice or pasta for an incredible one-dish
dinner.
Steaming is a v
ery healthful and nutritionally sound cooking method. It
helps retain many vitamins and miner
als that can be lost through other methods.
Steaming oers very tender results and, as such, is perfectly suited to seafood,
vegetables and other foods that break down quickly with moist heat. The
following hints and tips will help you create quick and easy steamed success with
your Deluxe Multi Cooker:
• ALWA
YS use the Baking/Steaming Rack inside the Removable Cooking
Pot for steaming. DO NOT steam without the Removable Cooking Pot as
electrical shock can occur if the heating element is exposed to moisture or
liquid.
• Place the R
ack inside the Removable Cooking Pot, then place food directly
on the rack or inside a heatproof plate or dish on top of the rack. Make sure
the Tempered Glass Lid can close completely before starting the Steam
Mode.
• Place a
t least 2-inches water in the Removable Cooking Pot to allow the
Cooker to steam eciently. If steaming for more than 30 minutes, ll the
water until it reaches the top of the Rack or bottom of the cooking dish.
Check frequently to ensure the Pot has water and add water, if needed.
3130
33
MAINTENANCE
MAINTENANCE
• ALWAYS allow the Deluxe Multi Cooker to cool completely before cleaning.
• Unplug the Deluxe M
ulti Cooker before cleaning.
• Aft
er each use, clean and dry the Deluxe Multi Cooker. Use a damp cloth to
clean the Cooker Base and Tempered Glass Lid. DO NOT immerse the Base
in water. Use non-abrasive soap only.
• Aft
er each use, the Removable Cooking Pot may be placed in the
dishwasher or washed by hand with the other parts.
35
Gourmia Stainless Steel
Deep Fryer with
3 Frying Baskets
GDF500
Gourmia Wide Mouth Fruit
and Vegetable Juice Extractor
GJ750
Gourmia 2.2 Quart Automatic
Ice Cream, Gelato, Sorbet
& Frozen Yogurt Maker
GSI400
Did you know?
Although Gour
mia is the new kid on the block, we’ve
already established ourselves as one of the leading manufacturers of creative and
innovative kitchen products.
Check out these new kitchen appliances and check our website often for new
product release information @ www.gourmia.com
Gourmia 8 Quart Smart Pot
Electric Pressure Cooker
GCP800
Gourmia 9 Quart Sous Vide
Water Oven Cooker
GSV550
Why not Add these Best-selling
A
ppliances to your Kitchen!
GOURMIA IN YOUR KITCHEN!
GOURMIA IN YOUR KITCHEN!
34
37
WARRANTY & SERVICE
This Limited Warranty is for one full year from the date of purchase. It is
applicable to the original purchaser only and is not transferable to a third party
user. Repair or replacement of defective parts is solely at the seller’s discretion.
In the event that repair isn’t possible, the seller will replace the product/part. If
product repair/replacement won’t suce, the seller has the option of refunding
the cash value of the product or component returned.
Product defects not covered under the Warranty provisions include normal wear
and damage incurred from use or accidental negligence, misuse of instruction
specications or repair by unauthorized parties. The manufacturing company
is not liable for any incidental or consequential damages incurred by such
circumstances.
For Customer Service or Questions, Please call: 888-552-0033
www
.gourmia.com
WARRANTY & SERVICE
36
www
.gourmia.com