
Loading ...
Loading ...
Loading ...
Page 9
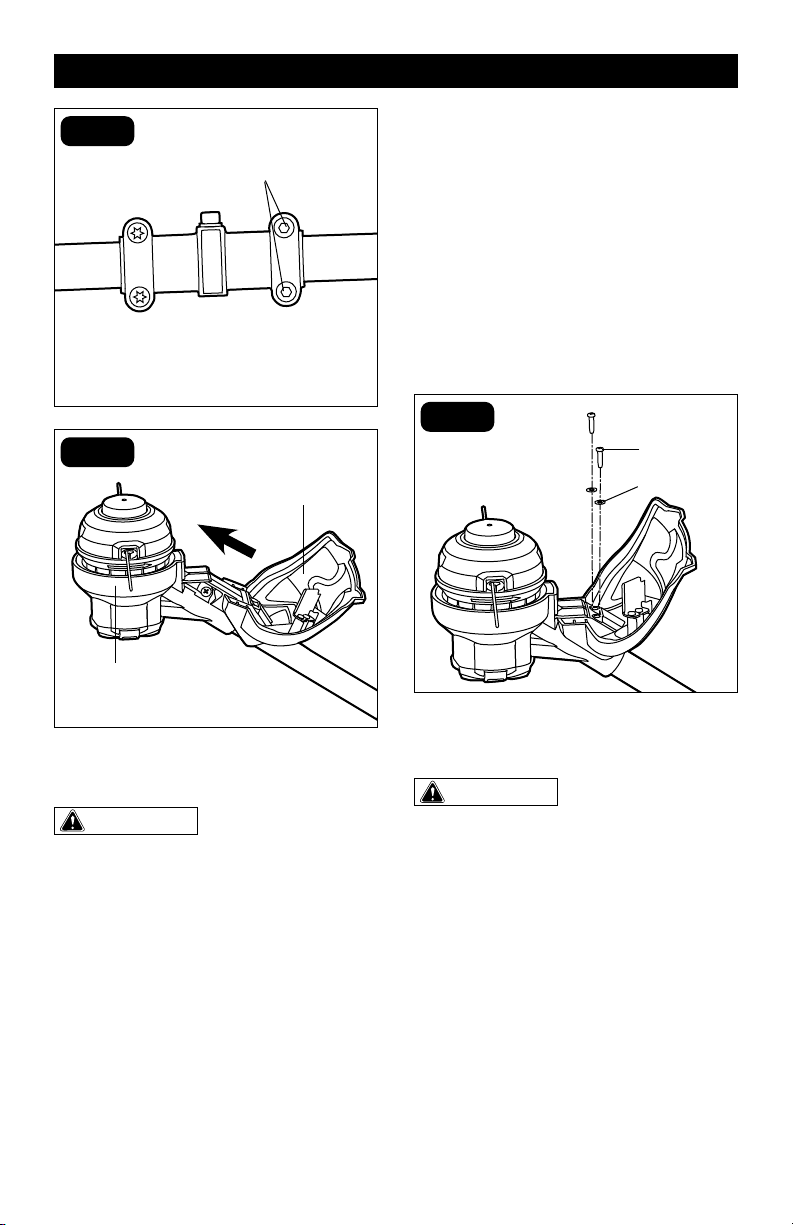
FIG. 2
FIG. 3
MOUTING THE GUARD
WARNING:
• Always wear gloves when mounting or
replacing the guard. Be careful of the blade
on the guard and protect your hands from
being injured by the blade.
• Always remove the battery pack from the
product when you are assembling parts,
making adjustments, cleaning, or when the
product is not in use.
1. Remove the battery pack from the
trimmer.
2. Lift the trimmer head and face it upward;
align the groove on the bottom of the
guard with the raised portion on the
base of the trimmer head, and then slide
the guard onto the base (Fig 3).
3. Make sure that the two mounting
holes in the guard are aligned with
the two assembly holes in the base
of the shaft. Insert a screw into each
washer, and then lock the guard in place
by tightening the two screws with a
screwdriver (not included) (Fig 4).
FIG. 4
Screw
Washer
MOUTING THE FRONT-ASSIST
HANDLE (FIG.5)
WARNING:
Always remove the
battery pack from the product when you
are assembling parts, making adjustments,
cleaning, or when the product is not in use.
1. Remove the battery pack from the
trimmer.
2. Remove the screw knob and the bolt
from the front-assist handle.
3. Press the front-assist handle onto
the shaft of the string trimmer. Make
sure that the front-assist handle faces
upward so that it points toward the top
of the handle.
4. To attach the front-assist handle on the
shaft, insert the bolt into the hole on the
front-assist handle, and then use the
screw knob to tighten the bolt.
ASSEMBLY
Hexagon Screws
Trimmer Head
Guard
Loading ...
Loading ...
Loading ...