Loading ...
Loading ...
Loading ...
8 CUSTOMER SUPPORT TEAM: +44 (0) 333 220 6056
HANDLING
Before continuing any further with the installation of this
re please read the following:
• Two people should be sucient to lift the re.
• When lifting always keep your back straight. Bend
your legs and not your back.
• Avoid twisting at the waist. It is better to reposition
your feet.
• Avoid upper body / top heavy bending. Always
bend from the knees rather than the waist. Do not
lean forward or sideways whilst handling the re.
• Always grip with the palm of your hand. Do not
use the tips of ngers for support.
• Always keep the product as close to the body as
possible to prevent unnecessary and undue strain
on the body.
• Use gloves to provide additional grip.
• Always use assistance if required.
UNPACKING THE PRODUCT
The appliance is supplied in a single package carton.
Carefully unpack the product using the following
procedure:
• Ensure that the product is in the correct position
with the carton wording legible.
• Remove the straps and sleeve.
• Carefully lift the replace out of the box.
• Remove the protective packaging and bag from
the appliance.
• Ensure all parts including loose items have been
removed prior to discarding the packaging.
• Read all instructions prior to unpacking or installing
the appliance.
IMPORTANT: Please ensure there is adequate space
for installation. Please ensure that there is an accessible
electrical socket within the space for installation. The
electrical socket must not be behind or above the re
INSTALLATION
• The Electric re is supplied with approximately
1.7 meters of exible mains cable (1mm2).The
appliance should be located close to a suitable
mains socket and MUST be easily accessible to
allow proper connection.
• This appliance must not be directly installed on a
carpet or similar material. We recommend that it
is tted onto a hearth or similar non-combustible
material.
• This re MUST be earthed. If in any doubt consult
the manufacturer, its service center or a qualied
person.
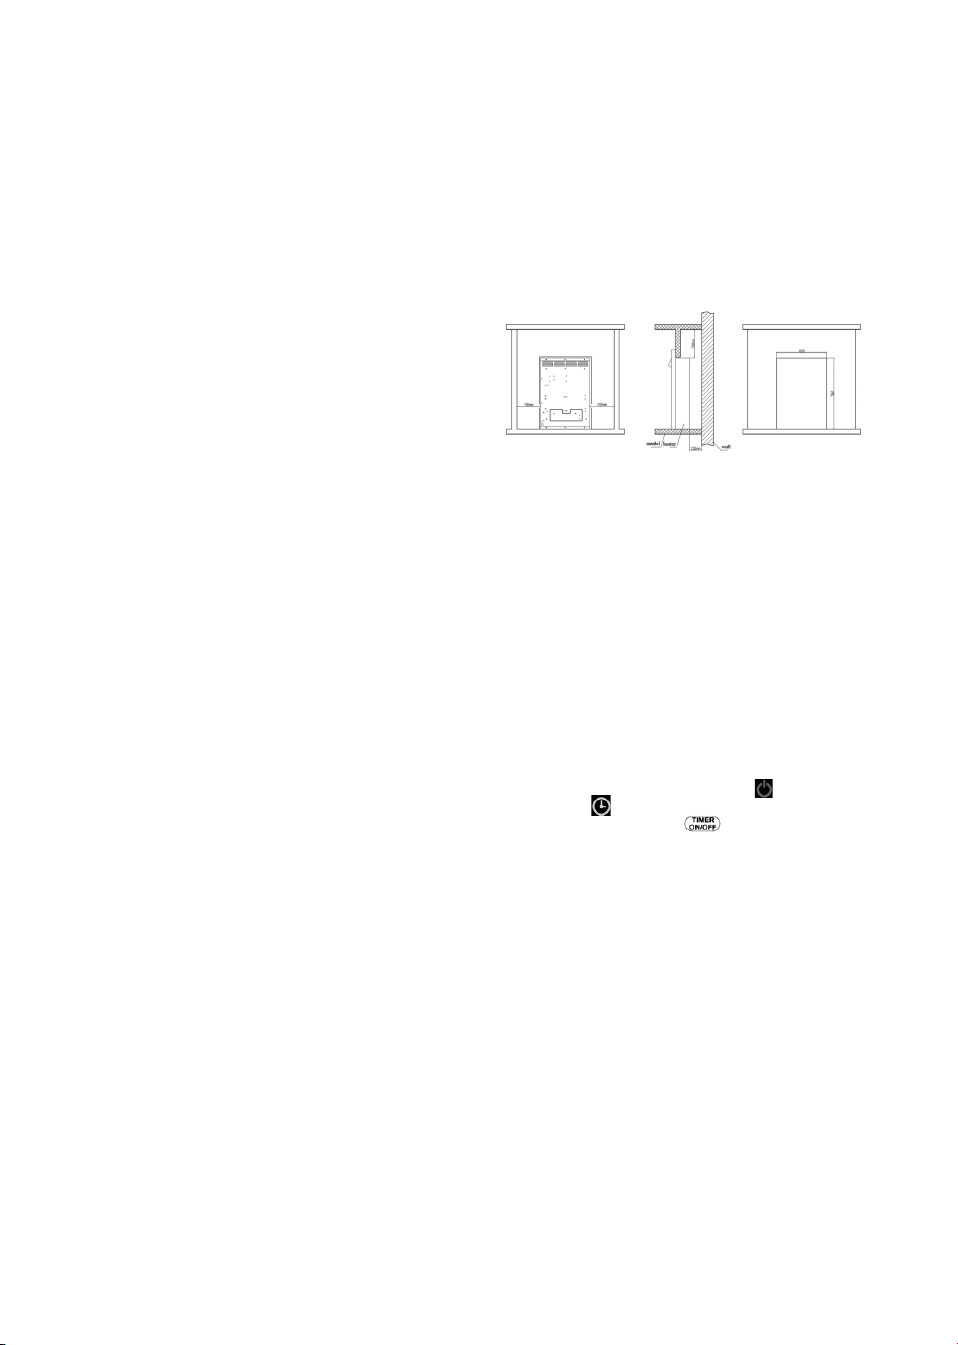
The heater is suitable for installation into a location that
has an opening size within the guidelines shown below:
Width
Minimum 15 1/2”/390mm Maximum 19”/483mm
Height
Minimum 21 3/4”/555mm Maximum 23 1/4”/590mm
Depth
Minimum 4 1/4”/110mm Maximum 5”/125mm
BEFORE YOUR FIRST USE:
1. Remove your appliance from the packaging.
2. Install your appliance in accordance with the
installation & safety instructions.
3. Your appliance is now ready for normal use.
Dispose of the packaging in a responsible manner.
NOTE: Before connecting the re to the power, please
remove the two pieces of foam from the rear. You can
choose to use the rear surround or not.
USING YOUR APPLIANCE:
Standby status:
• The re displays standby symbol and timer
symbol (The timer symbol will not illuminate
if no time is set or the button on remote
control is at the OFF position).
Switch on status :
• The re displays date/time, room temperature and
ame brightness level.
NOTE: Set the actual date/time before rst use.
Turning the unit On and Off:
The appliance can be operated either by the touch
switches located to the right hand side of the re canopy
or by the remote control.
Loading ...
Loading ...
Loading ...