
Loading ...
Loading ...
Loading ...
10
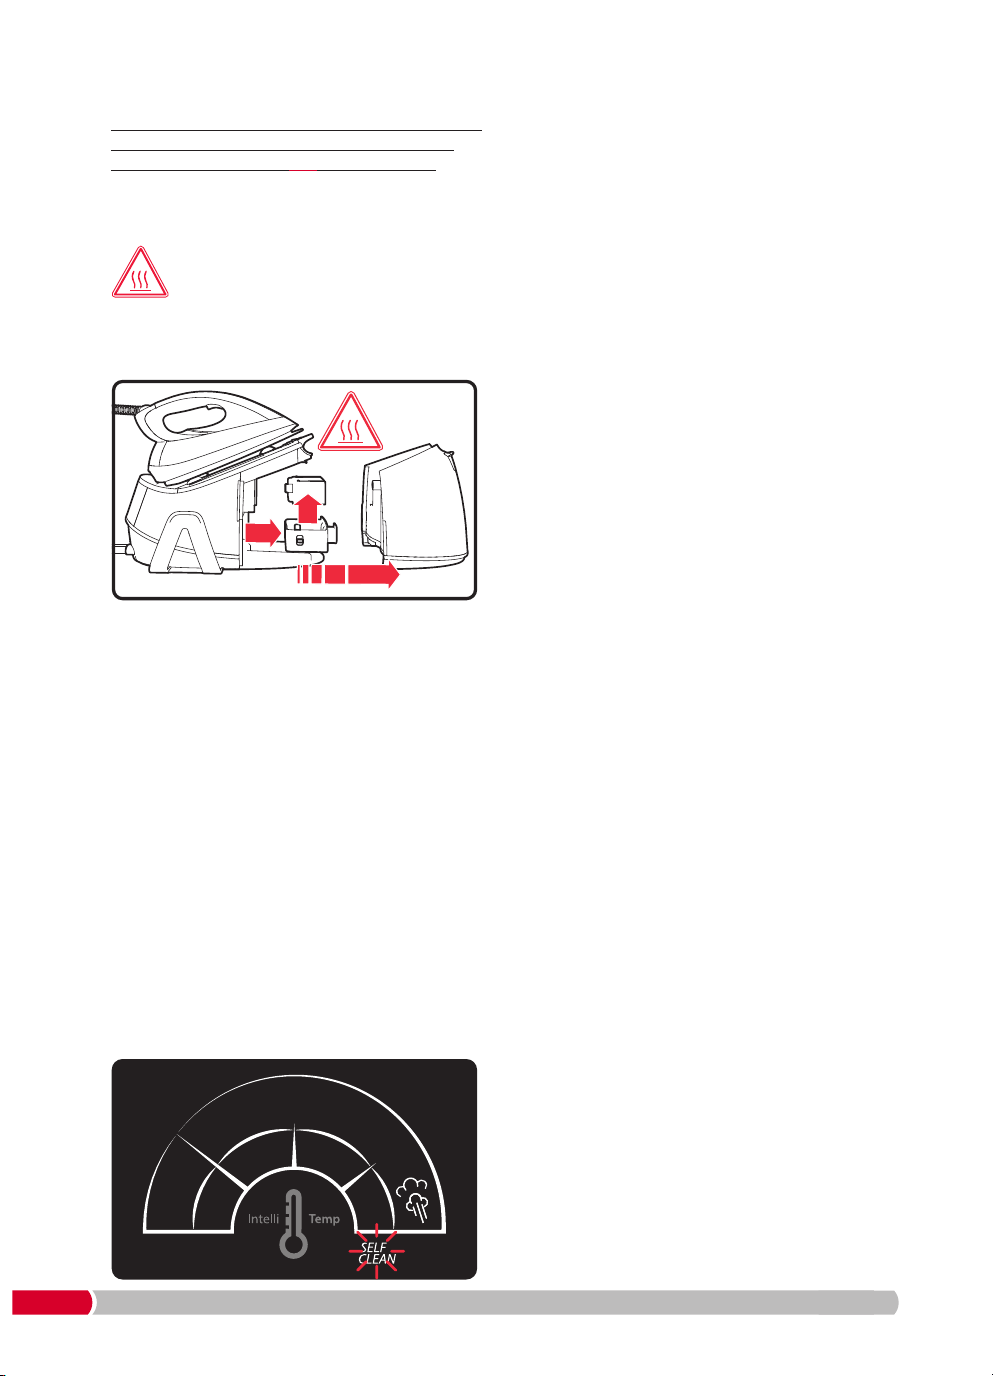
Replacing the antiscale cartridge (15)
1
T
he appliance must be plugged in and switched
ON whilst changing the cartridge, otherwise
t
he antiscale indicator
(
29)
w
ill not go out.
2
Remove the water tank (13) from the base unit
(
17)
b
y holding the tabs on the side of the water
tank and pulling the tank away from the base unit.
C
AUTION: The cartridge may be very
h
ot. Be careful when releasing the old
cartridge.
3
Grasp the grip on the front of the cartridge drawer
(16) and pull it out from the base unit. Lift the old
cartridge out of the drawer and dispose of it.
4
Remove the new anti-scale cartridge (15) from
the bag and immerse in water for 5 minutes for
better filtration.
5
Place the new antiscale cartridge into the
cartridge drawer and push the drawer back into
the base unit until it clicks into place.
6
Push the water tank back into the base unit until
it clicks into place.
7
Hold the steam trigger (4) for up to two minutes
to pull the water through the antiscale cartridge
and out through the soleplate (6) as steam.
NOTE: If no antiscale cartridge is installed, or the
antiscale cartridge is not installed correctly, the
antiscale indicator will continue to flash and the
appliance will not work correctly.
Self clean
The self clean function removes scale and
minerals which have built-up in the steam
chamber. This function must be performed every
time the self clean indicator (32) illuminates.
C
AUTION: Boiling hot water and lots of steam
will drain from the holes in the soleplate during
self clean. Position yourself comfortably near a
s
ink before you start. The self clean process
will take up to 5 minutes to complete. Do not
p
l ace the iron back on the base until the self
clean process has completed.
1
F
ill the water tank
(
13)
(
see step 1 of ‘Using the
Steam Generator’ on page 7).
2
P
ress and hold the select button
(
20)
a
nd steam
trigger
(4) and hold them both for 3 seconds. A
beep will be heard and the self clean indicator
(32) will flash, showing the product is ready to
begin self cleaning. Release the select button and
steam trigger.
3
Hold the iron (5) at approximately 15 centimetres
above an empty sink in the horizontal ironing
position.
4
Water containing loose scale and minerals will be
ejected through the holes in the iron’s soleplate
(6).
NOTE: Self clean cannot be aborted until the
process is complete.
5
Once self clean is complete, the iron will resume
at the previous ironing setting and your previous
temperature setting indicator (22/23/24/25/31)
will display on the control panel (8).
6
Iron over a damp cloth to remove any deposits on
the soleplate, this will also remove any water
marks that may have formed on the soleplate.
7
Turn off the product (see step 7 of ‘Using the
Steam Generator’ on page 8).
To clean a coated soleplate
Do not use scouring powder or solution as this
could cause damage to the coating.
If any man-made fibres fuse to the soleplate
(6),
set the iron at the MAX setting and pass it over a
clean piece of cotton to draw the deposit off the
surface.
To clean the exterior
Allow the unit to cool and wipe over with a damp
cloth and mild detergent, then wipe dry.
RN333300 MUK Rev3.qxp_IB 05/06/2018 09:37 Page 10
Loading ...
Loading ...