Loading ...
Loading ...
Loading ...
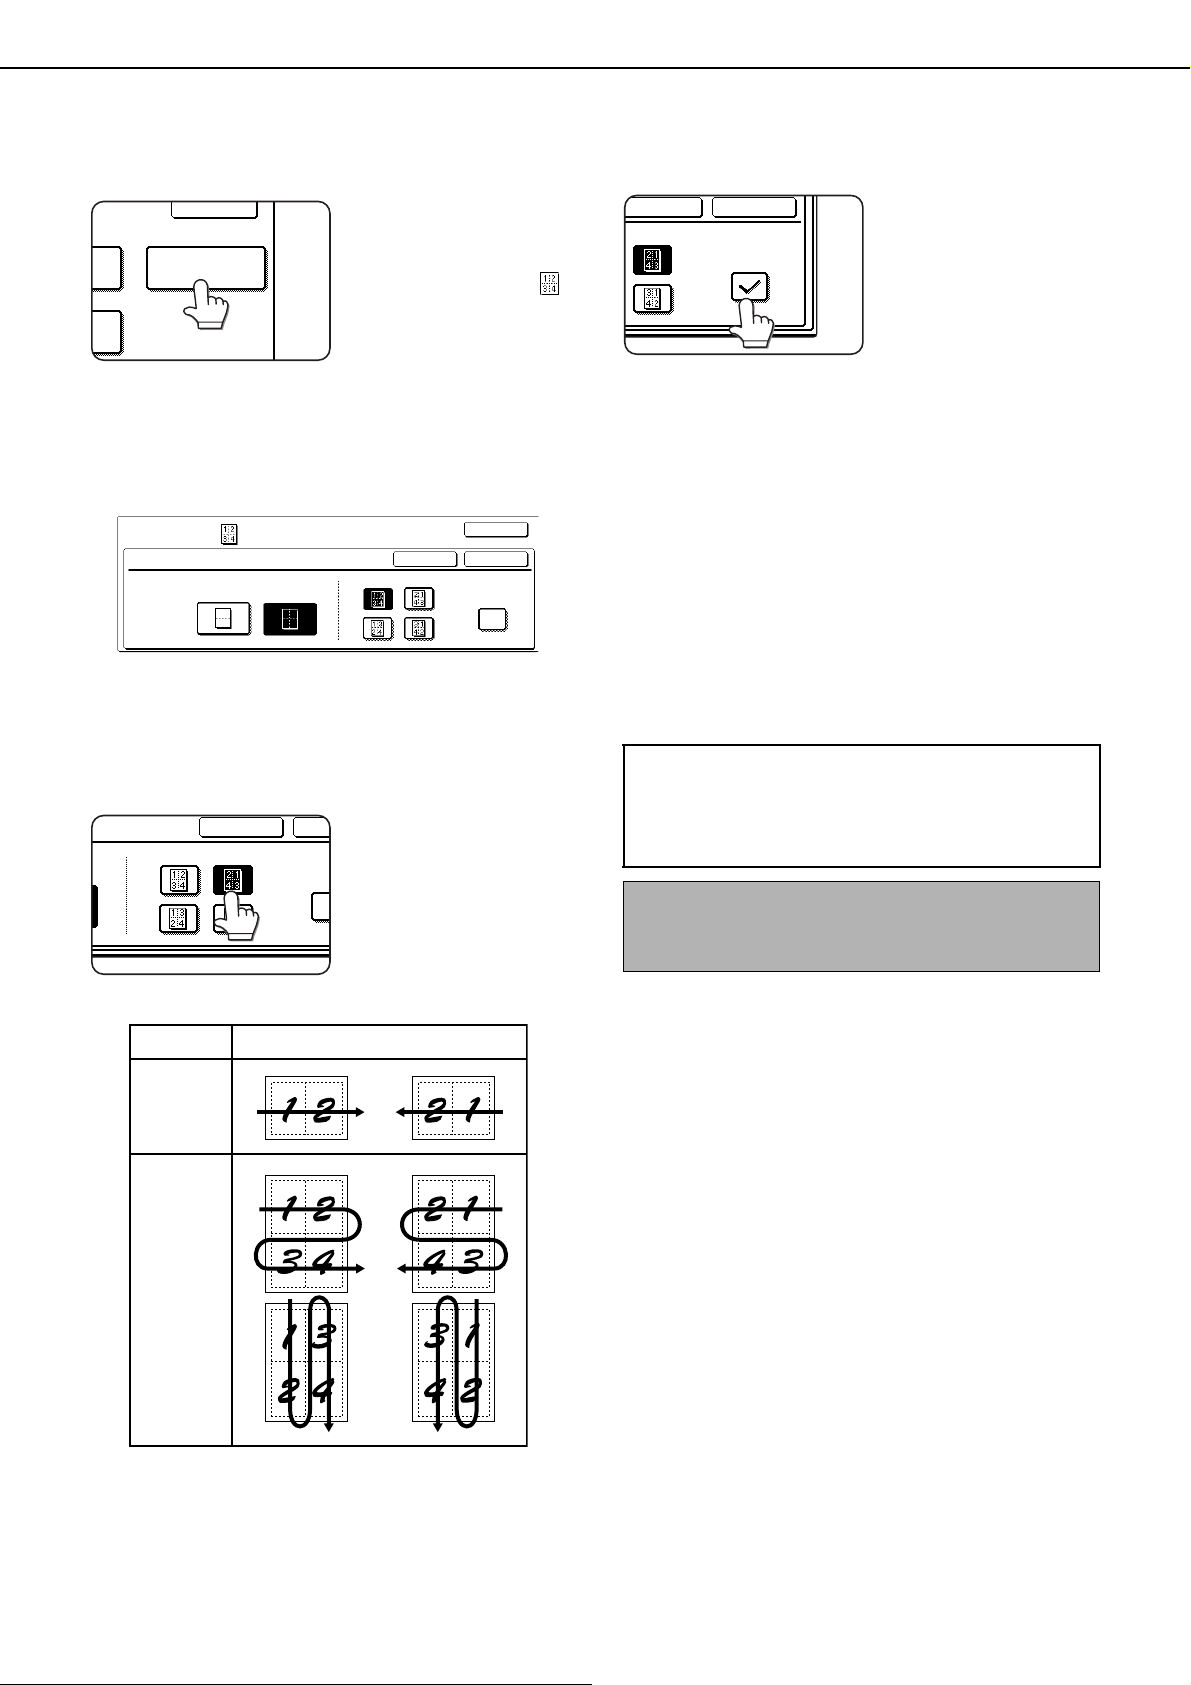
IMAGE EDIT MENU
6-20
1
Touch the [MULTI SHOT] key on the
IMAGE EDIT menu screen.
The MULTI SHOT
setting screen will
appear.
The multi shot icon ( ,
etc.) will also appear in
the upper left of the
screen to indicate that
the function is turned on.
2
Select the number of originals to be
copied onto one sheet of copy paper on
the multi shot selection screen.
The orientation of copy paper and the image of the
originals may be rotated as needed.
3
Select the layout.
Select the order in which
the originals will be
arranged on the copy.
The arrows in the above diagram indicate the
directions in which the images are arranged.
4
Select whether or not to add borderlines.
When the BORDER
LINE checkbox is
selected, borderlines
are added around the
borders of the images.
5
Touch the [OK] key (inside [OK] key) on
the MULTI SHOT setting screen.
Return to the IMAGE EDIT menu screen.
6
Touch the [OK] key on the IMAGE EDIT
menu screen.
Return to the SPECIAL MODES screen.
7
Touch the [OK] key on the SPECIAL
MODES screen.
Return to the main screen of copy mode.
OK
AT MULTI SHOT
OPY
OKCANCEL
OK
IMAGE EDIT
MULTI SHOT
2in1 4in1
LAYOUT
BORDER LINE
OCANCEL
LAYOUT
BORDER
2in1
4in1
Shot number
Layout
About the steps that follow
If a reversing single pass feeder is being used,
see pages 5-2 through 5-6. If the document
glass is being used, see pages 5-7 through 5-9.
To cancel the multi shot function, touch the
[CANCEL] key on the multi shot setting screen (step
2).
OKCANCEL
YOUT
BORDER LINE
ApollonII_general-copy_SEC.book 20 ページ 2004年9月6日 月曜日 午後4時57分
Loading ...
Loading ...
Loading ...