Loading ...
2
(1) (2)
(3) (4)
(5) (6)
(7)
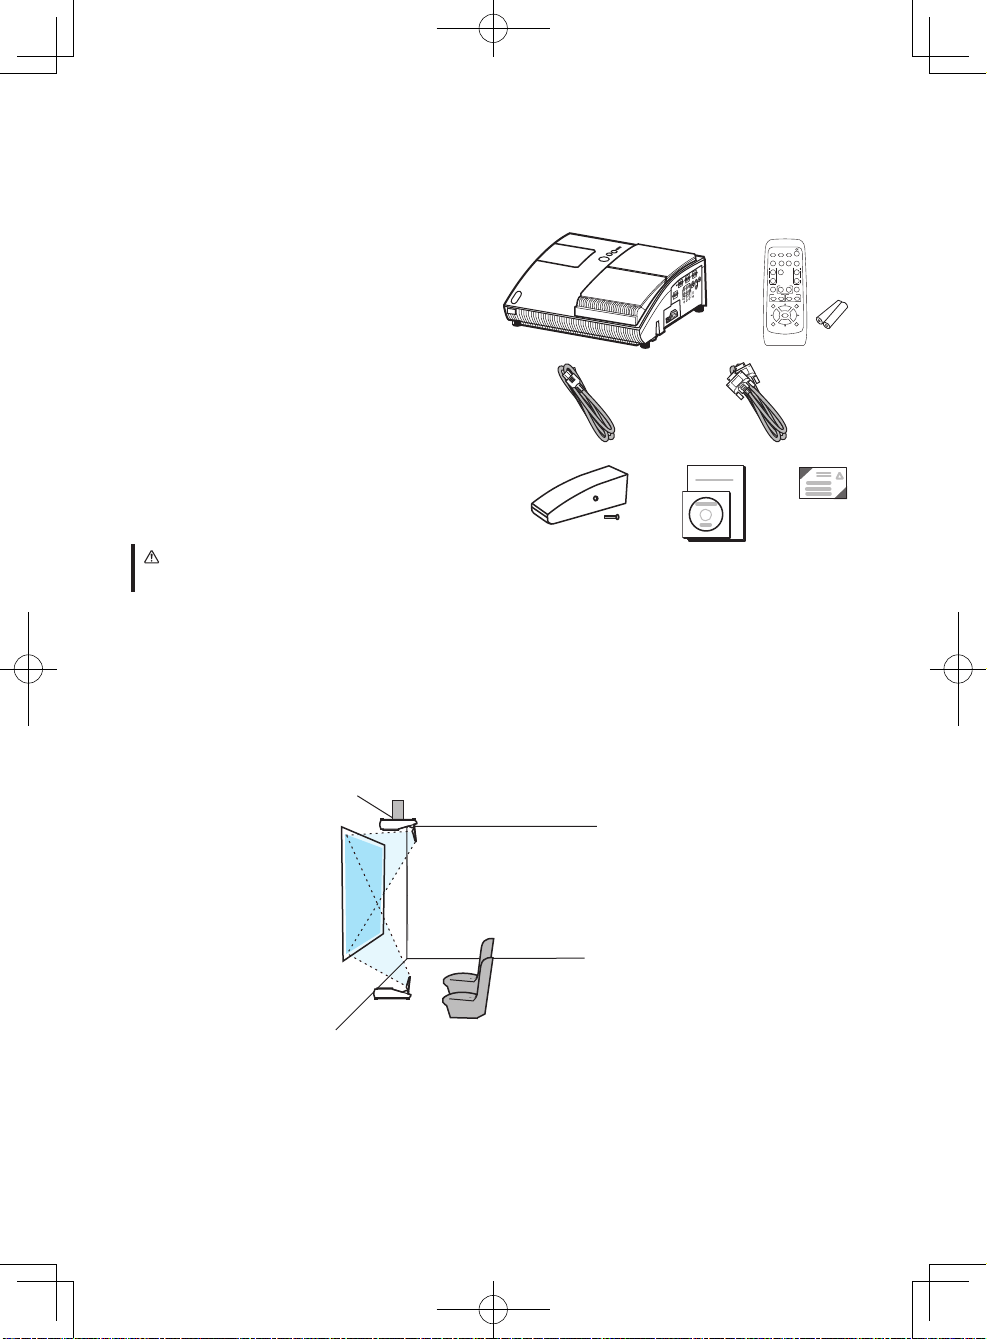
1. Checking the contents
Check that all the following items are included. If any items are missing, tell your dealer
soon.
(1) Projector
(2) Remote control with two batteries
(3) Power cord
(4) Computer cable
(5) Cable cover with a screw
(6) User’s manuals (a booklet, a CD)
(7) Security label
WARNING
■ Keep the original packing materials, and use for transporting this product.
2. Arrangement
Install the projector in a stable, cool, dry and airy place, keeping a space of 30 cm or more
between the sides of the projector and other objects such as walls.
Refer to the following to decide the projection style. For the case of installation in a
special state such as ceiling mount, the specified mounting accessories and service may be
required. Before installing the projector, consult your dealer about your installation.
(2) Ceiling mount
(1) Usual use
NOTE
• When installing the projector, confirm that there is nothing that blocks the projection
light between the projector and the screen.
• When installing the projector, check that the remote sensors are not exposed to any
strong ray (
7).
• Install the projector in the way specified in this manual. Otherwise the projection lamp
may not light.
VIDEO
DOC.CAMERA
KEYSTONE
ASPECT SEARCH
BLANK
MUTE
MY BUTTON
POSITION
1 2
ESC
ENTER
MENU
RESET
COMPUTER
MY SOURCE/
AUTO
MAGNIFY
VOLUME
ー
ON
OFF
+
FREEZE
FOCUS D-ZOOM
- + - +
d11_01CP-A200_CO_ENG.indd 2 2009/12/22 9:37:51
Loading ...
Loading ...
Loading ...