Loading ...
Loading ...
Loading ...
14
13. Maintaining the air-lter
Please check and clean the air-filter periodically, for keeping normal ventilation. When
the indicators or a message prompts you to clean the air-filter, comply with it as soon as
possible.
When it is damaged or too soiled, replace the filter unit. To prepare the new filter unit, call
your dealer and tell the type number:
UX35381
NOTE
• A filter unit of specified type will come with the replacement lamp for this projector.
Replacing the filter unit at the same time with the lamp is recommended.
• Please reset the filter time only when you have cleaned the air-filter, for a suitable
indication about the air-filter.
WARNING
■ Before caring for the air-filter, turn the projector off and unplug the power cord, then
cool the projector sufficiently.
■
Use only the filter unit of the specified type. Do not use the projector with the air-filter removed.
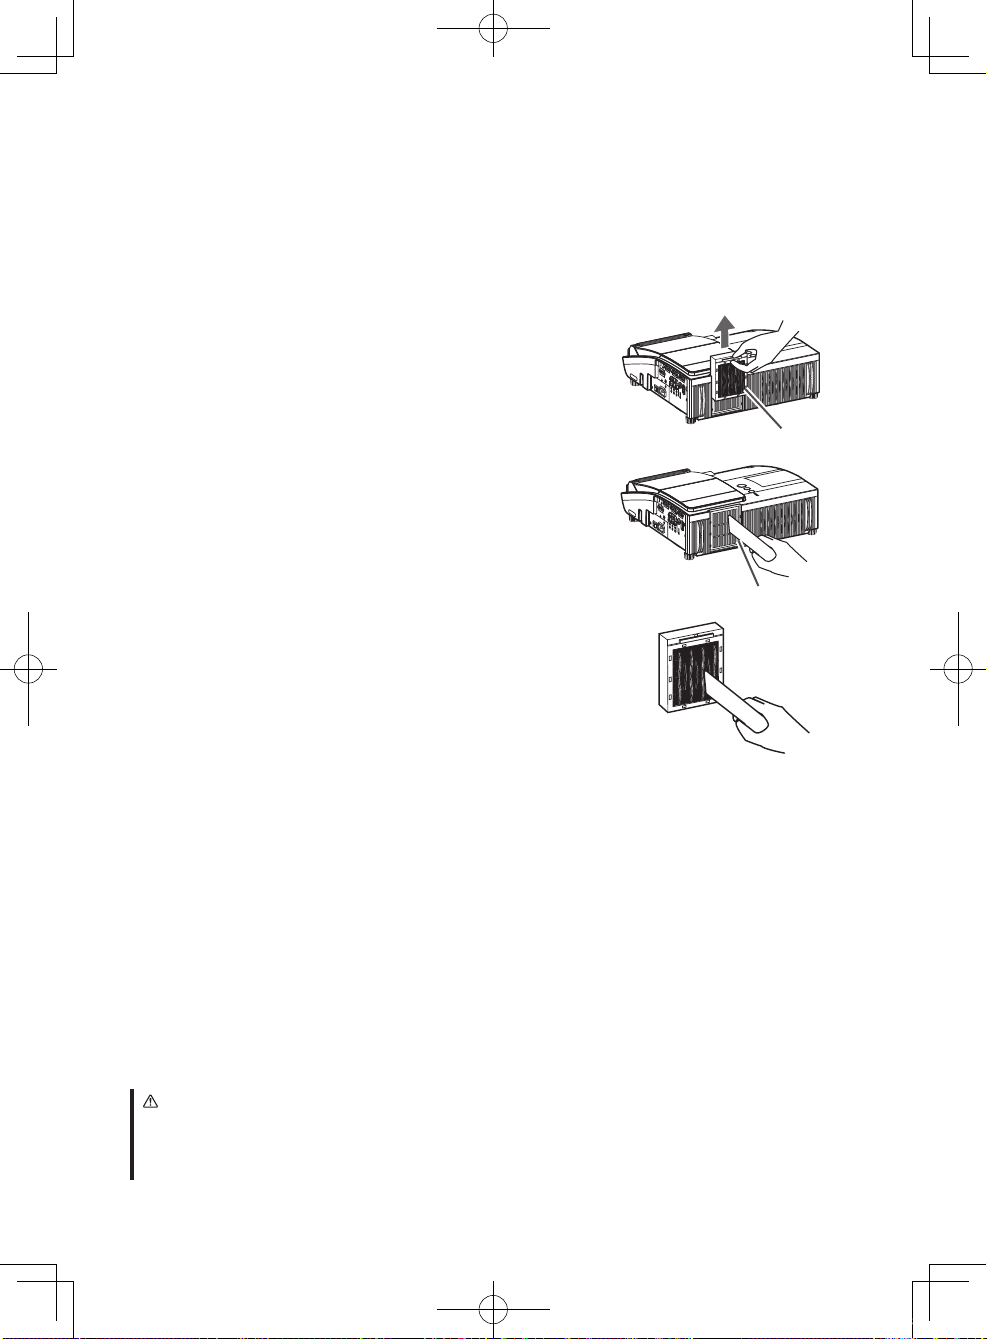
Filter unit
Intake vents
1.
Turn the projector off and unplug the power
cord from the power outlet. And cool the
projector down by leaving it for a while as it is.
2.
Use the vacuum cleaner on and around the filter
unit.
3.
Slide the filter unit upward to take it off from
the projector.
4.
Use the vacuum cleaner on the intake vents of
the projector.
5.
Use the vacuum cleaner on the cover side of the
filter unit. Do not vacuum the air-filter directly,
since the cleaner may inhale the air-filter.
When the air-filter is damaged or too soiled,
prepare the new filter unit.
6.
Make sure that there is the air-filter inside, then
slide the filter unit into place.
7.
Plug in and restart the projector. (
5, 8)
Then, reset the filter time (which is the time counter for the air-filter use).
(1) Press the ▲ or ▼ button on the projector or the
MENU
button on the remote
control. The “
EASY MENU
” appears.
(2) Point at the “
FILTER TIME
” in the menu using the ▲ or ▼ button, then press
the ► button. A dialog appears.
(3) Press the ▲ button to select the “
RESET
” on the dialog. It performs resetting
the filter time.
d11_01CP-A200_CO_ENG.indd 14 2009/12/22 9:37:58
Loading ...
Loading ...
Loading ...