Loading ...
Loading ...
Loading ...
28 224244
4. Fitting by trained personnel
4.1 Worktop cut-out
Carry out all cutting out of furniture units and worktops before fitting the
appliance, and remove all sawdust and chips.
The dimensions of the worktop recess can be seen in the dimension
drawing (figs. 1+2)
The cut sections should be sealed with a water-repellent protection
paint.
The worktop and the hob must be fitted horizontally. A tilted hob is
under tension and this increases the danger of breaking.
4.2 Installation
Before installing the hob, check that the all-round hob seal has no gaps.
If the induction hob is installed in a worktop with a ceramic or similar cover (tiles), remove the hob seal and seal
the hob from the worktop with a plastic seal, such as heat-resistant silicone rubber.
Attention!
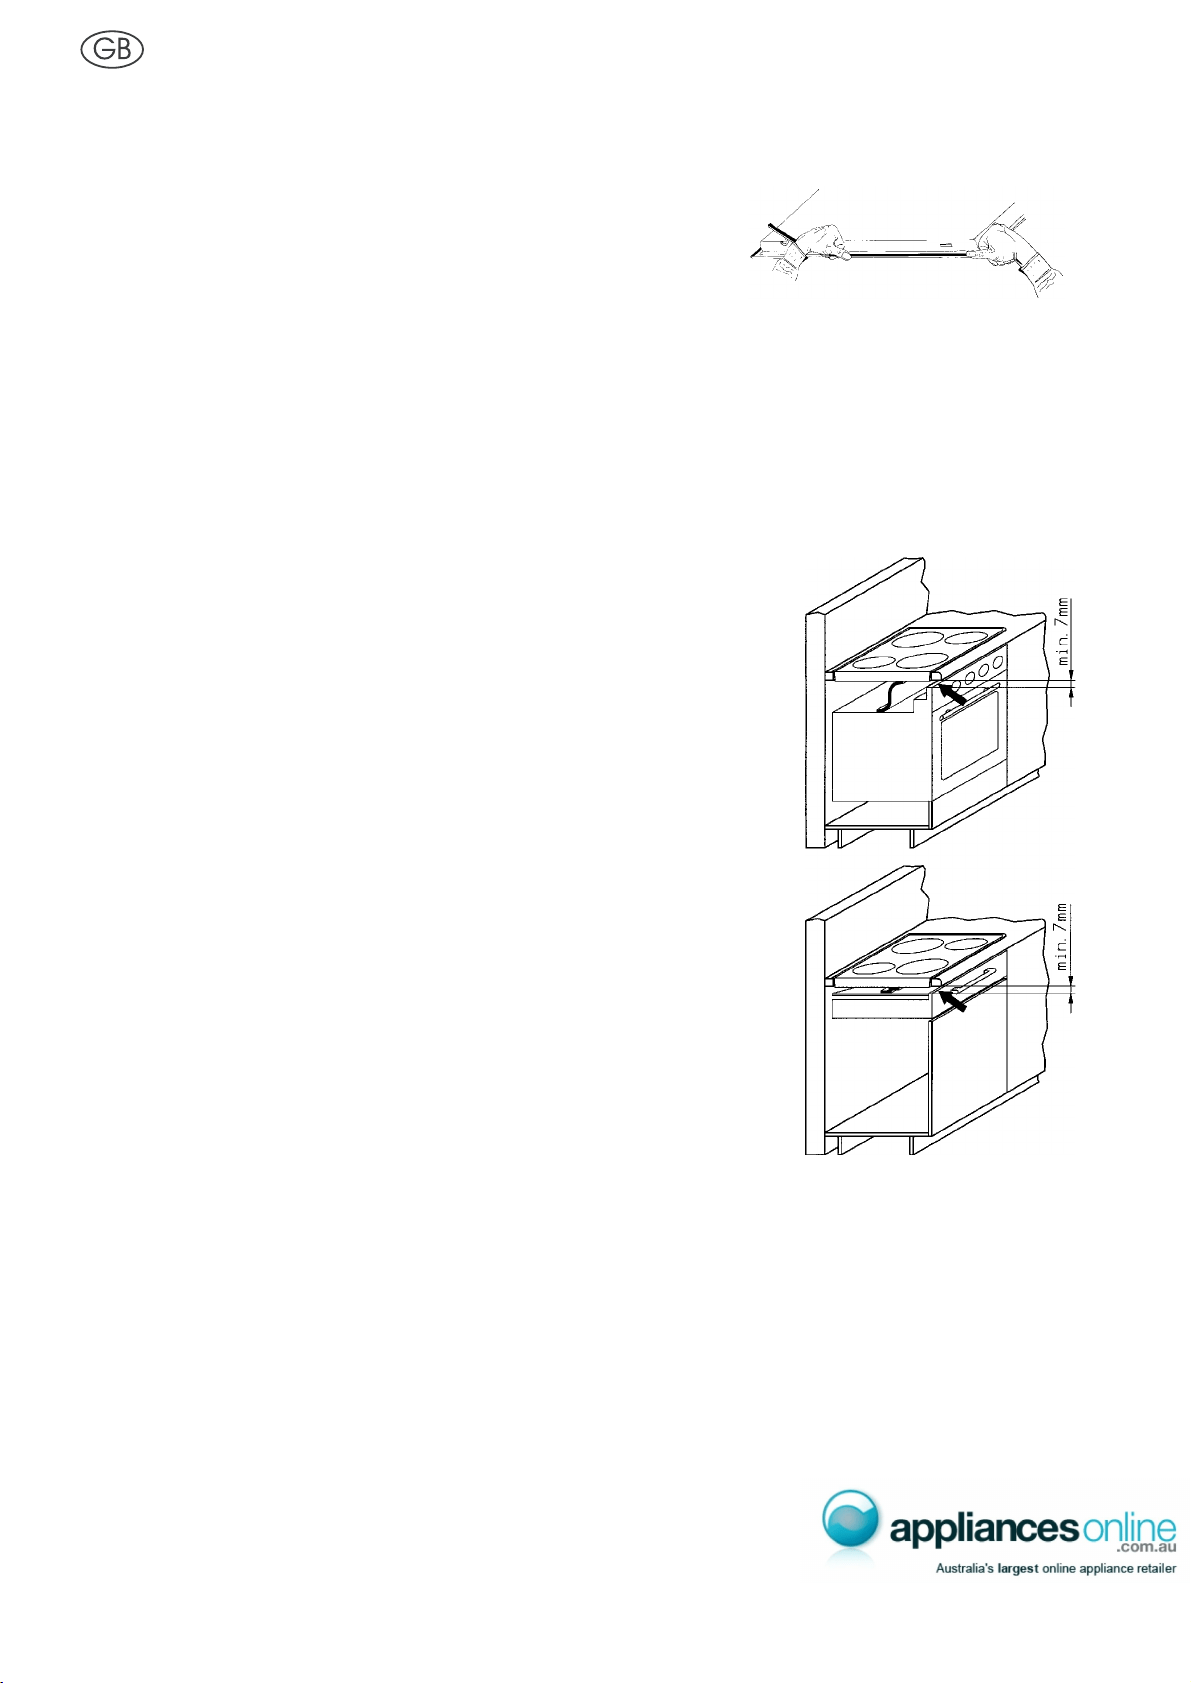
If the hob is installed above furniture parts (side walls, drawers, etc.) it
must be ensured that accidental contact with the underside of the hob is
prevented by means of a touch guard. The touch guard may only be
capable of removal with suitable tools and must be attached to the
underside of the cooking surface at a minimum distance of 20 mm so
that the mains connection cable does not touch the underside of the
cooking surface (fig. 4). The back wall of the cabinet must be open in
order to provide for air circulation. The front transverse strip of the
furniture must be removed so that an opening is provided for air flow
underneath the worktop over the entire width of the unit. The distance
between induction hob and kitchen furniture resp. built-in unit must pro-
vide for sufficient ventilation of the induction. The ventilation openings
must be thermically devided with the attached screen shield. Thus a
back-flow of warmed air is prevented from entering the cool air intake.
Attention! The screen shield must not cover the ventilation openings. If
necessary, shorten the shield up to the furniture or built-in unit. Avoid
excessive thermal development from below e.g. from a baking oven
without a appliance cooling device.
Remove any transverse strips underneath the worktop at least in the area of
the worktop cut-out.
Place the hob carefully into the cut-out and fasten it to the worktop with the fasteners (fig. 3). Tighten the screws
with a hand screw driver only; do not use a battery-operated screw driver.
Make sure that the worktop and the hob are horizontal. In addition, make sure that no liquids can penetrate
between the edge of the hob and the worktop or between the hob and the wall and come into contact with any
electrical appliances. Use sealing sections, strips, agents, etc.
Loading ...
Loading ...
Loading ...