Loading ...
Loading ...
Loading ...
en Appliance door
26
4. Open the appliance door slightly until you hear a
quiet click. Close the appliance door.
:Warning
Risk of injury if the door locks are not closed!
The appliance door may become detached. You
may be injured and the appliance door damaged.
After refitting the door, always close the left- and
right-hand door locks.
5. Close the left- and right-hand door locks (fig. %).
To do this, hold the screwdriver horizontally and use
it to push the door lock on each side of the door all
the way down (fig. &).
Removing and installing the door panels
For cleaning, you can remove the glass panels from the
appliance door.
To do this, the appliance door must be removed
beforehand (see section "Removing and fitting the
appliance door").
:Warning – Risk of injury!
The appliance must not be used again until the door
panels and appliance door have been correctly fitted.
:Warning – Risk of injury!
Components inside the appliance door may have sharp
edges. Wear protective gloves.
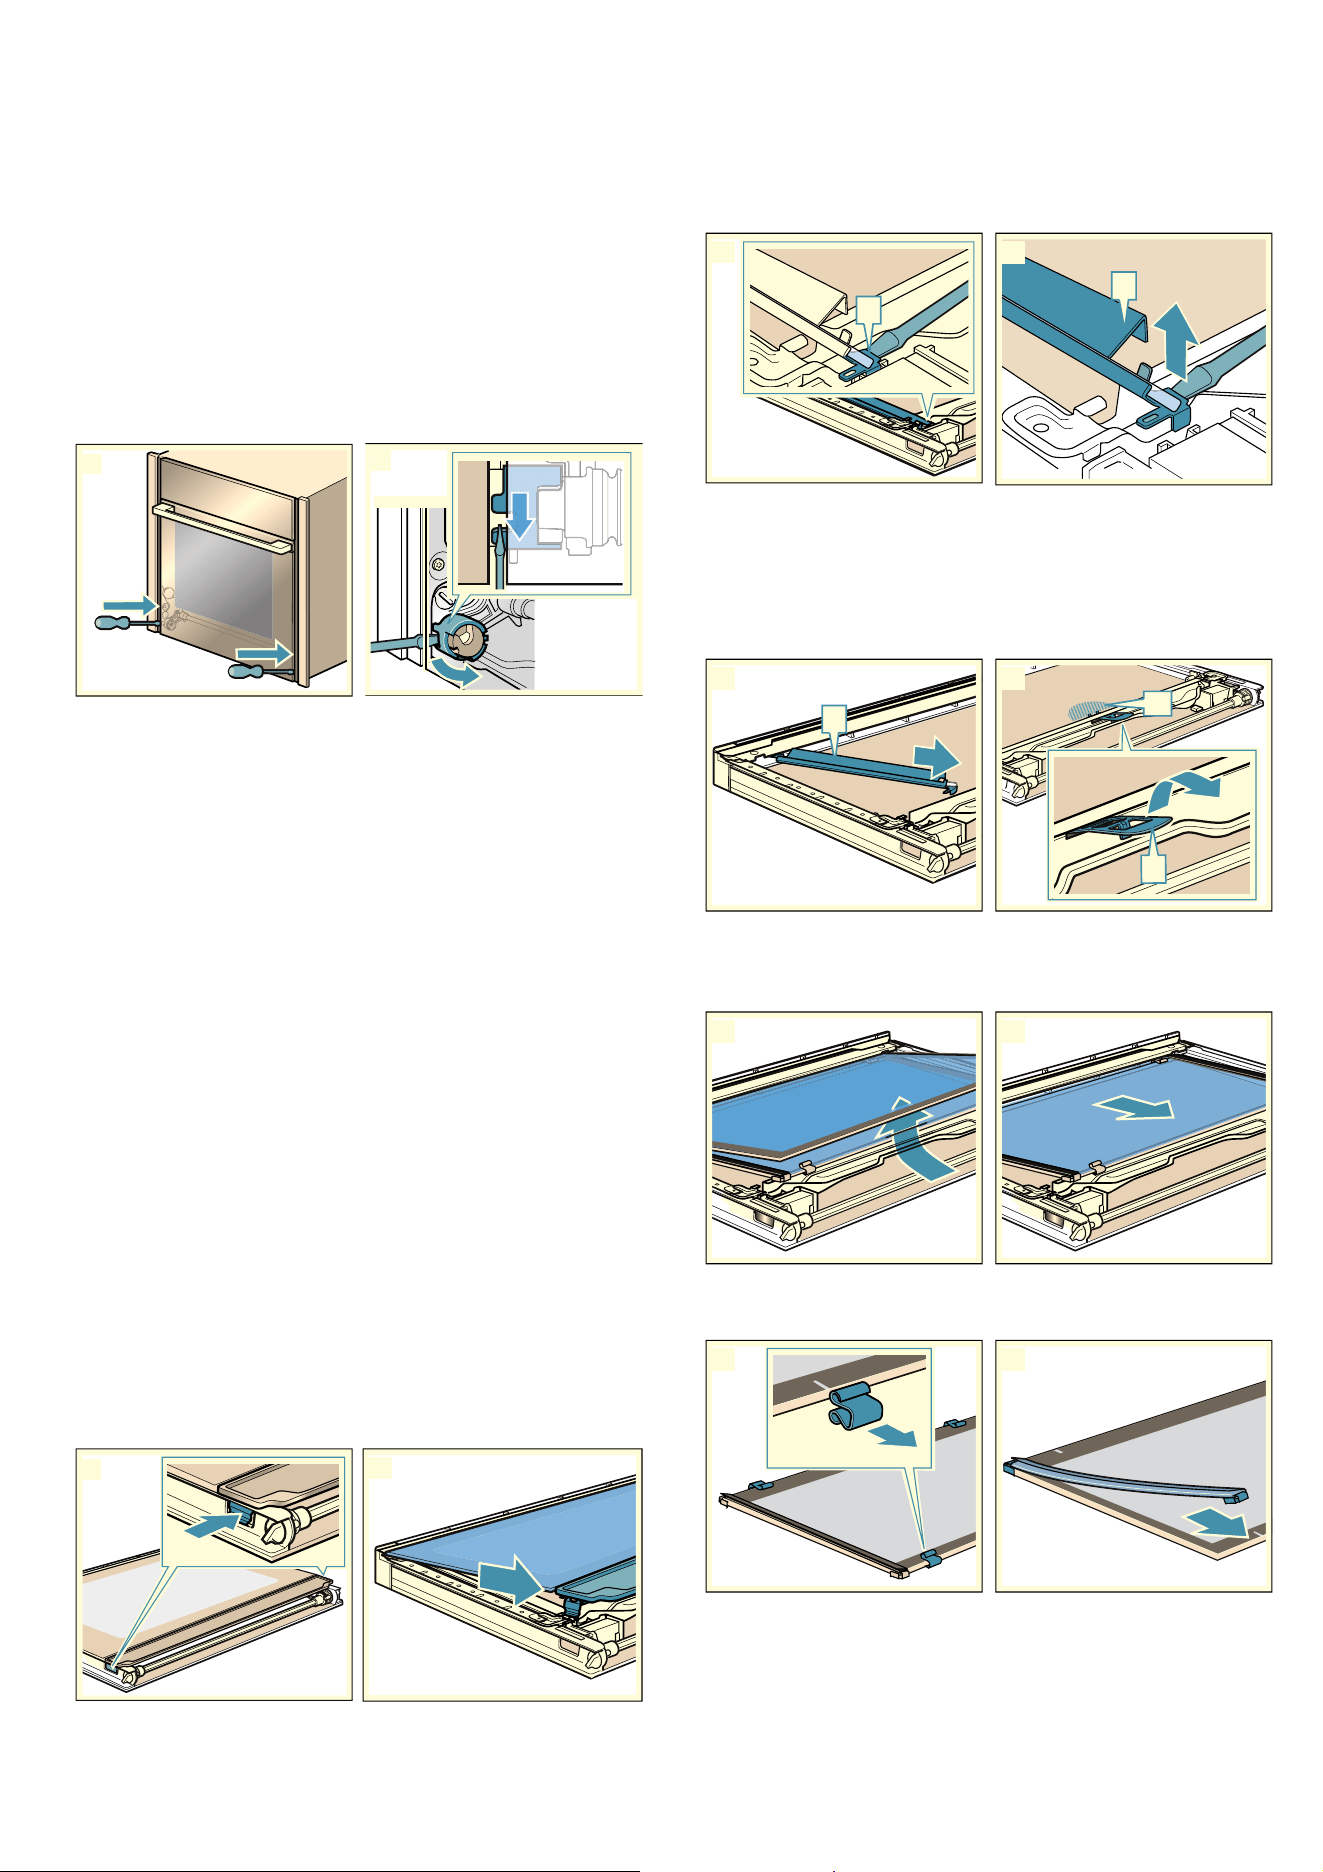
Removing the glass panels
Note: Lay the glass panels you have removed on a flat
surface that is soft and clean.
1. Detach the appliance door.
2. Lay the appliance door with the front side facing
down on a flat surface that is soft and clean.
3. Push on the left- and right-hand side on the outside
of the appliance door until the inner glass panel is
released on both sides (fig. !).
4. Carefully lift the inner glass panel and remove it in
the direction of the arrow (fig. ").
5. Slide the tip of the screwdriver in between the metal
tab ‚ and the plastic underneath it (fig. #).
6. Use the tip of the screwdriver to carefully lift the
reflector ƒ until it is detached (fig. $).
7. Lift the reflector ƒ up and out (fig. %).
8. Remove the second reflector in the same way as the
first.
9. Push down on the intermediate panel around „, and
carefully lift the holder … until you are able to pull it
out (fig.
&).
10. Lift the first and second intermediate panels from
below (fig. ') and remove them in the direction of
the arrow (fig. ().
11. Remove the spacers (fig. )) and seals (fig. *) for
cleaning if needed.
I
2
1
E
D
F
G
E
Loading ...
Loading ...
Loading ...