Loading ...
Loading ...
Loading ...
Accessories en
11
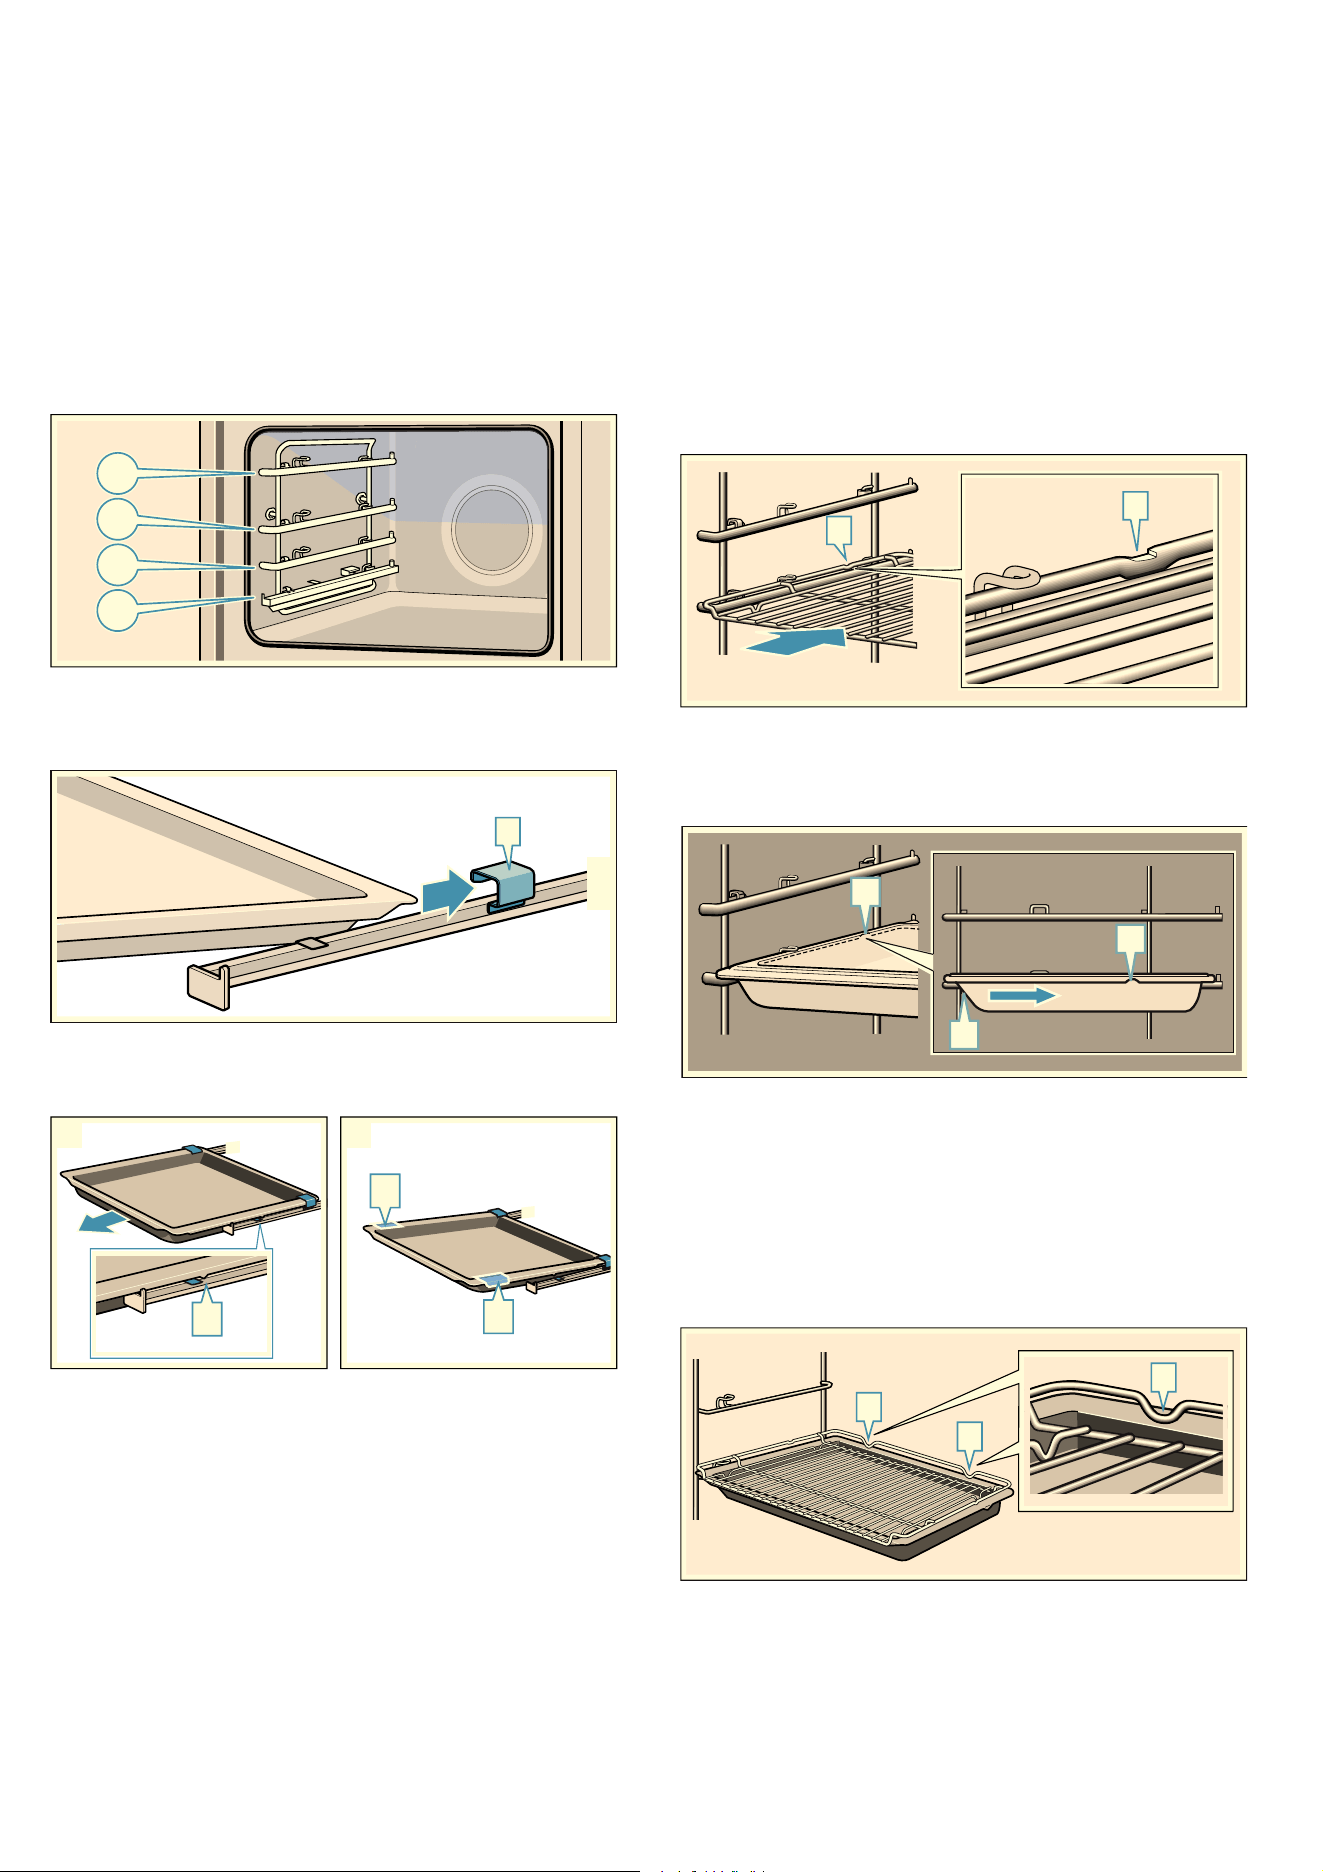
Inserting accessories
The cooking compartment has four shelf positions. The
shelf positions are counted from the bottom up.
In some appliances, the top shelf position in the
cooking compartment features a grill symbol.
:Warning – Risk of burns!
The telescopic shelves become hot when the appliance
is in use. Take special care not to get burnt when they
are pulled out.
Ensure that the accessory is placed under the lug ‚ on
the pull-out rail.
Example in the picture: Universal pan
Accessories on the telescopic shelf can be pulled out
as far as the notch ƒ (fig. !). Hold the accessory on
both sides in the area marked „ and remove it (fig. ").
Notes
■ Ensure that you always insert the accessories into
the cooking compartment the right way round.
■ Always insert the accessories fully into the cooking
compartment so that they do not touch the appliance
door.
Locking function
The locking function prevents the accessories from
tilting when they are pulled out. Accessories must only
ever be pulled out halfway. When the locking
mechanism engages, you will feel distinct resistance. If
the accessories are pulled out further than halfway, the
locking mechanism will not engage and titling may
occur. Hold with one hand. Always place cookware and
food in the centre.
:Warning – Risk of serious burns!
Accessories and ovenware become very hot. Always
use oven gloves to remove accessories or ovenware
from the cooking compartment.
The accessories must be inserted into the cooking
compartment correctly for the tilt protection to work
properly.
When inserting the wire rack, ensure that the lug ‚ is
facing downwards.
When inserting baking trays, ensure that the lug ƒ is at
the rear and is facing downwards. The sloping edge of
the accessory „ must be facing towards the appliance
door.
Combining accessories
You can insert the wire rack and the universal pan at
the same time to catch drops of liquid.
When inserting the wire rack, ensure that both spacers
‚ are at the rear edge. When the universal pan is
inserted, the wire rack is on top of the upper guide rod
of the shelf position.
D
F
F
2
E
1
D
D
E
E
F
D
D
D
Loading ...
Loading ...
Loading ...