Loading ...
Loading ...
Loading ...
setting up _21
01 SETTING UP
Snap ring are enclosed with the
refrigerator.
The thickness of RING is 1mm, 2ea.
Use the snap ring in case the handle does
not move because the out door is lowered.
INSTALLING THE WATER
DISPENSER LINE
A water dispenser with a filter is one of the helpful
features on your new refrigerator. To help promote
better health, the water filter removes unwanted
particles from your water. However, it does not
sterilize or destroy microorganisms. You may need
to purchase a water purifying system to do that.
In order for the ice maker to operate properly, a
water pressure of 20~125 psi is required.
Under normal conditions, a 170 cc (5.75 oz.) cup
can be filled in about 10 seconds.
If the refrigerator is installed in an area with low
water pressure (below 20psi), you can install
a booster pump to compensate for the low
pressure.
After you have connected the water line, make
sure the water storage tank inside the refrigerator
is properly filled. To do this, press the water
dispenser lever until the water runs from the water
outlet.
Water line installation kits are include with
unit. You can find it in freezer drawer.
The new hose-sets supplied with the
appliance are to be used and that old
hose-sets should not be reused.
Parts for water line Installation
Water line fixer and screws Pipe connector
Water line
Connecting to the water supply line
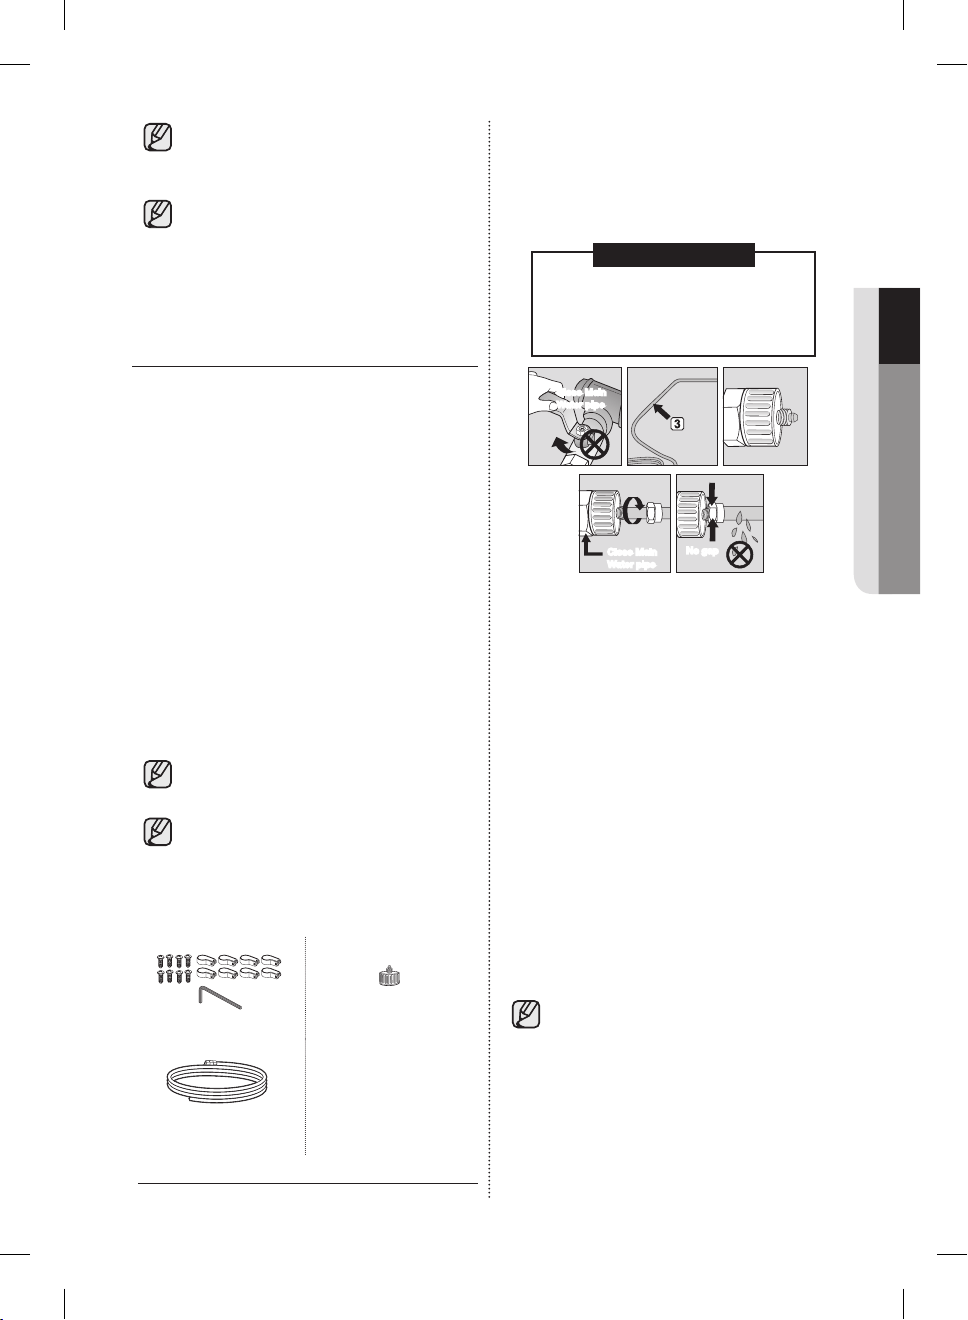
1. First, shut off the main water supply line.
2. Locate the nearest cold, drinking water line.
3. Follow the Water line Installation Instructions in
the installation kit.
CAUTION
The water line must be connected to
the cold water pipe. If it is connected
to the hot water pipe, it may cause the
purifier to malfunction.
Close Main
Water pipe
Close Main
Water pipe
No gap
4. After connecting the water supply to the water
filter, turn your main water supply back on
and dispense about 3L to clear and prime the
water filter.
Connecting the water line to the
refrigerator
1. Remove the cap from the water line on the unit
and insert the compression nut of the water
line into the water line on the unit.
2. Connect the water line on the unit with the
water line in the kit .
3. Tighten the compression nut onto the
compression fitting. There should be no gaps
between (A, B & C )
4. Turn water on and check for any leakage.
Only connect the water line to a drinkable
water source. If you have to repair or
disassemble the water line, cut off 6.5mm
of the plastic tubing to make sure you get
a snug, leak-free connection.
DA68-02916G-13.indb21 2018.3.24.10:19
Loading ...
Loading ...
Loading ...