Use & Care Guide for Coffee Makers
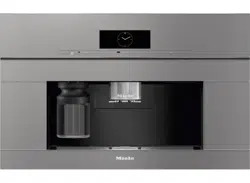
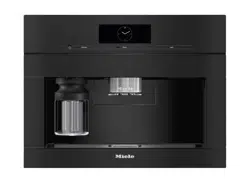
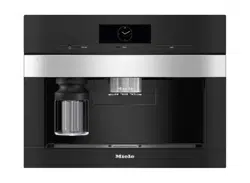
PARTS AND FEATURES
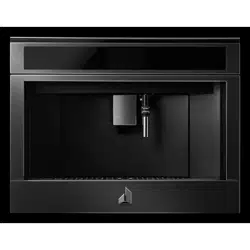
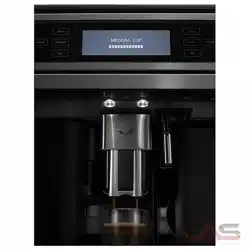
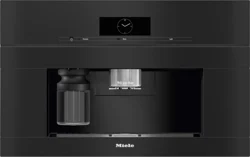
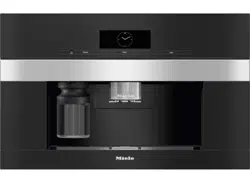
This manual covers several models. The coffee system you have purchased may have some or all of the items listed. The locations and appearances of the features shown here may not match those of your model.
Coffee System:

A. Beans container lid
B. Pre-ground door
C. Grinding adjustment dial
D. Beans container
E. Ground coffee funnel
F. Infuser
G. Coffee guide
H. Service door
I. Cup holder tray
J. Coffee grounds container
K. Drip tray
L. Coffee spouts (adjustable height)
M. Lights to illuminate cup
N. Hot water/steam connection nozzle
O. Water tank
P. Storage tray
Q. Main ON/OFF switch
R. Measure holder
S. Cup warming ledge
T. Power cord
U. Lighting to illuminate interior compartment
V. Control panel
W. On/standby button
Accessories:

A. "Total Hardness Test" indicator paper
B. Ground coffee measure
C. Cleaning brush
D. Hot water/steam spout
E. Connection nozzle cover
Milk and Accessories Container:

A. Froth adjustment and CLEAN function dial
B. Lid release buttons
C. Thermal casing
D. Milk container
E. Milk intake tube
F. Adjustable frothed milk spout
G. Lid with milk frother
BEFORE USING THE COFFEE SYSTEM
NOTE: This product is intended for household use only.
Coffee has been used to factory test the machine. It is completely normal for there to be traces of coffee in the mill.
Customize water hardness as soon as possible. See “Water Hardness” in the “Settings” section.
IMPORTANT: Complete the following steps before the coffee system is used for the first time.
1. INSERT WATER OUTLET: Check that the hot water/steam spout is inserted on the connection nozzle.

2. Turn on the coffee system.
3. To select a language, press or
or  until the flag corresponding to the required language appears on the display, then press the flag.
4. FILL WATER TANK WITH FRESH WATER: Remove the water tank, open the lid and fill to the MAX line with fresh water. Replace water tank.

5. Place a container with a minimum capacity of 1/2 cup (100 mL) underneath.
WATER CIRCUIT EMPTY PRESS OK TO START FILLING PROCESS will show on display. Press OK to confirm.

6. The coffee system will deliver fresh water from the spout then turns off automatically. The coffee system is now ready for normal use.
NOTES:
■ When first using the coffee system, you need to make 4-5 cappuccinos before the coffee system gives good results.
■ Before turning the coffee system on, make sure the main switch is turned on. Each time the coffee system is turned on, it performs an automatic preheat and rinse cycle which cannot be interrupted. The coffee system is ready for use only after the cycle is complete.
COFFEE SYSTEM USE

A. Menu to customize beverages settings
B. Appliance settings menu
C. Selected strength
D. Clock
E. Selected size
F. Strength selection
G. Size selection
H. Right scroll arrow
I. Selectable drinks (press on the scrolling arrows to see all the drinks)
J. Left scroll arrow
K. Customizable profiles (see “Memorizing Your Personal Profile”)
Settings
You can control several settings through the Settings Menu: Rinsing, Beep, Statistics, Cup Warmer, Water Hardness, Auto-Off, Coffee Temperature, Descaling, Auto-Start, Set Language, Set Time, Cup Lighting, Drink Settings, Energy Saving, Background, Demo Mode and Default Values.
To access the Settings Menu, press MENU. To exit the Settings Menu, press ESC.
Rinsing
Use this function to rinse the coffee spouts and preheat the brewing unit. Place a container with a minimum capacity of 1/2 cup (100 mL) under the coffee and hot water spouts.
1. Press to enter the menu.
2. Press or until the display shows  RINSING.
3. Press to start rinsing.
4. After a few seconds, hot water will come out of the coffee spout and RINSING HOT WATER RUNNING will be displayed.
5. To stop the rinsing cycle, press  STOP or wait for rinsing to stop automatically.
IMPORTANT: Do not leave the coffee system unattended while hot water is being delivered.
NOTES:
■ If the coffee system is not used for more than 3-4 days, we strongly recommend doing 2-3 rinse cycles before use.
■ After rinsing, it is normal for some water to remain in the grounds container.
Beep
This function will enable or disable tones that sound when an icon is pressed or an accessory is inserted/removed.
1. Press to enter the menu.
2. Press or until the display shows BEEP.
BEEP.
3. Press to enable or disable
 the sound notification. Press
  ESC to return to the home page.
Statistics
This function displays statistical data relating to the coffee system.
1. Press to enter the menu.
2. Press or until the display shows  STATISTICS.
3. Press . It is possible to check all the available statistics by pressing or . Press ESC to return to the home page.
Cup Warmer
Use to warm cups before making coffee.
1. Press to enter the menu.
2. Press or until the display shows  CUP WARMER.
3. Press to active or deactivate the cup warmer.
4. Press ESC to return to the home page.
Water Hardness
NOTE: The water hardness level is factory set at level 4. The coffee system can be programmed according to the hardness of your fresh water so the coffee system can be descaled less.
1. Remove the "Total hardness test" indicator paper provided from the packaging.
2. Immerse the paper completely in a glass of fresh water for about a second.
3. Remove the paper and shake lightly. After a minute, 1, 2, 3, or 4 squares will form. Each square corresponds to one level.
4. Press to enter the menu. Press or until the display shows WATER HARDNESS.
5. To change the level selected, press the symbol itself until the required level is displayed (Level 1 = soft water, Level 4 = very hard water). Press ESC to return to the home page.
Auto-Off
Auto-off can be set so the coffee system turns off after 15 or 30 minutes, as well as 1-3 hours of no use.
1. Press to enter the menu.
2. Press or until the display shows  AUTO-OFF together with the current selection (15 or 30 minutes, 1, 2 or 3 hours).
3. Press to select the required value; then press ESC to return to the homepage.
Coffee Temperature
1. Press to enter the menu.
2. Press or until the display shows  COFFEE TEMPERATURE together with the current selection (LOW, MEDIUM, HIGH, or MAX).
3. Press to select the required temperature.
4. Press ESC to return to the home page.
Descaling
IMPORTANT: Before using, read the instructions and labels on the descaler packaging.
Descale the appliance when the display shows DESCALING NEEDED PRESS OK TO START (~45 min) . To descale immediately, press OK and follow the steps.
1. "REMOVE WATER FILTER" will show on the display (if present). Remove the water filter (if present) and empty the water tank. Press NEXT  .
.
2. ADD DESCALER (UP TO LEVEL A) AND FRESH WATER (UP TO LEVEL B): Pour the descaler into the tank up to level A marked inside the water tank. This is equal to one 100 mL packet. Add 1 L (1 qt) fresh water up to level B and replace tank. Press NEXT .

3. EMPTY GROUND CONTAINER AND DRIP TRAY: Remove, empty and replace drip tray and the grounds container.
4. PLACE 2.5 L (3 qt) CONTAINER UNDER OUTLET, PRESS OK TO START DESCALING: Place an empty 2.5 L (3 qt) or larger container under the hot water/steam spout and coffee spout.
5. Press OK to confirm that descaling solution has been added. The display will show DESCALING PLEASE WAIT, which means the program has been started.
6. Descaler will come out of the hot water/steam and coffee spouts. A series of rinses and pauses is automatically carried out to remove all scale residue from the inside the coffee maker.
7. After approx. 25 minutes, descaling will stop; RINSE AND FILL WATER TANK UP TO MAX LEVEL will display. Empty the container used for descaler solution and place back under the spouts. Remove water tank, empty, rinse and refill to the MAX level and replace tank. Press OK .
8. Display will show RINSING PLEASE WAIT and hot water will empty from the spouts.
9. When the fresh water has run out, empty the container used to collect the fresh water from the spouts.
10. INSERT FILTER INTO ITS HOUSING will be displayed. Press NEXT and remove the water tank. Reinsert the water filter if it had been removed previously.
NOTE: Water filter not available on this model.
11. RINSE AND FILL WATER TANK UP TO MAX LEVEL will display. Fill tank up to MAX level with fresh water. Next, INSERT WATER TANK will be displayed. Place the water tank back into the coffee system.
12. PLACE 2.5 L (3 qt) CONTAINER UNDER OUTLET PRESS OK TO START RINSING: Place the empty container used to collect the descaling solution under the spouts and press OK . Hot water is dispensed and RINSING PLEASE WAIT is displayed.
13. EMPTY DRIP TRAY: At the end of the rinsing cycle, remove, empty and replace the drip tray, along with the grounds container. Replace and press NEXT .
14. For a few seconds, DESCALE COMPLETE PRESS OK will be displayed, then the coffee system will turn off. The descaling process is complete.
NOTE: If you would like to postpone the descaling process until a later time, press ESC . On the display the symbol will remain as a reminder.
To access the descaling menu when ready:
1. Press to enter the menu.
2. Press or until the display shows  DESCALE. Press to start the descaling cycle. Follow the instructions on the display until cycle is complete.
Auto-Start
The auto-start time can be set to have the coffee maker ready at a certain time.
NOTE: To enable this function, the time must be set correctly. To set the time, see "Setting the Clock."
1. Press to enter the menu.
2. Press or until the display shows  AUTO-START .
Select the function by pressing . The time setting panel will be displayed.
3. Press or corresponding to the hours and minutes until the required auto-start time is displayed. Press or to enable or disable auto-start.
4. To confirm, press OK . To cancel and return to the home page, press ESC twice.
The auto-start is now set and the symbol will be displayed next to the time to indicate that the function has been enabled.
NOTE: When the coffee system is turned off using the main switch, the auto-start setting will be lost if it had been enabled.
Set Language
1. Press to enter the menu.
2. Press or until the display shows  SET LANGUAGE.
3. Press . Press or until the flag corresponding to the required language is shown and select it. Press ESC twice to return to the home page.
Set Time
1. Press to enter the menu.
2. Press or until the display shows  SET TIME.
3. Press . The time setting panel will appear.
4. Press or corresponding to the hours and minutes until the current time is displayed. To confirm, press OK . To cancel, press ESC , then press again to return to the home page.
Cup Lighting
1. Press to enter the menu.
2. Press or until the display shows CUP LIGHTING.
3. Press to enable or disable the lights. Press ESC to return to the home page.
Drink Settings
In this section, you can consult your customized settings and reset the default values for each beverage.
1. Press to enter the menu. Press or until  DRINK SETTINGS appears on the display.
2. The reference user profile is highlighted on the display. The values are shown on the vertical bars. The manufacturer default value is indicated by the symbol while the current set value is highlighted by the filled part of the vertical bar.
3. To go back to the settings menu, press ESC . To scroll and display the beverages, press NEXT . To return to the default manufacturer values for the beverage shown on the display, press  RESET. CONFIRM RESET will be displayed. To confirm, press OK . To cancel, press ESC .
4. RETURN TO FACTORY will display. Press OK .
The beverage has been reset to the default values. Continue with the other beverage, or go back to the settings menu. NOTE: To change the beverages for another profile, go back to the homepage, select the required profile and repeat the procedure.
To reset all the beverages in the profile to the default values, see the "Default Values" section.
Energy Saving
Use this function to enable or disable energy saving mode. When enabled, the function guarantees reduced energy consumption. When it is disabled, warming time is reduced.
1. Press to enter the menu. Press or until  ENERGY SAVING appears on the display.
2. Press to enable or disable energy saving. Press ESC to go back to the homepage.
Demo Mode
By using this setting, the main functions of the coffee system are shown on the display.
1. Press to enter the menu. Press or until the display shows  DEMO MODE. Press to start the demo.
2. To exit DEMO MODE, first turn the coffee system off by pressing the . Press the again to go back to the homepage.
Default Values
This resets all menu settings and programmed quantities back to the default values (with the exception of the language which remains as set).
1. Press to enter the menu. Pressor until the display shows DEFAULT VALUES. Press
2. Press RESET ALL to reset all profiles to the original parameters, otherwise select the required profile (e.g. User 1).
3. RETURN TO FACTORY SETTINGS? RESET ALL will display.
Press OK to confirm or ESC to leave settings unaltered.
4. FACTORY SETTINGS SET. Press OK to confirm.
Customizing Beverages
The strength and size of drinks can be customized.
1. The profile that is needed to be customized needs to be active. A maximum of six profiles are available on the unit. You can only select one profile to set at a time.
2. From the homepage, press . Choose the beverage you wish to customize in order to access the customizing screen, The relative accessories must be inserted.
3. (Beverages with coffee only) CHOOSE COFFEE STRENGTH LEVEL will display. Select the required strength by pressing  or
or  and press OK .
4. CUSTOMIZING COFFEE (OR FRESH WATER) SIZE, PRESS STOP TO SAVE will display. Preparation begins and the coffee system displays the size customizing screen in the form of a vertical bar. The star alongside the bar represents the current size set.
5. When the amount reaches the minimum size you can set, the display shows  STOP . Press STOP when the required quantity in the cup is reached. SAVE NEW SETTINGS? will display. Press YES or NO.
6. The application confirms if the values have been saved or not (depending on the previous selection). Press OK . The coffee system goes back to the home page.
NOTE: Milk based drinks; the coffee strength is saved first, followed by the quantity of milk, then coffee.
Memorizing Your Personal Profile
The coffee system allows you to memorize six different profiles, each associated with a different icon. In every profile the customized MY beverages STRENGTH and SIZE values are saved and the order in which all beverages are displayed is based on the frequency of selection.
To select or enter a profile, press on the profile currently in use, press or until the required profile is displayed, then press on the profile.
NOTE: Profile  GUEST: Select this profile to deliver beverages with the default settings. The function is not active.
Selecting Coffee Strength
Select the required strength from the homepage by pressing STRENGTH.

After delivering the beverage, the strength setting is reset to the  value.
Making Coffee or Espresso Using Coffee Beans
IMPORTANT: Do not use green, caramelized or candied coffee beans as they could stick to the coffee mill and make it unusable.
1. Fill the beans container with coffee beans. Place a cup under the coffee spout.
2. Lower the spout so that it is as near as possible to the cup. This helps achieve a better cream.

3. Press or until the required coffee selection is displayed. Then select your required coffee from the home page: Espresso, Doppio+, Coffee, Long, X2 Espresso or Americano.
4. Preparation begins and the display shows the image of the selected beverage together with a progress bar which gradually fills as preparation proceeds.
NOTE: It is possible to prepare two cups of espresso coffee at the same time.
1. Press  during preparation of one espresso.
2. While the machine is making coffee, delivery can be interrupted at any time by pressing STOP .
3. As soon as delivery has ended, to increase the quantity of coffee in the cup, press  . Once the desired quantity is reached, press STOP .
4. Once the coffee has been made, the appliance is ready to make the next beverage.
NOTE: Various messages may be displayed while using the appliance (FILL TANK, EMPTY GROUNDS CONTAINER, etc.). Their meanings are explained in section "Displayed messages."
■ For hotter coffee, see "Tips for Hotter Coffee" section.
■ If the coffee comes out in drops, too weak and not creamy enough or too cold, see the "Adjusting the Coffee Mill" and "Troubleshooting" sections.
■ If "Energy Saving" mode is active, the first coffee may take a few seconds before it is delivered.
To Clean:
After every 14 cups of coffee made, the drip tray needs to be cleaned and the coffee grounds container emptied.
1. Open the service door on the front by pulling the coffee spout.

2. Remove the drip tray and clean it.
NOTE: When cleaning the coffee system, always fully remove the drip tray.

3. Empty the coffee grounds container and replace it.
NOTE: Every time the drip tray is removed, the coffee grounds container must be emptied. Failure to do so may clog the coffee system.
4. Replace the drip tray and close the service door.
Selecting the Coffee Size
From the home page, select the required size of coffee in the cup by pressing  SIZE.
SIZE.

After delivering the beverage, the size setting is reset to the value.
Adjusting the Coffee Mill
The coffee mill is factory-set and should not require adjustment. However, if after making the first few coffees you find that the coffee is either too weak and not creamy enough, or delivery is too slow (a drop at a time), this can be corrected by adjusting the grinding adjustment dial.

NOTE: The grinding adjustment dial must only be turned when the coffee mill is in operation during the initial phase of coffee preparation.
1. If the coffee comes out too slowly or does not come out at all, a message will be shown GROUND TOO FINE. ADJUST GRIND LEVEL, turn the coffee mill dial one or two clicks clockwise.
2. For fuller bodied creamier coffee, turn one click counterclockwise towards one. (Do not turn more than one click at a time. Otherwise the coffee could come out one drop at a time.)

The effect of these adjustments will only be evident after at least two cups of coffee have been delivered. If this adjustment does not obtain the desired result, repeat the correction by turning the dial another click.
Making Coffee using Pre-Ground Coffee
IMPORTANT:
■ Never add pre-ground coffee when the coffee maker is off in order to avoid it spreading through the inside of the coffee maker and making it dirty. This could damage the appliance.
■ Never use more than one level measure or it could dirty the inside of the coffee maker or block the funnel.
1. Press STRENGTH until the display shows  (pre-ground).
2. Open the cover and the pre-ground door.
3. Make sure the funnel is not blocked, then add one level measure of pre-ground coffee.

4. Place a cup under the coffee spouts, then select your required coffee from the home page.
5. Preparation begins and the image of the selected beverage appears on the display, together with a progress bar which gradually fills as preparation progresses.
NOTES:
■ If you use pre-ground coffee, you can only make one cup of coffee at a time.
■ While the coffee maker is making coffee, delivery can be interrupted at any time by pressing STOP .
■ As soon as delivery has ended, to increase the quantity of coffee in the cup, press . Once the desired quantity is reached, press STOP .
■ Once the coffee has been made, the appliance is ready to make the next beverage.
Making Milk-Based Hot Drinks
1. Remove the lid of the milk container.

2. Fill the container with approximately 1/2 cup (100 mL) of milk for each cappuccino you want to make. Do not fill above the MAX line on the milk container. For a denser or more even froth, use cold skim or partially skim milk.
3. Make sure the milk intake tube is correctly inserted in the bottom of the milk container lid and place the lid back onto the container.

4. Remove the hot water/steam spout.

5. Attach the milk container to the nozzle by pushing the bottom of the container. A tone will sound if the sound notification is enabled.

6. Place a large cup under the coffee spouts and frothed milk spout. To move the spout nearer to the cup, simply pull it downward.

Adjusting the Amount of Froth
Turn the froth adjustment dial on the milk container to adjust the amount of froth on the milk delivered while making the drinks. See table below.

Making Milk-Based Drinks Automatically
1. Fill the milk container and attach it as described above.
2. Select the required beverage from the home page: Cappuccino, Latte Macchiato, Caffe Latte, Hot Milk, Cappuccino+, Espresso Macchiato, Flat White or Cappuccino Mix.
3. On the display the coffee maker recommends turning the foam adjustment dial based on the foam requirements for the original recipe. Turn the dial on top of the milk container lid and confirm the selection by pressing OK .
4. After a few seconds, preparation begins automatically and an image of the selected beverage appears on the display, together with a progress bar which gradually fills as preparation progresses.
5. Once the coffee has been made, the coffee maker is ready to make the next beverage.
NOTES:
■ If "Energy Saving" mode is enabled, there may be a few seconds delay before the beverage is delivered.
■ Press ESC to interrupt preparation completely and go back to the home page.
■ Press STOP to interrupt milk or coffee delivery and move on to the next delivery (if applicable) to complete the beverage.
■ At the end of delivery, to increase the quantity of coffee in the cup, press .
■ Preparation of each milk based drink can be customized.
See "Customizing Beverages" and Memorizing Your Personal Profile" sections.
■ Do not leave the milk container out of the refrigerator for more than 15 minutes. The quality of the foam will decrease the longer the container is out.
To Clean Hot Water/Steam Spout:
Always clean the hot water/steam spout after use to avoid the build-up of milk residues and prevent it from clogging.
1. Place a container under the hot water/steam spout and let a little fresh water out. See "Delivering Hot Water" section. Stop delivery by pressing STOP .
2. Wait a few minutes for the hot water/steam spout to cool down. When cool, remove the spout. Hold the spout steady with one hand and with the other, turn and detach the cappuccino maker, pulling it downwards.

3. Also remove the steam connection nozzle by pulling it downward. Check that the hole in the connection nozzle is not blocked. If necessary, clean using a toothpick.
4. Wash all parts of the spout thoroughly with a sponge and warm water. Attach the connection nozzle and the cappuccino maker onto the spout by pushing it upwards and turning it clockwise until it is secure.
Delivering Hot Water
1. Make sure the hot water/steam spout is attached correctly to the hot water/steam connection nozzle.
2. Place a container under the spout as close as possible to avoid splashes.
3. Select  HOT WATER from the home page. The corresponding image appears on the display, together with a progress bar which fills gradually as preparation proceeds.
4. The machine delivers hot water, then the delivery stops automatically. To interrupt hot water delivery manually, press STOP .
NOTES:
■ If "Energy Saving" mode is active, there may be a few seconds delay before hot water is delivered.
■ Preparation of hot water can be customized. See "Customizing Beverages" and "Memorizing Your Personal Profile" sections.
Steam Delivery
1. Make sure the hot water/steam spout is attached correctly to the hot water/steam connection nozzle. Fill a container with the liquid to be heated or frothed and immerse the hot water/ steam spout in the liquid.
2. Select  STEAM from the homepage. The corresponding image appears on the display, together with a progress bar which fills gradually as preparation proceeds and after a few seconds, steam to heat the liquid is delivered from the hot water/steam spout.
3. When the required temperature or level of froth is reached, interrupt steam delivery by pressing STOP .
Tips for using steam to froth milk:
■ When choosing the size of the container, bear in mind that the liquid doubles or triples in volume.
■ For a richer, denser froth, use skimmed or partially skimmed milk at refrigerator temperature.
■ For a creamier froth, rotate the container with a slow movements in a upward motion.
■ To avoid milk with poor froth or large bubbles, always clean the spout.
COFFEE SYSTEM CARE
General Cleaning
To avoid damage to the coffee system, do not use solvents or abrasive detergents to clean the coffee system. Use a soft damp cloth to clean the exterior of the coffee system. Clean all machine parts regularly.
IMPORTANT: Before any cleaning, turn the coffee system off using the main On/Off switch and unplug it.
IMPORTANT: Do not immerse the coffee system in water.
Cleaning the Coffee Grounds Container and Drip Tray
When the display shows the message EMPTY GROUNDS CONTAINER, the grounds container must be emptied and cleaned. The appliance cannot be used to make coffee until the container is has been cleaned. Even if it is not full, the empty grounds container message is displayed 72 hours after the first coffee has been prepared. For the 72 hours to be calculated correctly, the machine must never be turned off with the main switch.
1. Open the bottom door by rotating it downwards and open.

2. Remove drip tray, empty and clean it.
3. Empty and clean the coffee grounds container making sure to remove all the residue that can be deposited on the bottom. The brush provided features a spatula especially for this job.
IMPORTANT: Every time the drip tray is removed, the coffee grounds container must be emptied. If this is not done, the grounds container may fill up more than expected and clog the coffee system.
The drip tray has a gray float as a water level indicator. Empty and clean the drip tray before the red float protrudes from the cup tray. If the drip tray is not emptied, the water can overflow and damage the coffee system.
1. Open the door and remove the drip tray and coffee grounds container.

2. Empty the drip tray and grounds container and wash them.
3. Replace the drip tray complete with grounds container.
Cleaning the Water Tank
Clean the water tank regularly with a damp cloth and a small amount of mild detergent. Rinse thoroughly before filling the tank and putting it back in the appliance.
Cleaning the Coffee Spouts
Clean the coffee spouts regularly with a sponge or cloth. Check that the holes in the coffee spouts are not blocked. If necessary, remove coffee deposits with a toothpick.
Cleaning the Pre-Ground Coffee Funnel
Check regularly that the pre-ground coffee funnel is not blocked. Remove coffee deposits with the brush supplied, if needed.
Cleaning the Inside
Check the inside of the coffee system approximately once a week for dirt and debris. If necessary, remove coffee deposits with the supplied brush and a damp sponge or cloth.
Cleaning the Infuser
IMPORTANT: The infuser must not be removed when the appliance is on. Do not use force to remove the infuser.
1. Make sure the machine is correctly turned off.
2. Open the service door.

3. Remove the drip tray and grounds coffee container.

4. Press the two colored release buttons inwards and at the same time pull the infuser outwards.

5. Soak the infuser in fresh water for about five minutes, then rinse.
IMPORTANT: Do not use detergent to clean the infuser to avoid removing the lubricant applied to the inside of the piston.
6. After cleaning, replace the infuser by sliding it onto the internal support and pin at the bottom, then push the PUSH symbol fully until it clicks into place.

NOTE: If you are having difficulty replacing the infuser, compress the moving parts from both the top and bottom as shown in the following illustration before reinserting it.

7. Once inserted, make sure the two colored release buttons have snapped out.
8. Replace the drip tray and grounds coffee container. Close the service door.
Cleaning the Milk Container
Each time a milk function is used, TURN MILK FROTH ADJUSTMENT KNOB TO CLEAN TO START CLEANING appears on the display and the milk frother lid must be cleaned.
1. Leave the milk container in the coffee maker. You do not need to empty it.
2. Place a cup or other recipient under the frothed milk spout.

3. Turn the foam adjustment dial to CLEAN. CLEANING MILK CONTAINER PLACE A CUP UNDER THE MILK OUTLET appears on the display together with a bar which gradually fills as cleaning proceeds. Cleaning will stop automatically.
4. Turn the dial back to a froth selection. Remove the milk container and always clean the steam connection nozzle with a sponge.
NOTES:
■ If a number of milk based drinks needs to be made, only clean the milk container after preparing the last beverage. To proceed with making the next beverages when the CLEAN message is displayed, press ESC .
■ If the milk container does not get cleaned, the (clean milk container icon) appears on the display as a reminder that the milk container needs cleaning.
■ In some cases, to carry out the cleaning the appliance requires a short time to heat up.
TROUBLESHOOTING
Please include a daytime phone number in your correspondence.
|
In the U.S.A.:
|
In Canada:
|
|
JennAir Brand Home Appliances Customer eXperience Center 553 Benson Road Benton Harbor, MI 49022-2692
JennAir Brand Home Appliances Customer eXperience Centre 200 – 6750 Century Ave. Mississauga, Ontario L5N 0B7
|
|
Please include a daytime phone number in your correspondence.
|
|
PROBLEM
|
POSSIBLE CAUSE & REMEDY
|
|
The coffee is not hot
|
The cups have not been preheated.
- Heat the cups by rinsing them with hot water.
|
|
The infuser has cooled down because 2-3 minutes have elapsed since the last coffee was made.
- Before making coffee, heat the infuser by selecting the Rinse function from the menu.
|
|
A low coffee temperature is set.
- Change the set temperature. See “Coffee Temperature” in the “Settings” section.
|
|
The coffee is weak or not creamy enough
|
The coffee is ground too coarsely.
- Turn the grinding adjustment dial one click counterclockwise towards number one while the coffee mill is in operation. Continue one click at a time until coffee delivery is satisfactory. The effect can only be noticed after delivering two coffees.
|
|
The blend of coffee is unsuitable.
- Use a blend of coffee specifically for espresso coffee machines.
|
|
The coffee is delivered too slowly or at a drop at a time
|
The coffee is ground too finely.
- Turn the grinding adjustment dial one click clockwise towards number seven while the coffee mill is in operation. Continue one click at a time until coffee delivery is satisfactory. The effect can only be noticed after delivering two coffees.
|
|
The appliance does not come on
|
The main switch is not turned on.
- Press the main switch to ON.
|
|
The milk does not come out of the milk spout
|
The lid of the milk container is dirty.
- Clean the milk container lid as described in the "Cleaning the Milk Container" section.
|
|
The infuser cannot be extracted
|
The appliance has not been turned off correctly.
- Turn the appliance off by pressing the button.
|
|
The milk contains large bubbles or spurts out of the milk spout or there is little froth
|
The milk is not cold enough or is not semi- skimmed or skimmed.
- Use fully skimmed or semi-skimmed milk at refrigerator temperature 5°C (41°F). If results are still not satisfactory, try changing brand of milk.
|
|
The froth adjustment dial is incorrectly adjusted.
- Adjust following the instructions in the "Adjusting the Amount of Froth" section.
|
|
The milk container lid or froth adjustment dial is dirty.
- Clean the milk container lid and froth adjustment dial as described in the "Cleaning the Milk Container" section.
|
|
The hot water/steam connection nozzle is dirty.
- Clean the connection nozzle as described in the "Cleaning the Hot Water/Steam Connection Nozzle" section.
|
|
At the end of descaling, the appliance requests a third rinse
|
During the two rinse cycles, the water tank was not filled to MAX level.
- Follow the instructions displayed by the appliance, first emptying the drip tray to avoid the water overflowing.
|
|
The machine emits noises or small puffs of steam while not in use
|
The machine is ready for use, or has recently been turned off, and condensate is dripping into the vaporizer which is still hot.
- This is part of normal operation. To limit this, empty the drip tray.
|
Displayed Messages
| DISPLAYED MESSAGE |
POSSIBLE CAUSE |
REMEDY |
|
ADD PRE-GROUND COFFEE, PRE-GROUND MAXIMUM ONE MEASURING CUP

|
The "Pre-ground coffee" function has been selected, but without placing any pre-ground coffee in the funnel. |
Place pre-ground coffee in the funnel and repeat delivery. |
| The funnel for pre-ground coffee is clogged. |
Empty the funnel using the brush provided as described in the "Cleaning the Pre-Ground Coffee Funnel" section. |
| A "Tall" coffee with pre-ground coffee has been requested. |
Place pre-ground coffee in the funnel and press OK to continue and complete delivery. |
|
EMPTY GROUND CONTAINER

|
The grounds container is full. |
Empty the grounds container and drip tray, clean and replace them.
IMPORTANT: When removing the drip tray, the grounds container must always be emptied, even if it contains a few grounds. If this is not done, when you make the next coffees, the grounds container may fill up more than expected and clog the machine.
|
|
DESCALING NEEDED, PRESS OK TO START (~45 MIN)

|
Indicates that descaling is needed. |
Press OK to start descaling or press ESC to descale later. The descaling procedure described in the "Descaling" section needs to be performed. |
|
FILL BEAN CONTAINER

|
The coffee beans have run out. |
Fill the beans container. |
|
FILL WATER TANK WITH FRESH WATER

|
The water tank is empty or incorrectly positioned. |
Fill the tank with fresh water and or insert it correctly pushing it as far as it will go until it clicks into place. |
|
GENERAL ALARM: REFER TO USER MANUAL

|
The inside of the coffee system is very dirty. |
Clean the inside of the appliance thoroughly, as described in the "Cleaning" section. If the message is still displayed after cleaning, contact an authorized Customer Service Center. |
|
SELECT A MILDER TASTE OR REDUCE PRE-GROUND COFFEE QUANTITY

|
Too much coffee has been used. |
Select a milder taste by pressing or reduce the quantity of pre-ground coffee (maximum one measure). |
|
GROUND TOO FINE. ADJUST GRIND LEVEL 1 CLICK WHILE IN OPERATION

|
The grinding is too fine and the coffee is delivered too slowly or not at all. |
Repeat coffee delivery and turn the grinding adjustment dial one click clockwise towards number seven while the coffee mill is in operation. If after making at least two coffees delivery is still too slow, repeat the correction procedure, turning the grinding adjustment dial another click. If the problem persists, make sure the water tank is fully inserted. |
| If the water filter is present, an air bubble may have been released inside the circuit, obstructing delivery. |
Insert the hot water/steam spout in the appliance and deliver a little fresh water until the flow becomes regular. |
|
INSERT BREWING UNIT

|
After cleaning, the infuser has not been replaced. |
Insert the infuser as described in the "Cleaning the Infuser" section. |
|
INSERT MILK CONTAINER

|
The milk container is not inserted correctly. |
Insert the milk container as far as it will go. |
|
INSERT GROUND CONTAINER AND DRIP TRAY

|
After cleaning, the grounds container has not been replaced. |
Remove the drip tray and insert the grounds container. |
|
INSERT WATER OUTLET

|
The hot water spout is not inserted or is inserted incorrectly. |
Insert the water spout as far as it will go. |
|
WATER CIRCUIT EMPTY PRESS OK TO START FILLING PROCESS

|
The water circuit is empty. |
Press OK and allow fresh water to drain out of the spout; the flow will stop itself automatically. If the problem persists, make sure the water tank is fully inserted. |
|
PRESS OK TO START CLEANING PROCESS OR TURN MILK FROTH ADJUSTMENT KNOB

|
The milk container has been inserted with the froth adjustment dial in the CLEAN position. |
To proceed with the CLEAN function, press OK or turn the froth adjustment dial to one of the milk positions. |
|
TURN THE MILK FROTH ADJUSTMENT KNOB TO START CLEANING

|
Milk has been delivered recently and the tube inside the milk container must be cleaned. |
Turn the froth adjustment dial to CLEAN. |
|
TURN THE MILK FROTH ADJUSTMENT KNOB TO MILK POSITION

|
The milk container has been inserted with the froth adjustment dial in the CLEAN position. |
Turn the dial to the required froth position. |
 |
Reminder that the appliance needs descaling and/or the filter must be replaced.
NOTE: Water filter not available on this model.
|
The descaling procedure described in the "Descaling" section needs to be performed as soon as possible. |
 |
Reminder that the tubes inside the milk container must be cleaned. |
Turn the froth adjustment dial to CLEAN. |
 |
Reminder that the machine must be descaled. |
The descaling procedure as described in the "Descaling" section needs to be carried out as soon as possible. |
 |
Indicated that the auto-start function is enabled. |
To disable the function, proceed as described in the "Auto-Start" section. |
 |
Energy saving is enabled. |
To disable energy saving proceed as described in the "Energy Saving" section. |