Loading ...
Loading ...
Loading ...
10 49-60763 Rev. 4
Care and Cleaning
CARE AND CLEANING
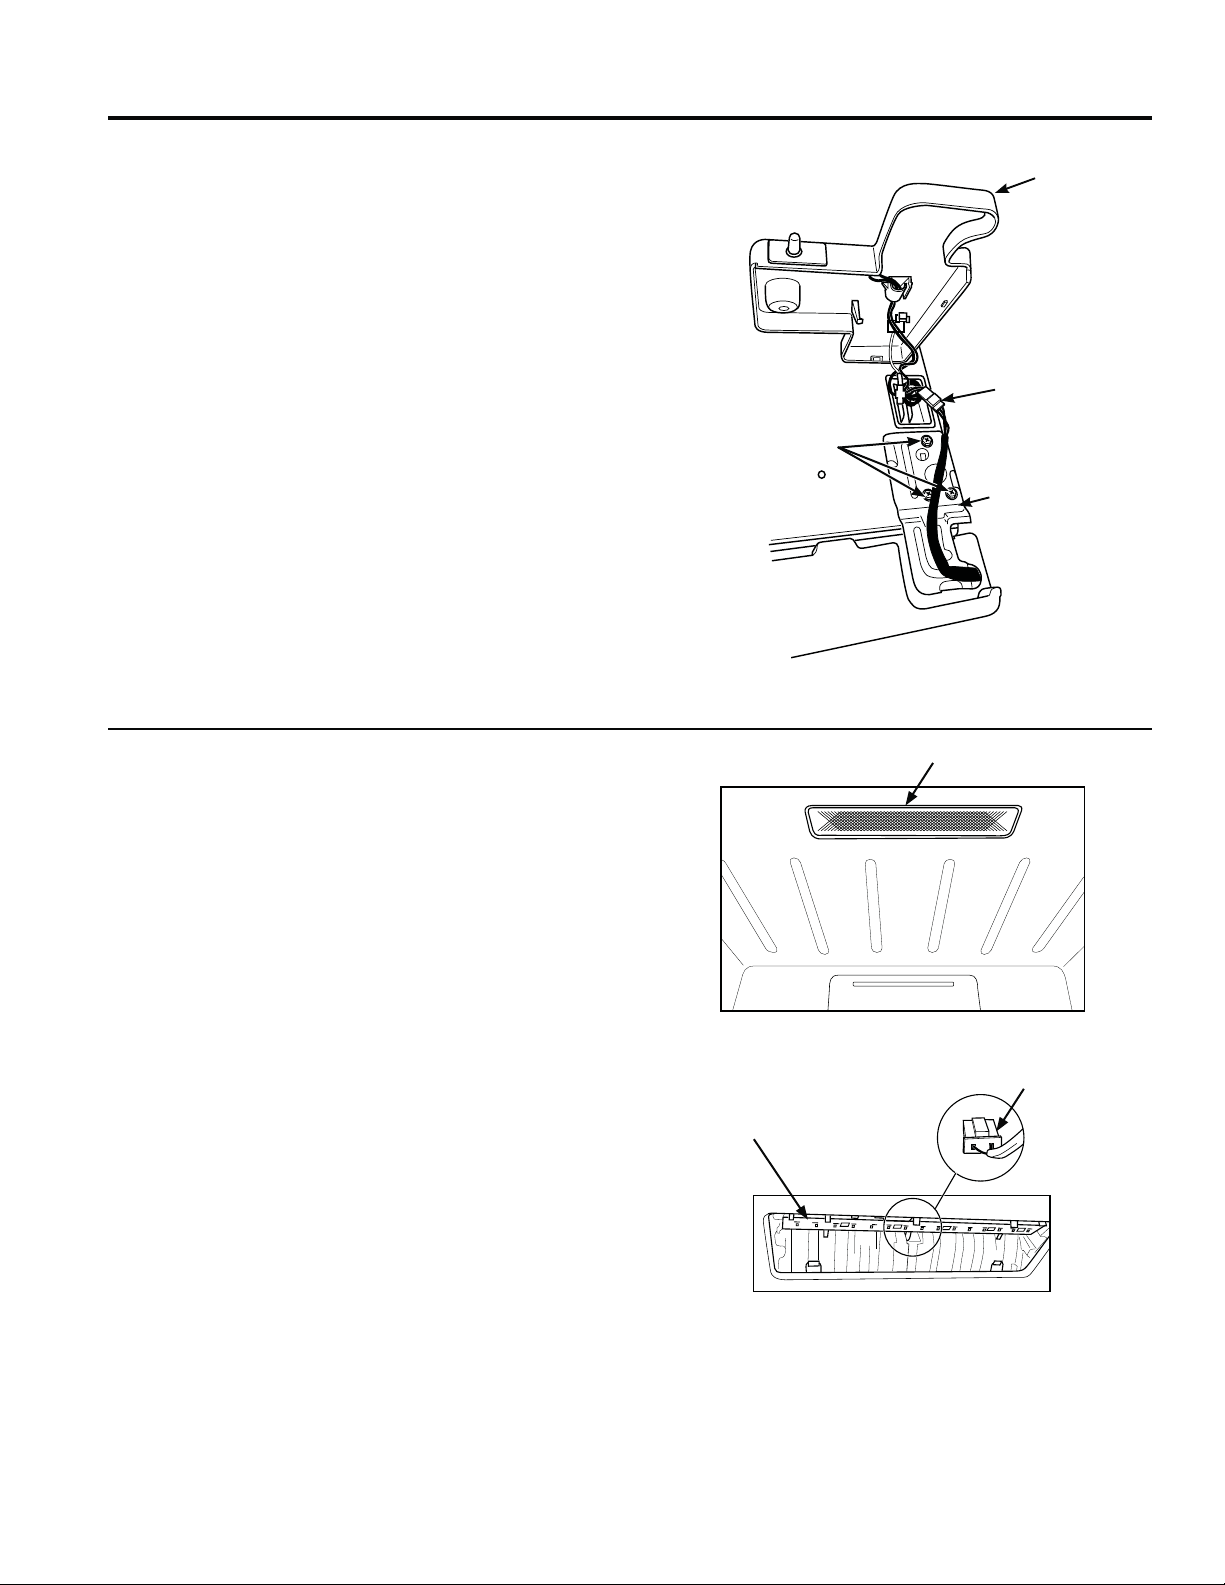
To Remove the Freezer Door
1. Remove the plastic hinge cover by removing one
screw, disconnect the wiring connector and remove
the ambient thermistor from the hinge cover, and then
lifting it off.
2. Remove the screws holding the hinge to the top of the
FDELQHWXVLQJD3KLOOLSVVFUHZGULYHURU´VRFNHW
driver. Be carefully not to damage the wiring nearby.
3. Remove the top hinge from the cabinet and lift the
door up and off the lower hinge pin. Set the door
aside.
4. Remove the screws from the bottom hinge.
To replace the doors, reverse the order of the above
instructions.
NOTICE: It is very important that all hinge screws are
securely tightened to ensure a secure assembly and
SUHYHQWKLQJHVOLSSDJH'RQRWRYHUWLJKWHQWKHKLQJH
screws. Tighten them until they are just snug, and then
turn them another one-half turn.
NOTE: The door swing is not reversible.
Wiring Connector
Top
Hinge
Hinge
Screws
Plastic
Hinge
Cover
Replacing the LED Light
7KH/('OLJKWLVORFDWHGEHKLQGDOLJKWOHQVLQWKHFHOOLQJ
RIWKH)UHH]HUVHFWLRQ
To replace the LED light:
1. Remove the top shelf (if necessary).
2. Gently push the three snap-in tabs at the front of
the lens, release the lens from the liner, and pull to
remove.
5HPRYHWKH/('DVVHPEO\IURPWKHPRXQWLQJWDEV
4. Gently pull the leads out and disconnect from the unit.
5HSODFHZLWKQHZ/('DVVHPEO\DQGVOLGHDVVHPEO\
back into mounting tabs.
6. Replace the light lens by sliding the tabs at the back
of the lens into the slots and push up on the lens until
the tabs at the front of the lens snap into place.
7RRUGHUWKH/('DVVHPEO\SOHDVHFDOO*(
$SSOLDQFHVDW*(&$5(6GXULQJ
normal business hours.
/('$VVHPEO\
'LVFRQQHFW/HDGV
/LJKW/HQVLQ)UHH]HU
Loading ...
Loading ...
Loading ...