Loading ...
Loading ...
Loading ...
15
12. Secure drain hose
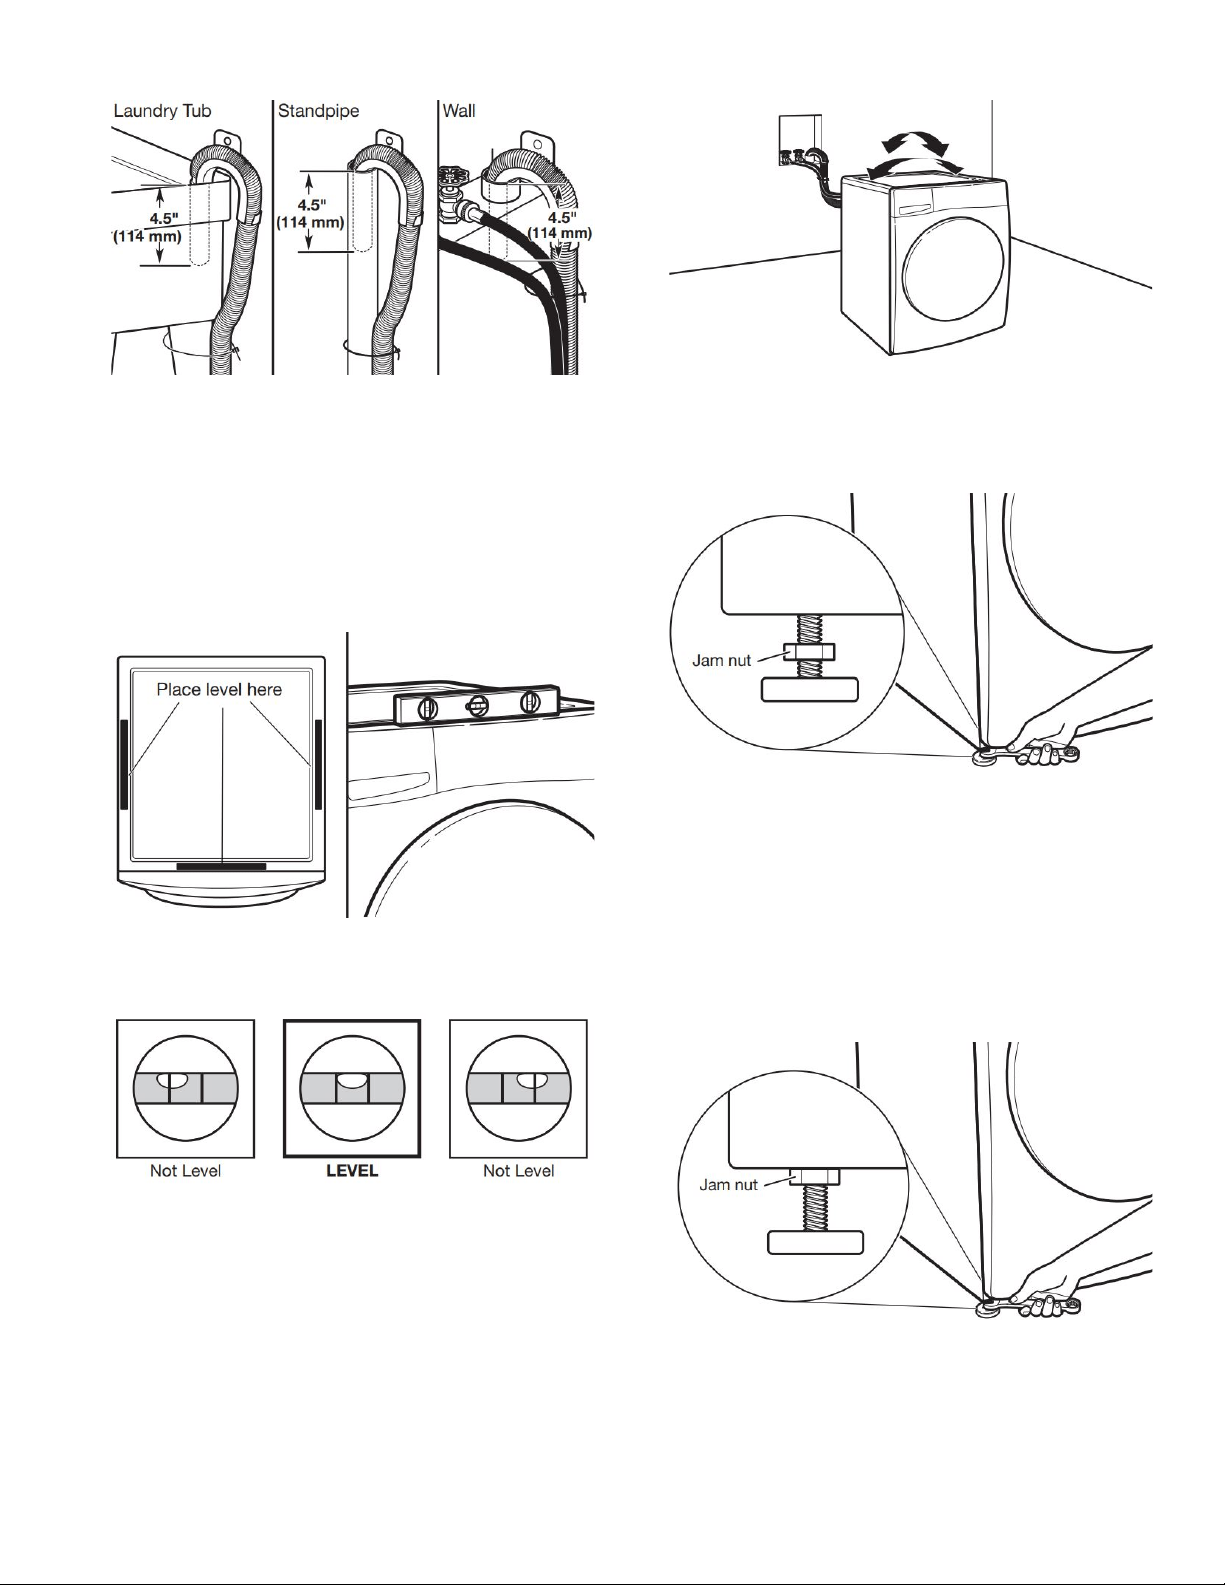
Secure drain hose to laundry tub leg, drain standpipe, or inlet
hoses for wall standpipe with cable tie or beaded tie strap.
It is the responsibility of the installer to install and secure the
drain hose in to the provided plumbing/drain in a manner that
will avoid the drain hose coming out of or leaking from the
plumbing/drain.
Level Washer
IMPORTANT: Leveling your washer properly reduces excess
noise and vibration.
13. Check levelness of washer
Remove cardboard from beneath washer. Place a level on
top edges of washer, checking each side and front. If not
level, tip washer and adjust feet up or down as shown in
steps 15 and 16, repeating as necessary.
14. Rock washer to test foot contact
Grip washer from top and rock back and forth, making sure
all four feet are firmly on floor. Repeat, rocking washer from
side to side. If washer rocks, go to step 15 and adjust leveling
feet. If all four feet are in firm contact with floor, go to step 16.
15. Adjust leveling feet
If washer is not level, use a 9/16" (14.3 mm) open-end or
adjustable wrench to turn jam nuts clockwise on feet until
they are about 1/2" (13 mm) from the washer cabinet. Then
turn the leveling foot clockwise to lower the washer or
counterclockwise to raise the washer. Do not exceed 2"
(50 mm) from bottom of foot to bottom of cabinet. Recheck
levelness of washer and that all four feet are firmly in contact
with the floor. Repeat as needed.
HELPFUL TIP: You may want to prop up front of washer
about 4" (102 mm) with a wood block or similar object that
will support weight of washer.
16. Tighten leveling feet
When washer is level and all four feet are firmly in contact
with the floor, use a 9/16" (14.3 mm) open-end or adjustable
wrench to turn jam nuts counterclockwise on leveling feet
tightly against washer cabinet.
HELPFUL TIP: You may want to prop washer again with a
wooden block.
Loading ...
Loading ...
Loading ...