Loading ...
Loading ...
Loading ...
6
Consumer Support Troubleshooting Tips
Operating Instructions Safety InstructionsInstallation Instructions
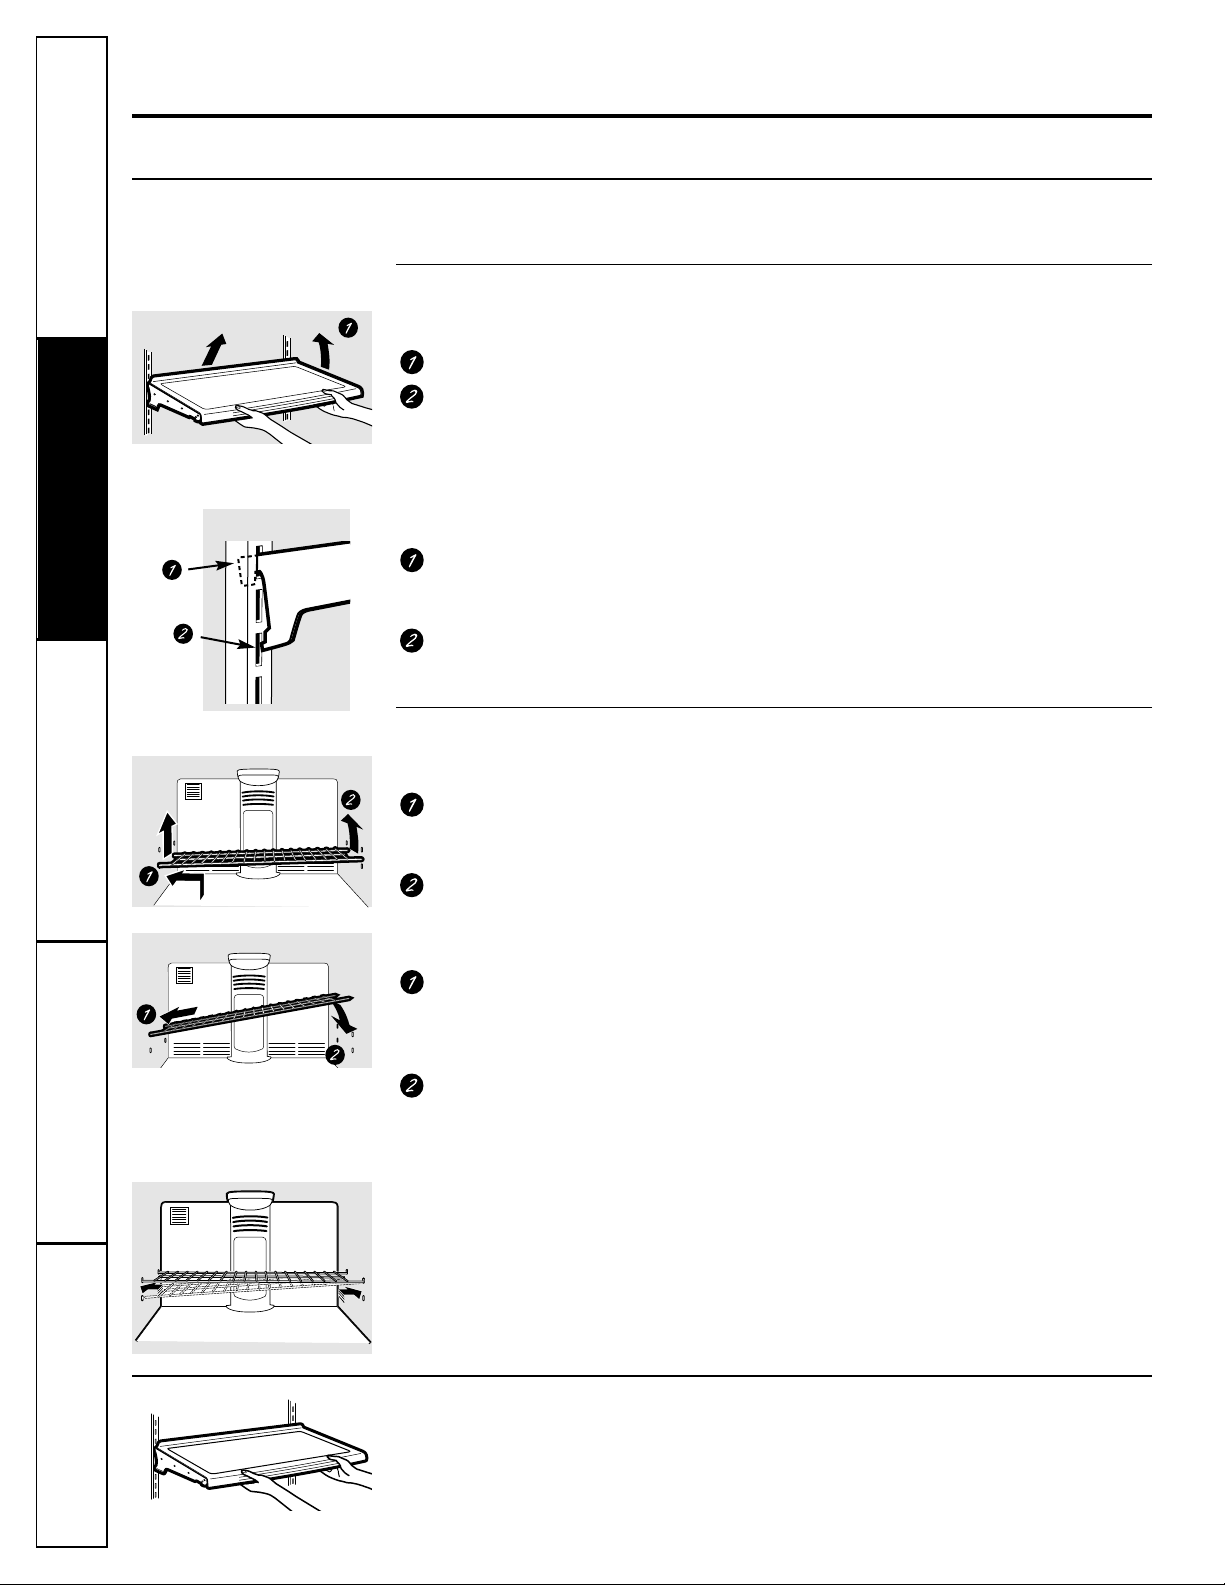
“Walking” the shelf
In some models, moving the shelf between
the lower and upper position may require
“walking” the shelf as shown. Lift up the left
side of the shelf and slide it left into the
center of the shelf supports. Then swing the
right side upwards and insert it into the
center of the upper shelf supports. Slide the
left side out of the shelf supports, swing it
upwards until level with the right side and
slide it into the shelf supports. Rest each
end of the shelf on the bottom of the shelf
supports.
Rearranging the Shelves
To remove:
Tilt the shelf up at the front.
Lift the shelf up at the back and bring
the shelf out.
To replace:
While tilting the shelf up, insert the top
hook at the back of the shelf in a slot
on the track.
Lower the front of the shelf until the
bottom of the shelf locks into place.
Spillproof Shelves (on some models)
Spillproof shelves have special edges to
help prevent spills from dripping to lower
shelves. To remove or replace the shelves,
see Rearranging the Shelves.
About the shelves and bins.
Not all features are on all models.
Some models have wire shelves that
can be adjusted in the same manner.
To remove:
Lift up the left side of the shelf and
slide it left into the center of the shelf
supports.
Rotate the right side of the shelf up and
out of the shelf supports.
Shelves in the refrigerator and freezer compartments are adjustable.
Refrigerator Compartment
Freezer Compartment
To replace:
Holding the shelf diagonally, insert the
left end of the shelf into the center of
the lower shelf supports on the side
wall.
Insert the right end of the shelf into the
shelf supports at the same level. Rest
each end of the shelf on the bottom of
the shelf supports.
NOTE: For models with an automatic icemaker,
the freezer shelf must be in the lower position for
the ice cube bucket to catch the cubes.
Loading ...
Loading ...
Loading ...