Loading ...
Loading ...
Loading ...
7
4. Place the bowl on the base with the handle
facing you. Then gently rotate the bowl
in a clockwise direction until it locks into
position (Fig 3). The bowl should feel firm
with no movement.
5. Lower the mixer head with the selected
mixing attachment in place into the mixing
bowl. Press the ‘head release’ button to
un-lock it from its position and ease the
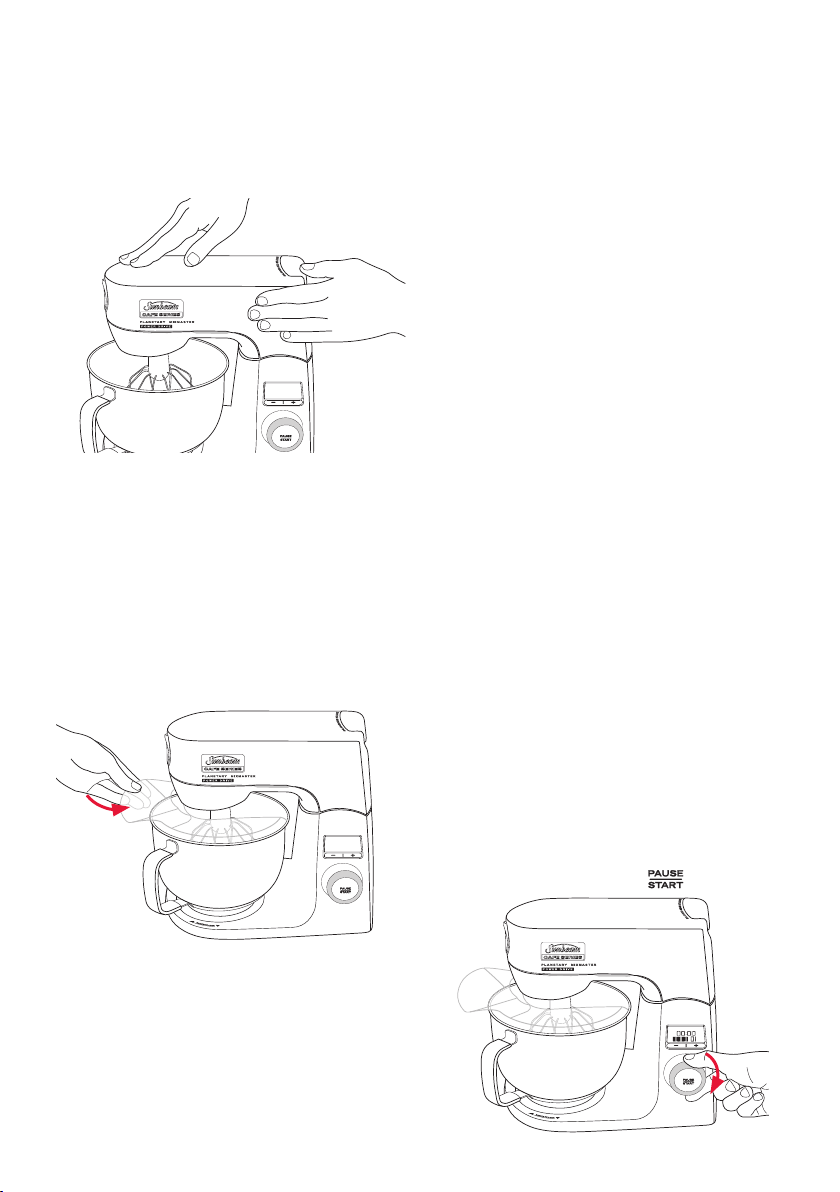
mixer head down (Fig. 4).
6. The splashguard can now be placed over
the bowl if desired (Fig 5).
Using your Planetary Mixmaster
®
Bench Mixer
1. Position the mixer on a level, dry
surface such as a bench top. Ensure the
mixing bowl is in place and the desired
attachment is inserted.
2. Plug the power cord into a 230/240 Volt
AC power outlet.
3. A beep will sound and the LCD screen
will light up to inform you that the mixer
is now switched on. The LCD screen
will flash three times and the timer will
display “00:00”. The screen will also
display the speed setting. If the LCD
displays a speed setting other than “0”
and continues to flash, you may turn the
speed control dial anti-clockwise to the
“0” position to re-set the speed setting.
4a. If using the splashguard, add ingredients
to the mixing bowl through the pouring
shoot.
4b. If using the mixer without the
splashguard, release the mixer head
out of its locked position and ease it
backwards until it locks into its tilt
position. Add ingredients to the mixing
bowl. Then, un-lock the mixer head and
lower it forward into the mixing bowl.
5. Turn the speed control dial clockwise to
commence mixing (Fig. 6), or, if a speed
is already set, press the
button.
Using your Café Series
®
Planetary Mixmaster
®
Power Drive
Bench Mixer continued
Using your Café Series
®
Planetary
Mixmaster
®
Power Drive Bench Mixer
Figure 4
Figure 5
Figure 6
Loading ...
Loading ...
Loading ...