Loading ...
Loading ...
Loading ...
SEWING THE STITCHES
Utility Stitches
Sewing S-27
S
2
e
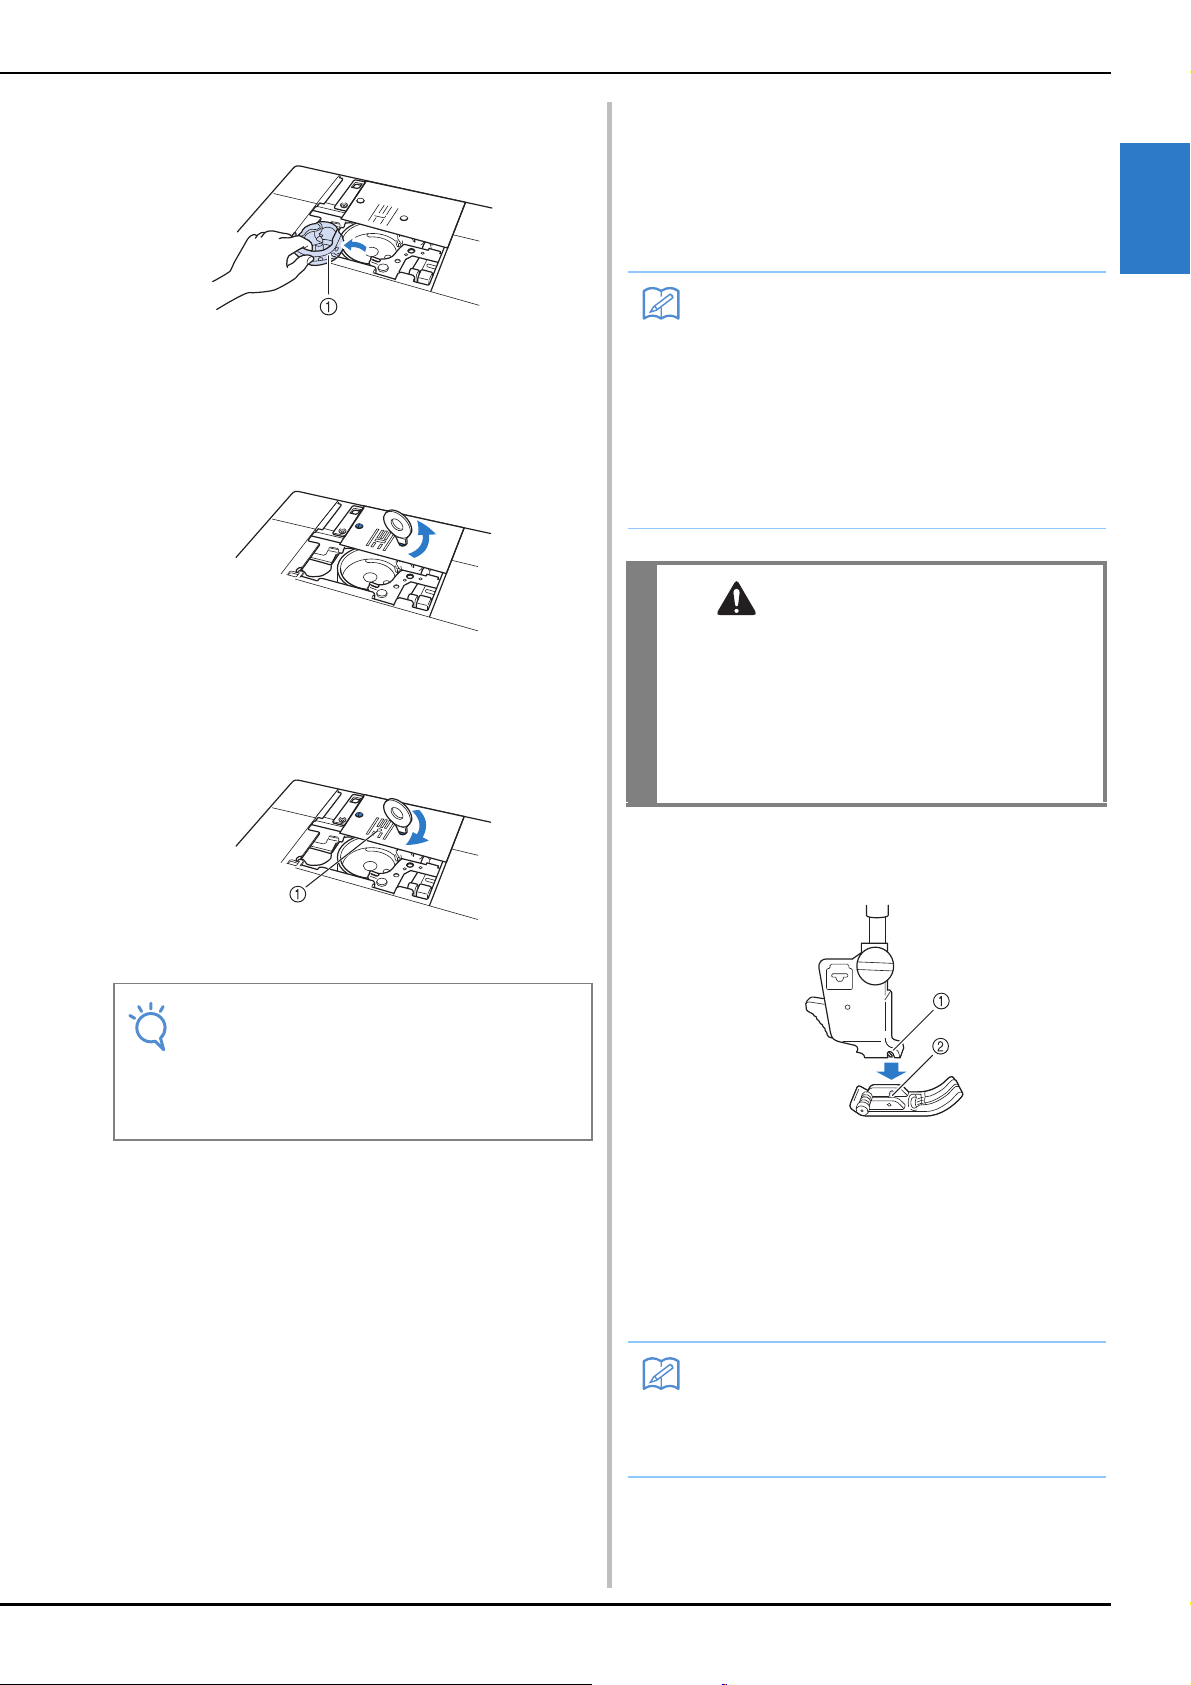
Grasp the bobbin case, and then pull it out.
a Bobbin case
f
Use the disc-shaped screwdriver included
with the machine to unscrew and remove
the regular needle plate.
g
Set the straight stitch needle plate in place
and use the disc-shaped screwdriver to
tighten the plate.
a Round hole
h
Insert the bobbin case in its original
position, and then attach the needle plate
cover.
i
After reinstalling the needle plate cover,
select any of the straight stitches.
j
Insert needle and attach the straight stitch
foot.
a Notch
b Pin
k
Start sewing.
* After sewing, make sure to remove the straight stitch
needle plate and the straight stitch foot, and reinstall
the regular needle plate, the needle plate cover and
the presser foot “J”.
Note
• Align the two screw holes on the needle
plate with the two holes on the machine.
Use the disc-shaped screwdriver included
with the machine to secure the screws in
the needle plate.
Memo
• When using the straight stitch needle plate,
all straight stitches become middle needle
position stitches. You cannot change the
needle position using the width display.
• Always secure the needle plate before
inserting the bobbin case into its original
position.
• “L/R SHIFT” does not work when straight
stitch needle plate is on the machine.
CAUTION
• Selecting other stitches will cause an error
message to be displayed.
• Slowly rotate the handwheel toward you
(counterclockwise) before sewing and make
sure that the needle is not contacting the
straight stitch foot and straight stitch needle
plate.
Memo
• To prevent puckering on fine fabrics, use a
fine needle, size 75/11, and a short stitch
length. For heavier fabrics, use a heavier
needle, size 90/14, and longer stitches.
Loading ...
Loading ...
Loading ...