Loading ...
Loading ...
Loading ...
13
FINAL INSTRUCTIONS
Lowes.com/harborbreeze
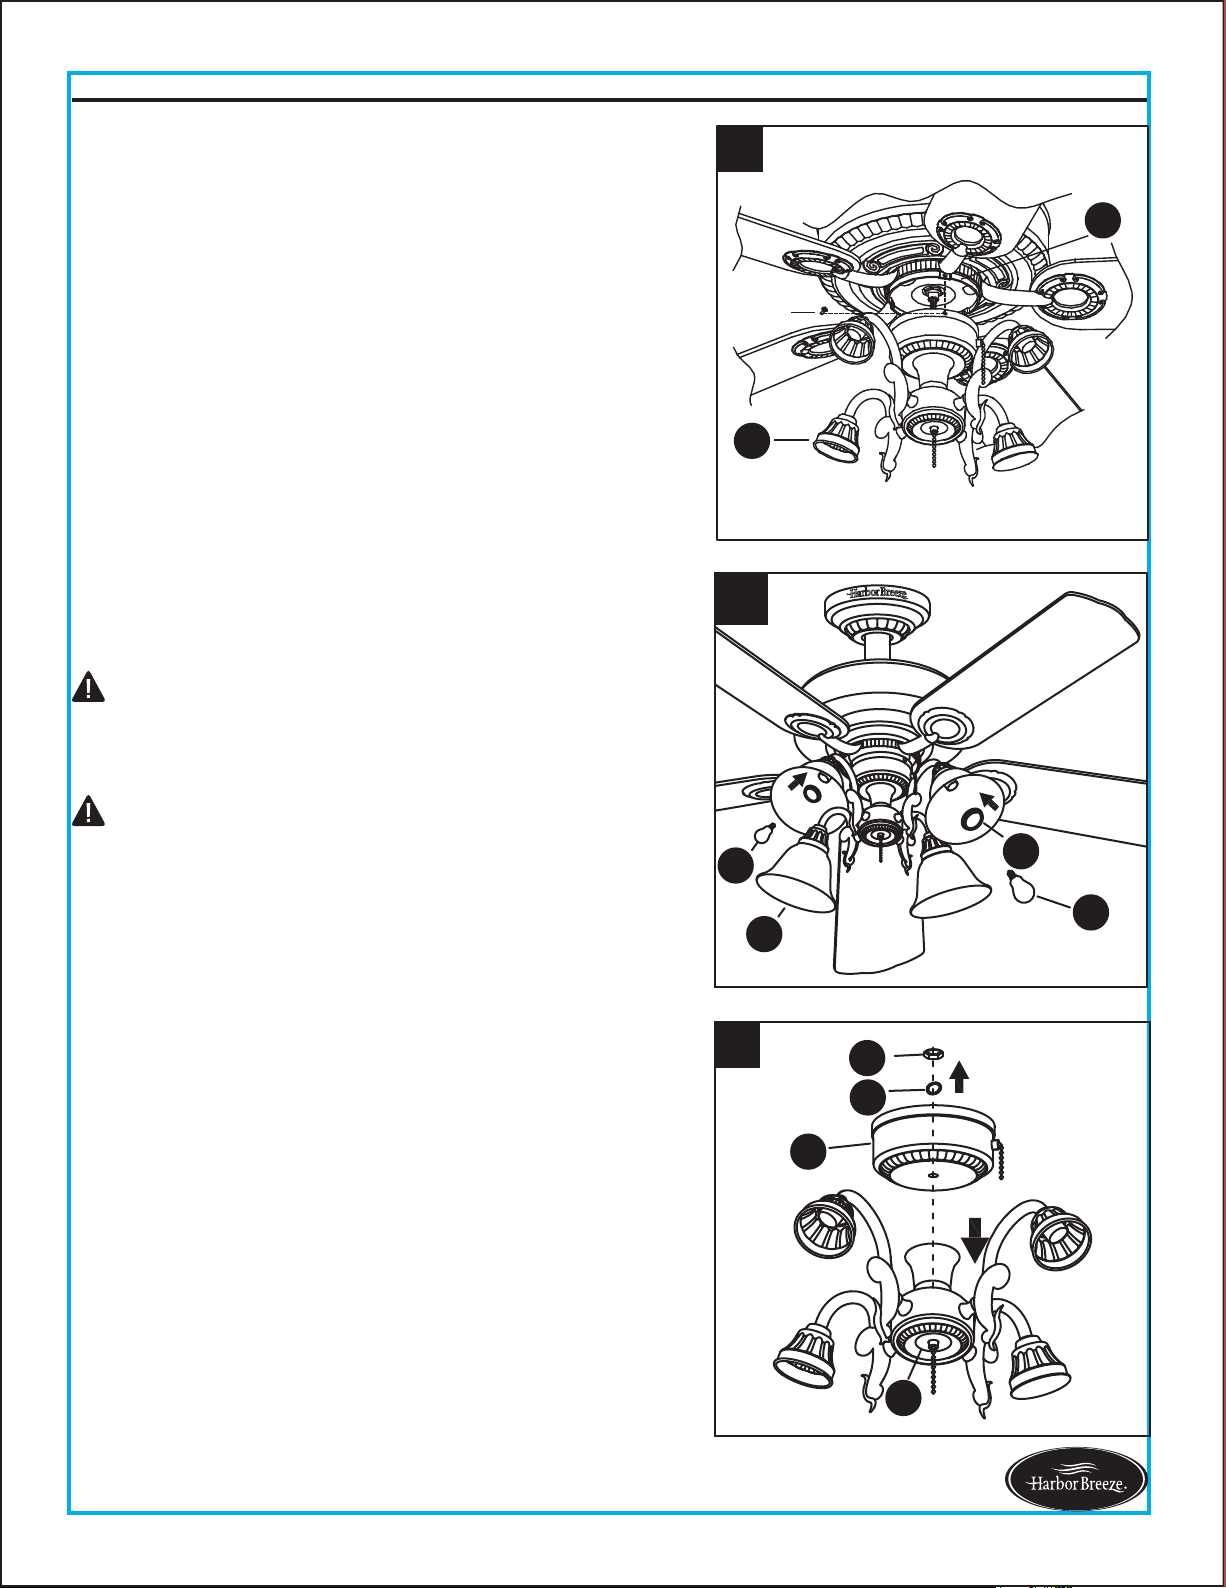
Remove socket ring (M) from each socket on light kit (J).
Slide glass bowl (K) to each socket, securing with socket
rings (M). Then, install bulbs (N) into sockets.
7.
For assembly without the light kit (J), remove the hex nut
(O) and spring washer (P) from the top of switch housing
(L). Disassemble light kit (J) from switch housing (L) and
discard. Save hardware for later use.
8.
7
M
N
K
N
6. Attach the switch housing (L) with light kit (J) to the
mounting plate (I) using the three screws previously
removed (step 4, page 12). Tighten securely.
6
J
I
Screw
Proceed to Step 10 (page 14).
CAUTION: Do not overtighten socket rings (M), as this
could crack or break the glass bowls (K).
CAUTION: When replacing bulbs (N), ensure wattage is
below 190 watts. If you replace bulbs with more than 190
watts, the fixture will dim the lights to 190 watts courtesy
of an energy-saving wattage limiter. After a period of time
from the power to the fan being turned off, there might be
a delay of about 0.5-1 second before the light turns on
due to this limiter.
8
J
L
P
O
Loading ...
Loading ...
Loading ...