

ENGLISH
E-1
ENGLISH
Thank you for purchasing a SHARP air conditioner. Please read this manual carefully
before operating the product.
• PRECAUTIONS ...........................................E-1
• ADDITIONAL NOTES ON OPERATION .....E-3
• TIPS ON SAVING ENERGY........................E-3
• PART NAMES..............................................E-4
• USING THE REMOTE CONTROL ..............E-6
•
TIPS ABOUT PLASMACLUSTER OPERATION.
E-7
• BASIC OPERATION ....................................E-8
• ADJUSTING THE AIR FLOW DIRECTION .E-10
CONTENTS
• PLASMACLUSTER OPERATION ...... E-11
• ONE-HOUR OFF TIMER .................... E-11
• TIMER OPERATION........................... E-12
• AUXILIARY MODE ............................. E-14
• OPTION KIT........................................ E-14
• MAINTENANCE .................................. E-15
• BEFORE CALLING FOR SERVICE ... E-16
PRECAUTIONS
WARNINGS FOR USE
1
Do not pull or deform the power supply cord. Pulling and misuse of the power supply cord
can result in damage to the unit and cause electrical shock.
2
Be careful not to expose your body directly to the outlet air for a long time. It may affect
your physical conditions.
3
When using the air conditioner for infants, children, elderly, bedridden, or disabled people
make sure the room temperature is suitable for those in the room.
4
Never insert objects into the unit. Inserting objects can result in injury due to the high
speed rotation of internal fans.
5
Ground the air conditioner without fail. Do not connect the grounding wire to gas pipe,
water pipe, lightning rod or telephone grounding wire. Incomplete grounding may cause
electric shock.
6
If anything is abnormal with the air conditioner (ex. a burning smell), stop the operation
immediately and turn the circuit breaker OFF.
7
Follow local rules and regulations for power supply cord cabling. Improper cable
connection can cause the power supply cord, plug and the electrical outlet to overheat
and cause fire.
8
Use only the manufacture-specified power cord for replacement. Replacement should be
performed by a qualified technician or a service person.
WARNINGS FOR INSTALLATION / REMOVAL / REPAIR
• Do not attempt to install/remove/repair the unit by yourself. Incorrect work will cause electric
shock, water leak, fire etc. Consult your dealer or other qualified service personnel for the
installation/removal/repair of the unit.
This equipment complies with the requirements of Directives 89/336/EEC and 73/23/
EEC as amended by 93/68/EEC.

PRECAUTIONS
CAUTIONS FOR USE
1
Open a window or door periodically to ventilate the room, especially when using gas
appliances. Insufficient ventilation may cause oxygen shortage.
2
Do not operate the buttons with wet hand. It may cause electric shock.
3
For safety, turn the circuit breaker off when not using the unit for an extended period of
time.
4
Check the outdoor unit mounting rack periodically for wear and to make sure it is firmly
in place.
5
Do not put anything on the outdoor unit nor step on it. The object or the person may fall
down or drop, causing injury.
6
This unit is designed for residential use. Do not use for other applications such as in a
kennel or greenhouse to raise animals or grow plants.
7
Do not place a vessel with water on the unit. If water penetrates into the unit, electrical
insulations may deteriorate and cause electric shock.
8
Do not block the air inlets nor outlets of the unit. It may cause insufficient performance
or troubles.
9
Be sure to stop the operation and turn the circuit breaker off before performing any
maintenance or cleaning. A fan is rotating inside the unit and you may get injured.
10
Do not splash or pour water directly on the unit. Water can cause electrical shock or
equipment damage.
11
This appliance is not intended for use by young children or infirm persons without
supervision.
Young children should be supervised to ensure that they do not play with the appliance.
CAUTIONS FOR LOCATION / INSTALLATION
• Make sure to connect the air conditioner to power supply of the rated voltage and
frequency.
Use of a power supply with improper voltage and frequency can result in equipment
damage and possible fire.
• Do not install the unit in a place where inflammable gas may leak. It may cause fire.
Install the unit in a place with minimal dust, fumes and moisture in the air.
• Arrange the drain hose to ensure smooth drainage. Insufficient drainage may cause wetting
of the room, furniture etc.
• Make sure a leak breaker or a circuit breaker is installed, depending on the installation
location, to avoid electrical shock.
E-2

ENGLISH
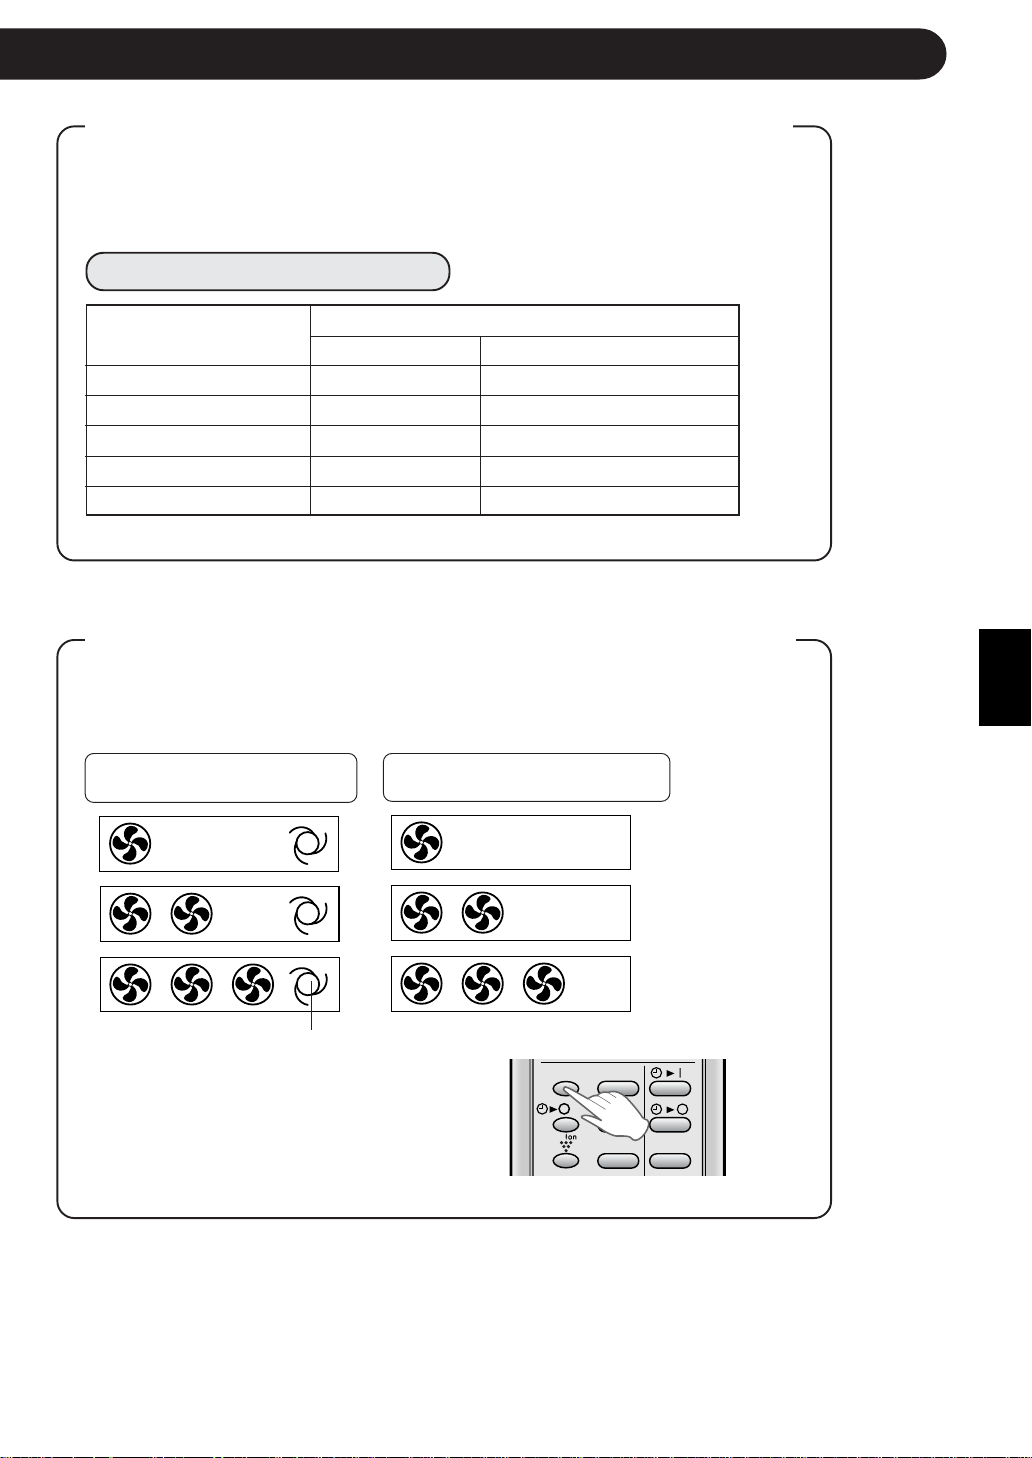
INDOOR TEMP. OUTDOOR TEMP.
COOLING
upper limit
32˚C D.B. 43˚C D.B.
23˚C W.B. -
lower limit
21˚C D.B. 21˚C D.B.
15˚C W.B. -
HEATING
upper limit
27˚C D.B. 24˚C D.B.
- 18˚C W.B.
lower limit
20˚C D.B. -8.5˚C D.B.
- -9.5˚C W.B.
ADDITIONAL NOTES ON OPERATION
OPERATING TEMPERATURE RANGE
• The built-in protective
device may prevent the
unit from operating when
used out of this range.
• Condensation may form
on the air outlet if the
unit operates continu-
ously in the COOL or
DRY mode when humid-
ity is over 80 percent.
D.B. = Dry-bulb W.B. = Wet-bulb
TIPS ON SAVING ENERGY
Below are some simple ways to save energy when you use your air conditioner.
SET THE CORRECT TEMPERATURE
• Setting the thermostat 1°C higher than the desired temperature in the COOL mode and 2°C lower in the
HEAT mode will save approximately 10 percent in power consumption.
• Setting the temperature lower than necessary during cooling operation will result in increased power
consumption.
BLOCK DIRECT SUNLIGHT AND PREVENT DRAFTS
• Blocking direct sunlight during cooling operation will reduce power consumption.
• Close the windows and doors during cooling and heating operation.
SET PROPER AIR FLOW DIRECTION TO OBTAIN THE BEST AIR
CIRCULATION
KEEP FILTER CLEAN TO ENSURE THE MOST EFFICIENT OPERATION
MAKE MOST OF THE TIMER OFF FUNCTION
DISCONNECT THE POWER CORD WHEN THE UNIT IS NOT USED FOR AN
EXTENDED PERIOD OF TIME
• The indoor unit still consumes a small amount of power when it is not operating.
WHEN POWER FAILURE OCCURS
This air conditioner has a memory function to store settings when a power failure occurs.
After power recovery, the unit will automatically re-start in the same settings which were active before the power
failure, except for timer settings.
If the timers were set before a power failure, they will need to be re-set after power recovery.
PREHEATING FUNCTION
In the HEAT operation, the indoor fan may not start for two to five minutes after the unit is turned on to prevent
cold air from blowing out of the unit.
DE-ICING FUNCTION
• When ice forms on the heat exchanger in the outdoor unit during the HEAT operation, an automatic de-icer
provides heat for about 5 to 10 minutes to remove the ice. During de-icing, the inside and outside fans stop
operating.
• After de-icing is completed, the unit automatically resumes operation in the HEAT mode.
HEATING EFFICIENCY
• The unit employs a heat pump that draws heat from the outside air and releases it into the room. The outside
air temperature therefore greatly affects the heating efficiency.
• If the heating efficiency is reduced due to low outside temperatures, use an additional heater.
• It takes time to warm up and heat the entire room because of the forced air circulation system.
E-3
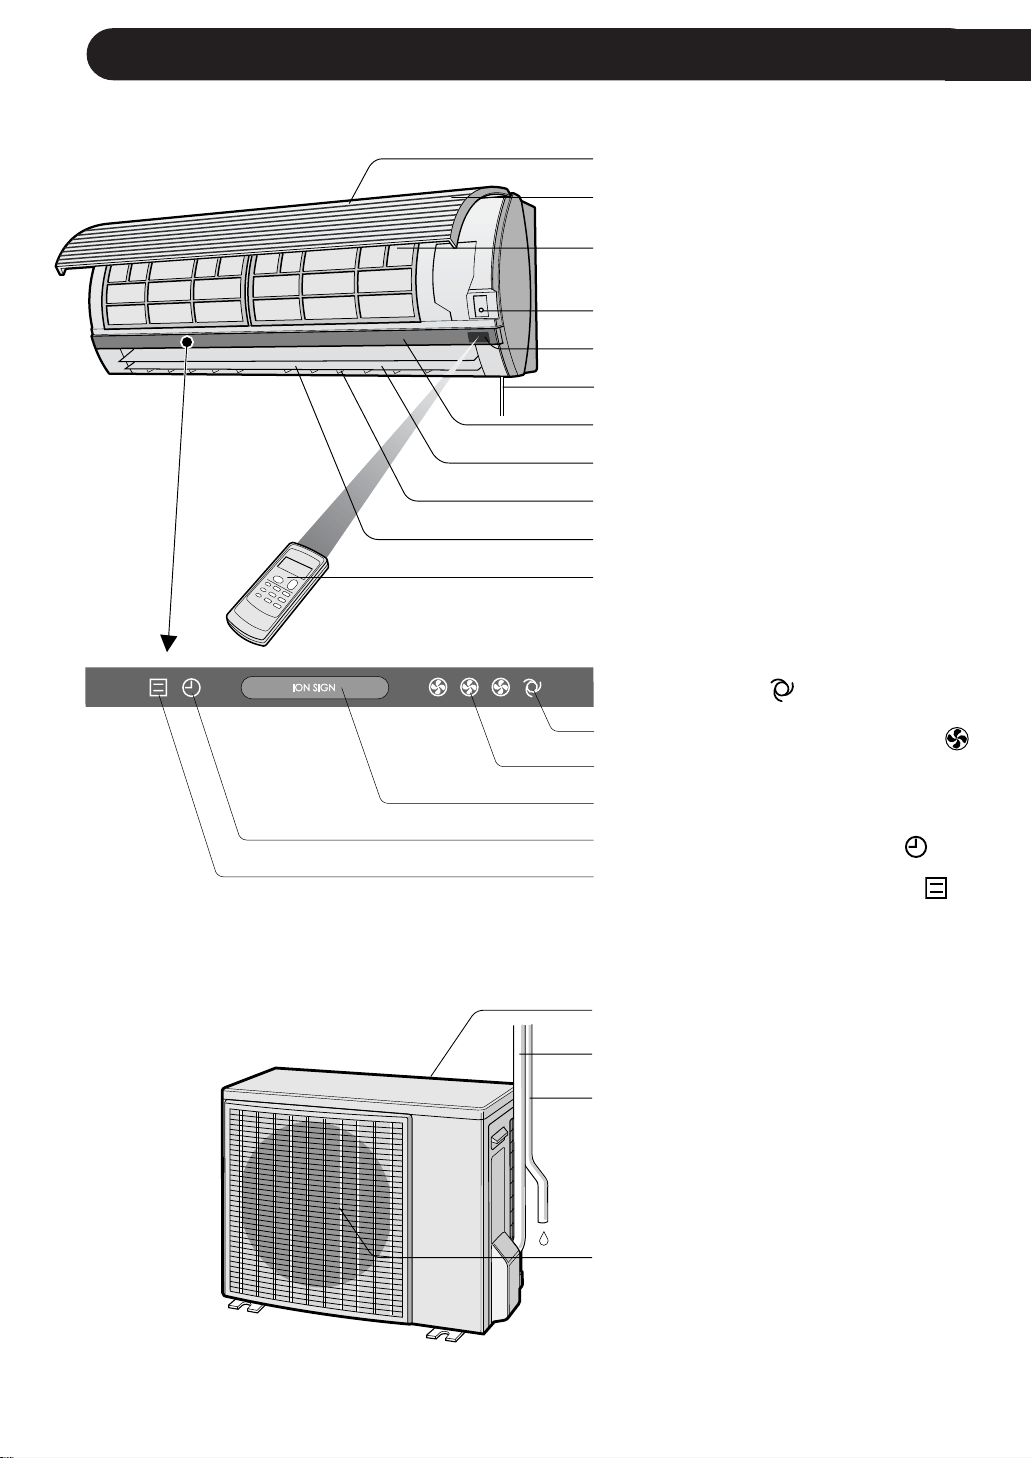
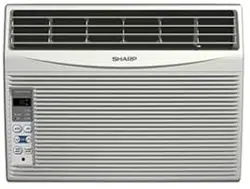
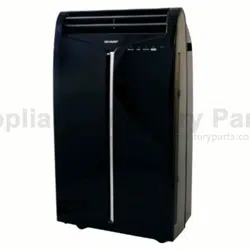
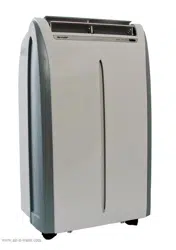
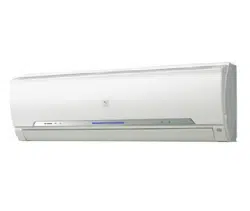
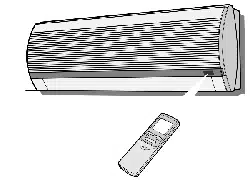
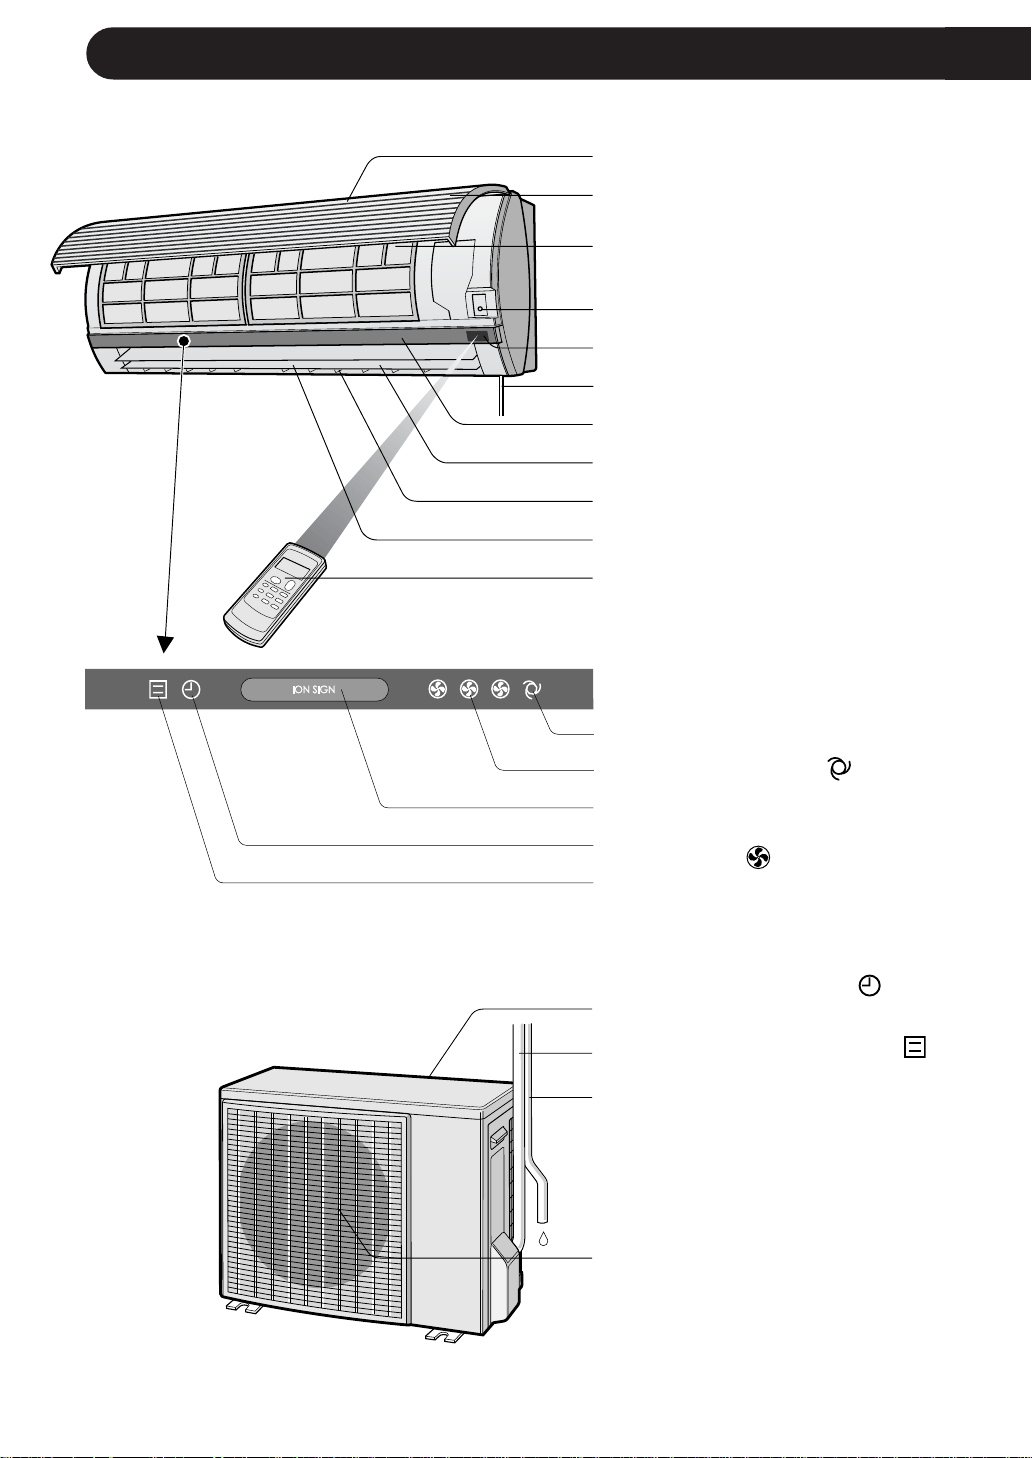
PART NAMES
1 Inlet (Air)
2 Open Panel
3 Air Filters
4 AUX. Button
5 RECEIVER Window
6 Power Supply Cord
7 Indicator Panel
8 Vertical Adjustment Louvres
9 Horizontal Adjustment Louvres
0 Outlet (Air)
q Remote Control
w AUTO FAN SPEED Lamp
(green
)
e FAN SPEED Lamp (green
)
r PLASMACLUSTER Lamp (blue,
green)
t TIMER Lamp (orange
)
y OPERATION Lamp (red
)
OUTDOOR UNIT
NOTE: Actual units might vary slightly from those shown above.
INDOOR UNIT
1
2
3
4
5
6
7
8
9
0
q
u Inlet (Air)
i Refrigerant Tube and
Interconnecting Cord
o Drainage Hose
p Outlet (Air)
E-4
w
e
r
t
y
u
i
o
p
ENGLISH
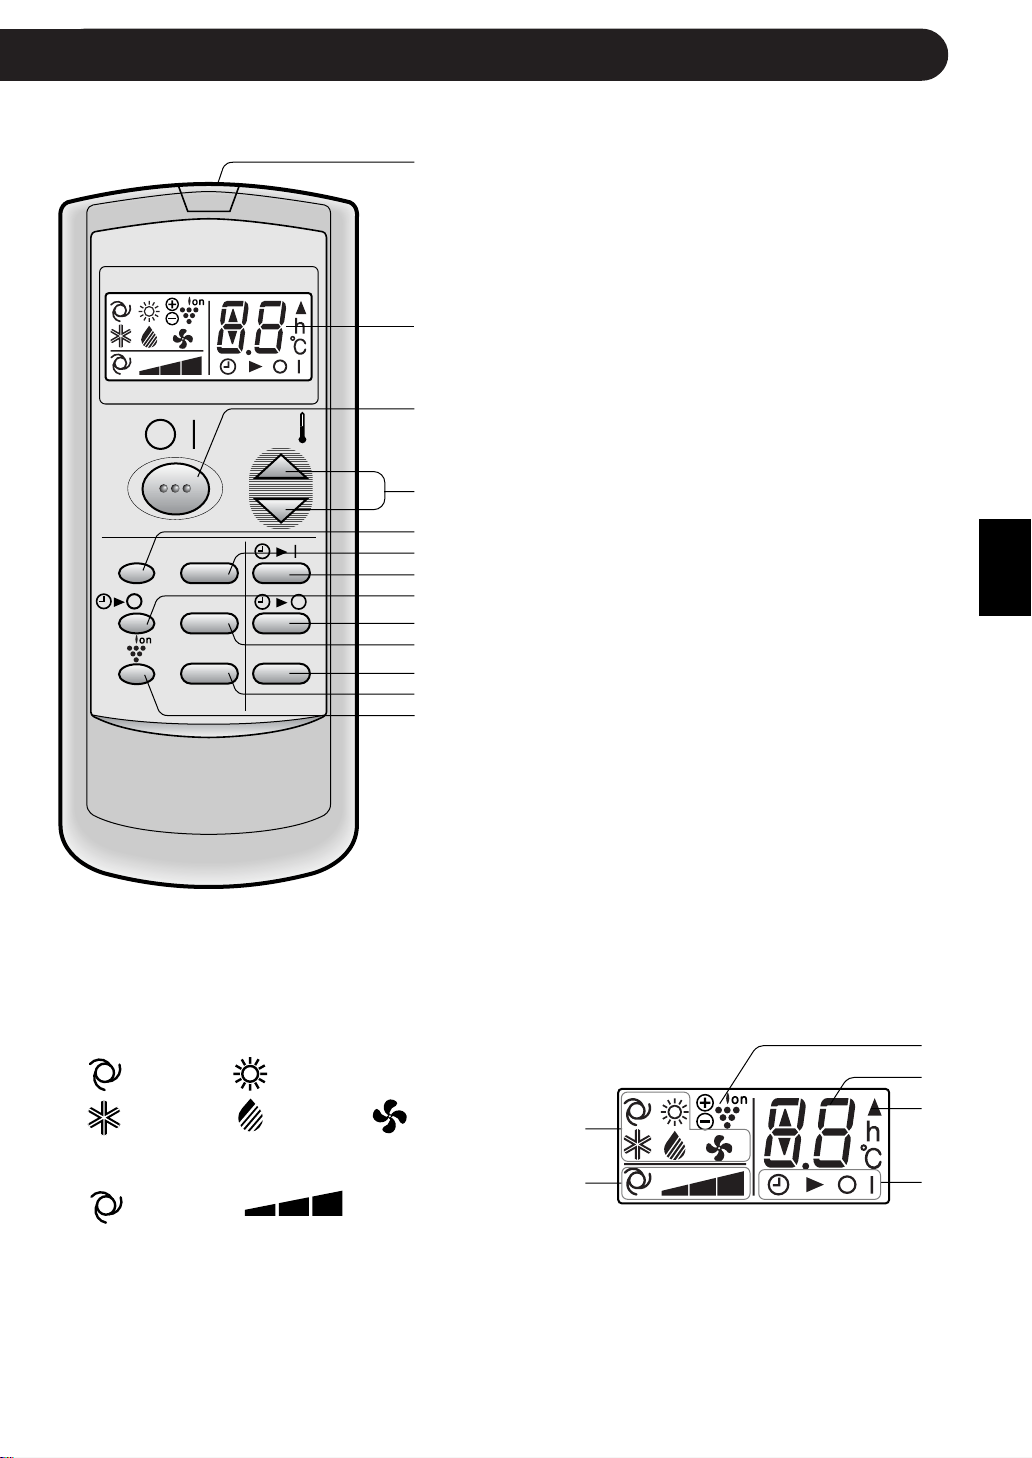
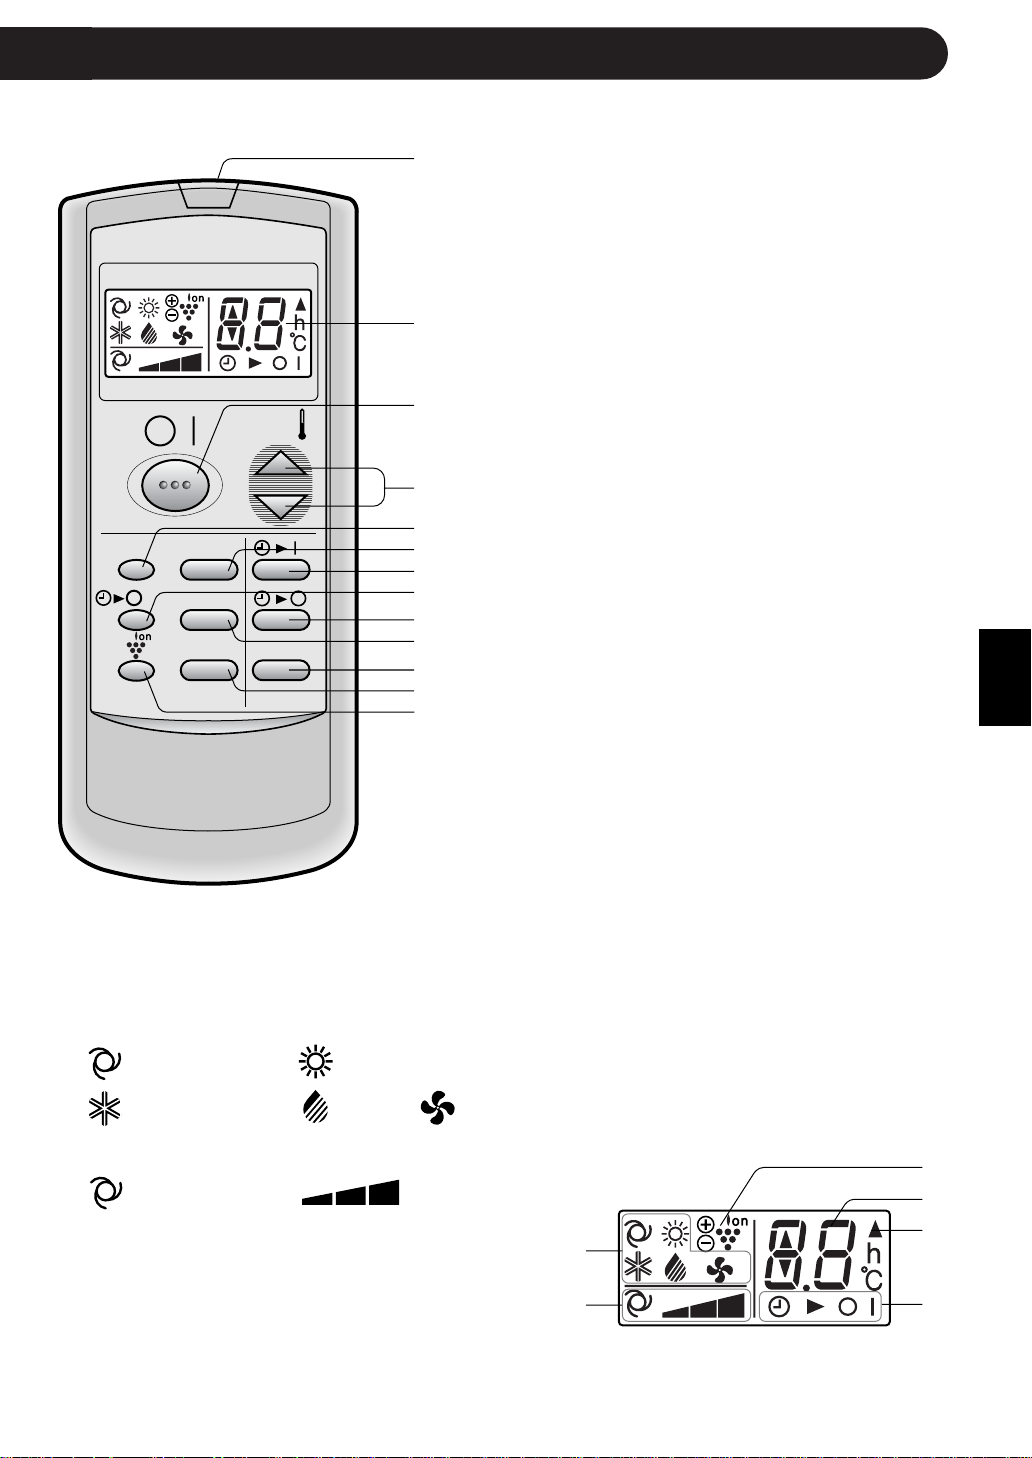
REMOTE CONTROL
1 TRANSMITTER
2 DISPLAY (Liquid Crystal Display)
3 ON/OFF Button
4 THERMO. (Thermostat) Button
5 DISPLAY Button
6 MODE Button
7 TIMER ON Button (for setting the timer)
8 ONE-HOUR OFF TIMER Button
9 TIMER OFF Button (for setting the timer)
0 FAN Button
q TIMER CANCEL Button
w SWING Button
e PLASMACLUSTER Button
E-5
r MODE SYMBOLS
: AUTO : HEAT
: COOL : DRY : FAN ONLY
t FAN SPEED SYMBOLS
: AUTO : Manual setting
y PLASMACLUSTER SYMBOL
u TEMPERATURE AND TIMER COUNT DOWN
INDICATOR
i TRANSMITTING SYMBOL
o TIMER ON/TIMER OFF INDICATOR
Indicates when timer on or timer off is set.
L.C.D. REMOTE CONTROL DISPLAY
1
2
3
4
5
6
7
8
9
0
q
w
e
r
t
y
u
i
o
MODE
DISPLAY MODE
FAN1h
SWING
CANCEL
TEMP.
TEMP.
FAN TIMER
CAUTION
• Do not allow the signal receiver window to receive strong direct sunlight, since it can
adversely affect its operation. If the signal receiver window is exposed to direct sunlight,
close a curtain to block the light.
• Using a fluorescent lamp with a quick starter in the same room may interfere with
transmission of the signal.
• The unit can be affected by signals transmitted from the remote control of a television,
VCR or other equipment used in the same room.
• Do not leave the remote control in direct sunlight or near a heater. Also, protect the unit
and remote control from moisture and shock which can discolour or damage them.
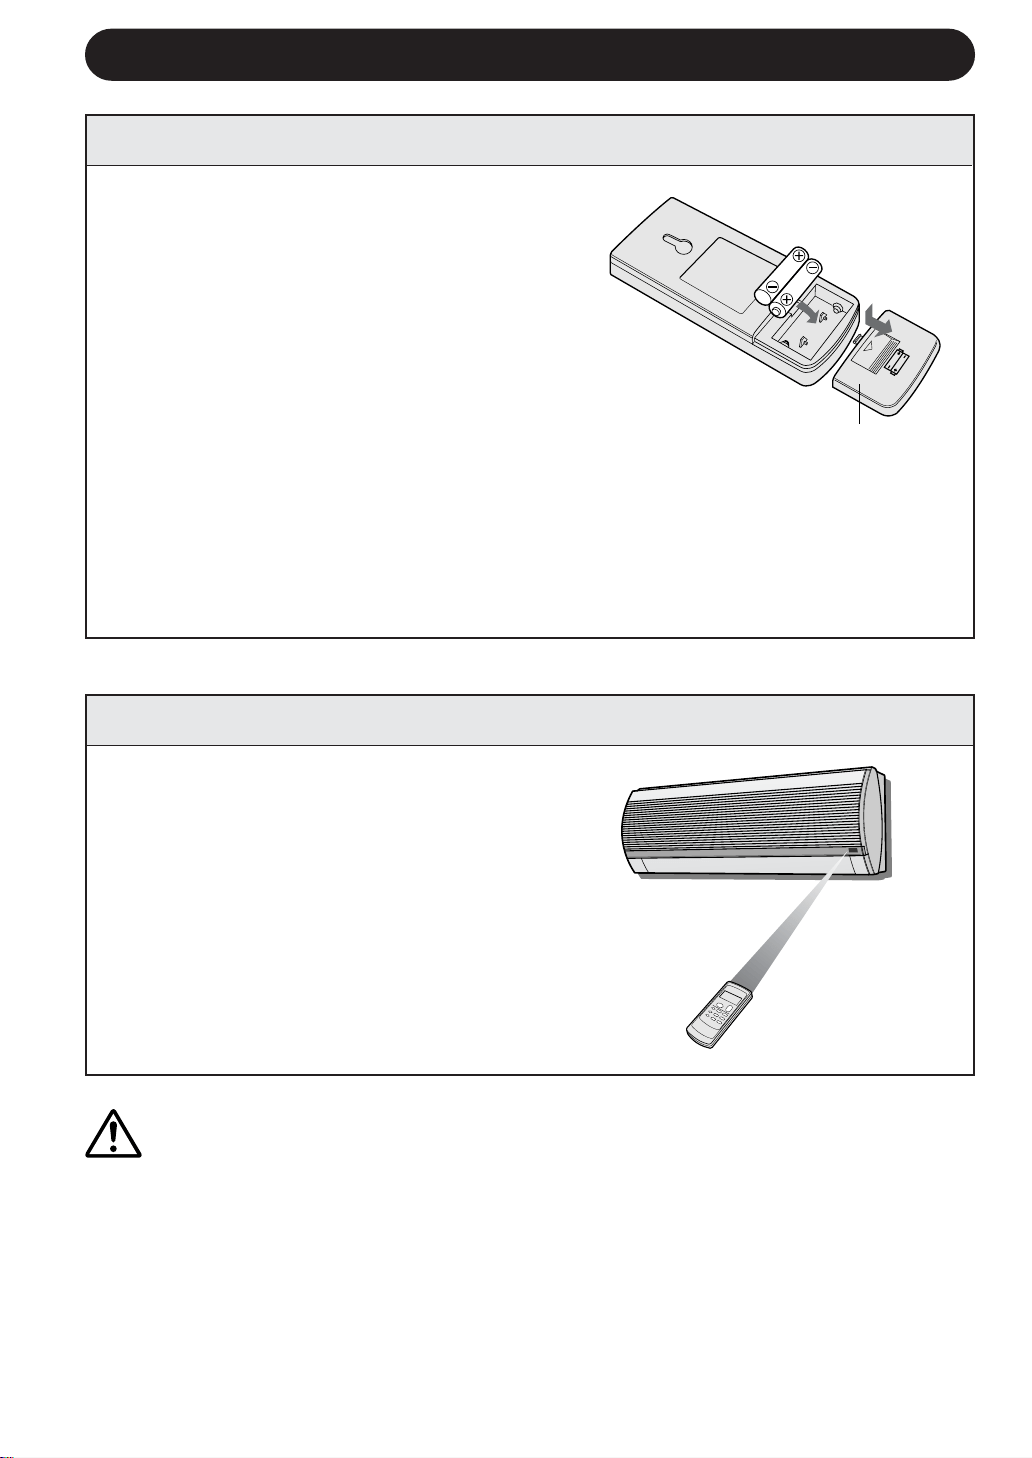
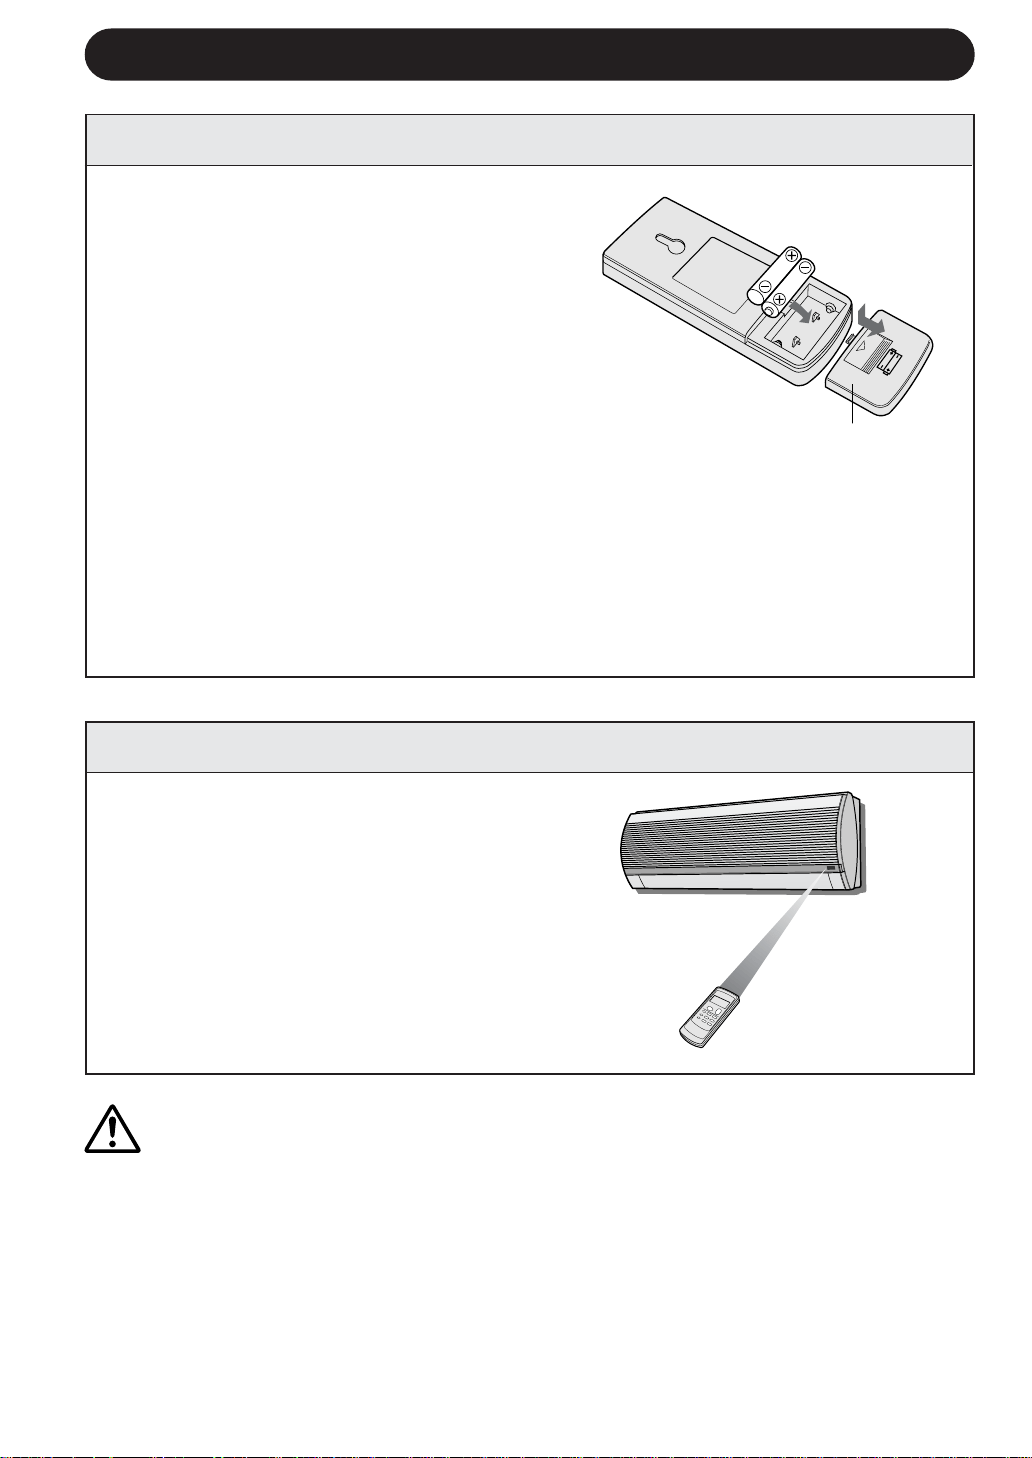
1
Remove the battery cover at the back of
the remote control.
2
Insert batteries in the compartment, mak-
ing sure the ± and — polarities are
correctly aligned.
• Lines will be indicated on the display
when batteries are properly installed.
3
Reinstall the battery cover.
USING THE REMOTE CONTROL
E-6
NOTES:
• The battery life is approximately one year in normal use.
• When you replace the batteries, always change both batteries, and make sure
they are the same type.
• If the remote control does not operate properly after replacing the batteries, take
out the batteries and reinstall them again after 30 seconds.
• If you will not be using the unit for a long time, remove the batteries from the
remote control.
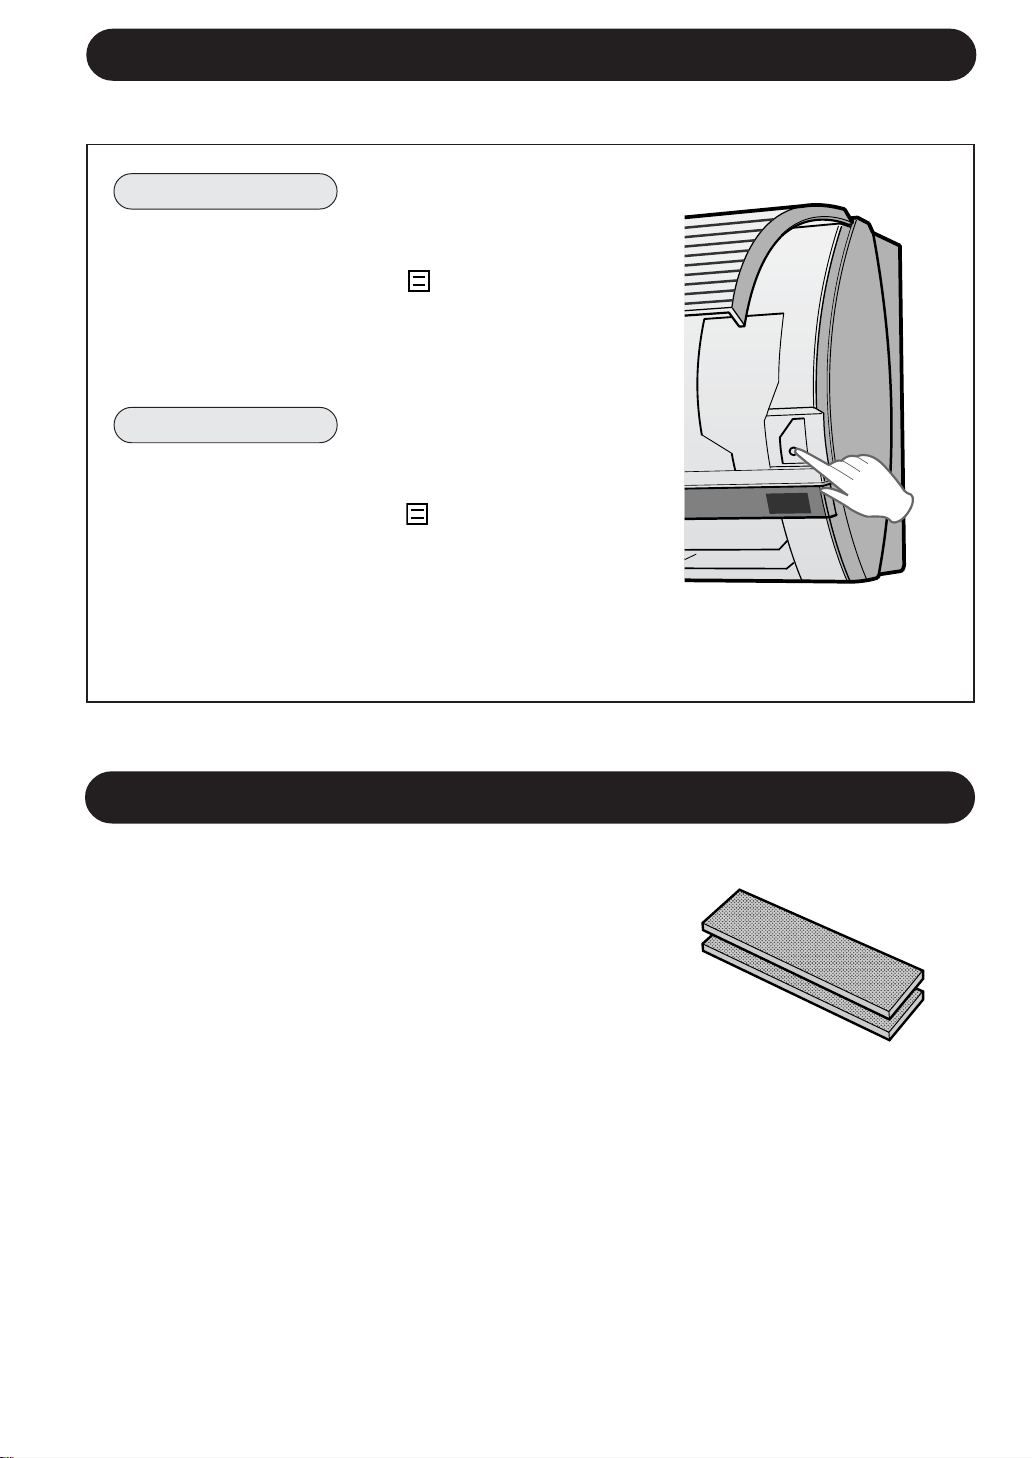
Point the remote control towards the
unit’s signal receiver window and
press the desired button. The unit
generates a beep when it receives the
signal.
• Make sure there is no curtain or other
object between the remote control and
the unit.
• The remote control can send signals from
up to 7 metres away.
LOADING BATTERIES Use two size-AAA (R03) batteries.
HOW TO USE THE REMOTE CONTROL
Battery cover
ENGLISH
E-7
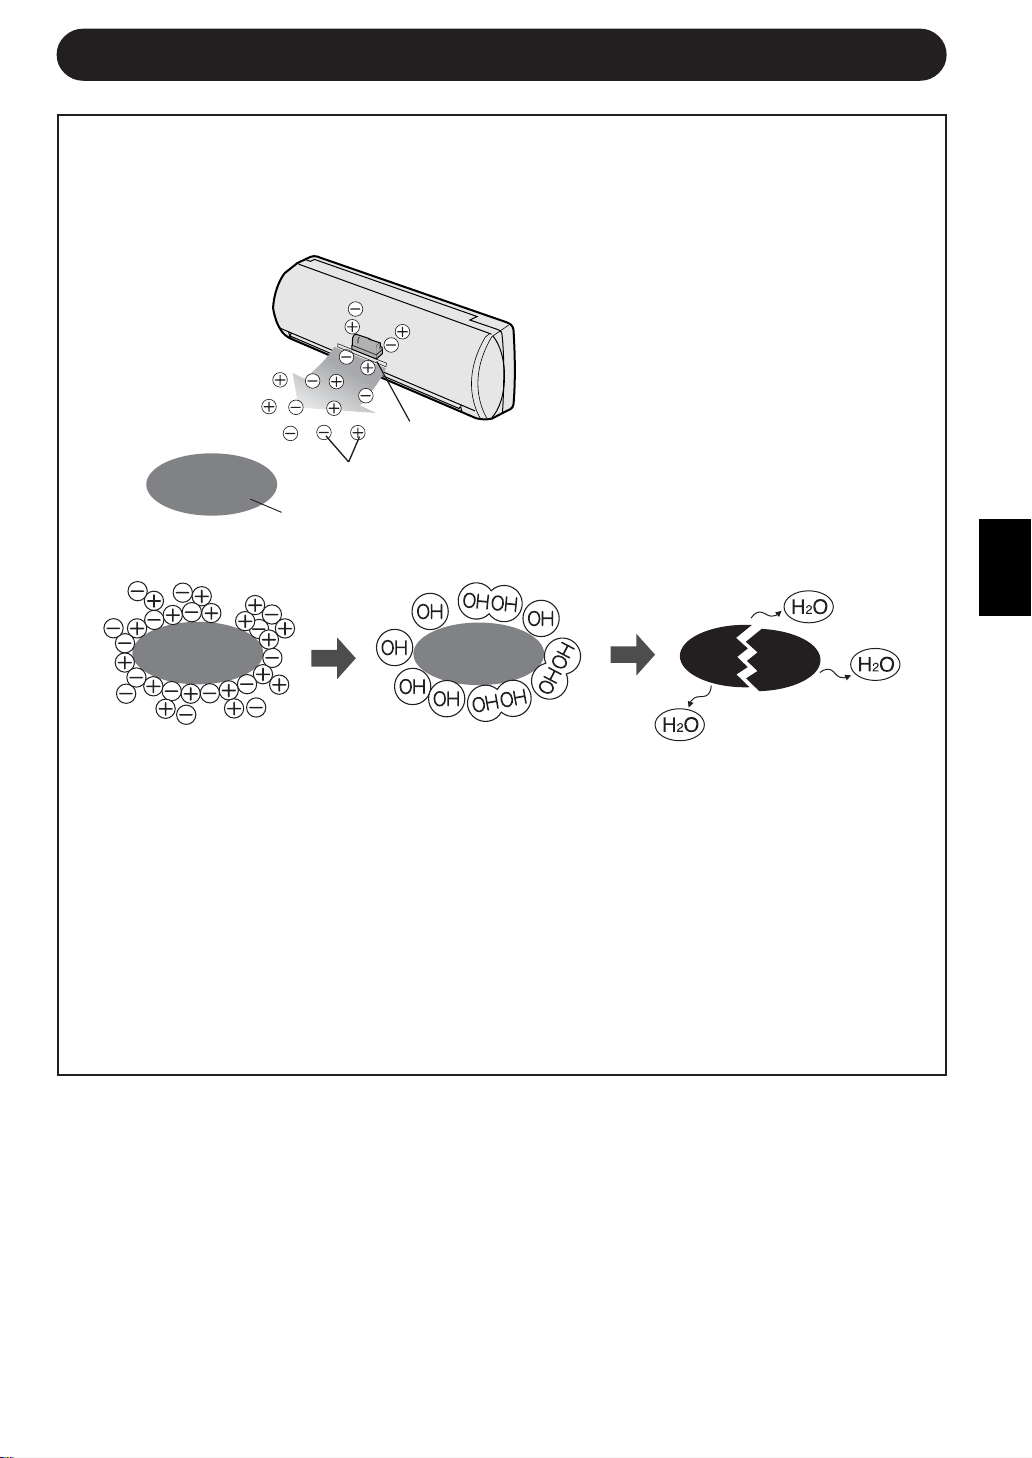
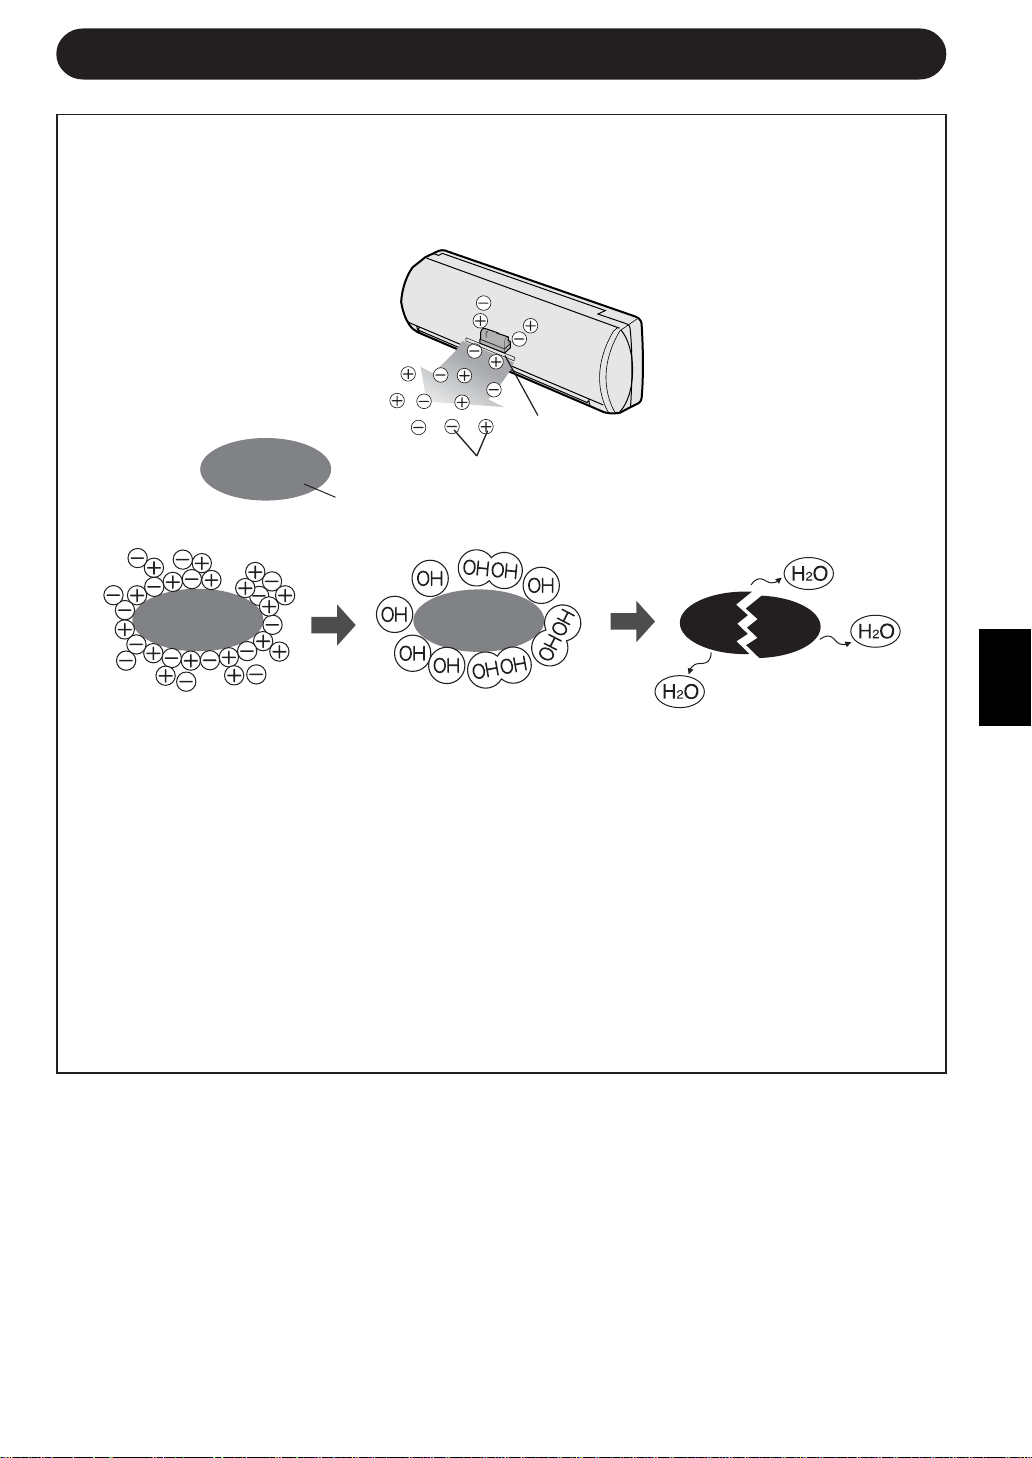
TIPS ABOUT PLASMACLUSTER OPERATION
AIR CLEAN OPERATION
Cluster ions released into the air will reduce airborne mold fungus.
ION BALANCE OPERATION
It is said that plenty of negative ions exist in places such as waterfalls or waterside in
natural environment. In this operation mode, negative ions will be released in an
increased rate, in order to bring the room air close to this condition.
Please refer to page 11 for operation.
The ionizer inside the air conditioner will release cluster ions, which are collective
mass of positive and negative ions, into the room.
The cluster ions reduce airborne mold fungus.
Ionizer
Cluster ions
Mold fungus

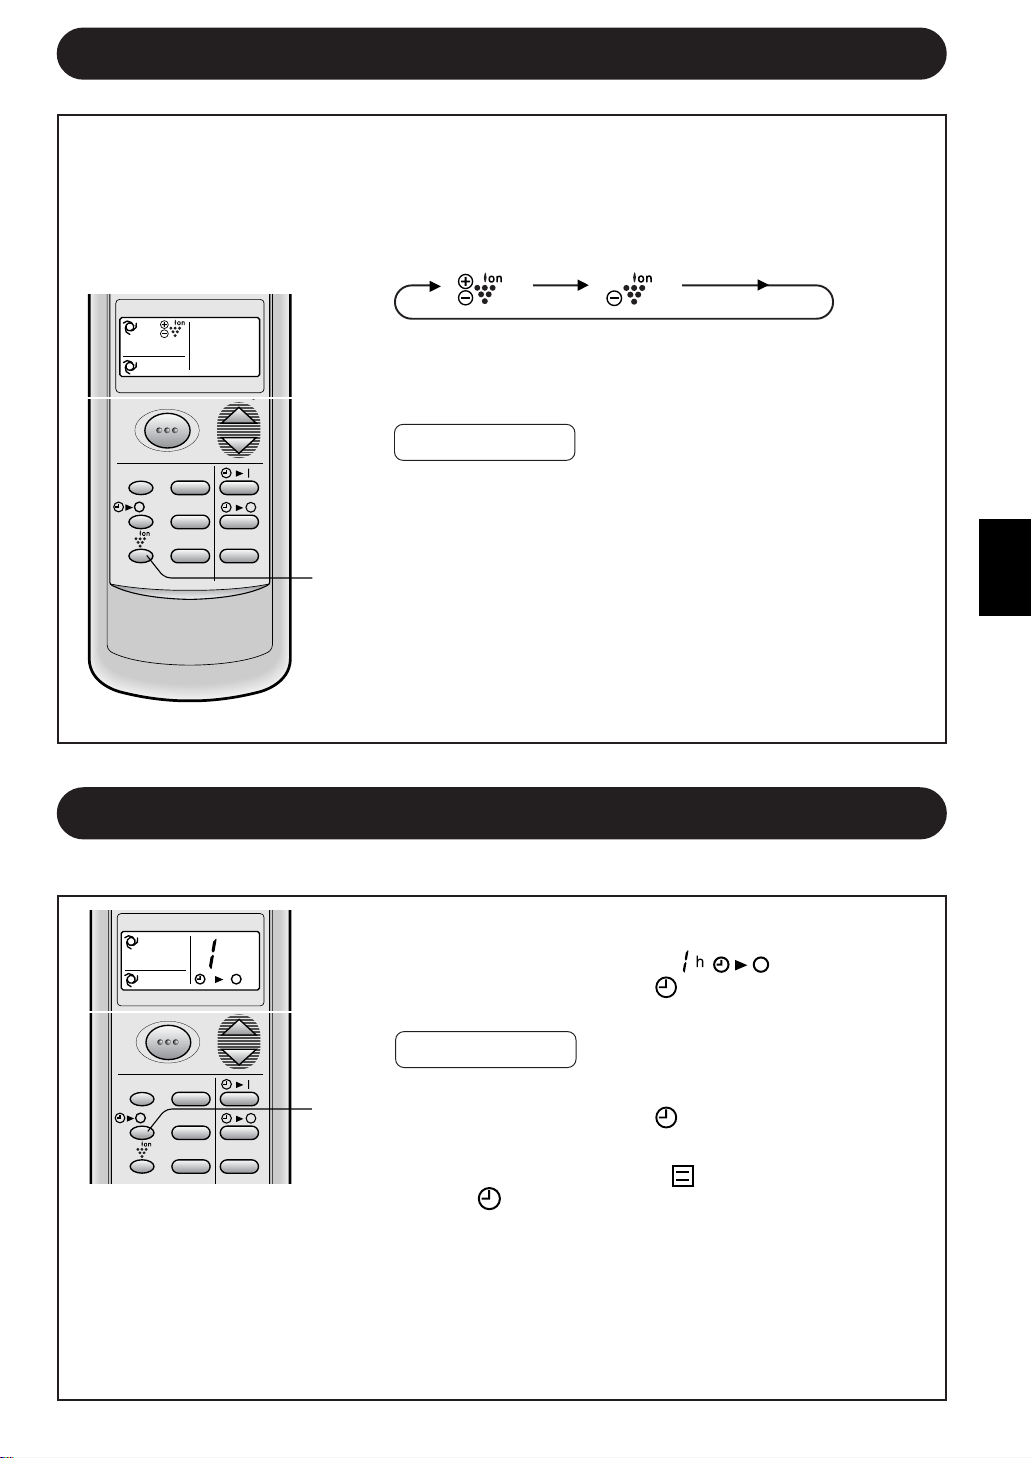
Press the THERMO. button to set the
desired temperature.
AUTO/DRY MODE
The temperature can
be changed in 1°C in-
crements within the
range of 2°C higher to
2°C lower from the tem-
perature automatically
determined by the air
conditioner.
COOL/HEAT MODE
The temperature can
be set within the range
of 18 to 32°C.
FAN ONLY MODE
The temperature set-
ting cannot be made.
1
E-8
BASIC OPERATION
2
Press the ON/OFF button to start op-
eration.
• The red OPERATION lamp (
) on the
unit will light.
3
4
1
4
5
2
3
Press the MODE button to select the
operation mode.
AUTO HEAT COOL DRY FAN ONLY
5
MODE
DISPLAY MODE
FAN1h
SWING
CANCEL
TEMP.
TEMP.
FAN TIMER
Please the FAN button to set the de-
sired fan speed.
AUTO SOFT LOW HIGH
• In the DRY mode, the fan speed is pre-
set to AUTO and cannot be changed.
• In the FAN ONLY mode, the fan speed
cannot be set to AUTO.
To turn off the unit, press the ON/OFF
button again.
• The red OPERATION lamp (
) on the
unit will turn off.
ENGLISH
E-9
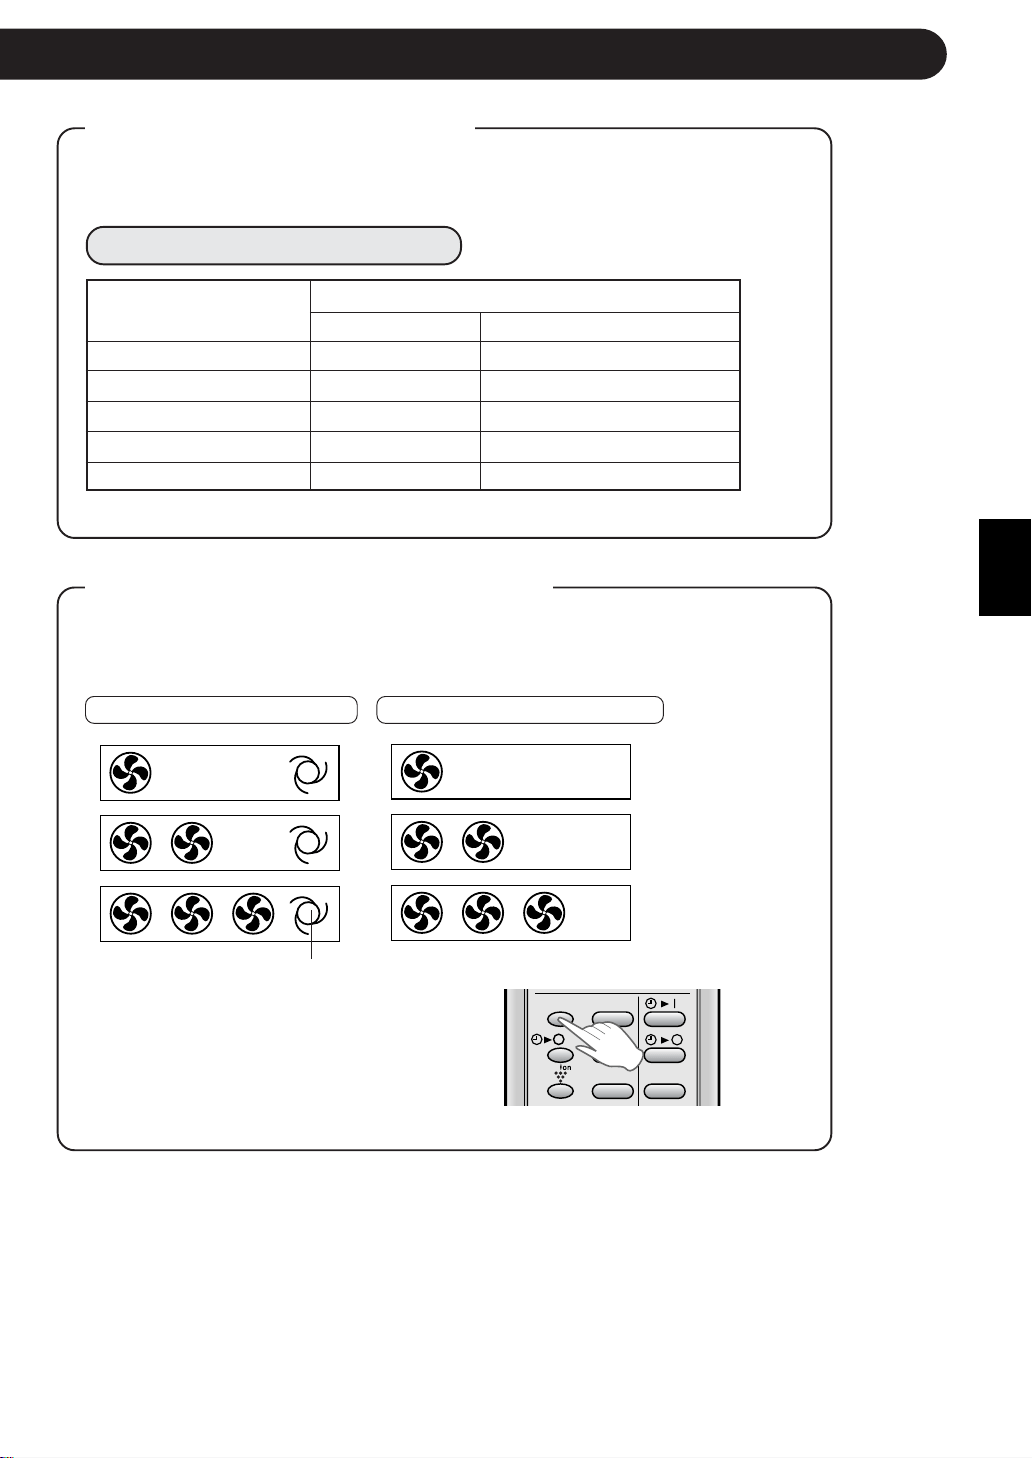
Automatic Operation
Mode Thermostat Setting
Below 21°C HEAT 23°C
21°C-24°C DRY Room Temp. at start-up
24°C-26°C COOL 24°C
26°C-28°C COOL 25°C
Above 28°C COOL 26°C
TIPS ABOUT AUTO MODE
In the AUTO mode, the temperature setting and mode are automatically
selected according to the room temperature when the unit is turned on.
Modes and Temperature Settings
Room temp. at opera-
tion start-up
TIPS ABOUT FAN SPEED LAMP
During operation, the FAN SPEED Lamp will light up in 3 levels (2 levels
for DRY mode) on the indicator panel of the unit to indicate the fan
speed.
When fan speed is set to AUTO When fan speed is set to manual
Soft speed
Low speed
High speed
The AUTO FAN SPEED Lamp
will light up.
To turn off the FAN SPEED Lamp, press
the DISPLAY button.
The PLASMACLUSTER Lamp will also go off.
DISPLAY MODE
FAN1h
SWING
CANCEL
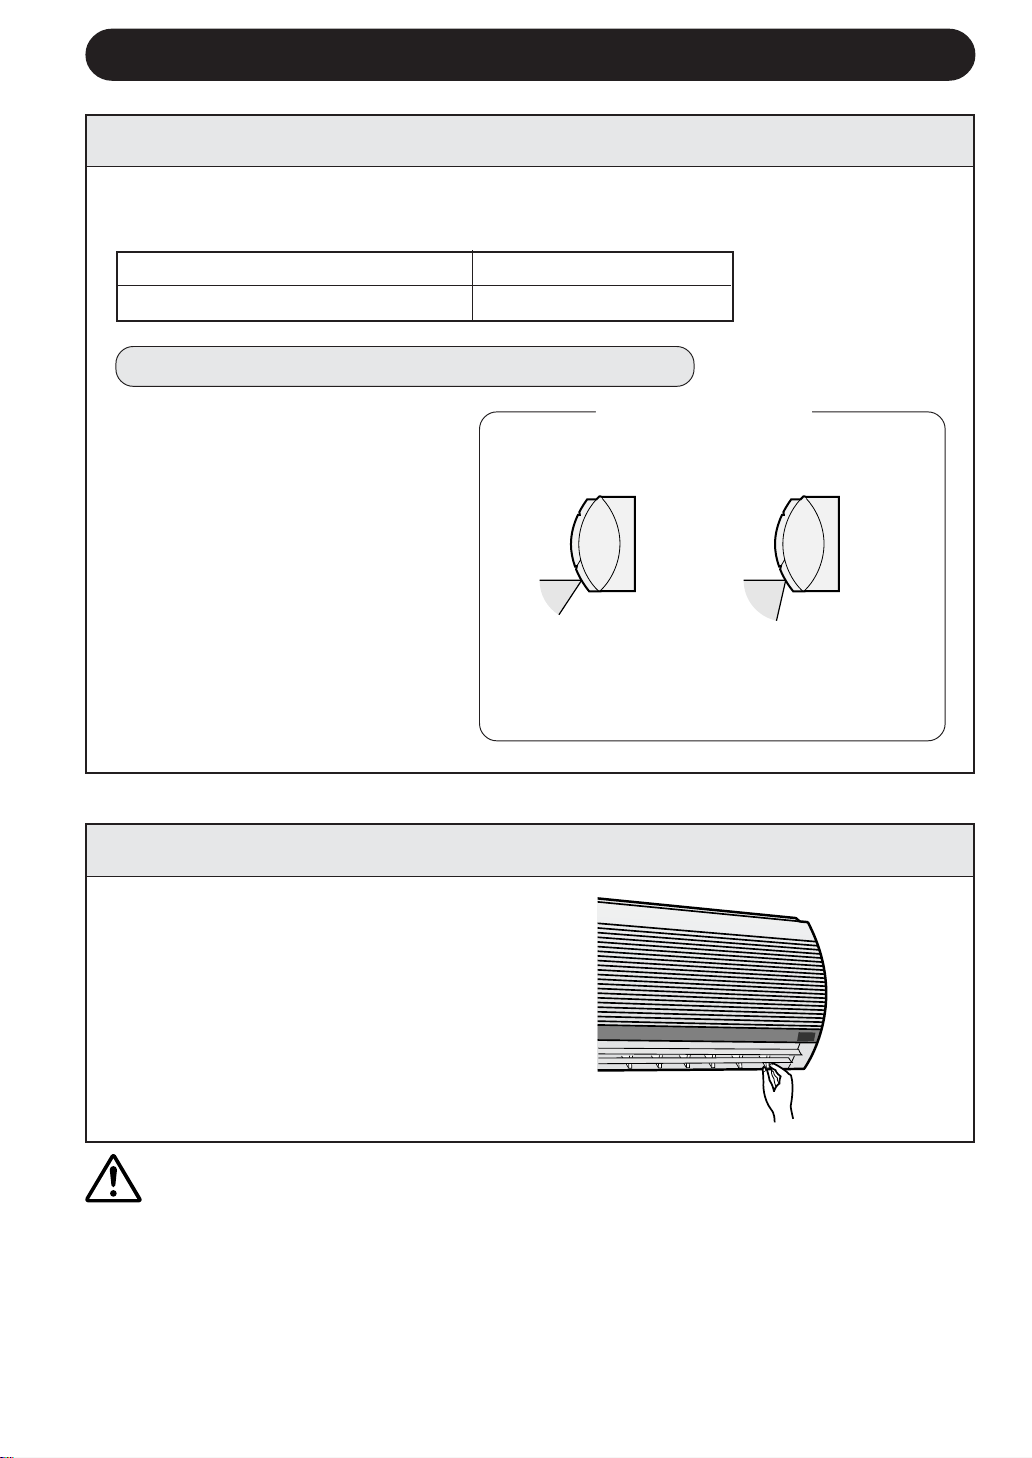
COOL and DRY modes Horizontal air flow
FAN ONLY and HEAT modes Diagonal air flow
E-10
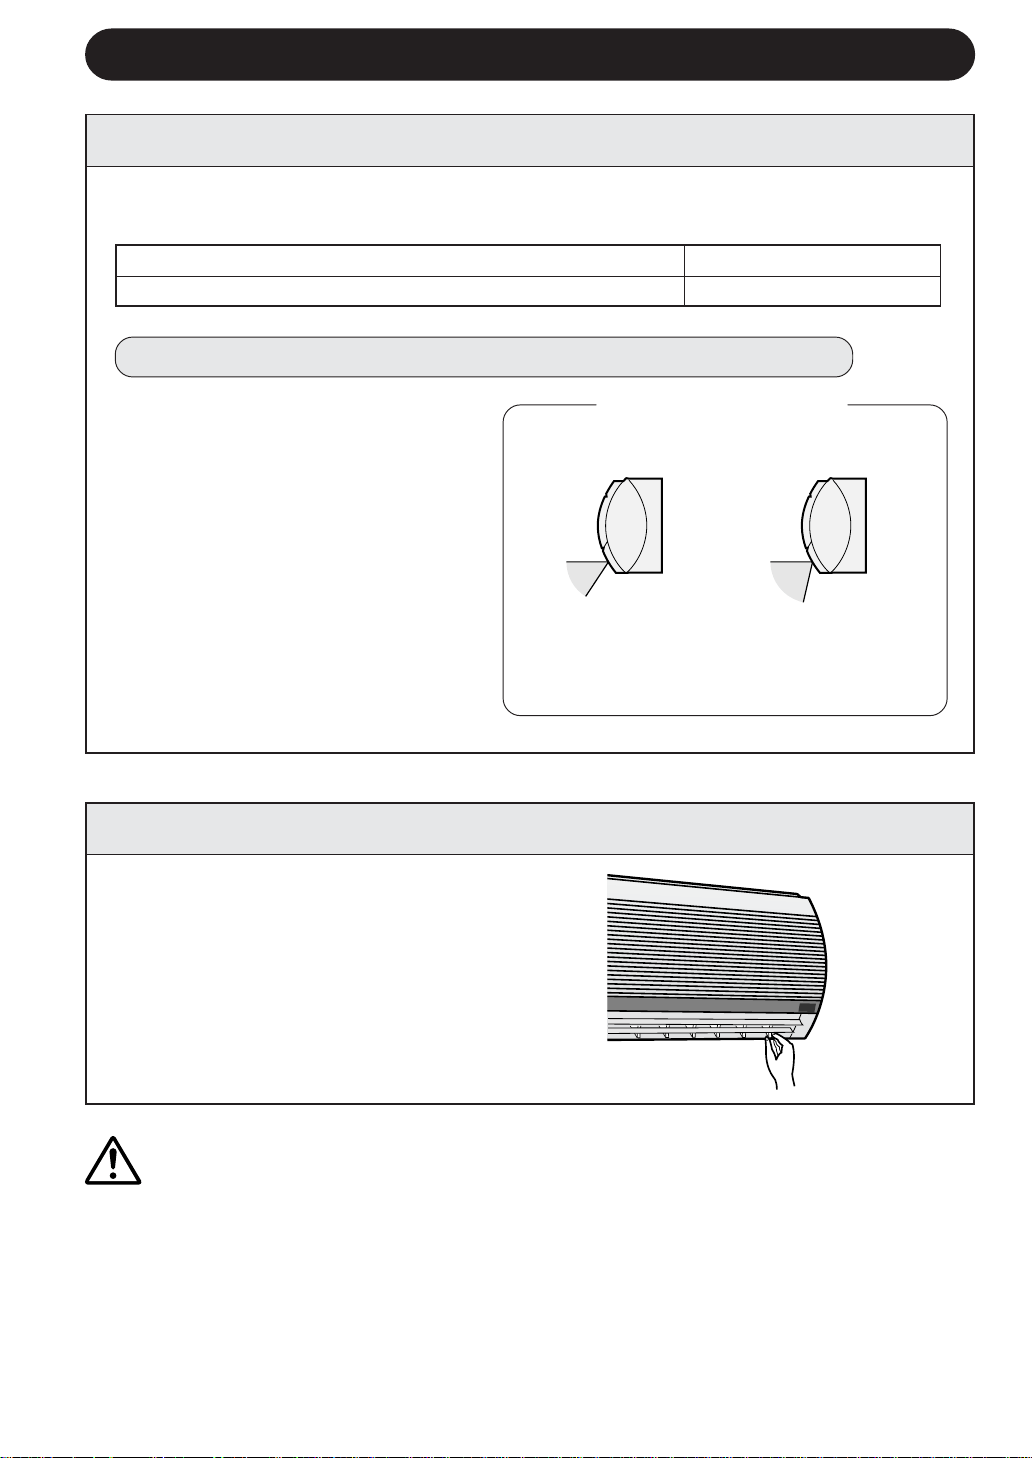
ADJUSTING THE AIR FLOW DIRECTION
VERTICAL AIR FLOW DIRECTION
The air flow direction is automatically preset in each mode as follows for optimum
comfort:
HOW TO ADJUST THE AIR FLOW DIRECTION
COOL and DRY modes
FAN ONLY and HEAT
modes
The adjustment range
is narrower the SWING
range in order to pre-
vent condensation from
dripping.
The range is wide so the
air flow can be directed
toward the floor.
Hold the horizontal adjustment
louvre as shown in the diagram
and adjust the air flow direction.
Press the SWING button on the
remote control once.
• The vertical adjustment louvre
will change its angle continu-
ously.
Press the SWING button again
when the vertical adjustment lou-
vre is at the desired position.
• The louvre will stop moving within
the range shown in the diagram.
• The adjusted position will be
memorized and will be automati-
cally set to the same position
when operated the next time.
Adjustment range
HORIZONTAL AIR FLOW DIRECTION
CAUTION
Never attempt to adjust the vertical adjustment louvres manually.
• Manual adjustment of the vertical adjustment louvre can cause the unit to malfunction
when the remote control is used for the adjustment.
• When the vertical adjustment louvre is positioned at the lowest position in the COOL or
DRY mode for an extended period of time, condensation may result.
Do not adjust the horizontal adjustment louvre extremely to the right or left when operating
the air conditioner with fan speed "SOFT" for an extended period of time.
Condensation may form on the louvres.
ENGLISH
E-11
1
Press the ONE-HOUR OFF TIMER button.
• The remote control displays “
”.
• The orange TIMER lamp (
) on the unit will light up.
• The unit will stop operating after one hour.
TO CANCEL
Press the CANCEL button.
• The orange TIMER lamp (
) on the unit will turn off.
Or, turn the unit off by pressing the ON/OFF button.
• The red OPERATION lamp (
) and the orange TIMER
lamp (
) on the unit will turn off.
1
When the ONE-HOUR OFF TIMER is set, the unit will stop operating after one hour.
ONE-HOUR OFF TIMER
NOTES:
• The ONE-HOUR OFF TIMER operation has priority over TIMER ON and TIMER OFF
operations.
• When the ONE-HOUR OFF TIMER is set while the unit is not operating, the unit will
operate for an hour with the formerly set condition.
• If you wish to operate the unit for another hour before the ONE-HOUR OFF TIMER
activates, press the ONE-HOUR OFF TIMER button again during operation.
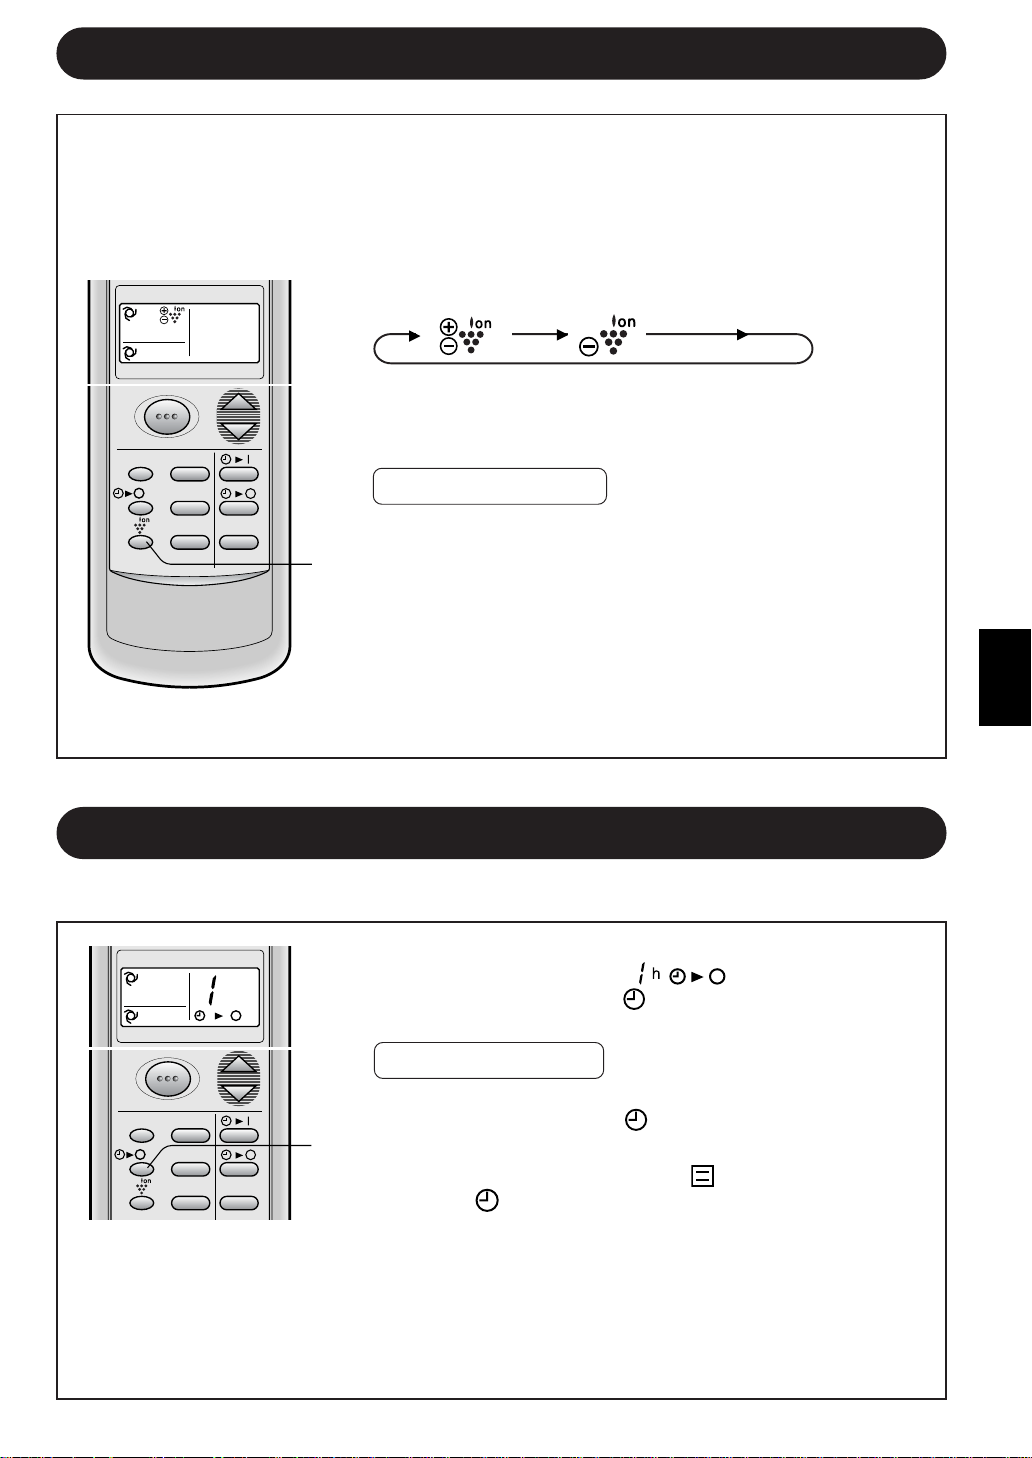
PLASMACLUSTER OPERATION
1
During operation, press the PLASMACLUSTER but-
ton to select the mode.
AIR CLEAN ION BALANCE CANCEL
• In the AIR CLEAN operation, the blue
PLASMACLUSTER lamp on the unit will light up.
• In the ION BALANCE operation, the green
PLASMACLUSTER lamp on the unit will light up.
TO CANCEL
Press the PLASMACLUSTER button until
PLASMACLUSTER symbol on the remote control dis-
play goes off.
• The PLASMACLUSTER lamp on the unit will turn off.
NOTE:
• Setting of the PLASMACLUSTER operation will be
memorized and will operate in the same mode, the next
time you turn on the air conditioner.
• To turn off the PLASMACLUSTER Lamp, press the
DISPLAY button.
1
MODE TEMP.
FAN TIMER
DISPLAY MODE
FAN1h
SWING
CANCEL
AIR CLEAN OPERATION : Cluster ions released into air will reduce airborne mold
fungus. ION BALANCE OPERATION : Negative ions will be released in an increased
rate.
MODE TEMP.
FAN TIMER
h
DISPLAY MODE
FAN1h
SWING
CANCEL
E-12
The unit will turn off automatically according to your setting.
Timer duration can be set from minimum 0.5 hours (30 minutes) to maximum 12
hours.
Up to 9.5 hours, you can set by 0.5 hours (30 minutes) increments and from 10 to 12
hours, by 1 hour increment.
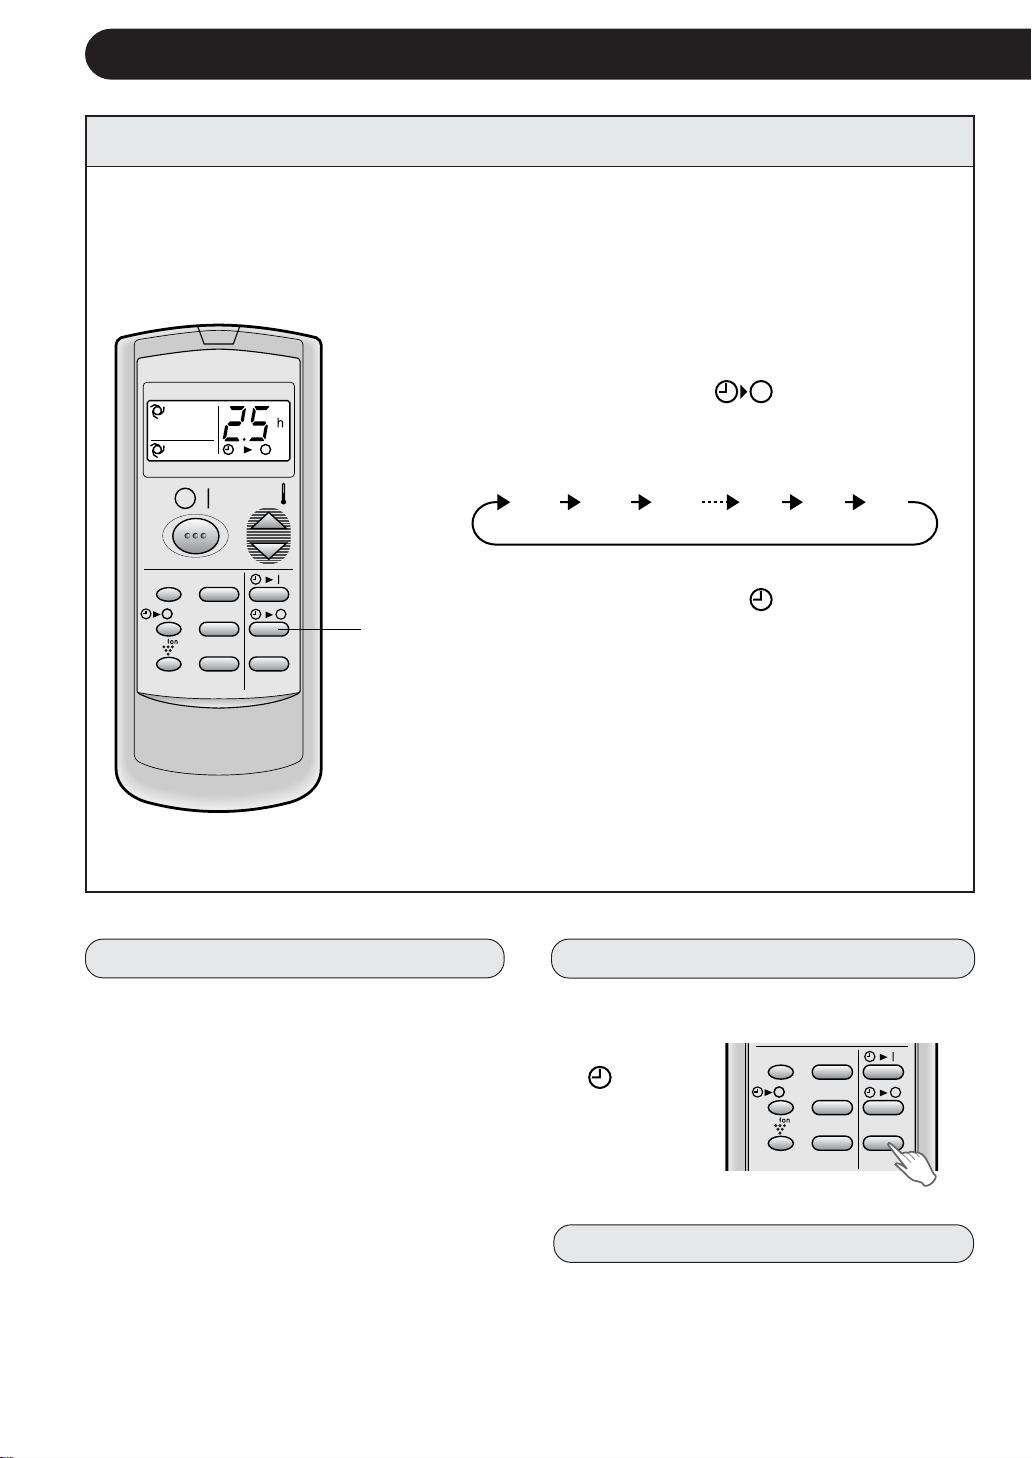
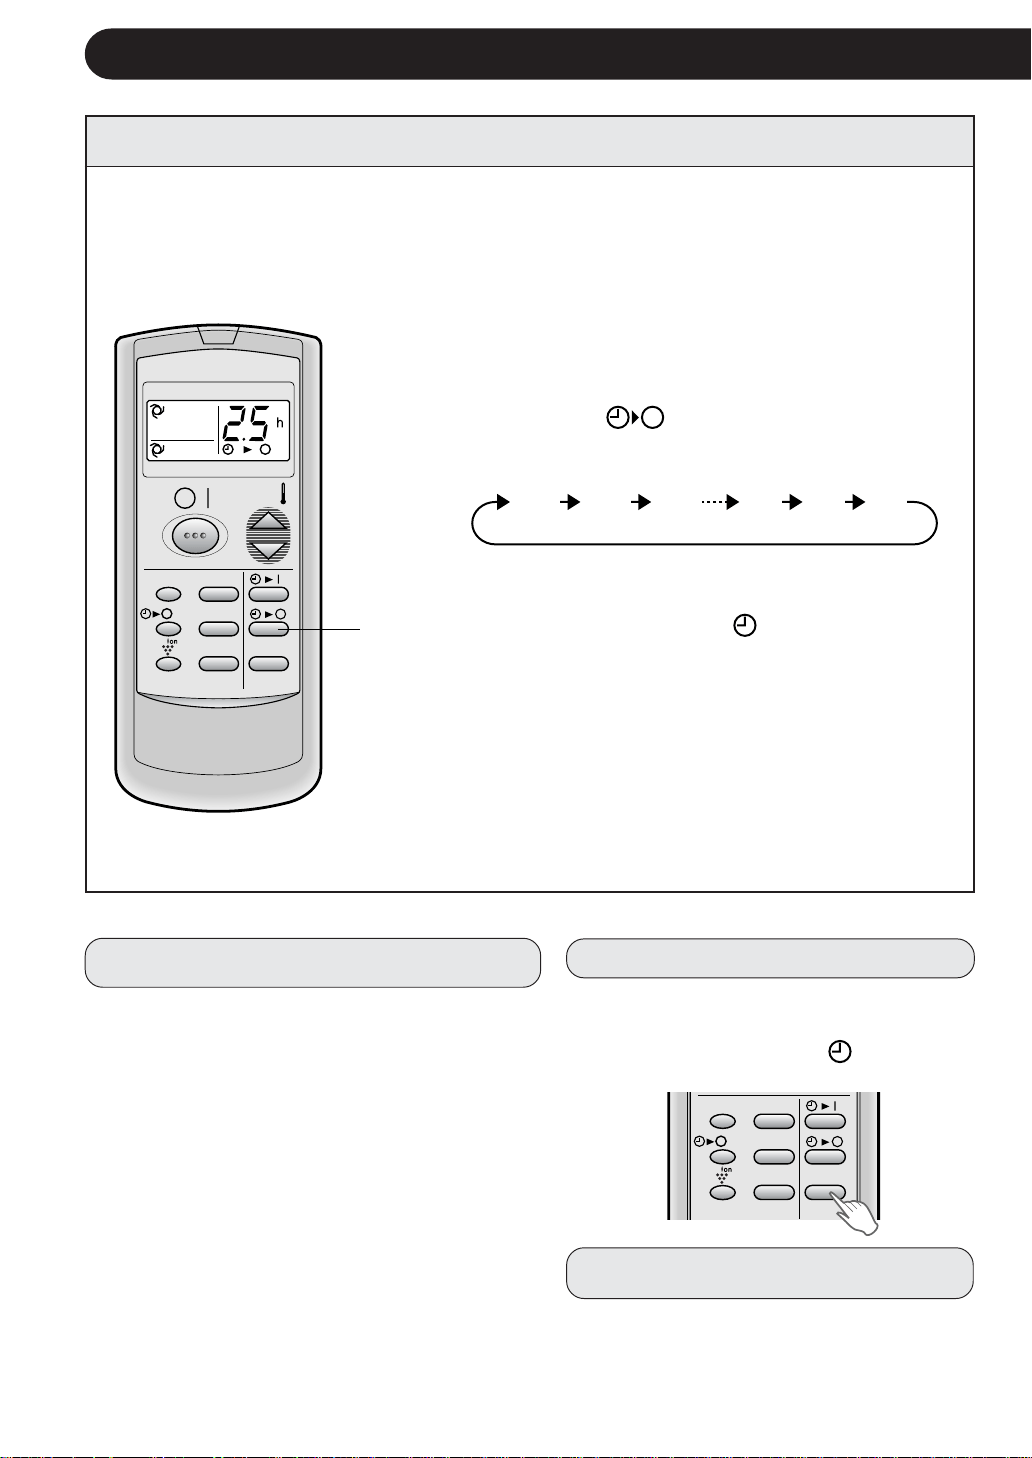
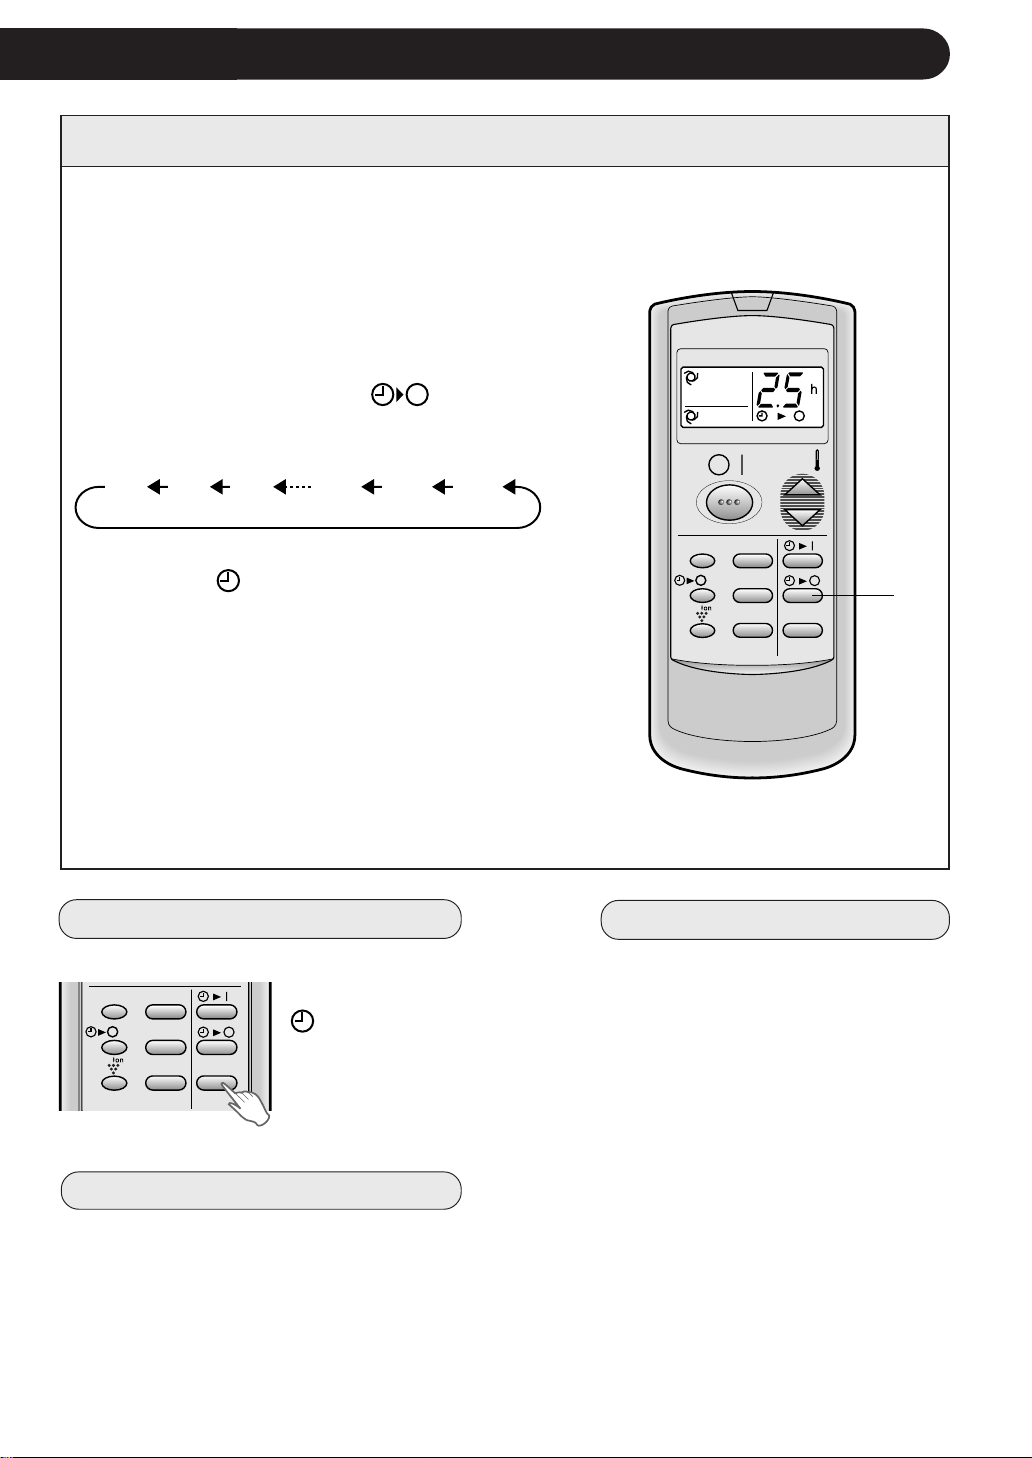
TIMER OPERATION
TIMER OFF
When the TIMER OFF is set, the temperature
setting is automatically adjusted to prevent
the room from becoming excessively hot or
too cold while you sleep. (Auto Sleep function)
1
COOL/DRY MODE:
• One hour after the timer operation begins, the
temperature setting rises 1°C higher than the
original thermostat setting.
HEAT MODE:
• One hour after the timer operation begins, the
temperature setting drops 3°C lower than the
original thermostat setting.
TIPS ABOUT TIMER OFF OPERATION
Point the remote control at the signal receiver win-
dow on the unit.
1
Press the TIMER OFF (
) button and set
time as desired.
• The time setting will change as you to press the
button as follows.
Hold the button pressed down for fast setting.
• The orange TIMER lamp (
) on the unit will
light.
• The unit will generate a beep when it receives the
signal.
• The time setting will count down to show remain-
ing time.
0.5h 1.0h 1.5h 10h 11h 12h
NOTE:
• The Auto Sleep function will not activate during
the FAN ONLY mode.
TO CANCEL TIMER
Press the CANCEL button.
• The orange
TIMER lamp
(
) on the
unit will turn
off.
TO CHANGE TIMER SETTING
Press the TIMER button which you wish to
change, (TIMER OFF or TIMER ON) and
change the time setting.
MODE
DISPLAY MODE
FAN1h
SWING
CANCEL
TEMP.
TEMP.
FAN TIMER
DISPLAY MODE
FAN1h
SWING
CANCEL
Example : When you wish to stop the operation
2.5 hours later.
ENGLISH
E-13
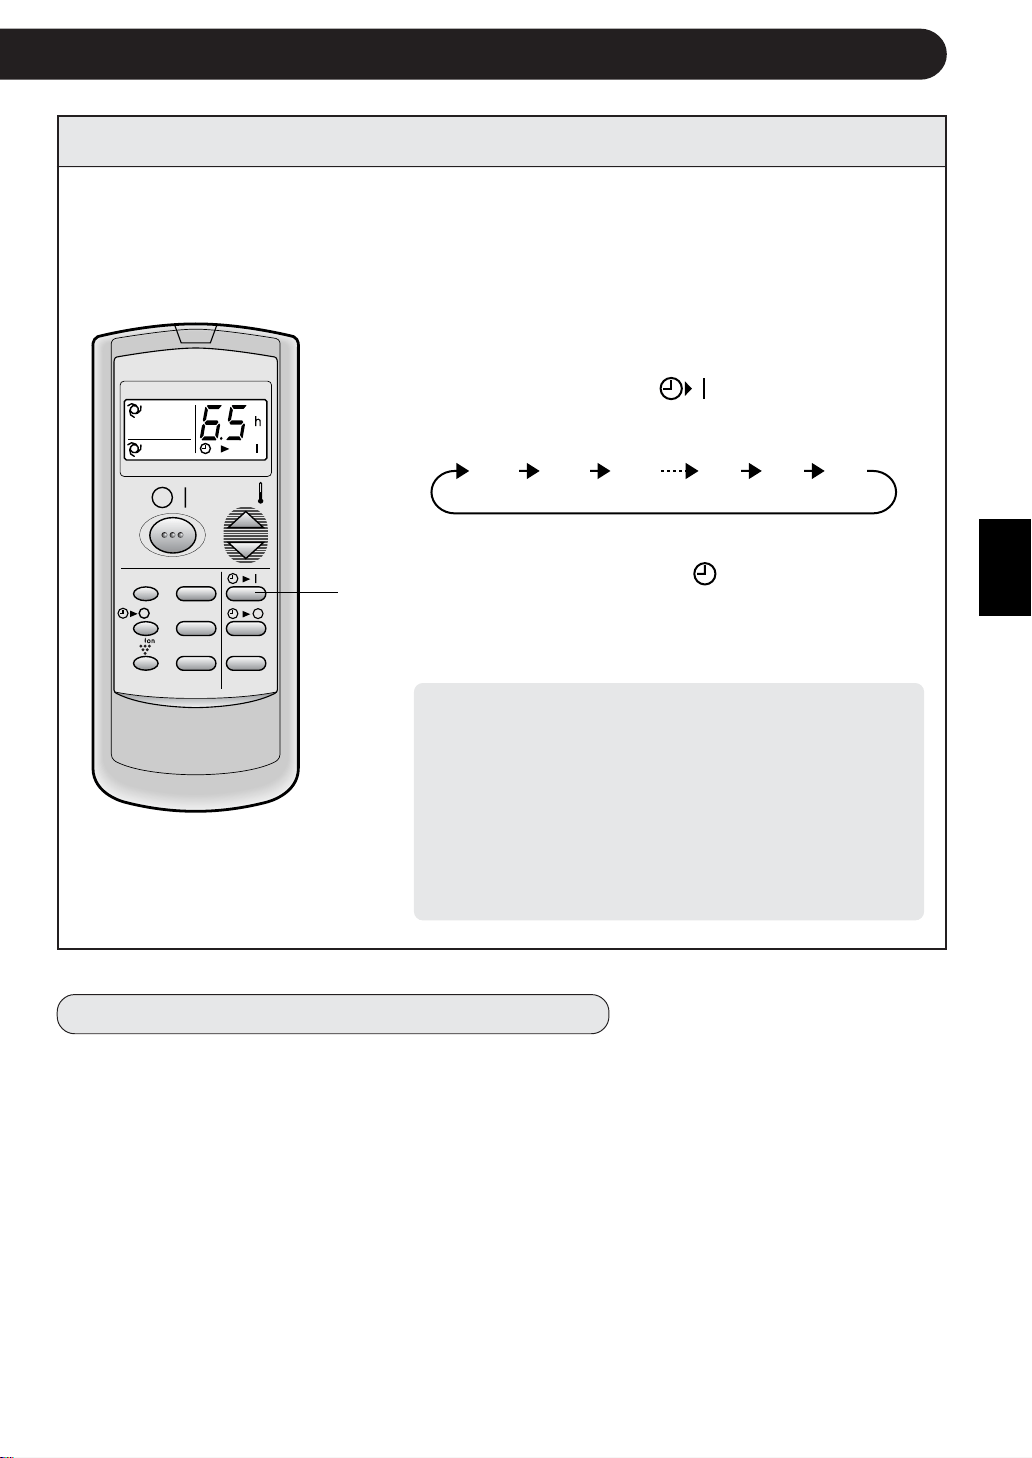
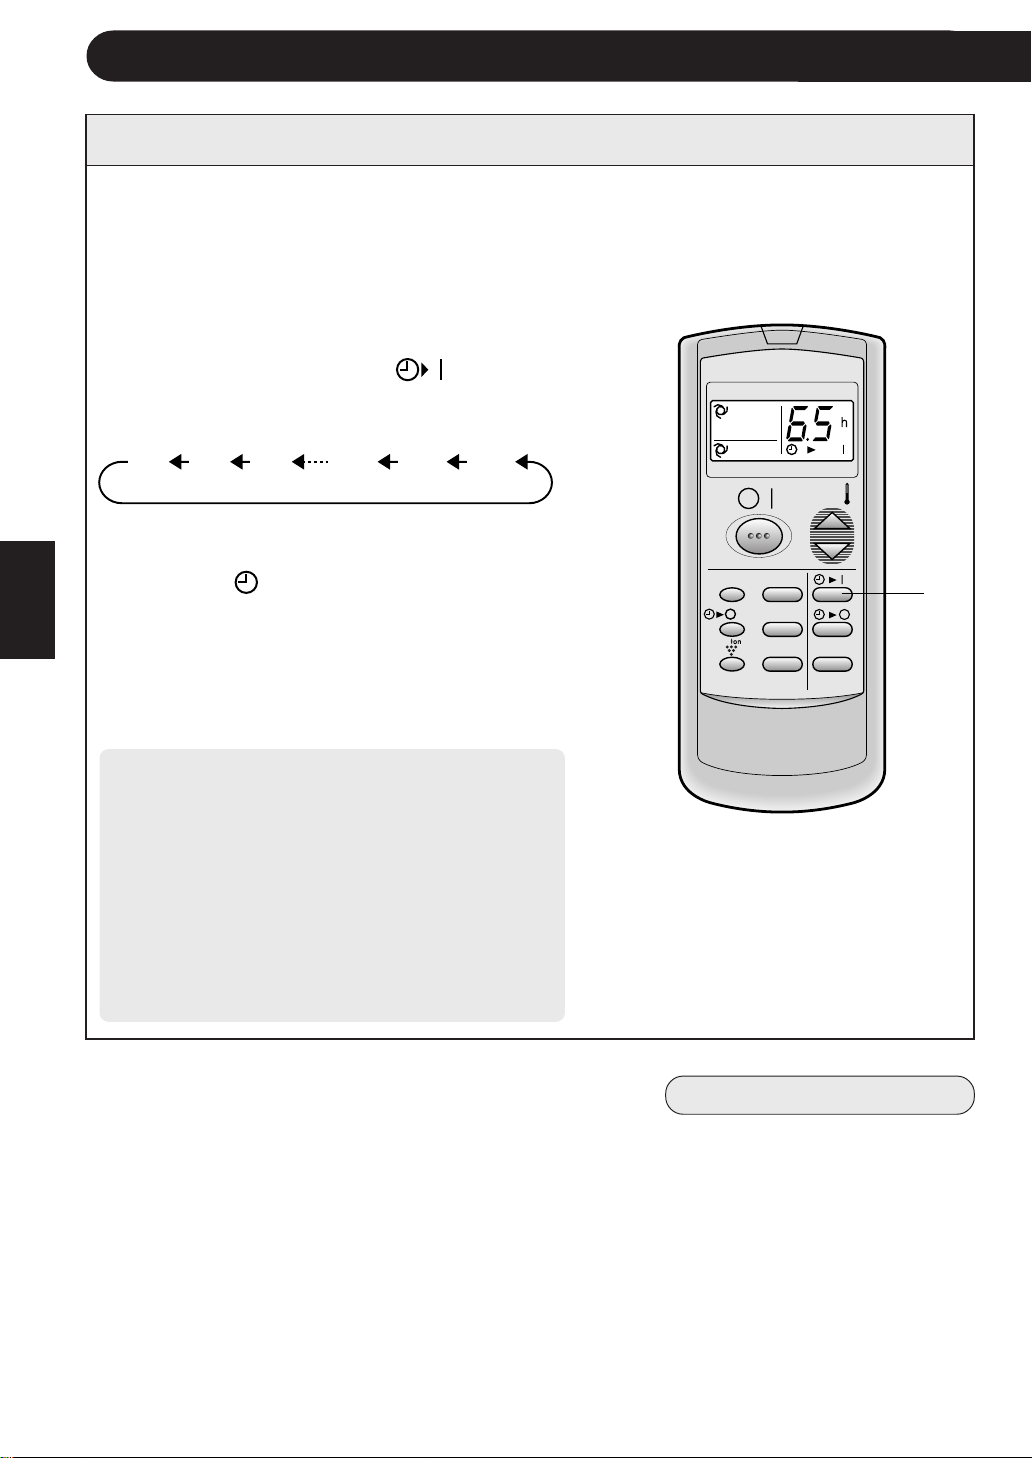
1
TIMER ON
NOTES FOR TIMER SETTING AND OPERATION
• The latest time setting will be memorized and will appear on the remote control display the next
time you set the TIMER OFF or TIMER ON.
• TIMER OFF and TIMER ON can not be set together.
The latest set TIMER will be active.
• When ONE-HOUR OFF TIMER is set, TIMER OFF and TIMER ON will not be available.
• When ONE-HOUR OFF TIMER is set during TIMER OFF or TIMER ON duration, the TIMER ON
or TIMER OFF will be cancelled.
Example : When you wish the
room temperature
to be as desired
6.5 hours later.
MODE
DISPLAY MODE
FAN1h
SWING
CANCEL
TEMP.
TEMP.
FAN TIMER
The unit will turn on automatically according to your setting.
Timer duration can be set from minimum 0.5 hours (30 minutes) to maximum 12
hours.
Up to 9.5 hours, you can set by 0.5 hours (30 minutes) increments and from 10 to 12
hours, by 1 hour increment.
Point the remote control at the signal receiver win-
dow on the unit.
1
Press the TIMER ON (
) button.
• The time setting will change as you press the button
as follows.
Hold the button pressed down for fast setting.
• The orange TIMER lamp (
) on the unit will light.
• The unit will generate a beep when it receives the
signal.
• The time setting will count down to show remaining
time.
Select the mode, temperature, fan speed setting
and PLASMACLUSTER operation as desired.
• When the temperature is set with the TIMER ON,
the temperature will show in the display for 5 sec-
onds and then return to the time display.
• If you do not change the setting, the unit will oper-
ate with the latest setting.
• The unit will turn on prior to the set time to allow
the room to reach the desired temperature by the
programmed time. (Awaking function)
0.5h 1.0h 1.5h 10h 11h 12h
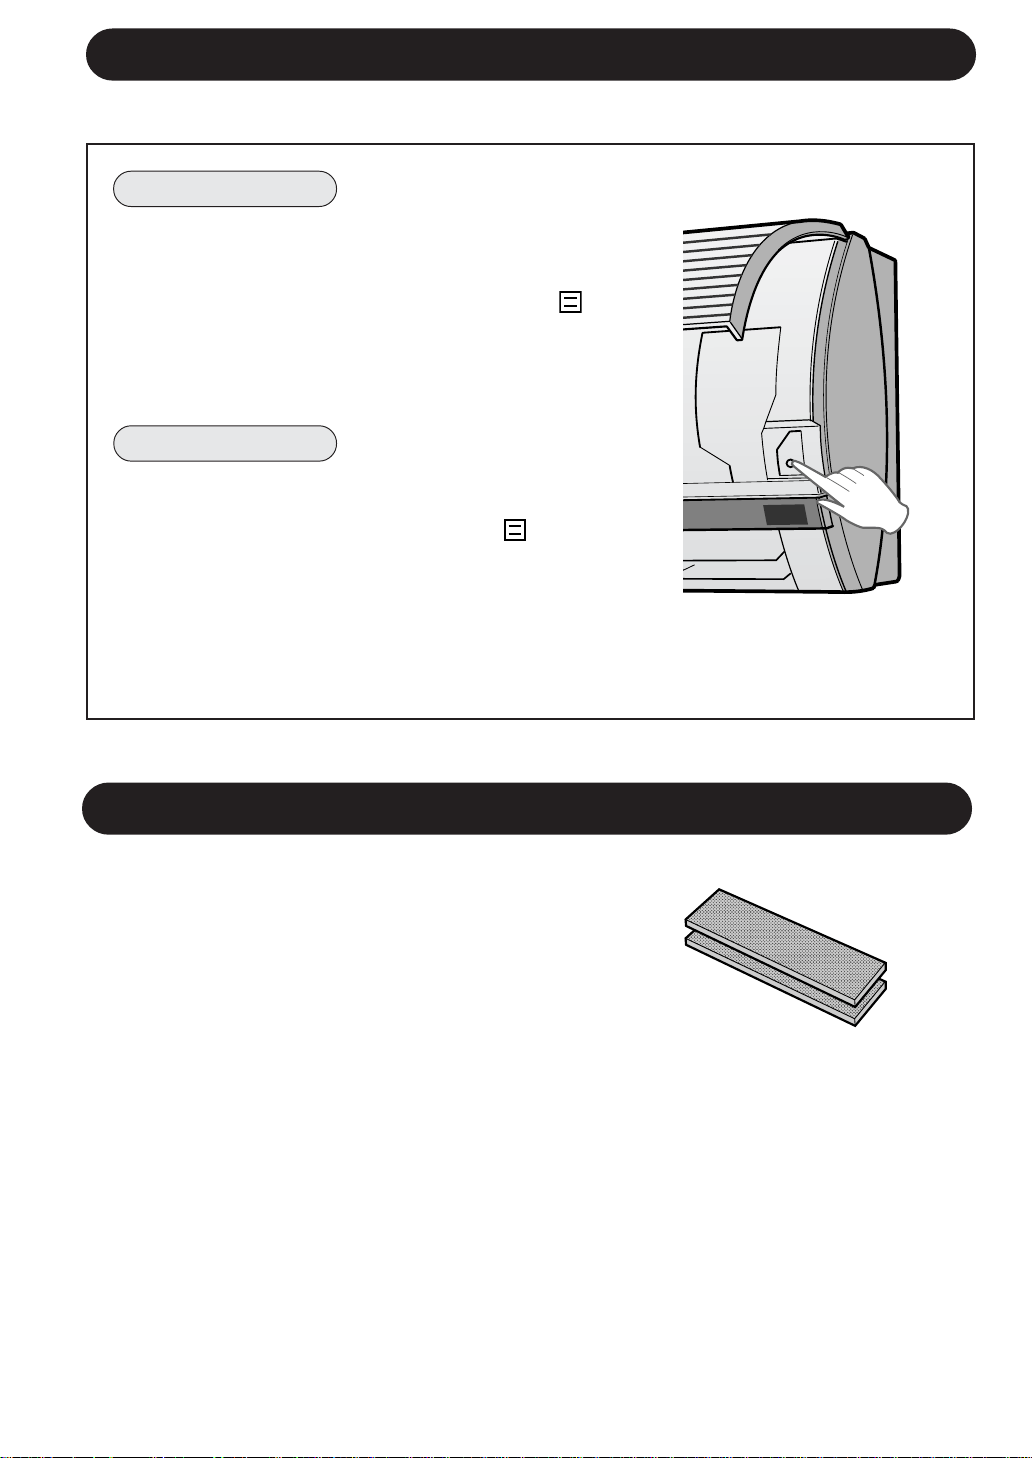
AUXILIARY MODE
Use this mode when the remote control is not available.
TO TURN ON
Lift the front panel of the indoor unit and press
the AUX. button on the operation panel.
• The red OPERATION lamp (
) on the unit will
light and the unit will start operating in the AUTO
mode.
• The fan speed and temperature setting are set to
AUTO.
TO TURN OFF
Press the AUX. button on the operation panel
again.
• The red OPERATION lamp (
) on the unit will
turn off.
NOTE:
If the AUX. button is pressed during normal op-
eration, the unit will turn off.
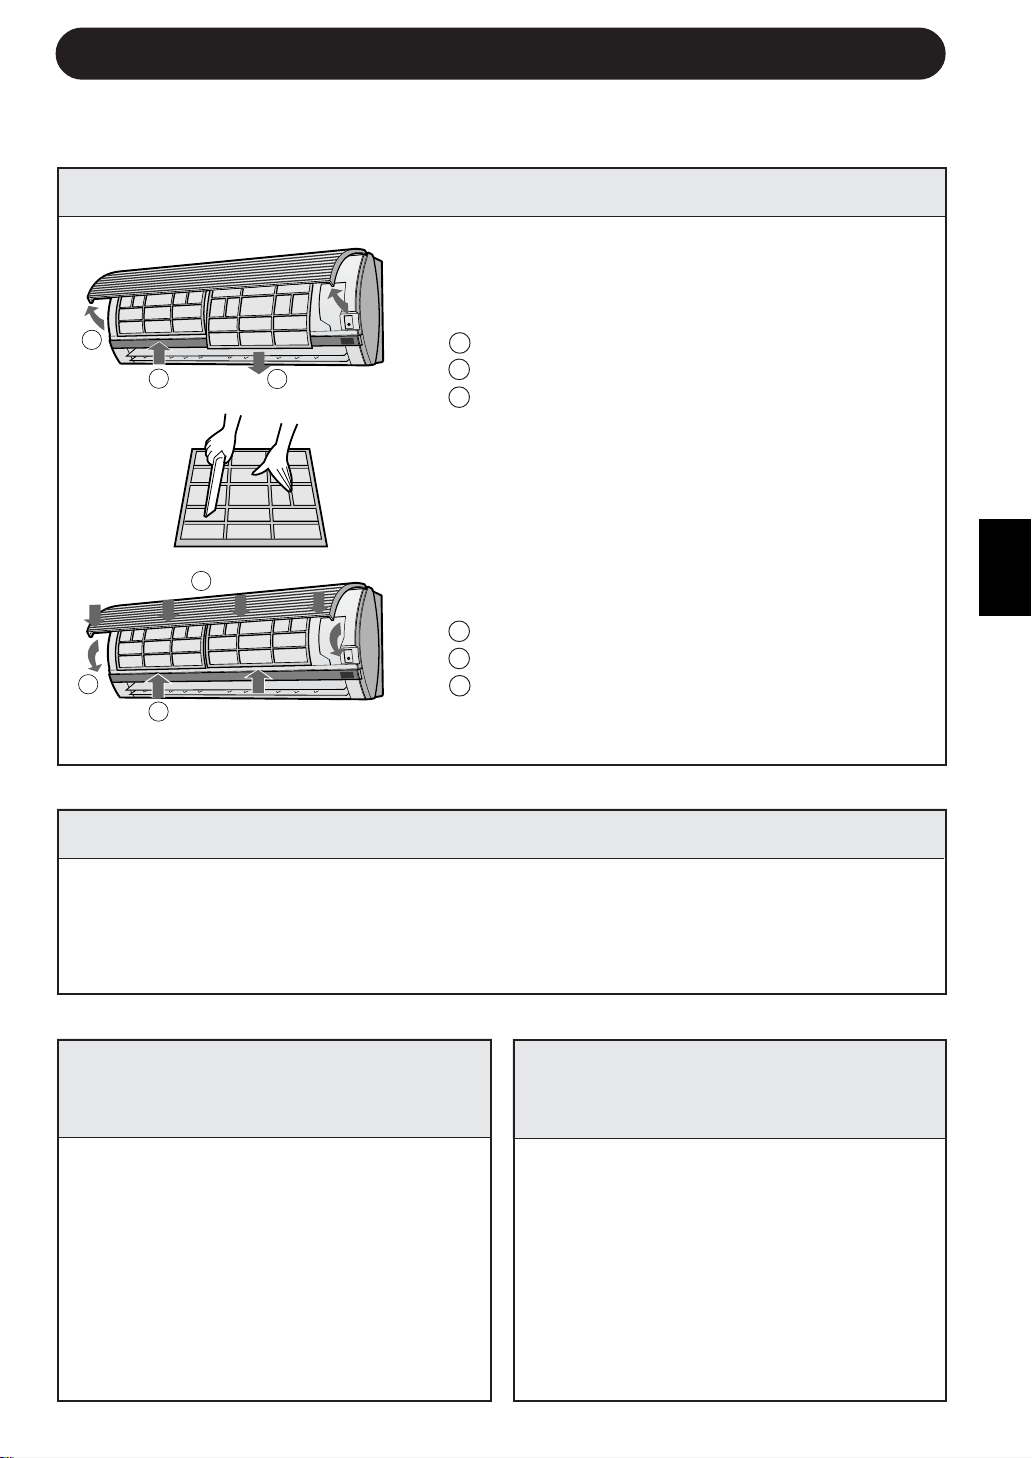
OPTION KIT
Air Purifying Filter
During operation of the air conditioner, the air purifying filter
removes dust and tobacco smoke from the air and discharges
clean air.
The apatite antibacterial material used in the air purifying
filter suppresses activities of adsorbed viruses and other
germs.
The replacement period for the disposable type is
approximately 3~6 months.
Contact your dealer for the purchase of this option.
Type AZ-F900B
E-14
AUX.
ENGLISH
E-15
CLEANING THE UNIT AND THE REMOTE CONTROL
• Wipe them with a soft cloth.
• Do not directly splash or pour water on them. We can cause electrical shock or
equipment damage.
• Do not use hot water, thinner, abrasive powders or strong solvents.
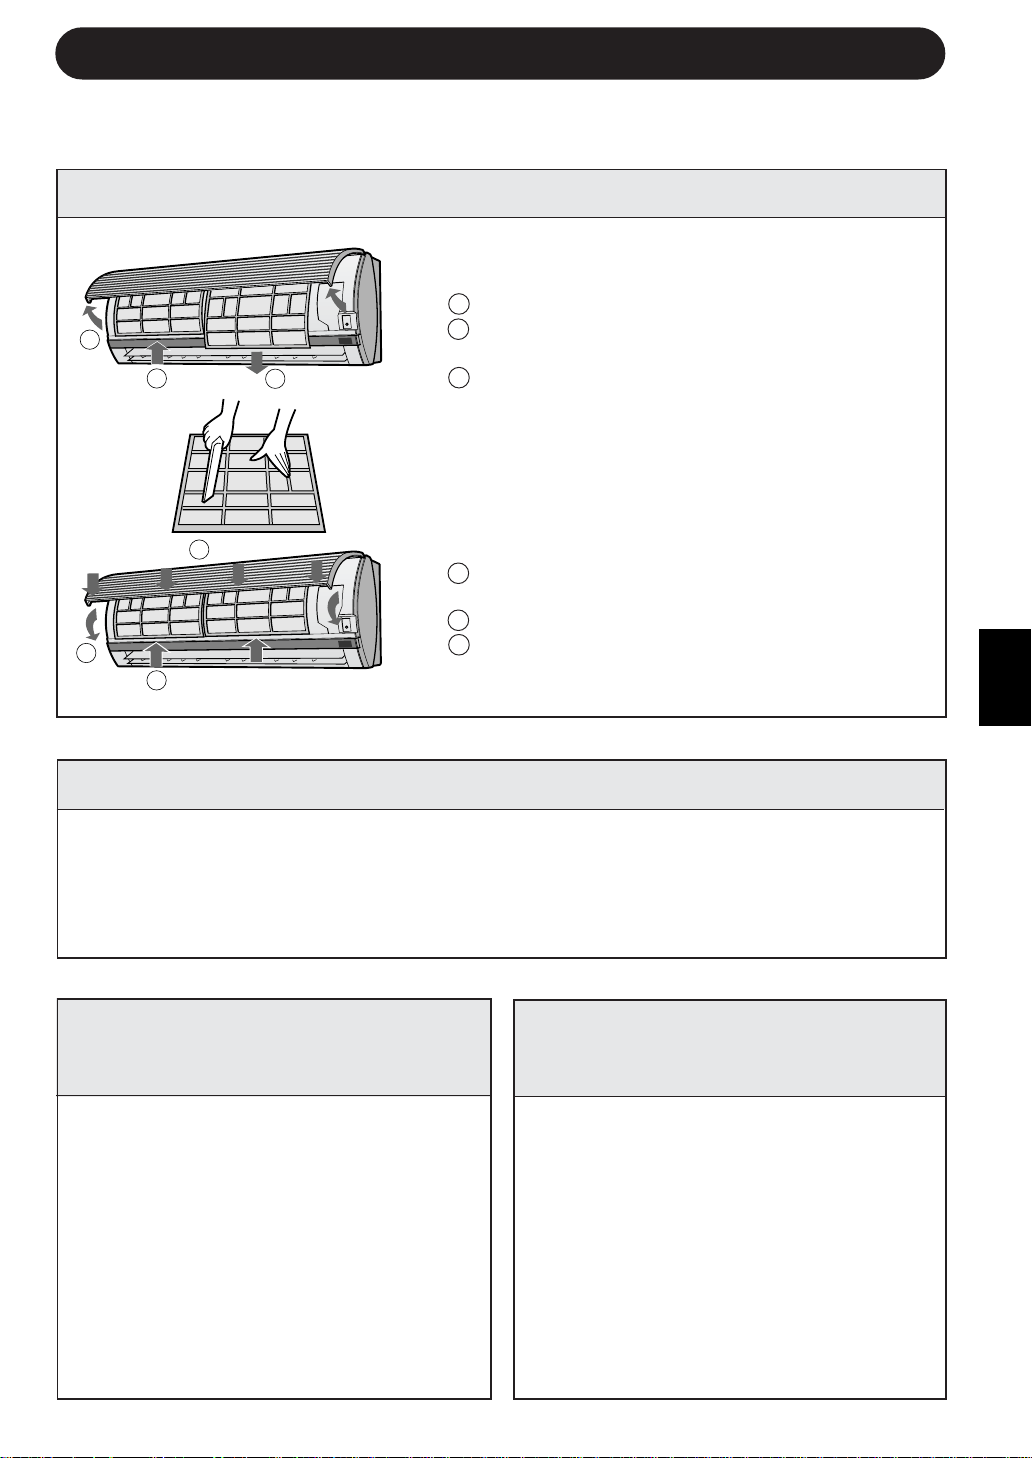
CLEANING THE FILTERS
MAINTENANCE AFTER
AIR CONDITIONER
SEASON
1
Operate the unit in the FAN ONLY
mode for about half a day to allow
the mechanism to thoroughly dry.
2
Stop the operation and unplug the
unit. Turn off the circuit breaker, if
you have one exclusively for the
air conditioner.
3
Clean the filters, then reinstall
them.
1
Make sure that the air filters are
not dirty.
2
Make sure that nothing obstructs
the air inlet or outlet.
3
Check the outdoor mounting rack
periodically for wear and to make
sure it is firmly in place.
MAINTENANCE
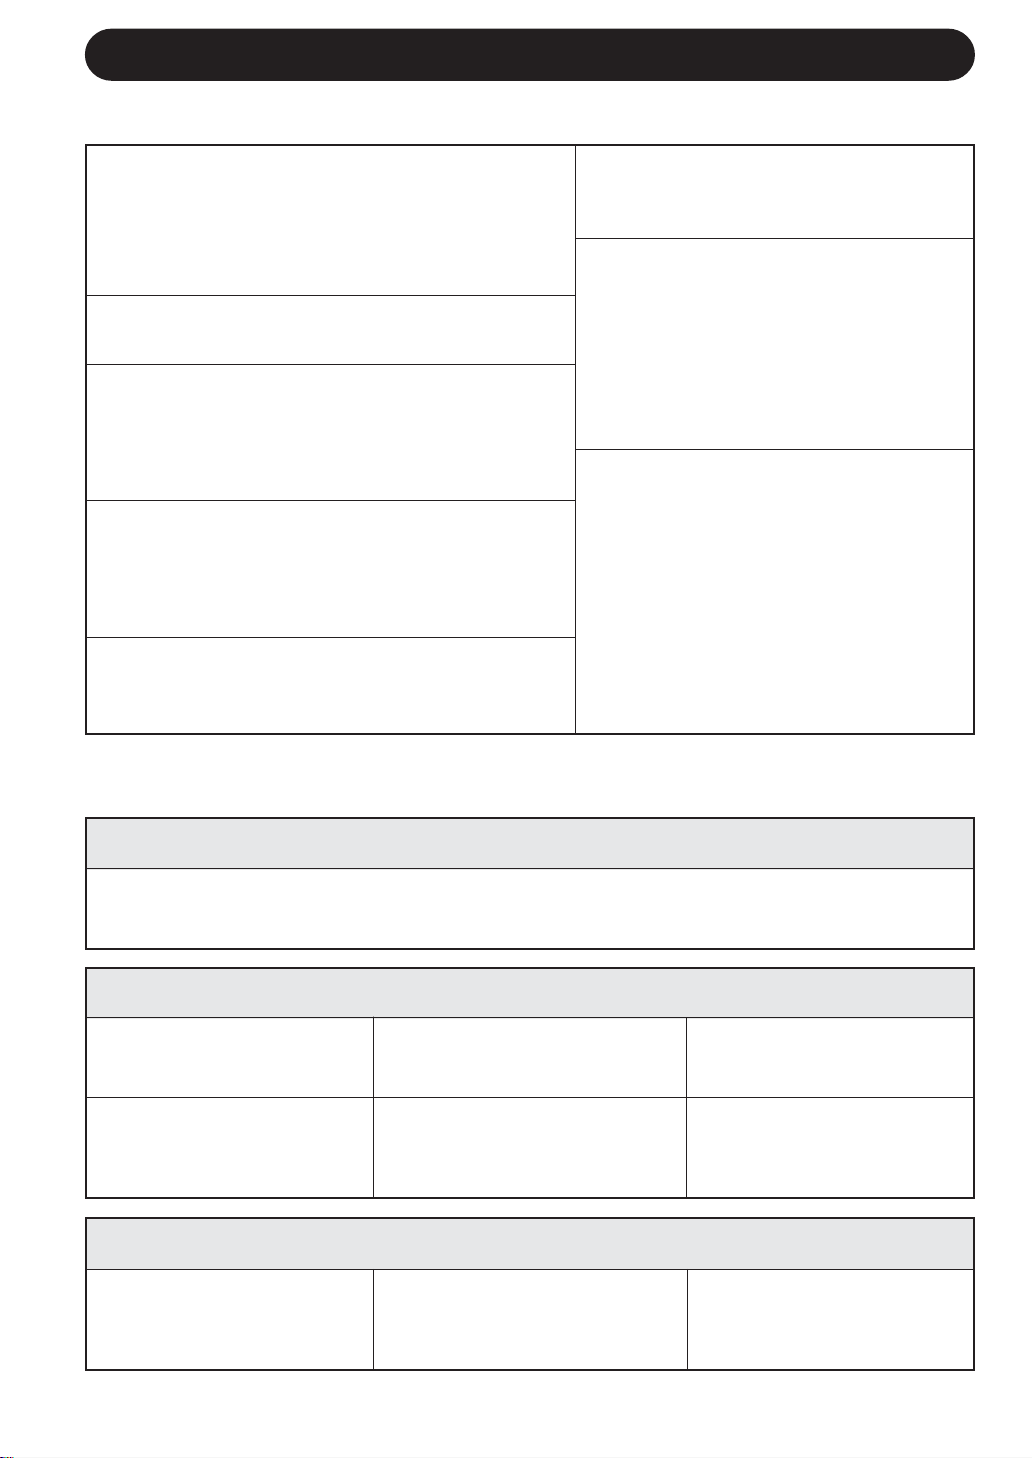
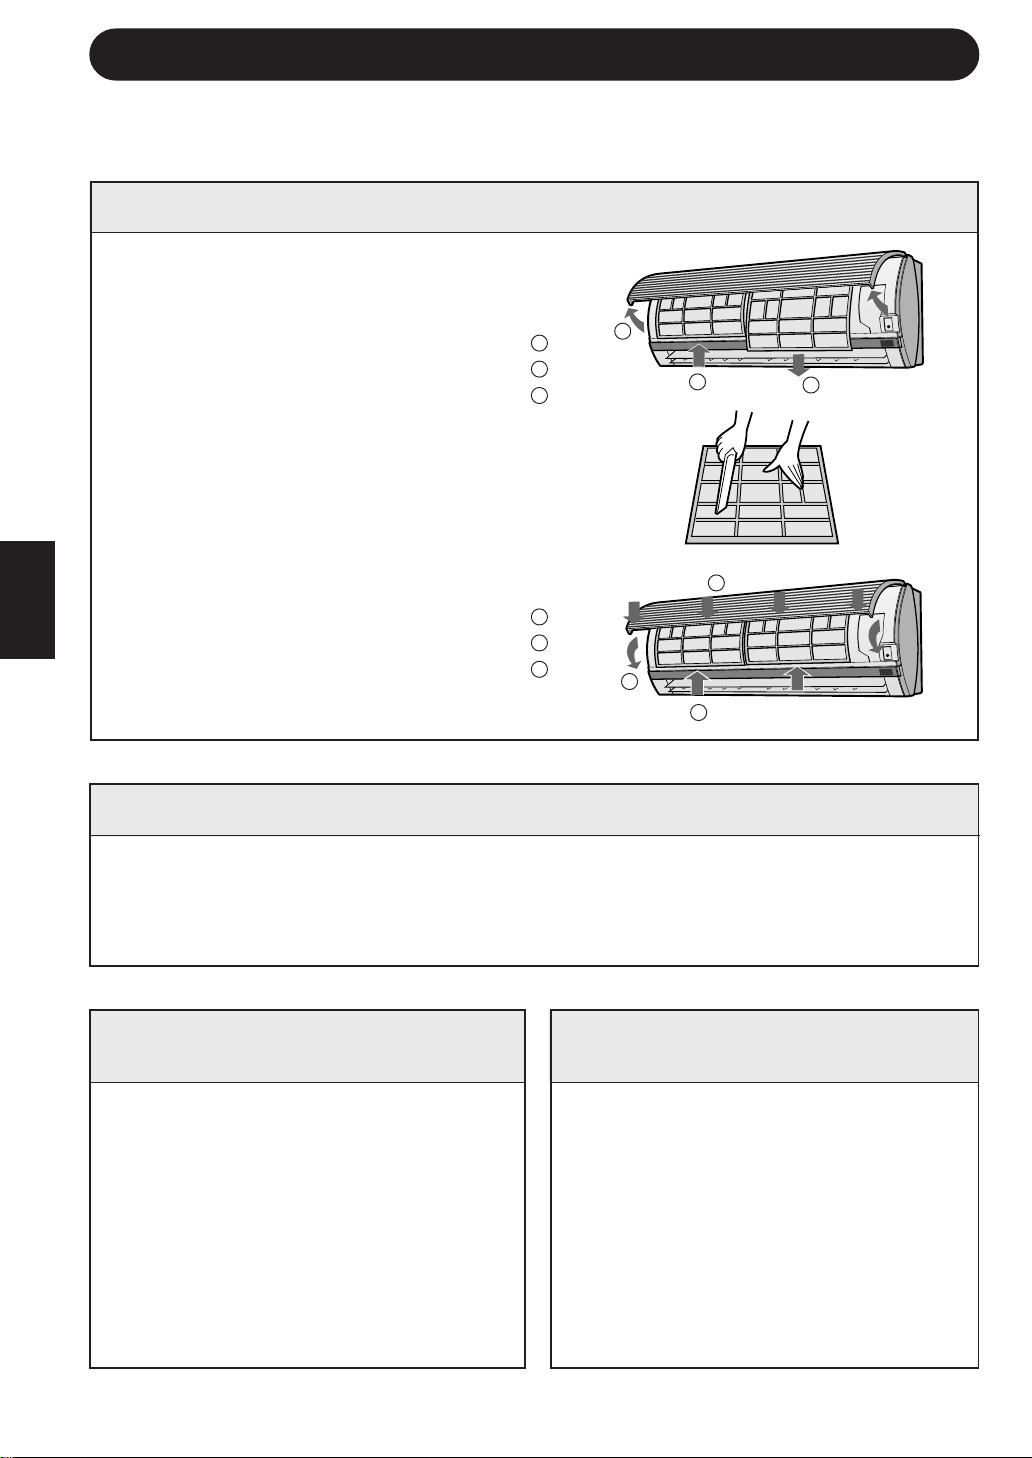
The air filters should be cleaned every two weeks.
1
TURN OFF THE UNIT
2
REMOVE THE FILTERS
1 Lift the open panel.
2 Push the air filters up slightly to unlock them.
3 Pull the air filters down to remove them.
3
CLEAN THE FILTERS
Use a vacuum cleaner to remove dust. If the
filters are dirty, wash them with warm water and
a mild detergent. Dry filters in the shade before
reinstalling.
4
REINSTALL THE FILTERS
1 Reinstall the filters in the original positions.
2 Close the open panel.
3 Push the arrow-marked of the panel firmly to
lock it in place.
MAINTENANCE BEFORE
AIR CONDITIONER
SEASON
Be sure to disconnect the power cord from the wall outlet or turn off the circuit
breaker before performing any maintenance.
1
2
3
3
1
2
IF THE UNIT FAILS TO RECEIVE THE REMOTE CONTROL SIGNAL
Check whether the remote
control batteries have be-
come old and weak.
Try to send the signal again
with the remote control
pointed properly towards the
unit’s signal receiver window.
Check whether the remote
control batteries are in-
stalled with the polarities
properly aligned.
E-16
BEFORE CALLING FOR SERVICE
The following conditions do not denote equipment malfunctions
UNIT DOES NOT OPERATE
The unit will not operate if it is turned on
immediately after it is turned off. The unit will not
operate immediately after the mode is changed.
This is to protect the internal mechanisms. Wait 3
minutes before operating the unit.
UNIT DOES NOT SEND OUT WARM AIR
The unit is preheating or de-icing.
CRACKING NOISE
The unit may produce a cracking noise. This sound
is generated by the friction of the front panel and
other components expanding or connecting due to
a temperature change.
If the unit appears to be malfunctioning, check the following points before calling
for service.
IF THE UNIT FAILS TO COOL (OR HEAT) THE ROOM EFFECTIVELY
Check the filters. If dirty,
clean them.
Check the outdoor unit to
make sure nothing is blocking
the air inlet or outlet.
Check the thermostat is
proper setting.
Make sure windows and
doors are closed tightly.
A large number of people in
the room can prevent the unit
from achieving the desired
temperature.
Check whether any heat-
generating appliances are
operating in the room.
ODORS
Carpet and furniture odors that entered into the
unit and the air conditioner's inner component
odors at the early stage of installation may be
sent out from the unit.
SWISHING NOISE
The soft, swishing noise is the sound of
the refrigerant flowing inside the unit.
WATER VAPOUR
• In the COOL and DRY operation, wa-
ter vapour can sometimes be seen at
the air outlet due to the difference
between the room air temperature and
the air discharged by the unit.
• In the HEAT operation, water vapour
may flow out of the outdoor unit dur-
ing de-icing.
Please call for service when OPERATION Lamp and TIMER Lamp on the indicator panel blink.
ODOR EMITTED FROM THE
PLASMACLASTER AIR OUTLET
This is the smell of ozone generated
from the ionizer. Density of the ozone is
very little, having no adverse effect over
your health. The ozone released into
the air will decompose soon, and its den-
sity in the room will not increase.
IF THE UNIT FAILS TO OPERATE
• Check to see if the circuit breaker has tripped or the fuse has blown.
• Check if the louvre unit is properly installed. All lamps on the indicator panel will blink when
the louvre unit is not properly installed.
A LOW BUZZ NOISE EMITTED
This is a sound emitted when the unit is generating
ion clusters.

FRANÇAIS
F-1
FRANÇAIS
Nous vous remercions d’avoir acheté un climatiseur SHARP. Lire attentivement ce manuel
avant d’utiliser l’appareil.
• PRECAUTIONS ........................................... F-1
• AUTRES REMARQUES SUR LE
FONCTIONNEMENT……… ........................ F-3
• CONSEILS SUR LES ECONOMIES
D’ENERGIE ................................................. F-3
• NOMENCLATURE....................................... F-4
• UTILISATION DE LA TELECOMMANDE .... F-6
• CONSEILS CONCERNANT LE FONCTION-
NEMENT DU PLASMACLUSTER ............... F-7
• FONCTIONNEMENT DE BASE .................. F-8
• AJUSTER LA DIRECTION DU
DEBIT D’AIR ................................................ F-10
TABLE DES MATIERES
• FONCTIONNEMENT DU PLASMA-
CLUSTER ........................................... F-11
• MINUTERIE D’ARRET APRES UNE
HEURE ............................................... F-11
• FONCTIONNEMENT DE LA
MINUTERIE ........................................ F-12
• MODE AUXILIAIRE ............................ F-14
• KIT EN OPTION.................................. F-14
• ENTRETIEN........................................ F-15
• AVANT D’APPELER LE SERVICE
APRES-VENTE................................... F-16
PRECAUTIONS
PRECAUTIONS D’EMPLOI
1
Ne pas tirer ou déformer le cordon d’alimentation. Le fait de le saisir ou une mauvaise
utilisation du cordon d’alimentation peut endommager l’appareil et provoquer une
décharge électrique.
2
Veiller à ne pas exposer votre corps directement à l’air évacué pendant une longue
période. Il risque d’affecter votre état physique.
3
Lors de l’utilisation du climatiseur pour des enfants en bas âge, des jeunes enfants, des
personnes âgées, des personnes alitées ou handicapées, s’assurer que la température
de la pièce est appropriée à ceux qui OK trouvent dans la pièce.
4
Ne jamais insérer des objets dans l’appareil. Le fait d’insérer des objets dedans peut
provoquer des blessures à cause de la rotation à grande vitesse des ventilateurs internes.
5
Mettre le climatiseur sans faille à la masse. Ne pas connecter le fil de mise à la terre à
un tuyau de gaz, un tuyau d’eau, un paratonnerre ou un fil de mise à la terre du téléphone.
Une mise à la terre incomplète risque de provoquer une décharge électrique.
6
En cas d’anomalie du climatiseur (par ex. s’il dégage une odeur de brûlure), arrêter
immédiatement son utilisation et tourner le disjoncteur en position OFF.
7
Respecter les réglementations et prescriptions locales pour le câblage du cordon
d’alimentation. Une connexion de câble incorrecte peut provoquer une surchauffe du
cordon d’alimentation, de la fiche et de la prise électrique et provoquer un incendie.
8
Utiliser uniquement le cordon d’alimentation spécifié par le fabricant pour le remplacement.
Le remplacement doit être effectué par un technicien ou un dépanneur qualifié.
MISES EN GARDE CONCERNANT L’INSTALLATION / LE DEMONTAGE / LA REPARATION
• Ne pas essayer d’installer/démonter/réparer soi-même l’appareil. Un travail incorrect
risque de proåvoquer une décharge électrique, une fuite d’eau, un incendie etc.
Consulter votre revendeur ou un autre dépanneur qualifié pour installer/démonter/réparer
l’appareil.
Cet équipement est conforme aux exigences des Directives 89/336/CEE et 73/23/CEE
modifiées par la directive 93/68/CEE.

PRECAUTIONS
PRECAUTIONS D’EMPLOI
1
Ouvrir périodiquement une fenêtre ou une porte pour aérer la pièce, en particulier lors
de l’utilisation d’appareils à gaz. Une ventilation insuffisante risque de provoquer un
manque d’oxygène.
2
Ne pas utiliser les touches avec les mains mouillées. Cela risque de provoquer une dé-
charge électrique.
3
Par mesure de sécurité, couper le disjoncteur lorsque l’appareil n’est pas utilisé pendant
une période prolongée.
4
Vérifier périodiquement l’usure du rack de montage de l’unité extérieure afin de s’assurer
qu’il est fixé fermement en place.
5
Ne rien placer sur l’unité extérieure et ne pas marcher dessus. L’objet ou la personne risque
de basculer ou de tomber, provoquant des blessures.
6
Cet appareil est conçu pour une utilisation privée. Ne pas utiliser pour d’autres appli-
cations, exemple dans un chenil ou une serre pour l’élevage d’animaux ou la culture des
plantes.
7
Ne pas placer une cuvette avec de l’eau sur l’appareil. Si l’eau pénètre dans l’appareil,
l’isolation électrique risque d’être détériorée et de provoquer une décharge électrique.
8
Ne pas bloquer les entrées et sorties d’air de l’appareil. Cela risque de provoquer un
fonctionnement insuffisant ou des pannes.
9
S’assurer d’arrêter l’utilisation et couper le disjoncteur avant d’effectuer la maintenance
ou le nettoyage. Un ventilateur tourne à l’intérieur de l’appareil et risque de vous blesser.
10
Ne pas éclabousser ou verser de l’eau directement sur l’appareil. L’eau risque de provo-
quer une décharge électrique ou d’endommager l’appareil.
11
Cet appareil n’est pas destiné à être utilisé par des enfants en bas âge ou des personnes
handicapées sans surveillance.
Les jeunes enfants doivent être surveillés afin de s’assurer qu’ils ne jouent pas avec l’appareil.
PRECAUTIONS CONCERNANT L’EMPLACEMENT /
INSTALLATION
• S’assurer de connecter le climatiseur à une source de tension et à une fréquence appropriées.
L’utilisation d’une alimentation ayant une tension et une fréquence incorrectes peut
endommager l’appareil et provoquer un incendie.
• Ne pas installer l’appareil dans un endroit où un gaz inflammable risque de fuire. Il risque
de provoquer un incendie.
Installer l’appareil dans un endroit peu poussiéreux, sans fumée et humidité dans l’air.
••
••
• Arranger le flexible de vidange pour assurer un écoulement normal. Un écoulement
insuffisant risque de mouiller la pièce, les meubles etc.
••
••
• S’assurer qu’un disjoncteur de fuite ou un disjoncteur de circuit est installé, en fonction de
l’emplacement d’installation, pour éviter une décharge électrique.
F-2

FRANÇAIS
TEMP. INT. TEMP. EXT.
CLIMATISATION
limite 32°C D.B. 43°C D.B.
supérieure
23°C W.B. -
limite 21°C D.B. 21°C D.B.
inférieure 15°C W.B. -
CHAUFFAGE
limite 27°C D.B. 24°C D.B.
supérieure - 18°C W.B.
limite 20°C D.B. -8,5°C D.B.
inférieure
- -9,5°C W.B.
AUTRES REMARQUES SUR LE FONCTIONNEMENT
GAMME DE TEMPERATURES DE SERVICE
• Le dispositif de protection
intégré peut empêcher
cette unité de fonctionner
quand celle-ci est utilisée
hors de cette portée.
• De la condensation peut
se former sur la sortie
d’air si cette unité fon-
ctionne continuellement
en mode FRAIS ou SEC
et que l’humidité dépas-
se les 80 pourcents.
D.B. = Ampoule sèche W.B. = Ampoule humide
CONSEILS SUR LES ECONOMIES D’ENERGIE
Certaines méthodes simples pour économiser de l’énergie sont décrites ci-dessous lorsque
le climatiseur est utilisé.
REGLER LA TEMPERATURE APPROPRIEE
• En réglant le thermostat à une température de 1°C supérieure à celle de la température souhaitée en mode
FRAIS et de 2°C inférieure en mode CHAUFFAGE permet une économie d’environ 10 pourcents de sa
consommation électrique.
• Le fait de régler la température à un niveau inférieur que nécessaire pendant la climatisation augmente la
consommation électrique.
BLOQUER LES RAYONS DIRECTS DU SOLEIL ET EVITER LES COURANTS D’AIR
• Le fait de bloquer les rayons directs du soleil pendant la climatisation réduira la consommation électrique.
• Fermez les fenêtres et les portes pendant les opérations de rafraîchissement et de chauffage.
REGLER LA DIRECTION APPROPRIEE DU DEBIT D’AIR POUR OBTENIR LA
MEILLEURE CIRCULATION D’AIR
MAINTENIR LE FILTRE PROPRE AFIN D’ASSURER LE FONCTIONNEMENT LE
PLUS EFFICACE
OPTIMISER L’UTILISATION DE LA FONCTION DE MINUTERIE D’ARRET
DEBRANCHER LE CORDON D’ALIMENTATION LORSQUE L’APPAREIL N’EST
PAS UTILISE PENDANT UNE PERIODE PROLONGEE
• L’unité intérieure continue à consommer une faible quantité de courant lorsqu’elle ne fonctionne pas.
EN CAS DE PANNE DE COURANT
Ce climatiseur est équipé d’une fonction de mémoire pour mémoriser les réglages en cas d’une panne de courant.
Lorsque la panne est rétablie, I’appareil redémarrera automatiquement avec les mêmes réglages qui ont été
actifs avant la panne de courant, excepté les réglages de la minuterie.
Si les minuteries ont été réglées avant une panne de courant, elles ne nécessitent pas d’être réglées à nouveau
lorsque le courant est rétabli.
FONCTION DE PRECHAUFFAGE
En mode CHAUFFAGE, le ventilateur intérieur risque de ne pas démarrer pendant deux à cinq minutes après
l’allumage de l’appareil pour éviter que de l’air froid soit soufflé de l’appareil.
FONCTION DE DEGIVRAGE
• Lorsque de la glace se forme sur l’échangeur de chaleur dans l’unité extérieure en mode CHAUFFAGE, un
dégivreur automatique fournit la chaleur pendant environ 5 à 10 minutes pour éliminer la glace. Pendant le
dégivrage, les ventilateurs intérieur et extérieur s’arrêtent de fonctionner.
• Après le dégivrage, I’appareil reprend automatiquement le fonctionnement en mode CHAUFFAGE.
RENDEMENT DE CHAUFFE
• L’appareil utilise une pompe à chaleur qui aspire la chaleur de l’air extérieur et la libére dans la pièce. La
température extérieur de I’air affecte ainsi considérablement le rendement de chauffe.
•
Si le rendement de chauffe est réduit à cause de températures extérieures basses, utiliser un réchauffeur
supplémentaire.
• Il faut du temps pour préchauffer et chauffer toute la pièce, à cause du système de circulation d’air forcé.
F-3
NOMENCLATURE
1 Bouche d’entrée (Air)
2 Panneau d’ouverture
3 Filtres à air
4 Bouton AUX.
5 Fenêtre RECEIVER
6 Cordon d’alimentation
7 Panneau d’indicateur
8 Volets d’aération à réglage
vertical
9 Volets d’aération à réglage
horizontal
0 Sortie (Air)
q Télécomande
w Voyant de VITESSE DE
VENTILATEUR
AUTOMATIQUE (AUTO FAN
SPEED) (vert
)
e Voyant de VITESSE DE
VENTILATEUR (FAN SPEED)
(vert
)
r Voyant PLASMACLUSTER
(bleu, vert)
t Voyant de TEMPORISATION
(TIMER) (orange
)
y Voyant de MARCHE
(OPERATION) (rouge
)
UNITE EXTERIEURE
REMARQUE : Les unités réelles peuvent différer légèrement de celles indiquées ci-dessus.
UNITE INTERIEURE
1
2
3
4
5
6
7
8
9
0
q
u Bouche d’entrée (Air)
i Tube réfrigérant et cordon
d’interconnexion
o Tuyau d’écoulement
p Sortie (Air)
F-4
w
e
r
t
y
u
i
o
p
FRANÇAIS
TELECOMMANDE
1 EMETTEUR
2 AFFICHAGE (Affichage à cristaux liquides)
3 Touche ON/OFF
4 Touche THERMO. (Thermostat)
5 Touche DISPLAY
6 Touche MODE
7 Touche TIMER ON (pour régler la
minuterie)
8 Touche de temporisation d’arrêt
ONE-HOUR OFF TIMER
9 Touche TIMER OFF (pour régler la
minuterie)
0 Interrupteur de ventilation FAN
q Touche d’annulation de la temporisation
TIMER CANCEL
w Touche SWING
e Touche PLASMACLUSTER
F-5
r SYMBOLES DES MODES
: AUTOMATIQUE : CHAUFFAGE
: FRAIS : SEC : VENTILATEUR
SEULEMENT
t SYMBOLES DE VITESSE DE VENTILATEUR
: AUTOMATIQUE : Réglage manuel
y SYMBOLE DU PLASMACLUSTER
u INDICATEUR DE TEMPERATURE ET DE
DECOMPTE DU TEMPS
i SYMBOLES DE TRANSMISSION
o INDICATEUR DE TEMPORISATION ON/OFF
Indique les horaires de réglage de la temporisation.
AFFICHAGE L.C.D. DE LA ELECOMMANDE
1
2
3
4
5
6
7
8
9
0
q
w
e
y
u
i
o
MODE
DISPLAY MODE
FAN1h
SWING
CANCEL
TEMP.
TEMP.
FAN TIMER
r
t
ATTENTION
• Ne pas exposer la fenêtre de réception du signal aux rayons directs du soleil, étant
donné qu’ils peuvent gêner son fonctionnement. Si la fenêtre de réception du signal est
exposée aux rayons directs du soleil, tirer le rideau pour bloquer la lumière.
• Le fait d’utiliser une lampe fluorescente avec un démarreur rapide dans la même pièce
risque de créer des interférences avec la transmission du signal.
• L’appareil peut être affecté par les signaux transmis par la télécommande d’un téléviseur,
magnétoscope ou un autre équipement utilisé dans la même pièce.
• Ne pas laisser la télécommande exposée aux rayons directs du soleil ou près d’un
radiateur. Protéger également l’appareil et la télécommande contre l’humidité et les
chocs qui peuvent décolorer ou endommager l’appareil.
UTILISATION DE LA TELECOMMANDE
F-6
REMARQUES :
• La durée de service des piles est d’environ un an dans des conditions d’utilisation
normale.
• Lors du remplacement des piles, toujours remplacer les deux piles, et s’assurer
qu’elles sont de même type.
• Si la télécommande ne fonctionne pas correctement après le remplacement des
piles, sortir les piles et les remettre en place 30 secondes plus tard.
• Si l’appareil ne sera pas utilisé pendant une longue période, enlever les piles de la
télécommande.
Pointer la télécommande vers la
fenêtre de réception du signal de
l’appareil et appuyer sur une touche.
L’appareil émet un bip lorsqu’il reçoit
le signal.
• S’assurer qu’il n’y a pas de rideau ou un
autre objet entre la télécommande et
l’appareil.
• La télécommande peut envoyer des
signaux à une distance de 7 mètres.
INSTALLATION DES PILES Utiliser deux piles de format AAA (R03).
VOICI COMMENT UTILISER LA TELECOMMANDE
Couvercle des piles
1
Retirez le couvercle du compartiment des
piles au dos de la télécommande.
2
Insérer les piles dans le compartiment en
respectant les polarités ± et —.
• Des lignes seront indiquées à l’affi-
chage lorsque les piles sont installées
correctement.
3
Remettre en place le couvercle du
compartiment des piles.
FRANÇAIS
F-7
CONSEILS CONCERNANT LE FONCTIONNEMENT DU PLASMACLUSTER
FONCTIONNEMENT DU PURIFICATEUR D’AIR
Les ions groupés libérés dans l’air de la pièce réduiront la quantité de champignons
de moisissure.
OPERATION D’EQUILIBRAGE DES IONS
On considère souvent que les endroits calmes et sereins, comme les cascades ou
les points d’eau sont favorables aux ions négatifs.
Lorsque l’appareil se trouve dans ce mode de
fonctionnement, des quantités importantes d’ions négatifs sont libérées à une
fréquence accélérée dans l’air de la pièce, afin qu’il atteigne une composition
semblable.
Veuillez vous reporter à la page 11 pour le fonctionnement.
L’ionisateur situé à l’intérieur du climatiseur diffusera des ions groupés, c’est à dire
une masse d’ions positifs et négatifs, dans la pièce.
Les ions groupés réduisent la quantité de champignons de moisissure.
Ionisateur
Ions groupés
Champignon de moisissure
Appuyer sur la touche THERMO. pour
régler la température désirée.
MODE AUTO/SEC
La température peut être
modifiée par incré-ments
de 1°C dans un intervalle
de 2°C supéri-eur à 2°C
inférieur à la température
automat-iquement
déterminée par le
climatiseur.
MODE
FRAIS/CHAUFFAGE
La température peut être
réglée dans un interval-le
de 18 à 32°C.
VENTILATEUR UNIQUEMENT
Le réglage de la tempé-
rature ne peut pas être
effectué.
1
F-8
FONCTIONNEMENT DE BASE
2
Appuyer sur la touche ON/OFF pour
commencer l’utilisation.
• Le voyant rouge OPERATION (
) s’allume
sur l’appareil.
3
4
1
4
5
2
3
Appuyer sur la touche MODE pour sélec-
tionner le mode de fonctionnement.
AUTOMATIQUE CHAUFFAGE FRAIS SEC VENTILATEUR
5
MODE
DISPLAY MODE
FAN1h
SWING
CANCEL
TEMP.
TEMP.
FAN TIMER
Appuyez sur la touche VENTILATEUR
pour régler la vitesse de ventilation souhaitée.
AUTOMATIQUE DOUX BAS HAUT
• En mode SEC, la vitesse du ventilateur est
préréglée sur AUTOMATIQUE et ne peut
pas être modifiée.
• En mode VENTILATEUR UNIQUE-MENT,
la vitesse du ventilateur ne peut pas être
réglée sur AUTOMATIQUE.
Pour éteindre l’appareil, appuyer à nou-
veau sur la touche ON/OFF.
• Le témoin rouge OPERATION (
) s’éteint
sur l’appareil.
FRANÇAIS
F-9
Fonctionnement automatique
Mode Réglage du thermostat
En-dessous de 21°C CHAUFFAGE 23°C
21°C-24°C SEC Temp. ambiante au démarrage
24°C-26°C FRAIS 24°C
26°C-28°C FRAIS 25°C
Au-dessus de 28°C FRAIS 26°C
CONSEILS A PROPOS DU MODE AUTOMATIQUE
En mode AUTOMATIQUE, le réglage de température et de mode sont
sélectionnés automatiquement selon la température de la pièce et la
température extérieure lorsque l’appareil est allumé.
Réglages de modes et de température
Temp. ambiante au
démarrage
DISPLAY MODE
FAN1h
SWING
CANCEL
CONSEILS AU SUJET DU VOYANT DE VITESSE
DE VENTILATEUR
Pendant le fonctionnement, le voyant FAN SPEED s’allume sur trois
niveaux (2 niveaux pour le mode SEC) sur le panneau d’indicateurs de
l’unité pour indiquer la vitesse du ventilateur.
Lorsque la vitesse du ventilateur Lorsque la vitesse du ventilateur
est réglée sur AUTOMATIQUE est réglée sur manuel
Vitesse faible
Vitesse basse
Vitesse haute
Le voyant AUTO FAN SPEED
s’allume.
Pour éteindre le voyant FAN SPEED,
appuyez la touche DISPLAY.
Le voyant PLASMACLUSTER s’éteindra
également.
DEBIT D’AIR HORIZONTALE
Modes FRAIS et SEC Débit d’air horizontal
Modes VENTILATEUR UNIQUEMENT et CHAUFFAGE
Débit d’air diagonal
F-10
AJUSTER LA DIRECTION DU DEBIT D’AIR
DEBIT D’AIR VERTICALE
La direction du débit d’air est préréglée automatiquement comme suit dans chaque
mode pour assurer un confort optimum :
Modes FRAIS et SEC
Mode VENTILATEUR
UNIQUEMENT et CHAUFFAGE
L’intervalle de réglage
est plus étroit que
l’inter-valle SWING afin
d’évi-ter une conden-
sation.
L’intervalle est large, de
sorte que le débit d’air
puisse être dirigé vers le
sol.
Maintenir le volet de réglage horizontal
de l’aération comme indiqué sur le
schéma et ajuster la direction du débit
d’air.
Intervalle de réglage
ATTENTION
Ne jamais essayer d’ajuster les volets de réglage vertical manuellement.
• Un réglage manuel du volet de réglage vertical peut provoquer un mauvais fonctionnement de
l’appareil lorsque la télécommande est utilisée pour le réglage.
• Lorsque le volet de réglage vertical est positionné à la position la plus basse en mode FRAIS ou
en mode SEC pendant une période prolongée, une condensation risque de se produire.
Ne pas positionner le volet de réglage vertical complètement à droite ni à gauche lors du
fonctionnement du climatiseur avec une vitesse de ventilateur réglée sur “FAIBLE” pendant
une période prolongée.
De la condensation risque de se former sur les volets d’aération.
VOICI COMMENT AJUSTER LA DIRECTION DU DEBIT D’AIR
Appuyer une fois sur la touche
SWING de la télécommande.
• Le volet de réglage d’aération vertical
change continuellement d’angle.
Appuyer à nouveau sur la touche
SWING lorsque volet de réglage
vertical est à la position désirée.
• Le volet d’aération s’arrête de se
déplacer dans l’intervalle indiqué sur
le schéma.
• La position ajustée sera mémorisée et
réglée automatiquement à la même
position lors de l’utilisation suivante.
FRANÇAIS
1
Pendant le fonctionnement, appuyer sur la touche
PLASMACLUSTER pour sélectionner le mode.
PURIFICATEUR D’AIR EQUILIBRAGE DES IONS ANNULER
•
Lors du fonctionnement du PURIFICATEUR D’AIR, le voyant
bleu du PLASMACLUSTER sur l’appareil s’allumera.
• Lorsque l’unité se trouve en mode EQUILIBRAGE DES
IONS, le voyant vert PLASMACLUSTER s’allume.
POUR ANNULER
Appuyer sur la touche PLASMACLUSTER jusqu’à ce
que le symbole PLASMACLUSTER de l’affichage de la
télécommande s’éteigne.
•
Le voyant PLASMACLUSTER situé sur l’appareil s’éteindra.
REMARQUE :
• Le réglage du fonctionnement du PLASMACLUSTER sera
mémorisé et fonctionnera dans le même mode, la
prochaine fois que vous activerez le climatiseur.
• Pour éteindre le voyant PLASMACLUSTER, appuyer sur
la touche DISPLAY.
MODE TEMP.
FAN TIMER
DISPLAY MODE
FAN1h
SWING
CANCEL
F-11
1
Appuyer sur la touche ONE-HOUR OFF TIMER.
• La télécommande affiche “
”.
• Le voyant orange TIMER (
) situé sur l’appareil s’allumera.
• L’appareil s’arrête après une heure.
POUR ANNULER
Appuyer sur la touche d’annulation CANCEL.
• Le voyant orange TIMER (
) situé sur l’appareil s’éteindra.
Ou, éteindre l’appareil en appuyant sur la touche ON/OFF.
• Le voyant rouge OPERATION (
) et le voyant orange
TIMER (
) situés sur l’appareil s’éteindront.
1
Lorsque la minuterie ONE-HOUR OFF TIMER est réglée, l’appareil s’arrête de fonctionner après une heure.
MINUTERIE D’ARRET APRES UNE HEURE
REMARQUES :
•
Le fonctionnement ONE-HOUR OFF TIMER a la priorité sur les fonctionnements TIMER ON et TIMER
OFF
.
• Lorsque ONE-HOUR OFF TIMER est réglé pendant que l’appareil ne fonctionne pas,
l’appareil fonctionne pendant une heure avec la condition réglée précédemment.
• Si l’on veut utiliser l’appareil une autre heure avant que ONE-HOUR OFF TIMER soit
activé, appuyer à nouveau sur la touche ONE-HOUR OFF TIMER pendant l’utilisation.
FONCTIONNEMENT DU PLASMACLUSTER
1
FONCTIONNEMENT DU PURIFICATEUR D’AIR : Les ions groupés libérés dans l’air
de la pièce réduiront la quantité de champignons de moisissure.
OPERATION D’EQUILIBRAGE DES IONS : Des quantités importantes d’ions négatifs
sont libérées à une fréquence accélérée dans l’air de la pièce.
MODE TEMP.
FAN TIMER
h
DISPLAY MODE
FAN1h
SWING
CANCEL
F-12
L’unité s’arrête automatiquement suivant votre réglage.
Le délai de la temporisation peut être réglé entre un minimum de 0,5 heure (30
minutes) et un maximum de 12 heures.
Réglable par incrément de 0,5 heure (30 minutes) jusqu’à 9,5 heures et par incrément
de 1 heure de 10 à 12 heures.
FONCTIONNEMENT DE LA MINUTERIE
MINUTERIE DESACTIVEE
Lorsque le mode TIMER OFF est réglé, le réglage
de la température est effectué automatiquement
pour éviter que la pièce devienne excessivement
chaude ou froide pendant votre sommeil.
(Fonction de veille automatique)
MODE FRAIS/SEC :
••
••
• Une heure après le départ de la temporisation, la
température augmente de 1°C au-dessus du
réglage original du thermostat.
MODE DE CHAUFFAGE :
••
••
• Une heure après le début de fonctionnement, la
température chute de 3°C plus bas que le réglage
original du thermostat.
REMARQUE :
••
••
• La fonction de veille automatique n’est pas activée
pendant le mode VENTILATEUR UNIQUEMENT.
1
CONSEILS A PROPOS DU
FONCTIONNEMENT DE LA MINUTERIE
Dirigez la télécommande vers la fenêtre du
capteur sur l’unité.
1
Appuyer sur la touche d’arrêt de la temporisation
TIMER OFF (
) et réglez le délai souhaité.
• Le réglage du délai se modifie à chaque pression
sur la touche de la façon suivante :
Maintenez la touche enfoncée pour effectuer un
réglage plus rapide.
• Le voyant orange TIMER (
) situé sur l’appareil
s’allumera.
• L’appareil émet un bip lorsqu’il reçoit le signal.
• Le réglage de la temporisation décomptera pour
indiquer le temps restant.
0.5h 1.0h 1.5h 10h 11h 12h
Appuyer sur la touche de temporisation
que vous souhaitez modifier, (de coupure
TIMER OFF ou de mise en marche TIMER
ON) et modifiez le réglage du temps.
MODE
DISPLAY MODE
FAN1h
SWING
CANCEL
TEMP.
TEMP.
FAN TIMER
DISPLAY MODE
FAN1h
SWING
CANCEL
Exemple : Si vous souhaitez arrêter le fonctionnement
2,5 heures plus tard.
POUR MODIFIER LE REGLAGE DE
LA TEMPORISATION
POUR ANNULER LE MODE MINUTERIE
Appuyer sur la touche d’annulation
CANCEL.
• Le voyant orangeTIMER (
)
situé sur l’appareil s’éteindra.
FRANÇAIS
F-13
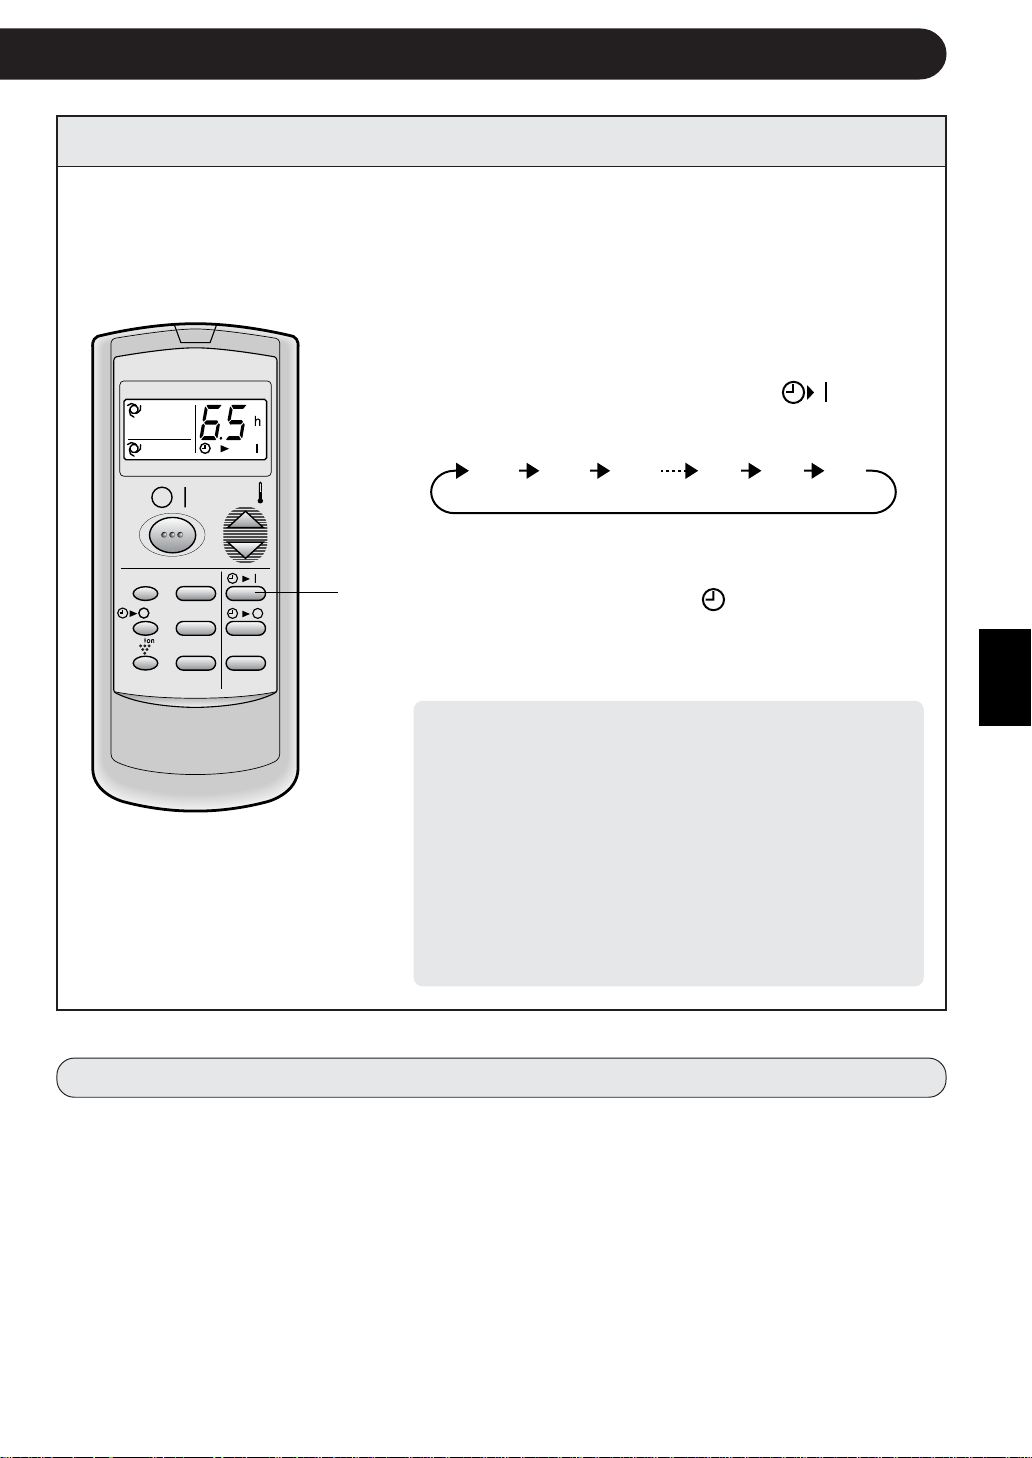
1
MINUTERIE ACTIVEE
Exemple : Si vous voulez que
la température de la
pièce soit à votre
convenance 6,5
heures plus tard.
MODE
DISPLAY MODE
FAN1h
SWING
CANCEL
TEMP.
TEMP.
FAN TIMER
L’unité s’arrête automatiquement suivant votre réglage.
Le délai de la temporisation peut être réglé entre un minimum de 0,5 heure (30
minutes) et un maximum de 12 heures.
Réglable par incrément de 0,5 heure (30 minutes) jusqu’à 9,5 heures et par incrément
de 1 heure de 10 à 12 heures.
Dirigez la télécommande vers la fenêtre du
capteur sur l’unité.
1
Appuyer sur la touche TIMER ON (
).
• Le réglage du délai se modifie à chaque pression
sur la touche de la façon suivante,
Maintener la touche enfoncée pour effectuer un
réglage plus rapide.
• Le voyant orange TIMER (
) situé sur l’appareil
s’allumera.
• L’appareil émet un bip lorsqu’il reçoit le signal.
• Le réglage de la temporisation décomptera pour
indiquer le temps restant.
Sélectionner le mode, la température, le réglage
de la vitesse du ventilateur et le fonctionnement
du PLASMACLUSTER.
• Lorsque la température est réglée avec la tempori-
sation de mise en marche TIMER ON, celle-ci est
affichée pendant 5 secondes et ensuite l’affichage
de l’heure reprend.
• Si vous ne souhaitez pas modifier le réglage, l’unité
fonctionnera suivant le dernier réglage.
• L’appareil s’allume avant l’heure réglée afin de
permettre à la pièce d’atteindre la température
désirée par l’heure programmée. (Fonction de
réveil)
0.5h 1.0h 1.5h 10h 11h 12h
REMARQUES SUR LE REGLAGE ET LE FONCTIONNEMENT DE LA TEMPORISATION
• Le dernier réglage du temps sera mémorisé et apparaîtra sur l’affichage de la télécommande
lorsque vous effectuerez le prochain réglage de la temporisation d’activation ou de désactivation
TIMER OFF ou TIMER ON.
• Les temporisations d’activation ou de désactivation TIMER OFF et TIMER ON ne peuvent être
réglées ensemble.
La dernière temporisation réglée sera active.
• Lorsque la temporisation ONE-HOUR OFF TIMER (Coupure après une heure de fonctionnement)
est réglée, les temporisations TIMER OFF et TIMER ON ne sont pas disponibles.
• Lorsque la temporisation ONE-HOUR OFF TIMER est réglée pendant les délais des temporisa-
tions TIMER OFF ou TIMER ON, cette temporisation sera annulée.
KIT EN OPTION
Filtre purificateur d’air
Pendant le fonctionnement du climatiseur, le filtre
purificateur d’air élimine la poussière et la fumée de
cigarettes de l’air et délivre de l’air propre.
Le matériau anti-bactérien d’apatite utilisé dans le filtre
purificateur d’air élimine les virus et autres germes
adsorbés.
La périodicité de remplacement du type jetable est
d’environ 3~6 mois.
Contacter votre revendeur pour l’achat de cette option.
Type AZ-F900B
MODE AUXILIAIRE
Utiliser ce mode si la télécommande n’est pas disponible.
POUR ALLUMER
Soulever le panneau avant de l’unité intérieure et
appuyer sur la touche AUX. du panneau de
commande.
• Le témoin lumineux rouge OPERATION ( ),
s’allume sur l’appareil et l’appareil commence à
fonctionner en mode AUTO.
• La vitesse du ventilateur et le réglage de température
sont en position AUTO.
POUR ETEINDRE
Appuyer à nouveau sur la touche AUX. du panneau
de commande.
• Le témoin lumineux rouge OPERATION (
) s’éteint
sur l’appareil.
REMARQUE :
Si la touche AUX. est enfoncée pendant le
fonctionnement normal, l’appareil s’éteint.
F-14
AUX.
FRANÇAIS
NETTOYER L’APPAREIL ET LA TELECOMMANDE
• Essuyer avec un chiffon doux.
• Ne pas éclabousser de l’eau ou verser de l’eau. Cela peut provoquer une décharge
électrique ou endommager l’appareil.
• Ne pas utiliser de l’eau chaude, un diluant, des poudres abrasives ou des solvants
forts.
F-15
NETTOYAGE DES FILTRES
MAINTENANCE AVANT
LA SAISON
CLIMATISATION
1
Faire fonctionner l’appareil en mode
VENTILATEUR UNIQUEMENT
pendant environ une demi-journée
pour sécher complètement le
mécanisme.
2
Arrêter le fonctionnement et déb-
rancher l’appareil. Couper le disjon-
cteur, si on n’a qu’un seul
exclusivement pour le climatiseur.
3
Nettoyer les filtres, puis les
réinstaller.
1
S’assurer que les filtres à air ne
sont pas encrassés.
2
S’assurer qu’aucun objet ne bloque
l’entrée ou la sortie d’air.
3
Vérifier périodiquement l’usure du
rack de montage extérieur afin de
s’assurer qu’il est fermement mis
en place.
ETRETIEN
Les filtres à air doivent être nettoyés toutes
les deux semaines.
1
ETEINDRE L’APPAREIL
2
ENLEVER LES FILTRES
1 Soulever le panneau d’ouverture.
2 Pousser les filtres à air légèrement vers le
haut pour les déverrouiller.
3 Tirer les filtres à air vers le bas pour les
démonter.
3
NETTOYER LES FILTRES
Utiliser un aspirateur pour éliminer la poussière.
Si les filtres sont encrassés, les laver avec de
l’eau chaude et un détergent doux. Sécher les
filtres à l’ombre avant de les remettre en place.
4
REINSTALLER LES FILTRES
1 Réinstaller les filtres dans leurs positions
originales.
2 Fermez le panneau d’ouverture.
3 Appuyer fermement sur la flèche située sur le
panneau pour le verrouiller.
MAINTENANCE APRES
LA SAISON DE
CLIMATISATION
S’assurer de débrancher le cordon d’alimentation de la prise murale ou couper le
disjoncteur avant d’effectuer la maintenance.
1
2
3
3
1
2
SI L’APPAREIL N’ARRIVE PAS A RECEVOIR LE SIGNAL DE TELECOMMANDE
Vérifier si les piles de la télé-
commande sont usagées ou
faibles.
Essayer d’envoyer à nouveau
le signal avec la télécommande
pointée correctement vers la
fenê-tre de réception du signal
de l’appareil.
Vérifier si les piles de la télé-
commande sont mises en
place et si elles sont alignées
correctement selon leur
polarité.
F-16
AVANT D’APPELER LE SERVICE APRES-VENTE
Les conditions suivantes ne signifient pas un mauvais fonctionnement de
l’appareil
L’APPAREIL NE FONCTIONNE PAS
L’appareil ne fonctionne pas s’il est allumé
immédia-tement après sa mise hors circuit. L’appareil
ne fonction-ne pas immédiatement après le
changement de mode. Cela sert à protéger le
mécanisme interne. Attendre 3 minutes avant de
faire fonctionner l’appareil.
L’APPAREIL N’ENVOIE PAS D’AIR CHAUD
L’appareil est en cours de préchauffage ou de dégivrage.
BRUIT DE CRAQUEMENT
L’appareil risque de produire un bruit de craquement.
Ce son est généré par la friction du panneau avant
et par la dilatation ou la connexion des autres
composants dues à une variation de température.
Si l’appareil semble mal fonctionner, vérifier les points suivants avant de faire
appel au service après-vente.
SI L’APPAREIL NE REFROIDIT PAS (OU NE CHAUFFE PAS) LA PIECE CORRECTEMENT
Vérifier les filtres. S’ils sont
encrassés, les nettoyer.
Vérifier l’unité extérieure pour
s’assurer que rien ne bloque
l’entrée ou la sortie d’air.
Vérifier si le thermostat est
réglé correctement.
S’assurer que les fenêtres
et les portes sont bien
fermées.
La présence d’un grand nombre
de personnes dans la pièce peut
empêcher que l’appareil atteigne
la température désirée.
Vérifier si des appareils
générateur de chaleur sont
utilisés dans la pièce.
ODEURS
Des odeurs de moquette et de meubles qui entrent
dans l’appareil et des odeurs des composants
internes du climatiseur au début de l’installation
peuvent être dégagées de l’appareil.
BRUIT DE BRUISEMENT
Le bruit de bruissement doux est le son du
réfri-gérant se propageant à l’intérieur de
l’appareil.
VAPEUR D’EAU
• Dans les modes FRAIS et SEC, de la va-
peur d’eau peut parfois être constatée
à la bouche de sortie d’air en raison de
la différence entre la température
ambiante et celle de l’air déchargé par
l’appareil.
• En mode CHAUFFAGE, de la vapeur
d’eau risque de s’échapper de l’unité
extérieure pendant le dégivrage.
Contacter le service aprèsvente si les voyants OPERATION et TIMER clignotent sur le panneau d’indicateurs.
ODEUR EMISE PAR LA SORTIE
D’AIR DU PLASMACLUSTER
C’est l’odeur d’ozone générée par l’ioni-
sateur. La densité d’ozone est très faible
et n’affectera pas votre santé. L’ozone
dispersée dans l’air se décomposera
rapidement et la densité dans la pièce
n’augmentera pas.
SI L’APPAREIL NE FONCTIONNE PAS
•Vérifier si le disjoncteur a été déclenché ou si le fusible est grillé.
•Vérifier que les volets d’aération sont posés correctement. Tous les voyants du panneau
d’indicateurs clignoteront si les volets d’aération ne sont pas correctement installés.
UN LEGER BRUISSEMENT EST EMIS
Il s’agit d’un son émis par l’unité lorsqu’elle génère
des ions groupés.
±∂±∂
±∂±∂
±∂
W½UOB« wM ¡UŽb²Ý« q³W½UOB« wM ¡UŽb²Ý« q³
W½UOB« wM ¡UŽb²Ý« q³W½UOB« wM ¡UŽb²Ý« q³
W½UOB« wM ¡UŽb²Ý« q³
“UN'« w qKš w≈ dOAð ô WOU²« ôU(«“UN'« w qKš w≈ dOAð ô WOU²« ôU(«
“UN'« w qKš w≈ dOAð ô WOU²« ôU(«“UN'« w qKš w≈ dOAð ô WOU²« ôU(«
“UN'« w qKš w≈ dOAð ô WOU²« ôU(«
qLFð ô …bŠu«qLFð ô …bŠu«
qLFð ô …bŠu«qLFð ô …bŠu«
qLFð ô …bŠu«
«—u UNKOGAð - «–≈ …bŠu« qLFð sÎs ÆUNUI¹≈ bFÐ
«—u …bŠu« qLFðÎWOü« W¹UL( «c¼ Æl{u« dOOGð bFÐ
Æ…bŠu« qOGAð q³ ozUœ ≥ dE²½« ÆWOKš«b«
`z«Ë—`z«Ë—
`z«Ë—`z«Ë—
`z«Ë—
…bŠu« v≈ XKšœ w²« ÀUŁ_«Ë œU−« `z«Ë—
Ãdð b ¡«uN« nOJ* WOKš«b« U½uJ*« W×z«—Ë
ÆVOd²« s vË_« …d²H« ¡UMŁ√ …bŠu« s
WN¼ uBÐ ¡U{u{WN¼ uBÐ ¡U{u{
WN¼ uBÐ ¡U{u{WN¼ uBÐ ¡U{u{
WN¼ uBÐ ¡U{u{
qzUÝ obð u u¼ ¨rŽU½ WN¼ u
Æ…bŠu« qš«œ b¹d³²«
¡U*« d³ð¡U*« d³ð
¡U*« d³ð¡U*« d³ð
¡U*« d³ð
• b¹d³²« l{Ë wCOOL ·U'«Ë DRYb ¨
w ÊUOŠ_« iFÐ ¡U*« d³ð WEŠö r²¹
Wł—œ 5Ð ·ö²šô« V³Ð ¡«uN« Ãd
WDÝ«uÐ ¡«uN« œdÞË WdG« …—«dŠ
Æ…bŠu«
• 5²« l{Ë vKŽ qOGA²« bMŽHEATÆ
…bŠu« ×Uš v≈ ¡U*« —UÐ Ãd¹ b
ÆZK¦« WЫ–« ¡UMŁ«
dOJð ¡U{u{dOJð ¡U{u{
dOJð ¡U{u{dOJð ¡U{u{
dOJð ¡U{u{
dOJð ¡U{u{ u …bŠu« —bBð b.«c¼ —bB¹
lÝuðË WOU_« WŠuK« „UJ²Š« W−O²½ uB«
OGð V³Ð Ídš_« U½uJ*«
^
…—«d(« Wł—œ d.
iHM 5MÞ …bŠu« s YF³M¹iHM 5MÞ …bŠu« s YF³M¹
iHM 5MÞ …bŠu« s YF³M¹iHM 5MÞ …bŠu« s YF³M¹
iHM 5MÞ …bŠu« s YF³M¹
bOuð ¡UMŁ√ …bŠu« s YF³M¹ uB« «c¼
U½u¹_« UŽuL−.
¡«u¼ Ãd s YF³Mð w²« W×z«d«¡«u¼ Ãd s YF³Mð w²« W×z«d«
¡«u¼ Ãd s YF³Mð w²« W×z«d«¡«u¼ Ãd s YF³Mð w²« W×z«d«
¡«u¼ Ãd s YF³Mð w²« W×z«d«
U“ö³« UŽuL−U“ö³« UŽuL−
U“ö³« UŽuL−U“ö³« UŽuL−
U“ö³« UŽuL−
s¹Q²« WOKLŽ s "UM« ÊË“Ë_« W×z«— Ác¼.
«bł WCHM ÊË“Ë_« WU¦ÎÍ√ UN fOË ¨
p²× wKŽ TÝ dOŁQð.Íc« ÊË“Ë_«
UF¹dÝ qKײ¹ ¡«uN« w YF³M¹Îb¹eð sË ¨
WdG« w t²U¦.
W½UOB« wM ¡UŽb²Ý« q³ WOU²« ◊UIM« h׫ ¨qKš UNÐ …bŠu« Ê√ p «bÐ «–≈W½UOB« wM ¡UŽb²Ý« q³ WOU²« ◊UIM« h׫ ¨qKš UNÐ …bŠu« Ê√ p «bÐ «–≈
W½UOB« wM ¡UŽb²Ý« q³ WOU²« ◊UIM« h׫ ¨qKš UNÐ …bŠu« Ê√ p «bÐ «–≈W½UOB« wM ¡UŽb²Ý« q³ WOU²« ◊UIM« h׫ ¨qKš UNÐ …bŠu« Ê√ p «bÐ «–≈
W½UOB« wM ¡UŽb²Ý« q³ WOU²« ◊UIM« h׫ ¨qKš UNÐ …bŠu« Ê√ p «bÐ «–≈.
qOGA²« sŽ …bŠu« XIHš« «–≈qOGA²« sŽ …bŠu« XIHš« «–≈
qOGA²« sŽ …bŠu« XIHš« «–≈qOGA²« sŽ …bŠu« XIHš« «–≈
qOGA²« sŽ …bŠu« XIHš« «–≈
• “uOH« ‚«d²Š« - Ë√ tUI¹≈ - WOzUÐdNJ« …dz«b« lÞU ÊU «–≈ h׫.
• r «–≈ iuð ·uÝ «dýR*« WŠu `OÐUB lOLł Æ`O× qJAÐ W³d g¹d« …bŠË Ê√ s bQð
ÆbOł qJAÐ g¹d« …bŠË VOdð r²¹
…¡UHJÐ WdG« ©5ð® b¹d³ð w …bŠu« XIHš√ «–≈…¡UHJÐ WdG« ©5ð® b¹d³ð w …bŠu« XIHš√ «–≈
…¡UHJÐ WdG« ©5ð® b¹d³ð w …bŠu« XIHš√ «–≈…¡UHJÐ WdG« ©5ð® b¹d³ð w …bŠu« XIHš√ «–≈
…¡UHJÐ WdG« ©5ð® b¹d³ð w …bŠu« XIHš√ «–≈
wUB*« h׫.X½U «–≈
ÆUNHOEM²Ð r ¨W²
»«uÐ_«Ë c«uM« Ê√ s bQð
ÆWLJ× …—uBÐ WIKG
s bQ²K WOł—U)« …bŠu« h׫
Ë√ qšb oOF¹ ełUŠ œułË ÂbŽ
Æ¡«uN« Ãd
qš«œ ’Uýô« s dO³ œbŽ œułË
s …bŠu« oOF¹ Ê√ sJ1 WdG«
ÆWÐužd*« …—«d(« Wł—œ w≈ ‰uu«
qł√ s U²Ýud¦« h׫
ÆW×O× …—uBÐ j³C«
…eNł√ „UM¼ ÊU «–≈ U h׫
ÆWdG« w qLFð …—«dŠ bOuð
bFÐ sŽ rJײ« tłu …—Uý≈ ‰U³I²Ý« w …bŠu« XIHš√ «–≈bFÐ sŽ rJײ« tłu …—Uý≈ ‰U³I²Ý« w …bŠu« XIHš√ «–≈
bFÐ sŽ rJײ« tłu …—Uý≈ ‰U³I²Ý« w …bŠu« XIHš√ «–≈bFÐ sŽ rJײ« tłu …—Uý≈ ‰U³I²Ý« w …bŠu« XIHš√ «–≈
bFÐ sŽ rJײ« tłu …—Uý≈ ‰U³I²Ý« w …bŠu« XIHš√ «–≈
U¹—UDÐ X½U «–≈ U h׫
X׳√ bFÐ sŽ rJײ« tłu
ÆWHOF{Ë W1b
Èdš√ …d …—Uýù« ‰UÝ—≈ ‰ËUŠ
bFÐ sŽ rJײ« tłu ‰ULF²ÝUÐ
łu
Ò
…cU½ ÁU&UÐ W×O× …—uBÐ UN
Æ…bŠuK …—Uýù« ‰U³I²Ý«
U¹—UDÐ X½U «–≈ U h׫
³d bFÐ sŽ rJײ« tłu
Ò
l W
…—uBÐ »UD_« …«–U×
ÆW×O×
qOGA²« ÕU³B iu¹ UbMŽ Wb)UÐ ‰UBðô« vłd¹OPERATION XR*« ÕU³BË TIMERWŠu vKŽ
Æ«dýR*«
sšUÝ ¡«u¼ …bŠu« s YF³M¹ ôsšUÝ ¡«u¼ …bŠu« s YF³M¹ ô
sšUÝ ¡«u¼ …bŠu« s YF³M¹ ôsšUÝ ¡«u¼ …bŠu« s YF³M¹ ô
sšUÝ ¡«u¼ …bŠu« s YF³M¹ ô
ÆZK¦« WЫ–« Ë√ o³*« 5²« l{Ë w …bŠu«
±µ±µ
±µ±µ
±µ
W½UOW½UO
W½UOW½UO
W½UO
ÍPÐ ÂUOI« q³ WOzUÐdNJ« …dz«b« lÞU ·UI¹SÐ r Ë√ Í—«b'« Ãd<« s —UO²« pKÝ qB s bQðÍPÐ ÂUOI« q³ WOzUÐdNJ« …dz«b« lÞU ·UI¹SÐ r Ë√ Í—«b'« Ãd<« s —UO²« pKÝ qB s bQð
ÍPÐ ÂUOI« q³ WOzUÐdNJ« …dz«b« lÞU ·UI¹SÐ r Ë√ Í—«b'« Ãd<« s —UO²« pKÝ qB s bQðÍPÐ ÂUOI« q³ WOzUÐdNJ« …dz«b« lÞU ·UI¹SÐ r Ë√ Í—«b'« Ãd<« s —UO²« pKÝ qB s bQð
ÍPÐ ÂUOI« q³ WOzUÐdNJ« …dz«b« lÞU ·UI¹SÐ r Ë√ Í—«b'« Ãd<« s —UO²« pKÝ qB s bQð
ÆW½UO ‰ULŽ√ÆW½UO ‰ULŽ√
ÆW½UO ‰ULŽ√ÆW½UO ‰ULŽ√
ÆW½UO ‰ULŽ√
wUB*« nOEMðwUB*« nOEMð
wUB*« nOEMðwUB*« nOEMð
wUB*« nOEMð5Žu³Ý√ q wUB*« nOEMð V−¹
±±
±±
±
≤≤
≤≤
≤
…bŠu« ·UI¹SÐ r
wUB*« ŸeMÐ r
ÆWOU_« WŠuK« `²«
ÆUNMOQð pH WHÐ ¡«uN« wUB lœ«
ÆUNŽeM qHÝ_ ¡«uN« wUB V×Ý«
wUB*« nOEM²Ð r
X½U «–≈ ¨—U³G« ŸeM WOzUÐdN WMJ qLF²Ý«
‰uK×Ë T«œ ¡U ‰ULF²ÝUÐ UNKž√ ¨W² wUB*«
q³ qE« w wUB*« nOH−²Ð r Ɖb²F nOEMð
ÆrN³Odð …œUŽ≈
wUB*« VOdð bŽ√
ÆWOK_« rNF{«u w wUB*« VOdð bŽ√
ÆWOU_« WŠuK« oKž«
w UNMOQ² ÂUJŠSÐ WŠuK Íed*« ¡e'« lœ«
ÆUNF{u
¥¥
¥¥
¥
≥≥
≥≥
≥
bFÐ sŽ rJײ« tłuË …bŠu« nOEMðbFÐ sŽ rJײ« tłuË …bŠu« nOEMð
bFÐ sŽ rJײ« tłuË …bŠu« nOEMðbFÐ sŽ rJײ« tłuË …bŠu« nOEMð
bFÐ sŽ rJײ« tłuË …bŠu« nOEMð
• ÆWLŽU½ ‘UL WFD ‰ULF²ÝUÐ rN׫
• Æ“UN'« w —d{ Ë√ WOzUÐdN Wb ¡U*« V³¹ b ÆrNOKŽ ¡U*« VJÝ Ë√ ‘dÐ …dýU³ rIð ô
• ÆW¹u qOU× Ë√ oOŠU ¨dMŁ ¨sšUÝ ¡U qLF²ð ô
‰ULF²Ý« rÝu ¡UN²½« bFÐ W½UOB«‰ULF²Ý« rÝu ¡UN²½« bFÐ W½UOB«
‰ULF²Ý« rÝu ¡UN²½« bFÐ W½UOB«‰ULF²Ý« rÝu ¡UN²½« bFÐ W½UOB«
‰ULF²Ý« rÝu ¡UN²½« bFÐ W½UOB«
¡«uN« nOJ¡«uN« nOJ
¡«uN« nOJ¡«uN« nOJ
¡«uN« nOJ
±±
±±
±
≥≥
≥≥
≥
≤≤
≤≤
≤
±±
±±
±
≥≥
≥≥
≥
≤≤
≤≤
≤
jI WŠËd*« l{Ë w …bŠu« qOGA²Ð r
FAN ONLYU³¹dIð Âu¹ nB½ …b* ÎÕULK
ÆÂUð qJAÐ nOH−²UÐ WOx
Æ…bŠu« fÐU qB√Ë qOGA²« ·UI¹SÐ r
«–≈ ¨WOzUÐdNJ« …dz«b« lÞU ·UI¹SÐ r
Æ¡«uN« nOJ* hB lÞU „UM¼ ÊU
ÆUN³Odð bŽ√ rŁ ¨wUB*« nOEM²Ð r
‰ULF²Ý« rÝu ¡UN²½« q³ W½UOB«‰ULF²Ý« rÝu ¡UN²½« q³ W½UOB«
‰ULF²Ý« rÝu ¡UN²½« q³ W½UOB«‰ULF²Ý« rÝu ¡UN²½« q³ W½UOB«
‰ULF²Ý« rÝu ¡UN²½« q³ W½UOB«
¡«uN« nOJ¡«uN« nOJ
¡«uN« nOJ¡«uN« nOJ
¡«uN« nOJ
XO ¡«uN« wUB Ê√ s bQð
ÆW²
Ë√ qšb oOF¹ Tý œułË ÂbŽ s bQð
Æ¡«uN« Ãd
…—uBÐ wł—U)« VOd²« ·— h׫
UN²O³¦ð s bQ²KË qP²« h×H W¹—Ëœ
ÆÂUJŠSÐ UNF{u w
±±
±±
±
≤≤
≤≤
≤
≥≥
≥≥
≥
±±
±±
±
≤≤
≤≤
≤
≥≥
≥≥
≥
±±
±±
±
≤≤
≤≤
≤
≥≥
≥≥
≥
±±
±±
±
≤≤
≤≤
≤
≥≥
≥≥
≥
wÐdŽwÐdŽ
wÐdŽwÐdŽ
wÐdŽ

—e« jG{«Ë WOKš«b« …bŠuK WOU_« WŠuK« l—«
AUX.ÆqOGA²« WŠu vKŽ
• qOGA²« ÕU³B ¡wCOÝOPERATIONdLŠ√ © ®
l{u« w qOGA²UÐ …bŠu« √b³²ÝË …bŠu« vKŽ
wzUIK²«AUTOÆ
• l{u« v≈ …—«d(« Wł—œË WŠËd*« WŽdÝ W¾ONð r²¹
wzUIK²«AUTOÆ
±¥±¥
±¥±¥
±¥
bŽU l{ËbŽU l{Ë
bŽU l{ËbŽU l{Ë
bŽU l{Ë
«du² bFÐ sŽ rJײ« tłu ÊuJ¹ ô UbMŽ l{u« «c¼ qLF²Ý««du² bFÐ sŽ rJײ« tłu ÊuJ¹ ô UbMŽ l{u« «c¼ qLF²Ý«
«du² bFÐ sŽ rJײ« tłu ÊuJ¹ ô UbMŽ l{u« «c¼ qLF²Ý««du² bFÐ sŽ rJײ« tłu ÊuJ¹ ô UbMŽ l{u« «c¼ qLF²Ý«
«du² bFÐ sŽ rJײ« tłu ÊuJ¹ ô UbMŽ l{u« «c¼ qLF²Ý«
ÎÎ
ÎÎ
Î
ÆÆ
ÆÆ
Æ
qOGA²KqOGA²K
qOGA²KqOGA²K
qOGA²K
qOGA²« ·UI¹ùqOGA²« ·UI¹ù
qOGA²« ·UI¹ùqOGA²« ·UI¹ù
qOGA²« ·UI¹ù
Æ —e« jG{«AUXÆÈdš√ …d qOGA²« WŠu wKŽ
• qOGA²« ÕU³B THDMOÝOPERATIONdLŠ_« © ®
ÆqOGA²« sŽ …bŠu« nu²²ÝË …bŠu« vKŽ
∫WEŠö∫WEŠö
∫WEŠö∫WEŠö
∫WEŠö
—e« jG{ - «–≈AUX.nu²²Ý ¨ÍœUF« qOGA²« ¡UMŁ√
ÆqLF« sŽ …bŠu«
W¹—UO²š« «Ëœ√W¹—UO²š« «Ëœ√
W¹—UO²š« «Ëœ√W¹—UO²š« «Ëœ√
W¹—UO²š« «Ëœ√
¡«uN« WOIMð d²K¡«uN« WOIMð d²K
¡«uN« WOIMð d²K¡«uN« WOIMð d²K
¡«uN« WOIMð d²K
W×z«—Ë WÐdð_« ¡«uN« WOIMð d²K q¹e¹ ¨¡«uN« nOJ qOGAð ¡UMŁ√
ÆnOE½ ¡«u¼ qšb¹Ë ¡«uN« s ÊUšb«
¡«uN« WOIMð d²K l U¹d²J³K …œUC …œU w¼Ë XOðUÐ_« …œU Âb²ð
ÆÈdš_« rOŁ«d'«Ë UÝËdOH« ’UB²« lM w
≥ s …bŠ«Ë …d Âb²¹ Íc« ŸuM« s d²KH« ‰«b³²Ý« …d²-Æ—uNý ∂
Æd²KH« «c¼ ¡«dA wK;« pKOuÐ qBð«
AUX.
Ÿu½ Ÿu½
Ÿu½ Ÿu½
Ÿu½AZ-F900B
wÐdŽwÐdŽ
wÐdŽwÐdŽ
wÐdŽ
±≥±≥
±≥±≥
±≥
qOGA²« XRqOGA²« XR
qOGA²« XRqOGA²« XR
qOGA²« XR
UOzUIKð …bŠu« qOGAð r²¹ ·uÝÎUI³Þ ÎÆpÐ WU)« j³C« ŸU{Ë_
ÆWŽUÝ ±≤ vB√ b×ÐË ©WIOœ ≥∞® WŽUÝ nB½ v½œ√ b×Ð XR*« …d² j³{ sJ1
j³{ r²¹ ¨WŽUÝ ±≤ v≈ ±∞ sË ©WIOœ ≥∞® WŽUÝ nB½ …œU¹eÐ j³C« pMJ1 ¨nB½Ë UŽUÝ π v²Š
Æ…bŠ«Ë WŽUÝ ‰bF0 …œU¹e«
…—Uýù« ‰U³I²Ý« …cU½ v≈ bFÐ sŽ rJײ« tłu tłË
Æ…bŠu« vKŽ
±±
±±
±
qOGA²« XR © ® —e« jG{«TIMER ONÆ
• —e« vKŽ jGC« ¡UMŁ√ se« j³{ dOG²¹ ·uÝ
ÆwK¹ UL
j³CK tOKŽ jGC« w dL²Ý«Ë —e« jG{«
Æl¹d«
• XR*« ÕU³B*« ¡wCOÝTIMERdH_« © ®
Æ…bŠu« vKŽ œułu*«
• UNU³I²Ý« bMŽ VOÐ u —«bSÐ …bŠu« ÂuIð
Æ…—Uýû
• {³j «es Ýu· ¹²r ðMU“OUÎ Fd÷ «es
«*²³IwÆ
WŠËd*« WŽdÝ j³{ ¨…—«d(« Wł—œ ¨l{u« —U²š«
ÆW³žd« VŠ U“ö³« UŽuL− qOGAðË
• qOGA²« XR WDÝ«uÐ …—«d(« Wł—œ j³{ bMŽ
TIMER ONWýUA« wKŽ …—«d(« Wł—œ ÷dFð ·uÝ ¨
Æse« ÷dŽ v≈ œuFð rŁ w½«uŁ µ …d²H
• UI³Þ …bŠu« qLFð ·uÝ ¨j³C« dOGð r «–≈Îdš_
ÆUNOKŽ X½U j³{ ŸU{Ë√
• WdG« sJL² j³C« s“ q³ …bŠu« qLFð ·uÝ
UNO »užd*« …—«d(« Wł—œ w≈ ‰uu« s
©ÿUIO²Ýô« WHOþË® ÆZd³*« se« WDÝ«uÐ
∫‰U¦∫‰U¦
∫‰U¦∫‰U¦
∫‰U¦ÊuJð Ê√ Vždð UbMŽ
UI³Þ WdG« …—«dŠ Wł—œÎ
µ bFÐ p²³žd.ÆWŽUÝ ∂
qOGA²«Ë XR*« j³C UEŠöqOGA²«Ë XR*« j³C UEŠö
qOGA²«Ë XR*« j³C UEŠöqOGA²«Ë XR*« j³C UEŠö
qOGA²«Ë XR*« j³C UEŠö
• …d*« w bFÐ sŽ rJײ« tłu WýUý vKŽ dNE¹ ·uÝË …d«c« w kH×¹ ·uÝ seK dOš_« j³C«
·UI¹ô« XR j³{ bMŽ WOU²«TIMER OFF qOGA²« XR Ë√ TIMER ONÆ
• ·UI¹ô« XR j³{ sJ1 ôTIMER OFF qOGA²« XRË TIMER ONUF ÎÆ
XRLK dOš_« j³C«TIMERÆjAM¹ ·uÝ Íc« u¼
• …bŠ«Ë WŽUÝ ·UI¹ô« XR j³{ bMŽONE-HOUR OFF TIMER«du² ÊuJð s ¨Î ·UI¹ô« XR TIMER OFF
qOGA²« XRËTIMER ONÆ
• …bŠ«Ë WŽUÝ ·UI¹ô« XR j³{ bMŽONE-HOUR OFF TIMER ·UI¹ô« XR ¡UMŁ√ TIMER OFFXR Ë√
qOGA²«TIMER ON ·UI¹ô« XR ¡UG≈ r²¹ ·uÝ ¨TIMER OFF qOGA²« XR Ë√ TIMER ONÆ
MODE
DISPLAY MODE
FAN1h
SWING
CANCEL
TEMP.
TEMP.
FAN TIMER
±±
±±
±
0.5h
1.0h
1.5h
10h
11h
12h
wÐdŽwÐdŽ
wÐdŽwÐdŽ
wÐdŽ
·UI¹ô« XR © ® —e« jG{«TIMER OFFÆ
• UL —e« vKŽ jGC« ¡UMŁ√ se« j³{ dOG²¹ ·uÝ
wK¹.
Æl¹d« j³CK tOKŽ jGC« w dL²Ý«Ë —e« jG{«
• XR*« ÕU³B*« ¡wCOÝTIMERœułu*« dH_« © ®
Æ…bŠu« vKŽ
• UNU³I²Ý« bMŽ VOÐ u —«bSÐ …bŠu« ÂuIð
Æ…—Uýû
• UO“UMð r²¹ ·uÝ se« j³{ÎÆwI³²*« se« ÷dF
±≤±≤
±≤±≤
±≤
XR*UÐ qOGA²«XR*UÐ qOGA²«
XR*UÐ qOGA²«XR*UÐ qOGA²«
XR*UÐ qOGA²«
·UI¹ù« XR·UI¹ù« XR
·UI¹ù« XR·UI¹ù« XR
·UI¹ù« XR
UOzUIKð …bŠu« QHDð ·uÝÎUI³Þ ÎÆpÐ WU)« j³C« ŸU{Ë_
ÆWŽUÝ ±≤ vB√ b×Ð ©WIOœ ≥∞® WŽUÝ nB½ 5Ð XR*« …d² j³{ sJ1
j³{ r²¹ ¨WŽUÝ ±≤ v≈ ±∞ sË ©WIOœ ≥∞® WŽUÝ nB½ …œU¹eÐ j³C« pMJ1 nB½Ë UŽUÝ π v²Š
Æ…bŠ«Ë WŽUÝ ‰bF0 …œU¹e«
…—Uýù« ‰U³I²Ý« …cU½ v≈ bFÐ sŽ rJײ« tłu tłË
Æ…bŠu« vKŽ
±±
±±
±
∫‰U¦∫‰U¦
∫‰U¦∫‰U¦
∫‰U¦qOGA²« ·UI¹≈ w Vždð UbMŽ
µ bFÐ.ÆbFÐ ULO WŽUÝ ≤
qOGA²« ·UI¹≈ XR ‰uŠ Uþu×KqOGA²« ·UI¹≈ XR ‰uŠ Uþu×K
qOGA²« ·UI¹≈ XR ‰uŠ Uþu×KqOGA²« ·UI¹≈ XR ‰uŠ Uþu×K
qOGA²« ·UI¹≈ XR ‰uŠ Uþu×K
·UI¹ù« XR l{Ë j³{ bMŽTIMER OFFUOzUIKð r²¹ ¨Î
`³Bð Ê√ s WdG« lM* …—«d(« Wł—œ t¾ONð j³{
Æpu½ ¡UMŁ√ …œËd³« …b¹bý Ë√ W½u« …b¹bý
©WOzUIK²« ÂuM« WHOþË®
b¹d³²« l{Ë b¹d³²« l{Ë
b¹d³²« l{Ë b¹d³²« l{Ë
b¹d³²« l{ËCOOL
·UH'«Ø ·UH'«Ø
·UH'«Ø ·UH'«Ø
·UH'«ØDRY
∫∫
∫∫
∫
• œ«œeð ¨XR*UÐ qOGA²« √b³¹ Ê√ bFÐ …bŠ«Ë WŽUÝ
± …—«d(« Wł—œ W¾ONð°Ê«eO W¾ONð s vKŽ√ Â
ÆwK_« …—«d(«
5²« l{Ë 5²« l{Ë
5²« l{Ë 5²« l{Ë
5²« l{Ë:HEAT
• Wł—œ iHMð ¨XR*« qOGAð ¡bÐ bFÐ …bŠ«Ë WŽUÝ
◊u³C*« Wł—b« s q√ W¹u¾ Uł—œ ≥ …—«d(«
ÆU²Ýud²« UNOKŽ
XR*« l{Ë ¡UGùXR*« l{Ë ¡UGù
XR*« l{Ë ¡UGùXR*« l{Ë ¡UGù
XR*« l{Ë ¡UGù
¡UG« —e« jG{«.CANCEL
• ÕU³B*« THDMOÝ
XR*«TIMER© ®
vKŽ œułu*« dH_«
Æ…bŠu«
XR*« j³{ dOOG²XR*« j³{ dOOG²
XR*« j³{ dOOG²XR*« j³{ dOOG²
XR*« j³{ dOOG²
XR*« —“ jG{«TIMER¨ÁdOOGð w Vždð Íc«
·UI¹ô« XR®OFF TIMERqOGA²« XR Ë√
TIMER ONÆj³C« s“ dOžË ©
±±
±±
±
∫WEŠö∫WEŠö
∫WEŠö∫WEŠö
∫WEŠö
• l{u« ¡UMŁ√ WOzUIK²« ÂuM« WHOþË qLFð s
jI WŠËd.FAN ONLY
0.5h
1.0h
1.5h
10h
11h
12h
MODE
DISPLAY MODE
FAN1h
SWING
CANCEL
TEMP.
TEMP.
FAN TIMER
DISPLAY MODE
FAN1h
SWING
CANCEL
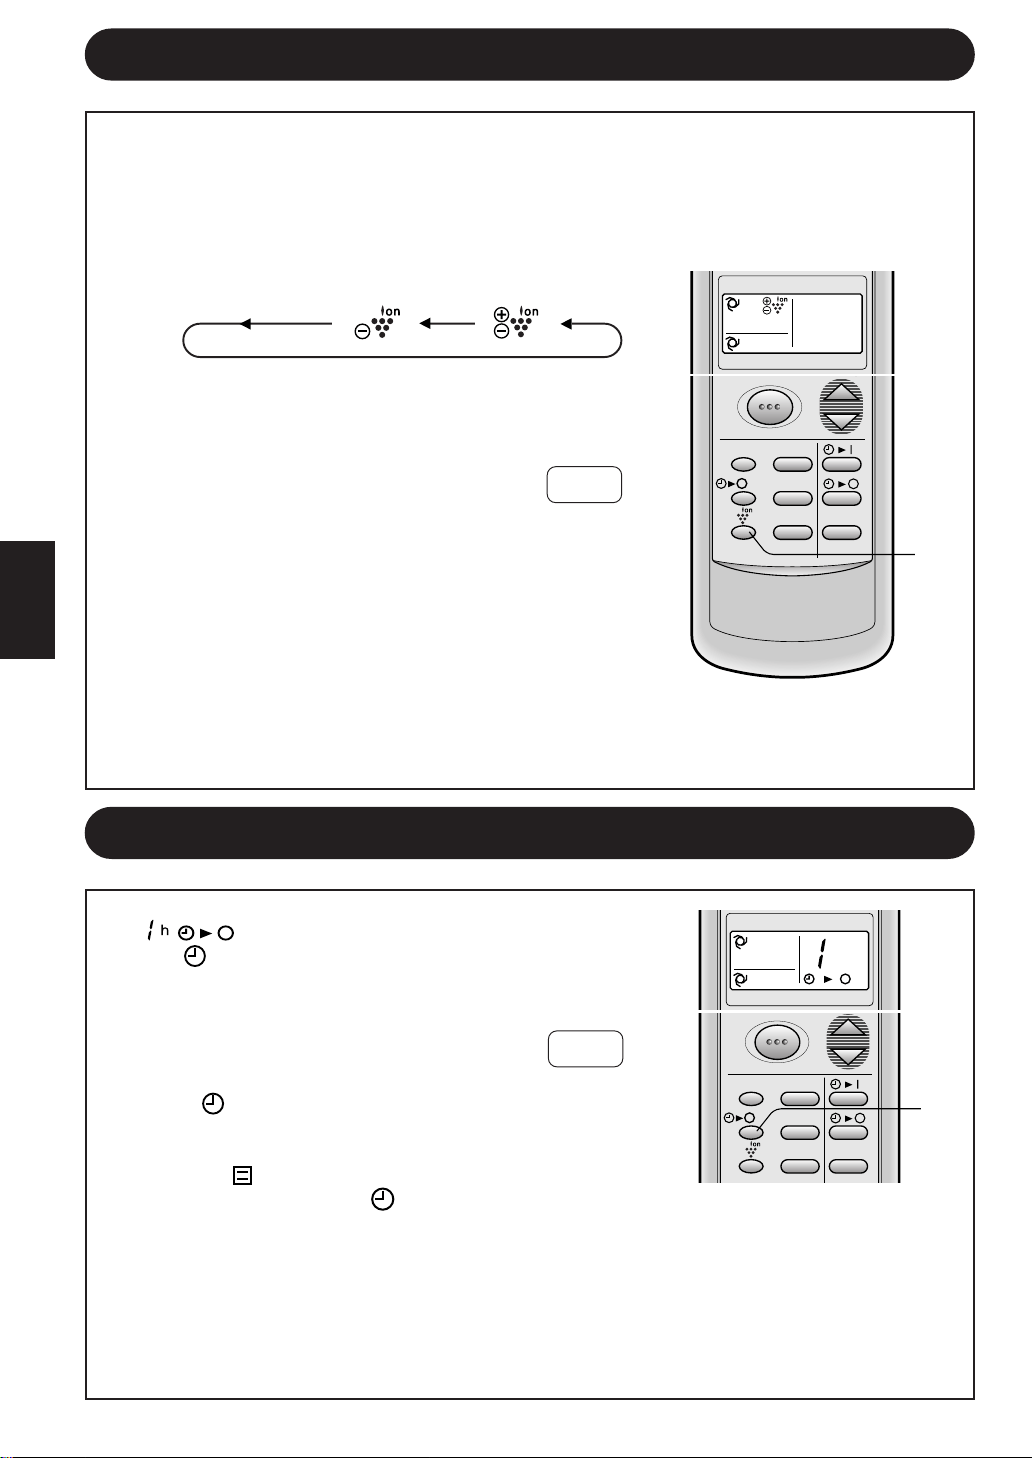
wÐdŽ
—“ vKŽ jG{«CANCELÆ¡UGù«
• XR*« ÕU³B QHD¹ ·uÝTIMERvKŽ © ® wUIðd³«
Æ…bŠu«
qOGAð —“ vKŽ jGCUÐ …bŠu« nË√ ¨Ë√/ ·UI¹« ON/OFFÆ
• qOGA²« ÕU³B QHD¹ ·uÝOPERATIONwUIðd³« © ®
XR*« ÕU³BËTIMERÆdLŠ_« © ®
…bŠ«Ë WŽUÝ ·UI¹ô« XR —e« jG{«ONE-HOUR OFF TIMERÆ
• ¢ ¢ …—U³F« ÷dFÐ bFÐ sŽ rJײ« tłu ÂuI¹.
• R*« ÕU³B ¡UC¹ ·uÝ XTIMER ® wUIðd³«
vKŽ©
Æ…bŠu«
• Æ…bŠ«Ë WŽUÝ bFÐ qOGA²« sŽ …bŠu« nu²²Ý
±±
±±
±
±±±±
±±±±
±±
U“ö³« lOL& qOGAðU“ö³« lOL& qOGAð
U“ö³« lOL& qOGAðU“ö³« lOL& qOGAð
U“ö³« lOL& qOGAð
±±
±±
±
U“ö³« lOL& —“ vKŽ jG{« ¨qOGA²« ¡UMŁ√
PLASMACLUSTERÆl{u« —UO²šô
• qOGAð l{Ë bMŽAIR CLEAN‚—“_« ÕU³B*« ¡UC¹ ·uÝ ¨
U“ö³« lOL&PLASMACLUSTER Æ…bŠu« vKŽ
• ‘UF²½« qOGAð bMŽION BALANCEÕU³B*« ¡UC¹ ·uÝ ¨
U“ö³« lOL& dCš_«PLASMACLUSTERÆ…bŠu« vKŽ
U“ö³« lOL& —“ jG{«PLASMACLUSTERe— wH²¹ v²Š
U“ö³« lOL&PLASMACLUSTERrJײ« tłu WýUý vKŽ s
ÆbFÐ sŽ
• U“ö³« lOL& ÕU³B QHD¹ ·uÝPLASMACLUSTERvKŽ
Æ…bŠu«
∫WEŠö∫WEŠö
∫WEŠö∫WEŠö
∫WEŠö
• U“ö³« lOL& qOGAð j³{PLASMACLUSTERr²¹ ·uÝ
…d*« w ¨l{u« fH½ vKŽ qLF¹ ·uÝË …d«c« w tEHŠ
Æ¡«uN« nOJ qOGAð bMŽ WOU²«
• U“ö³« lOL& ÕU³B ¡UHÞùPLASMACLUSTERvKŽ jG{« ¨
÷dF« —“DISPLAYÆ
…bŠ«Ë WŽUÝ ·UI¹≈ XR…bŠ«Ë WŽUÝ ·UI¹≈ XR
…bŠ«Ë WŽUÝ ·UI¹≈ XR…bŠ«Ë WŽUÝ ·UI¹≈ XR
…bŠ«Ë WŽUÝ ·UI¹≈ XR
…bŠ«Ë WŽUÝ ·UI¹ô« XR W¾ONð bMŽ …bŠ«Ë WŽUÝ ·UI¹ô« XR W¾ONð bMŽ
…bŠ«Ë WŽUÝ ·UI¹ô« XR W¾ONð bMŽ …bŠ«Ë WŽUÝ ·UI¹ô« XR W¾ONð bMŽ
…bŠ«Ë WŽUÝ ·UI¹ô« XR W¾ONð bMŽ
ONE-HOUR OFF TIMER
Æ…bŠ«Ë WŽUÝ bFÐ qOGA²« sŽ …bŠu« nu²²Ý ¨Æ…bŠ«Ë WŽUÝ bFÐ qOGA²« sŽ …bŠu« nu²²Ý ¨
Æ…bŠ«Ë WŽUÝ bFÐ qOGA²« sŽ …bŠu« nu²²Ý ¨Æ…bŠ«Ë WŽUÝ bFÐ qOGA²« sŽ …bŠu« nu²²Ý ¨
Æ…bŠ«Ë WŽUÝ bFÐ qOGA²« sŽ …bŠu« nu²²Ý ¨
¡UGû¡UGû
¡UGû¡UGû
¡UGû
¡UGû¡UGû
¡UGû¡UGû
¡UGû
±±
±±
±
∫UEŠö∫UEŠö
∫UEŠö∫UEŠö
∫UEŠö
•
…bŠ«Ë WŽUÝ ·UI¹ô« XR qOGAðONE-HOUR OFF TIMER qOGA²« XR qOGAð vKŽ W¹uË_« t TIMER ON
·UI¹ô« XRË.TIMER OFF
•
…bŠ«Ë WŽUÝ ·UI¹ô« XR j³{ bMŽONE-HOUR OFF TIMERWŽUÝ …b* …bŠu« qLF²Ý ¨…bŠu« ·UI¹≈ ¡UMŁ√
oÐU« j³CUÐ jI …bŠ«Ë.
•
…bŠ«Ë WŽUÝ ·UI¹ô« XR qLŽ q³ Èdš√ WOU{≈ WŽUÝ …b* …bŠu« qOGAð w X³ž— «–≈ONE-HOUR OFF
TIMER …bŠ«Ë WŽUÝ ·UI¹ô« XR —“ jG{« ¨ONE-HOUR OFF TIMERqOGA²« ¡UMŁ√ Èdš√ …d .
‰uL;« dDH« s qKIð ·uÝ ¡«uN« w oKDð w²« U½u¹_« UŽuL− ∫¡«uN« nOEMð WOKLŽ
Æ¡«uN« WDÝ«uÐ
Æb¹«e² ‰bF0 W³U« U½u¹_« ‚öÞ« r²¹ ·uÝ ∫U½u¹_« Ê“«uð WOKLŽ
±±
±±
±
MODE TEMP.
FAN TIMER
DISPLAY MODE
FAN1h
SWING
CANCEL
MODE TEMP.
FAN TIMER
h
DISPLAY MODE
FAN1h
SWING
CANCEL
CANCEL ION BALANCE AIR CLEAN
nOE½ ¡«u¼‘UF²½« ¡UG≈
wÐdŽwÐdŽ
wÐdŽwÐdŽ
wÐdŽ
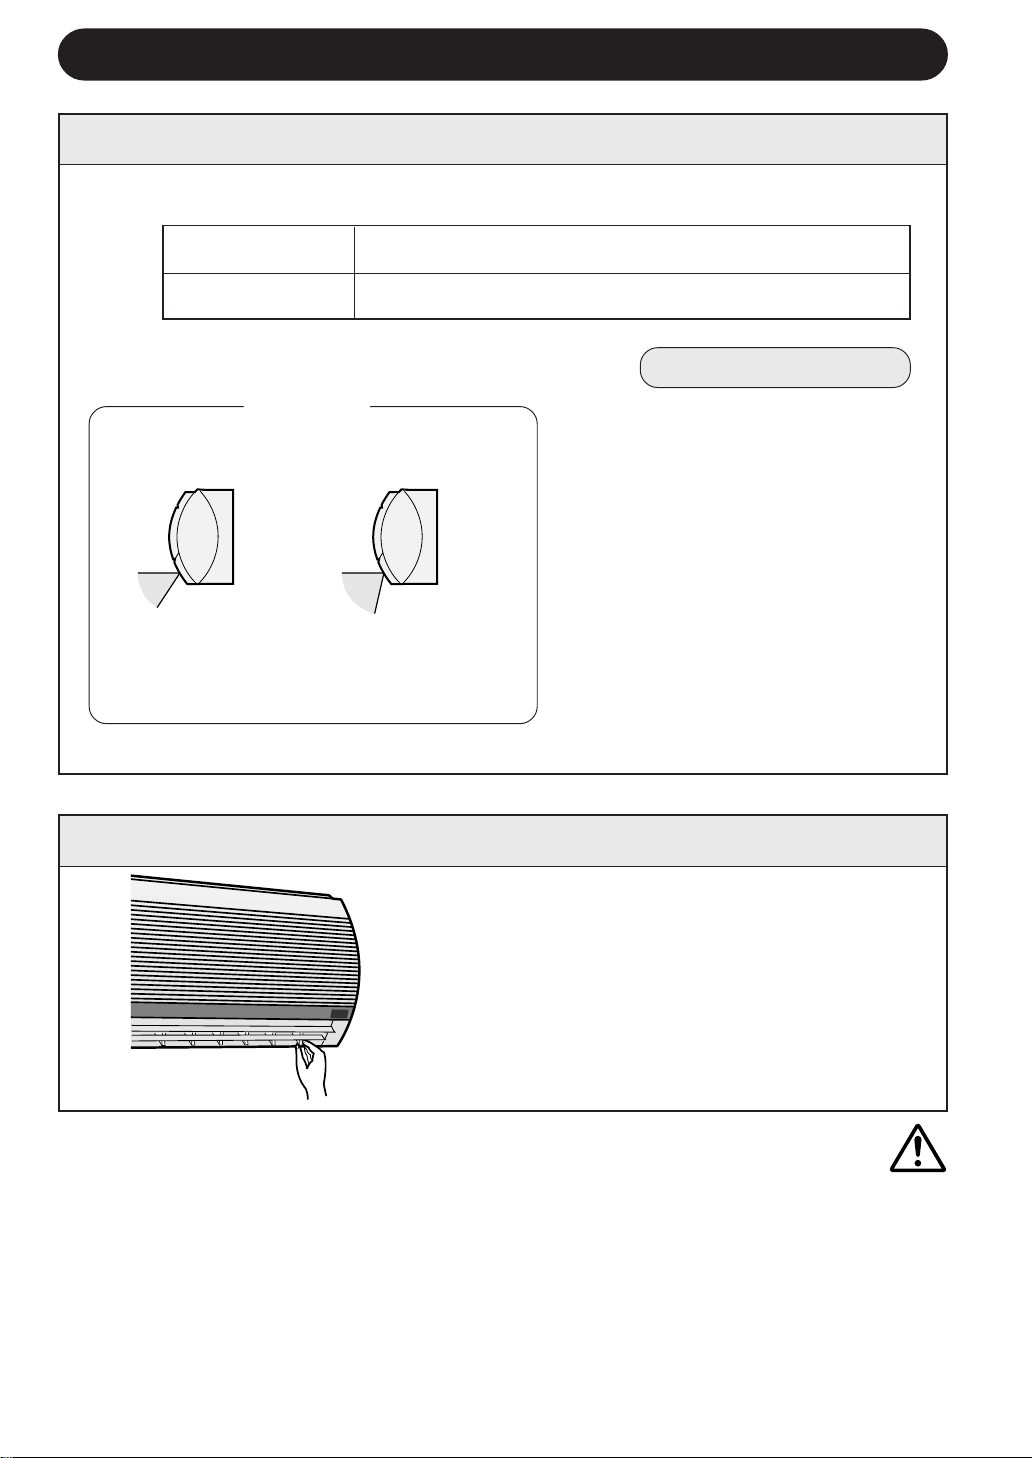
tO³MðtO³Mð
tO³MðtO³Mð
tO³Mð
«bÐ√ bLFð ôÎU¹Ëb¹ W¹œuLF« j³C« WA¹— j³C ÎÆ
• sŽ rJײ« tłu ‰ULF²Ý« bMŽ …bŠu« w qKš V³¹ Ê√ sJ1 W¹œuLF« j³C« WA¹d ÍËbO« j³C«
Æj³C« WOKLŽ w bFÐ
• b¹d³²« l{u« w U{UH½« d¦_« Èu²*« vKŽ W¹œuLF« j³C« WA¹— l{u b¹b% bMŽCOOLË√
·U'«DRYÆWÐuÞdK n¦Jð p– sŽ Z²M¹ b ¨se« s WK¹uÞ …d²H
UbMŽ ¡«uN« nOJ qOGAð bMŽ …bAÐ d¹_« V½U'« Ë√ s1_« V½U'« vKŽ wI_« j³C« g¹— j³Cð ô
rŽU½ WŠËd*« WŽdÝ ÊuJð"SOFT"Æse« s WK¹uÞ …d²H
Æg¹d« vKŽ n¦Jð Àb×¹ b
±∞±∞
±∞±∞
±∞
¡«u?N« oœ ÁU&« j³{¡«u?N« oœ ÁU&« j³{
¡«u?N« oœ ÁU&« j³{¡«u?N« oœ ÁU&« j³{
¡«u?N« oœ ÁU&« j³{
U¹œuLŽ ¡«uN« obðU¹œuLŽ ¡«uN« obð
U¹œuLŽ ¡«uN« obðU¹œuLŽ ¡«uN« obð
U¹œuLŽ ¡«uN« obð
ÎÎ
ÎÎ
Î
UI³ tD³{ r²¹ ¡«uN« obð ÁU&«ÎUOzUIKð Î∫WŠ«— qC√ vKŽ ‰uB×K wK¹ UL l{Ë q w
b¹d³²« ŸU{Ë«COOL ·U'«Ë DRY
WŠËd*« ŸU{Ë«FAN 5²«Ë HEATjI
wI√ ¡«u¼ obð
ÍdD ¡«u¼ obð
¡«uN« obð ÁU&« j³{ WOHO¡«uN« obð ÁU&« j³{ WOHO
¡«uN« obð ÁU&« j³{ WOHO¡«uN« obð ÁU&« j³{ WOHO
¡«uN« obð ÁU&« j³{ WOHO
j³C« ‚UD½j³C« ‚UD½
j³C« ‚UD½j³C« ‚UD½
j³C« ‚UD½
`ł—Q²« —“ jG{«SWINGtłu vKŽ
Æ…bŠ«Ë …d bFÐ sŽ rJײ«
• UN²¹Ë«“ dOG²Ý ÍœuLF« j³C« WA¹—
Æ…dL² …—uBÐ
—e« jG{«SWINGÊuJð UbMŽ Èdš√ …d
l{u*« w ÍœuLF« j³C« WA¹—
Æ»užd*«
• jG{ bMŽ „dײ« sŽ WA¹d« nu²²Ý
ÆjD<« w 5³*« Èb*« ‰öš —e«
• …d«c« w ◊u³C*« l{u« kH×¹ ·uÝ
UOzUIKð tOKŽ j³C« r²¹ ·uÝËÎbMŽ
ÆWOU²« …d*« qOGA²«
WŠËd*« ŸU{Ë« FAN
5²«ËHEATjI
YO×Ð lÝ«Ë ‚UDM«
tOłuð ÊUJùUÐ ÊuJ¹
ÁU&UÐ ¡«uN« obð
ÆWO{—_«
oO{ j³C« ‚UD½
nO¦Jð Íb½ lM*
ÆjU²« s WÐuÞd«
UOI√ ¡«uN« obðUOI√ ¡«uN« obð
UOI√ ¡«uN« obðUOI√ ¡«uN« obð
UOI√ ¡«uN« obð
ÎÎ
ÎÎ
Î
5³ u¼ UL wI_« j³C« WA¹— Ÿ—–√ p«
Æ¡«uN« obð ÁU&« j³{«Ë rÝd« w
b¹d³²« ŸU{Ë«COOL
·U'«ËDRY

wÐdŽwÐdŽ
wÐdŽwÐdŽ
wÐdŽ
ππ
ππ
π
wzUIK²« l{u« ‰uŠ UEŠöwzUIK²« l{u« ‰uŠ UEŠö
wzUIK²« l{u« ‰uŠ UEŠöwzUIK²« l{u« ‰uŠ UEŠö
wzUIK²« l{u« ‰uŠ UEŠö
wzUIK²« l{u« wAUTOUOzUIKð l{u«Ë …—«d(« Wł—œ j³{ —UO²š« r²¹ ¨ÎUF³ð ÎWł—b
Æ…bŠu« qOGAð bMŽ WdG« …—«dŠ
WŠËd*« WŽdÝ ÕU³B sŽ UEŠöWŠËd*« WŽdÝ ÕU³B sŽ UEŠö
WŠËd*« WŽdÝ ÕU³B sŽ UEŠöWŠËd*« WŽdÝ ÕU³B sŽ UEŠö
WŠËd*« WŽdÝ ÕU³B sŽ UEŠö
WŠËd*« WŽdÝ ÕU³B TC¹ ·uÝ qOGA²« ¡UMŁ√FAN SPEEDU¹u² ≥ vKŽ
·Uł l{u 5¹u²®DRYÆWŠËd*« WŽdÝ v≈ dOA² …bŠuK «dýR*« WŠu vKŽ ©
l{Ë vKŽ WŠËd*« WŽdÝ j³{ bMŽ l{Ë vKŽ WŠËd*« WŽdÝ j³{ bMŽ
l{Ë vKŽ WŠËd*« WŽdÝ j³{ bMŽ l{Ë vKŽ WŠËd*« WŽdÝ j³{ bMŽ
l{Ë vKŽ WŠËd*« WŽdÝ j³{ bMŽAUTO
ÍËbO« l{u« vKŽ WŠËd*« WŽdÝ j³{ bMŽÍËbO« l{u« vKŽ WŠËd*« WŽdÝ j³{ bMŽ
ÍËbO« l{u« vKŽ WŠËd*« WŽdÝ j³{ bMŽÍËbO« l{u« vKŽ WŠËd*« WŽdÝ j³{ bMŽ
ÍËbO« l{u« vKŽ WŠËd*« WŽdÝ j³{ bMŽ
WŽdÝ
«bł WCHMÎ
WŽdÝ
WCHM
WOUŽ WŽdÝ
WŠËd*« WŽdÝ ÕU³B ¡UHÞùFAN SPEED¨
÷dF« —“ vKŽ jG{«DISPLAYÆ
UC¹√ QHD¹ ·uÝÎU“ö³« lOL& ÕU³B
PLASMACLUSTERÆ
ÕU³BAUTO FAN SPEED¡UC¹ ·uÝ .
…—«d(« Wł—œ j³{Ë ŸU{Ë√…—«d(« Wł—œ j³{Ë ŸU{Ë√
…—«d(« Wł—œ j³{Ë ŸU{Ë√…—«d(« Wł—œ j³{Ë ŸU{Ë√
…—«d(« Wł—œ j³{Ë ŸU{Ë√
bMŽ WdG« …—«dŠ Wł—œ
qOGA²« ¡bÐ
≤± s q√°Â
≤±°≤¥≠°Â
≤¥°≤∂≠°Â
≤∂°≤∏≠°Â
≤∏ s vKŽ√°Â
wzUIK²« qOGA²«
l{u«
5ðHEAT
·Uł DRY
b¹d³ð COOL
b¹d³ð COOL
b¹d³ð COOL
U²Ýud²« j³{
≤≥°Â
qOGA²« ¡bÐ bMŽ WdG« …—«dŠ
≤¥°Â
≤µ°Â
≤∂°Â
DISPLAY MODE
FAN1h
SWING
CANCEL
wÐdŽwÐdŽ
wÐdŽwÐdŽ
wÐdŽ
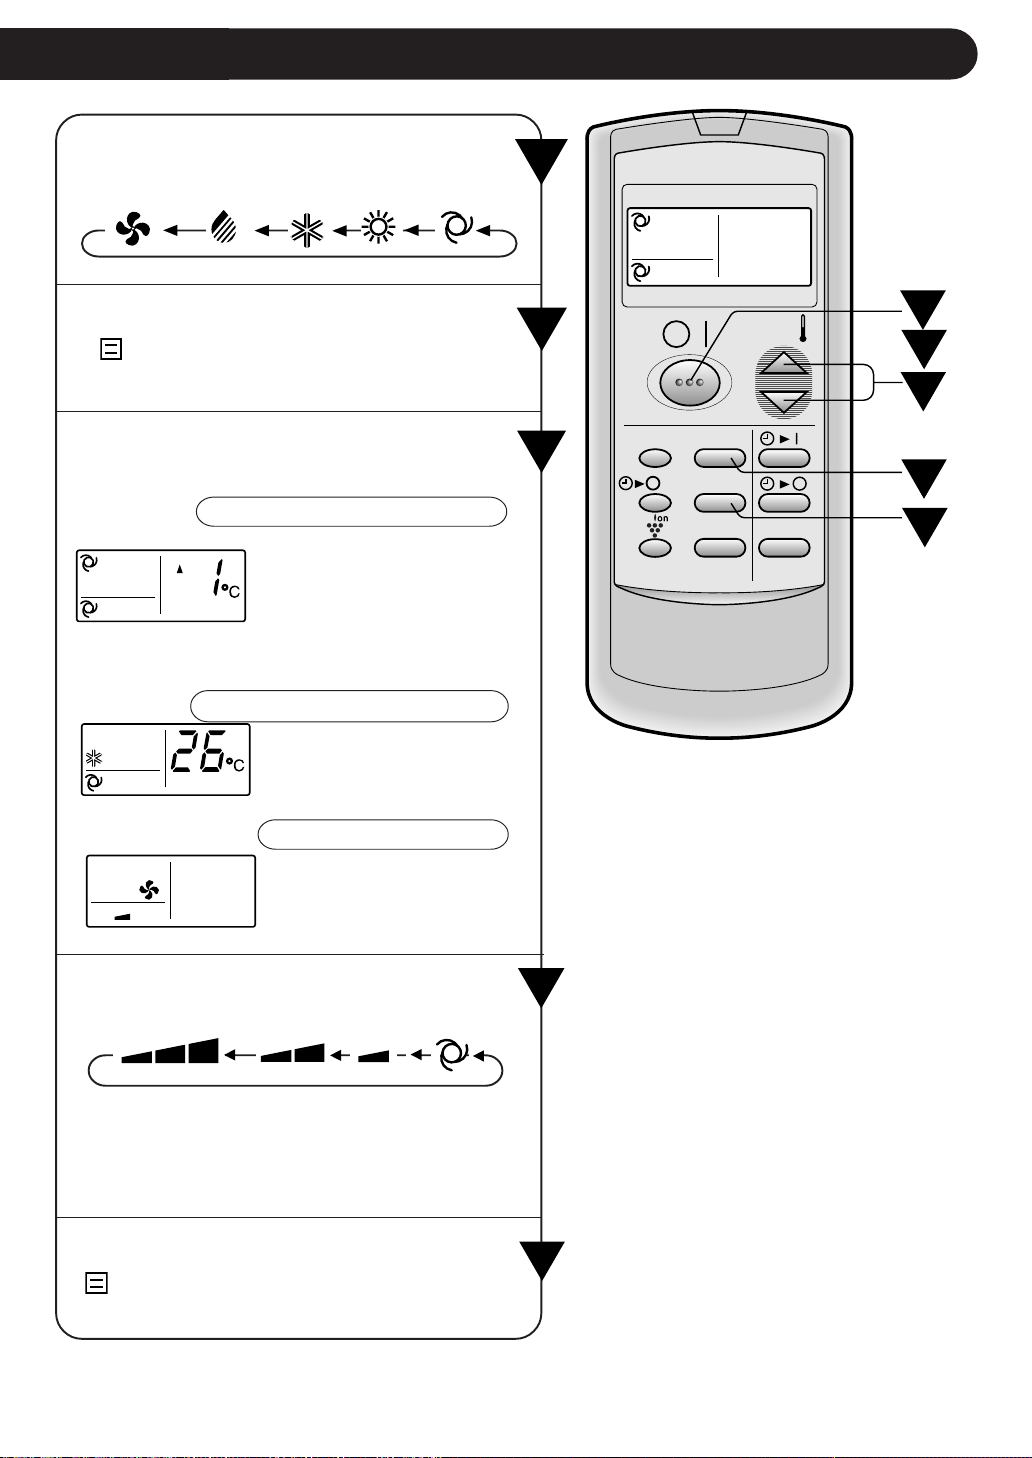
∏∏
∏∏
∏
W?O?ÝUÝ_« qOGA²« UOKLŽW?O?ÝUÝ_« qOGA²« UOKLŽ
W?O?ÝUÝ_« qOGA²« UOKLŽW?O?ÝUÝ_« qOGA²« UOKLŽ
W?O?ÝUÝ_« qOGA²« UOKLŽ
≤≤
≤≤
≤
µµ
µµ
µ
≥≥
≥≥
≥
±±
±±
±
¥¥
¥¥
¥
≥≥
≥≥
≥
¥¥
¥¥
¥
µµ
µµ
µ
≤≤
≤≤
≤
±±
±±
±
—e« jG{«MODEÆqOGA²« l{Ë —UO²šô
—e« jG{«ON/OFFÆqOGA²« ¡b³
• qOGA²« ÕU³B TC¹OPERATION© ® dLŠ_«
Æ…bŠu« vKŽ œułu*«
—e« jG{«THERMO.ÆWÐužd*« …—«d(« Wł—œ j³C
wzUIK²« l{u« wzUIK²« l{u«
wzUIK²« l{u« wzUIK²« l{u«
wzUIK²« l{u« / AUTO
·U'«·U'«
·U'«·U'«
·U'«DRY
…—«d(« Wł—œ dOOGð sJ1
± U¼—b …œU¹eаœËbŠ w Â
≤°≤ v≈ wKŽ√ °s q√ Â
UOzUIKð …œb;« …—«d(« Wł—œÎ
Æ¡«uN« nOJ WDÝ«uÐ
b¹d³²« l{Ë b¹d³²« l{Ë
b¹d³²« l{Ë b¹d³²« l{Ë
b¹d³²« l{Ë/ COOL
5ð 5ð
5ð 5ð
5ð HEAT
jI WŠËd*« l{Ë jI WŠËd*« l{Ë
jI WŠËd*« l{Ë jI WŠËd*« l{Ë
jI WŠËd*« l{ËFAN ONLY
…—«d(« Wł—œ j³{ sJ1
≥≤ v≈ ±∏ s Èb*« ‰öš°ÆÂ
Uł—b j³{ qLŽ sJ1 ô
Æ…—«d(«
—e« jG{«FAN ÆWÐužd*« WŠËd*« WŽdÝ j³C
• l{u« wDRYvKŽ WŠËd*« WŽdÝ j³{ r²¹ ¨
l{ËAUTOÆWŠËd*« WŽdÝ dOGð sJ1 ôË
• l{u« wFAN ONLYWŽdÝ W¾ONð sJ1 ô ¨
wzUIK²« l{u« vKŽ WŠËd*«AUTOÆ
—e« jG{« ¨…bŠu« ·UI¹ùON/OFFÆÈdš√ …d
• qOGA²« ÕU³B THDM¹OPERATION© ® dLŠ_«
Æ…bŠu« vKŽ œułu*«
MODE
DISPLAY MODE
FAN1h
SWING
CANCEL
TEMP.
TEMP.
FAN TIMER
jI WŠËd ·Uł b¹d³ð 5ð wzUIKð
FAN ONLY DRY COOL HEAT AUTO
wUŽ iHM rŽU½ wzUIKð
HIGH LOW SOFT AUTO
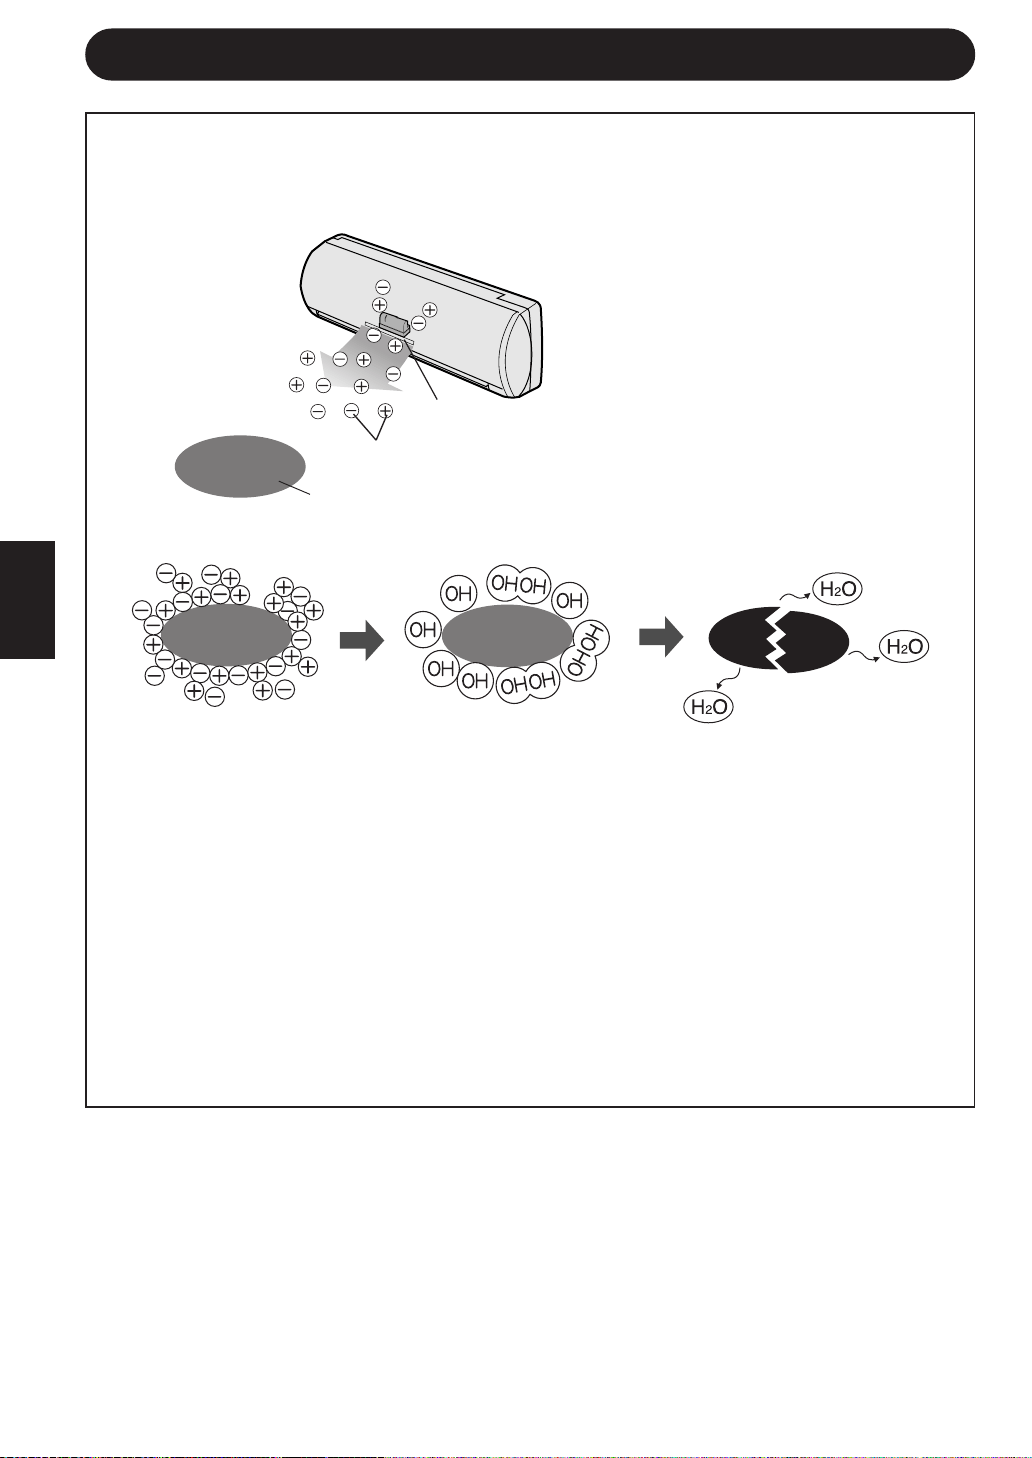
∑∑
∑∑
∑
U?“ö?³« lOL& qOGAð sŽ UEŠöU?“ö?³« lOL& qOGAð sŽ UEŠö
U?“ö?³« lOL& qOGAð sŽ UEŠöU?“ö?³« lOL& qOGAð sŽ UEŠö
U?“ö?³« lOL& qOGAð sŽ UEŠö
s WFL− WK² w¼Ë ¨U½u¹_« s UŽuL− ¡«uN« nOJ qš«œ s¹R*« “UNł oKD¹ ·uÝ
ÆWdG« qš«œ ¨W³U«Ë W³łu*« U½u¹_«
Æ¡«uN« WDÝ«uÐ WuL;« U¹dDH« lM9 U½u¹_« UŽuL−
s¹R
U½u¹_« UŽuL−
dD
nOEM« ¡«uN« qOGAðnOEM« ¡«uN« qOGAð
nOEM« ¡«uN« qOGAðnOEM« ¡«uN« qOGAð
nOEM« ¡«uN« qOGAð
¡«uN« WDÝ«uÐ WuL;« U¹dDH« qKIð ·uÝ ¡«uN« w UNöÞ≈ r²¹ w²« U½u¹_« UŽuL−.
U½u¹_« Ê“«uð qOGAðU½u¹_« Ê“«uð qOGAð
U½u¹_« Ê“«uð qOGAðU½u¹_« Ê“«uð qOGAð
U½u¹_« Ê“«uð qOGAð
w ÁUO*« jUË UÐUG« q¦ sU√ w W³U« U½u¹_« s …dO³ UOL bł«u²ð t½« ‰UI¹
qł¬ s b¹«e² ‰bF0 W³U« U½u¹_« ‚öÞ≈ r²¹ ¨«c¼ qOGA²« l{Ë w ÆWOFO³D« W¾O³«
ÆWU(« pKð v≈ ÊuJ¹ U »d¬ p²dž w u'« q¹u%
ÆqOGA²« vKŽ ·dF²K ±± r— W×H v≈ Ÿułd« vłd¹
wÐdŽwÐdŽ
wÐdŽwÐdŽ
wÐdŽ
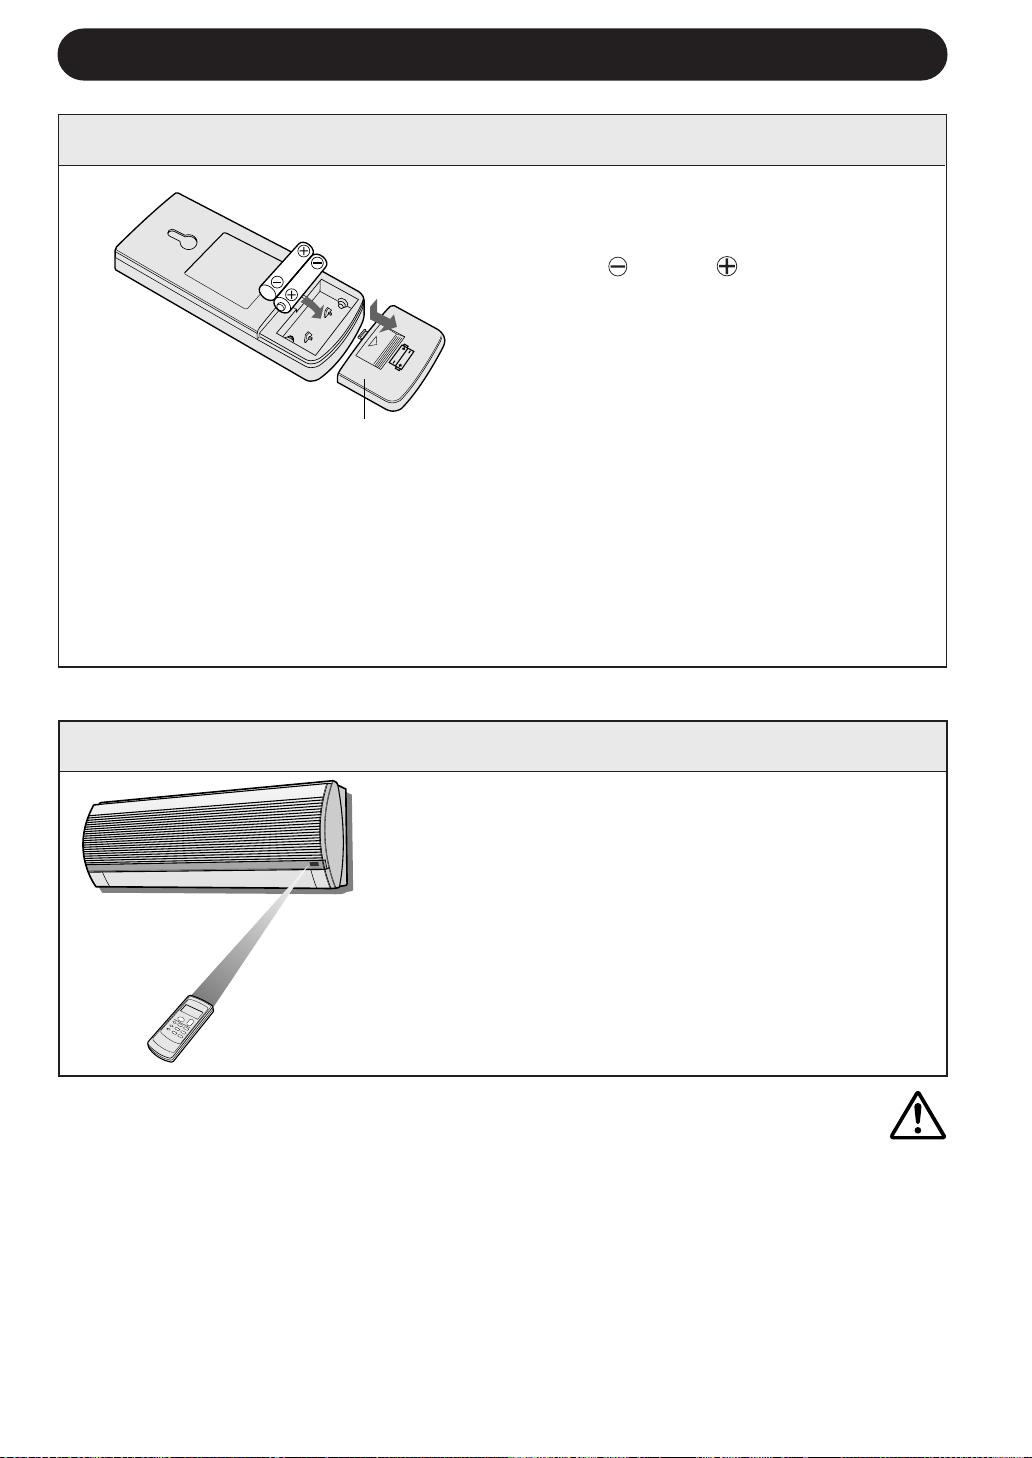
tO³½ tO³½
tO³½ tO³½
tO³½
• qJAÐ qOGA²« vKŽ dŁR¹ b ¨W¹uI« …dýU³*« fLA« WFý√ ‰U³I²ÝUÐ …—Uýù« ‰U³I²Ý« …cUM `Lð ô
ÆWFý_« WUŽù …—U²Ý ‚öžSÐ r ¨…dýU³*« fLA« WFý√ v≈ …—Uýù« ‰U³I²Ý« …cU½ i¹dFð - «–≈ ÆTOÝ
• Æ…—Uýù« ‰UÝ—≈ l p– qš«b²¹ b WdG« fH½ w l¹dÝ ¡bÐ ÂUEMÐ XMÝ—uK ÕU³B ‰ULF²Ý«
• …eNł√ ͬ Ë√ u¹bOH« q− ¨Êu¹eHK²K bFÐ sŽ rJײ« tłu s WKÝd*« «—UýùUÐ …bŠu« dŁQ²ð b
ÆWdG« fH½ w UNULF²Ý« r²¹ Èdš√
• UC¹√ ÆW¹Uœ s »dIUÐ Ë√ …dýU³*« fLA« WFý√ X% bFÐ sŽ rJײ« tłu „d²ð ôÎ…bŠu« W¹UL×Ð r ¨
uAð b w²«Ë UbB«Ë WÐuÞd« s bFÐ sŽ rJײ« tłuË
Ò
Æ—«d{QÐ rN³OBð Ë√ Ê«u_« Á
b?F?Ð sŽ rJײ« tłu ‰ULF²Ý«b?F?Ð sŽ rJײ« tłu ‰ULF²Ý«
b?F?Ð sŽ rJײ« tłu ‰ULF²Ý«b?F?Ð sŽ rJײ« tłu ‰ULF²Ý«
b?F?Ð sŽ rJײ« tłu ‰ULF²Ý«
∂∂
∂∂
∂
bFÐ sŽ rJײ« tłu ¡UDž
±±
±±
±
≤≤
≤≤
≤
≥≥
≥≥
≥
U¹—UD³« VOdðU¹—UD³« VOdð
U¹—UD³« VOdðU¹—UD³« VOdð
U¹—UD³« VOdð
”UI 5²¹—UDÐ qLF²Ý« ”UI 5²¹—UDÐ qLF²Ý«
”UI 5²¹—UDÐ qLF²Ý« ”UI 5²¹—UDÐ qLF²Ý«
”UI 5²¹—UDÐ qLF²Ý«AAA
W¾® W¾®
W¾® W¾®
W¾® R03
©©
©©
©
bFÐ sŽ rJײ« tłu nKš W¹—UD³« ¡UDž Ÿe½«.
…«–U×0 bQ²« l ¨…dO−(« w U¹—UD³« ‰UšœSÐ r
W³łu*« WO³DI«
W³U«Ë
ÆW×O× …—uBÐ
• U¹—UD³« VOdð bMŽ Xu« v≈ W{—UF« dOAð
ÆW×O× …—uBÐ
Æ¡UDG« VOdð bŽ√
∫UEŠö∫UEŠö
∫UEŠö∫UEŠö
∫UEŠö
• U³¹dIð U¹—UD³« dLŽÎÆW¹œUF« ‰ULF²Ýô« ôUŠ w WMÝ
• ULz«œ ¨U¹—UD³« ‰«b³²Ý« bMŽÎÆŸuM« fH½ vKŽ rN½√ s bQðË ¨5²¹—UD³« ö dOOG²Ð r
• ëdšSÐ r ¨U¹—UD³« ‰«b³²Ý« bFÐ W×O× …—uBÐ bFÐ sŽ rJײ« tłu qLF¹ r «–≈
ÆWO½UŁ ≥∞ bFÐ Ídš√ …d rNUšœ≈ bŽ√Ë U¹—UD³«
• ÆbFÐ sŽ rJײ« tłu s U¹—UD³« Ÿe½« ¨se« s WK¹uÞ …d²H …bŠu« ‰ULF²ÝUÐ rIð r «–≈
bFÐ sŽ rJײ« tłu ‰ULF²Ý« WOHObFÐ sŽ rJײ« tłu ‰ULF²Ý« WOHO
bFÐ sŽ rJײ« tłu ‰ULF²Ý« WOHObFÐ sŽ rJײ« tłu ‰ULF²Ý« WOHO
bFÐ sŽ rJײ« tłu ‰ULF²Ý« WOHO
‰U³I²Ý« …cU½ ÁU&UÐ bFÐ sŽ rJײ« tłu tOłu²Ð r‰U³I²Ý« …cU½ ÁU&UÐ bFÐ sŽ rJײ« tłu tOłu²Ð r
‰U³I²Ý« …cU½ ÁU&UÐ bFÐ sŽ rJײ« tłu tOłu²Ð r‰U³I²Ý« …cU½ ÁU&UÐ bFÐ sŽ rJײ« tłu tOłu²Ð r
‰U³I²Ý« …cU½ ÁU&UÐ bFÐ sŽ rJײ« tłu tOłu²Ð r
Æ»užd*« —e« jG{«Ë …bŠuK «—Uýù«Æ»užd*« —e« jG{«Ë …bŠuK «—Uýù«
Æ»užd*« —e« jG{«Ë …bŠuK «—Uýù«Æ»užd*« —e« jG{«Ë …bŠuK «—Uýù«
Æ»užd*« —e« jG{«Ë …bŠuK «—Uýù«
UNU³I²Ý« bMŽ VOÐ u —«bSÐ …bŠu« ÂuIðUNU³I²Ý« bMŽ VOÐ u —«bSÐ …bŠu« ÂuIð
UNU³I²Ý« bMŽ VOÐ u —«bSÐ …bŠu« ÂuIðUNU³I²Ý« bMŽ VOÐ u —«bSÐ …bŠu« ÂuIð
UNU³I²Ý« bMŽ VOÐ u —«bSÐ …bŠu« ÂuIð
Æ…—UýûÆ…—Uýû
Æ…—UýûÆ…—Uýû
Æ…—Uýû
• tłu 5Ð Èdš√ ·«b¼√ Ë√ …—U²Ý œułË ÂbŽ s bQð
Æ…bŠu«Ë bFÐ sŽ rJײ«
• v²Š bFÐ sŽ «—Uý≈ ‰UÝ—≈ bFÐ sŽ rJײ« tłu ÊUJSÐ
Æd² ∑
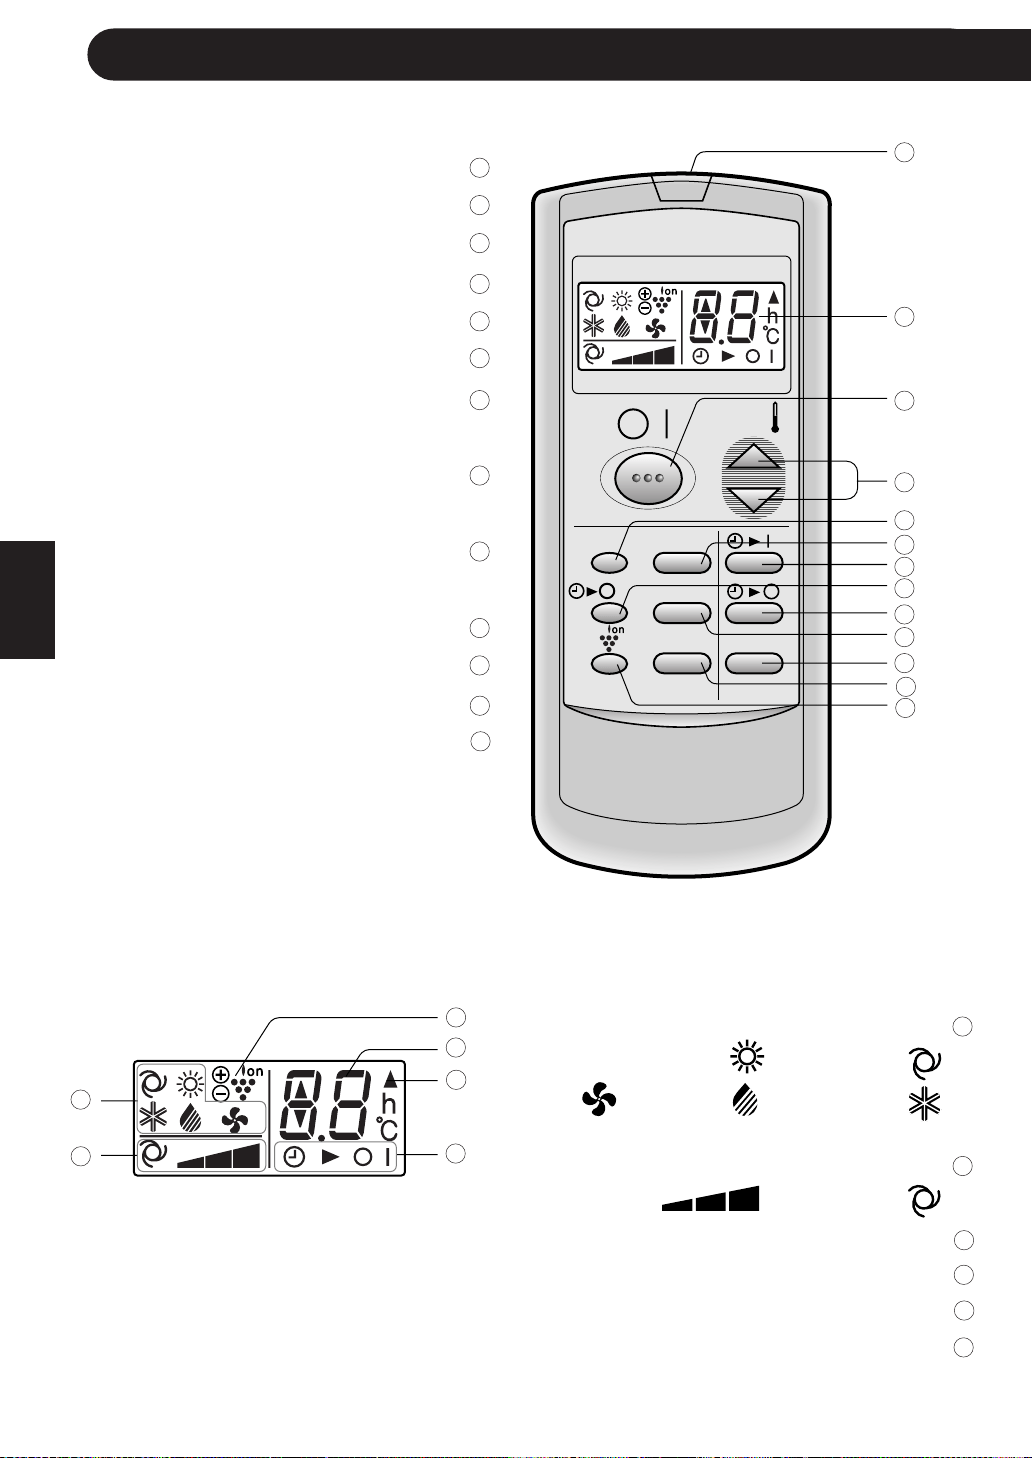
µµ
µµ
µ
bFÐ sŽ rJײ« tłubFÐ sŽ rJײ« tłu
bFÐ sŽ rJײ« tłubFÐ sŽ rJײ« tłu
bFÐ sŽ rJײ« tłu
qzU« ‰U²¹dJUÐ bFÐ sŽ rJײ« tłu W{—UŽqzU« ‰U²¹dJUÐ bFÐ sŽ rJײ« tłu W{—UŽ
qzU« ‰U²¹dJUÐ bFÐ sŽ rJײ« tłu W{—UŽqzU« ‰U²¹dJUÐ bFÐ sŽ rJײ« tłu W{—UŽ
qzU« ‰U²¹dJUÐ bFÐ sŽ rJײ« tłu W{—UŽ
l{u« “u—l{u« “u—
l{u« “u—l{u« “u—
l{u« “u—
wzUIKð ∫ AUTO∫ 5ðHEAT
·Uł∫ DRYWŠËd ∫
WŠËd*« WŽdÝ “u—WŠËd*« WŽdÝ “u—
WŠËd*« WŽdÝ “u—WŠËd*« WŽdÝ “u—
WŠËd*« WŽdÝ “u—
wzUIKð ∫ AUTOÍËbO« j³C« ∫
U“ö³« lOL& e—U“ö³« lOL& e—
U“ö³« lOL& e—U“ö³« lOL& e—
U“ö³« lOL& e—
…—«d(« Wł—œË XRLK w“UM²« bF« dýR…—«d(« Wł—œË XRLK w“UM²« bF« dýR
…—«d(« Wł—œË XRLK w“UM²« bF« dýR…—«d(« Wł—œË XRLK w“UM²« bF« dýR
…—«d(« Wł—œË XRLK w“UM²« bF« dýR
‰UÝ—ù« e—‰UÝ—ù« e—
‰UÝ—ù« e—‰UÝ—ù« e—
‰UÝ—ù« e—
XR*« ·UI¹≈ØXR*« qOGAð dýRXR*« ·UI¹≈ØXR*« qOGAð dýR
XR*« ·UI¹≈ØXR*« qOGAð dýRXR*« ·UI¹≈ØXR*« qOGAð dýR
XR*« ·UI¹≈ØXR*« qOGAð dýR
nu² Ë√ qLF¹ XR*« ÊU «–≈ U dOA¹.
∫ b¹d³ð COOL
«—Uýù« qÝd«—Uýù« qÝd
«—Uýù« qÝd«—Uýù« qÝd
«—Uýù« qÝd
©qzUÝ ‰U²¹d WýUý® ÷dŽ WýUý©qzUÝ ‰U²¹d WýUý® ÷dŽ WýUý
©qzUÝ ‰U²¹d WýUý® ÷dŽ WýUý©qzUÝ ‰U²¹d WýUý® ÷dŽ WýUý
©qzUÝ ‰U²¹d WýUý® ÷dŽ WýUý
·UI¹ù«ØqOGA²« —“ ·UI¹ù«ØqOGA²« —“
·UI¹ù«ØqOGA²« —“ ·UI¹ù«ØqOGA²« —“
·UI¹ù«ØqOGA²« —“ON/OFF
…—«d(« Wł—œ —“ …—«d(« Wł—œ —“
…—«d(« Wł—œ —“ …—«d(« Wł—œ —“
…—«d(« Wł—œ —“
ÆÆ
ÆÆ
ÆTHERMO
÷dF« —“ ÷dF« —“
÷dF« —“ ÷dF« —“
÷dF« —“DISPLAY
l{u« —“ l{u« —“
l{u« —“ l{u« —“
l{u« —“MODE
qOGA²« XR —“ qOGA²« XR —“
qOGA²« XR —“ qOGA²« XR —“
qOGA²« XR —“TIMER ON
©XR*« j³C®©XR*« j³C®
©XR*« j³C®©XR*« j³C®
©XR*« j³C®
…bŠ«Ë WŽUÝ ·UI¹ù« XR —“…bŠ«Ë WŽUÝ ·UI¹ù« XR —“
…bŠ«Ë WŽUÝ ·UI¹ù« XR —“…bŠ«Ë WŽUÝ ·UI¹ù« XR —“
…bŠ«Ë WŽUÝ ·UI¹ù« XR —“
ONE-HOUR OFF TIMER
XR*UÐ ·UI¹ù« —“ XR*UÐ ·UI¹ù« —“
XR*UÐ ·UI¹ù« —“ XR*UÐ ·UI¹ù« —“
XR*UÐ ·UI¹ù« —“TIMER OFF
©XR*« j³C®©XR*« j³C®
©XR*« j³C®©XR*« j³C®
©XR*« j³C®
WŠËd*« —“ WŠËd*« —“
WŠËd*« —“ WŠËd*« —“
WŠËd*« —“FAN
XR*« ¡UG≈ —“ XR*« ¡UG≈ —“
XR*« ¡UG≈ —“ XR*« ¡UG≈ —“
XR*« ¡UG≈ —“
TIMER CANCEL
`ł—Q²« —“ `ł—Q²« —“
`ł—Q²« —“ `ł—Q²« —“
`ł—Q²« —“SWING
U“ö³« lOL& —“ U“ö³« lOL& —“
U“ö³« lOL& —“ U“ö³« lOL& —“
U“ö³« lOL& —“PLASMACLUSTER
MODE
DISPLAY MODE
FAN1h
SWING
CANCEL
TEMP.
TEMP.
FAN TIMER
±±
∞±
π
∏
∑
∂
µ
¥
≥
≤
±
≤±
≥±
±±
∞±
π
∏
∑
∂
µ
¥
≥
≤
±
≤±
≥±
¥±
µ±
∂±
∑±
∏±
π±
¥±
µ±
∂±
∑±
∏±
π±
jI
FAN ONLY
wÐdŽwÐdŽ
wÐdŽwÐdŽ
wÐdŽ
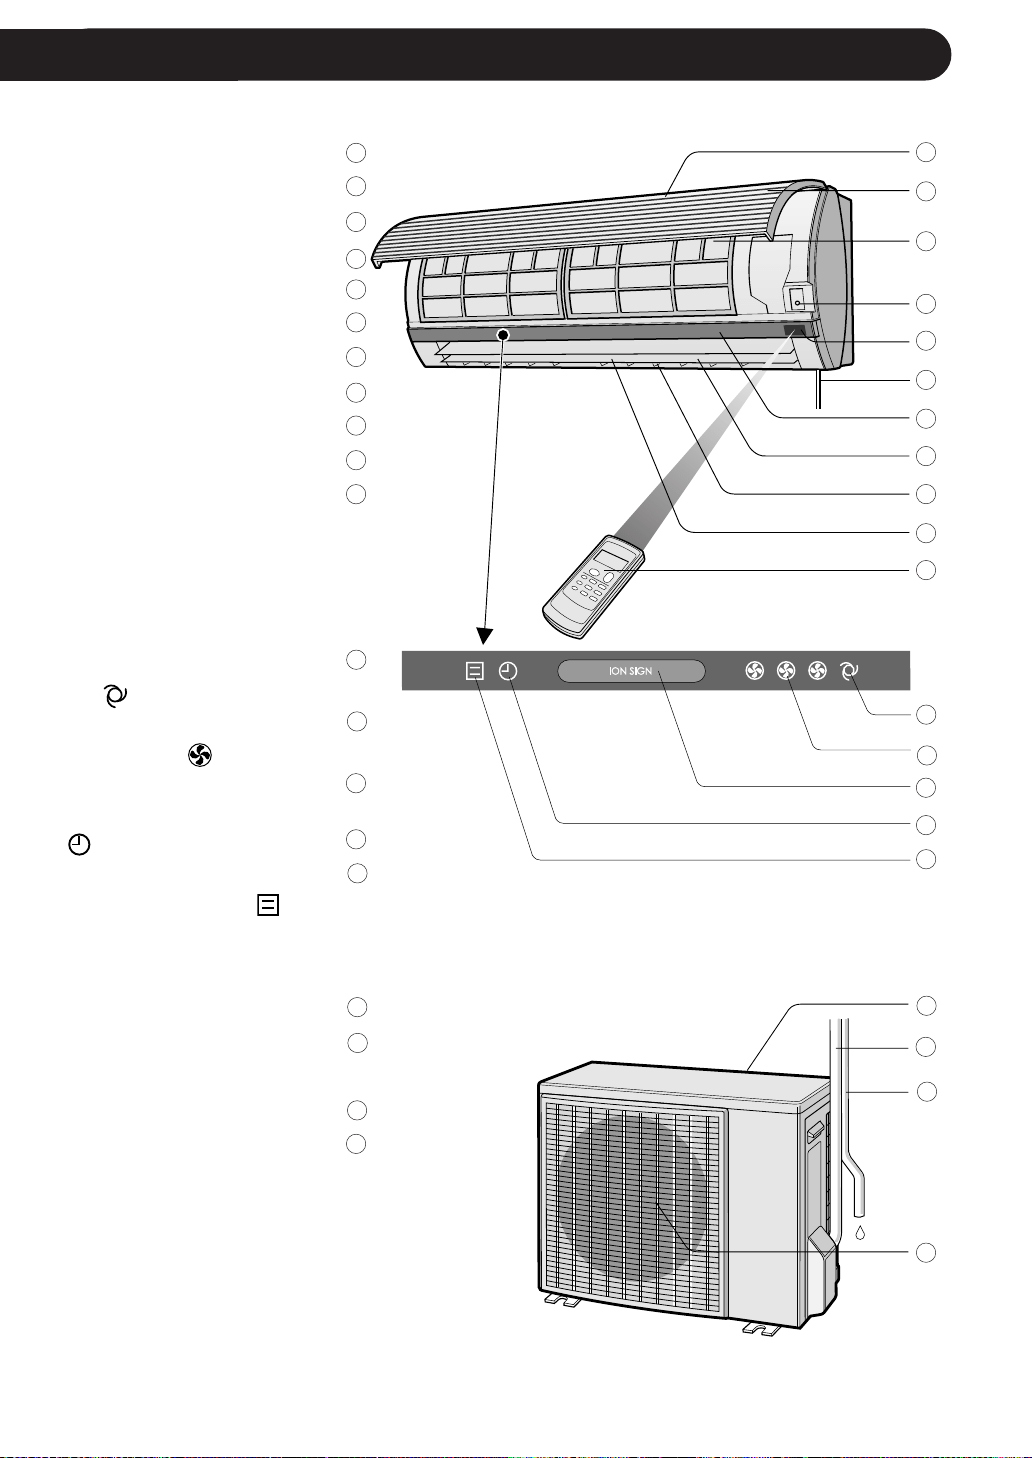
¥¥
¥¥
¥
WOKš«b« …bŠu«WOKš«b« …bŠu«
WOKš«b« …bŠu«WOKš«b« …bŠu«
WOKš«b« …bŠu«
¡«e?ł_« ¡ULÝ√¡«e?ł_« ¡ULÝ√
¡«e?ł_« ¡ULÝ√¡«e?ł_« ¡ULÝ√
¡«e?ł_« ¡ULÝ√
WOł—U)« …bŠu«WOł—U)« …bŠu«
WOł—U)« …bŠu«WOł—U)« …bŠu«
WOł—U)« …bŠu«
©¡«u¼® qšb©¡«u¼® qšb
©¡«u¼® qšb©¡«u¼® qšb
©¡«u¼® qšb
`²H« WŠu`²H« WŠu
`²H« WŠu`²H« WŠu
`²H« WŠu
¡«uN« wUB¡«uN« wUB
¡«uN« wUB¡«uN« wUB
¡«uN« wUB
Æ —“Æ —“
Æ —“Æ —“
Æ —“AUX
«—Uýù« ‰U³I²Ý« …cU½«—Uýù« ‰U³I²Ý« …cU½
«—Uýù« ‰U³I²Ý« …cU½«—Uýù« ‰U³I²Ý« …cU½
«—Uýù« ‰U³I²Ý« …cU½
—UO²« œ«b≈ pKÝ—UO²« œ«b≈ pKÝ
—UO²« œ«b≈ pKÝ—UO²« œ«b≈ pKÝ
—UO²« œ«b≈ pKÝ
«dýR*« WŠu«dýR*« WŠu
«dýR*« WŠu«dýR*« WŠu
«dýR*« WŠu
ÍœuLF« j³C« g¹—ÍœuLF« j³C« g¹—
ÍœuLF« j³C« g¹—ÍœuLF« j³C« g¹—
ÍœuLF« j³C« g¹—
wI_« j³C« g¹—wI_« j³C« g¹—
wI_« j³C« g¹—wI_« j³C« g¹—
wI_« j³C« g¹—
©¡«u¼® Ãd©¡«u¼® Ãd
©¡«u¼® Ãd©¡«u¼® Ãd
©¡«u¼® Ãd
bFÐ sŽ rJײ« tłubFÐ sŽ rJײ« tłu
bFÐ sŽ rJײ« tłubFÐ sŽ rJײ« tłu
bFÐ sŽ rJײ« tłu
WOzUIK²« WŠËd*« WŽdÝ ÕU³BWOzUIK²« WŠËd*« WŽdÝ ÕU³B
WOzUIK²« WŠËd*« WŽdÝ ÕU³BWOzUIK²« WŠËd*« WŽdÝ ÕU³B
WOzUIK²« WŠËd*« WŽdÝ ÕU³B
AUTO FAN SPEED
© dCš√® © dCš√®
© dCš√® © dCš√®
© dCš√®
WŠËd*« WŽdÝ ÕU³B WŠËd*« WŽdÝ ÕU³B
WŠËd*« WŽdÝ ÕU³B WŠËd*« WŽdÝ ÕU³B
WŠËd*« WŽdÝ ÕU³BFAN
SPEED
© dCš√® © dCš√®
© dCš√® © dCš√®
© dCš√®
U“ö³« lOL& ÕU³BU“ö³« lOL& ÕU³B
U“ö³« lOL& ÕU³BU“ö³« lOL& ÕU³B
U“ö³« lOL& ÕU³B
PLASMACLUSTER
©dCš√ ¨‚—“√® ©dCš√ ¨‚—“√®
©dCš√ ¨‚—“√® ©dCš√ ¨‚—“√®
©dCš√ ¨‚—“√®
XR*« ÕU³B XR*« ÕU³B
XR*« ÕU³B XR*« ÕU³B
XR*« ÕU³BTIMER
© dH√® © dH√®
© dH√® © dH√®
© dH√®
qOGA²« ÕU³B qOGA²« ÕU³B
qOGA²« ÕU³B qOGA²« ÕU³B
qOGA²« ÕU³BOPERATION
© dLŠ√®© dLŠ√®
© dLŠ√®© dLŠ√®
© dLŠ√®
©¡«u¼® qšb©¡«u¼® qšb
©¡«u¼® qšb©¡«u¼® qšb
©¡«u¼® qšb
b¹d³²« qzUÝ »u³½√b¹d³²« qzUÝ »u³½√
b¹d³²« qzUÝ »u³½√b¹d³²« qzUÝ »u³½√
b¹d³²« qzUÝ »u³½√
WOKš«b« öOu²«ËWOKš«b« öOu²«Ë
WOKš«b« öOu²«ËWOKš«b« öOu²«Ë
WOKš«b« öOu²«Ë
n¹dB²« ÂuÞdšn¹dB²« ÂuÞdš
n¹dB²« ÂuÞdšn¹dB²« ÂuÞdš
n¹dB²« ÂuÞdš
©¡«u¼® Ãd©¡«u¼® Ãd
©¡«u¼® Ãd©¡«u¼® Ãd
©¡«u¼® Ãd
ÆÁöŽ√ WMO³*« pKð s ¡wA« iFÐ nK²ð b WOKFH« «bŠu« ∫WEŠö
±±
∞±
π
∏
∑
∂
µ
¥
≥
≤
±
≤±
≥±
¥±
µ±
∂±
∑±
∏±
π±
∞≤
±±
∞±
π
∏
∑
∂
µ
¥
≥
≤
±
≤±
≥±
¥±
µ±
∂±
∑±
∏±
π±
∞≤

≥≥
≥≥
≥
q?O?GA²« ‰uŠ WOU{≈ UEŠöq?O?GA²« ‰uŠ WOU{≈ UEŠö
q?O?GA²« ‰uŠ WOU{≈ UEŠöq?O?GA²« ‰uŠ WOU{≈ UEŠö
q?O?GA²« ‰uŠ WOU{≈ UEŠö
—UO²« w ‚UHš≈ Àb×¹ UbMŽ—UO²« w ‚UHš≈ Àb×¹ UbMŽ
—UO²« w ‚UHš≈ Àb×¹ UbMŽ—UO²« w ‚UHš≈ Àb×¹ UbMŽ
—UO²« w ‚UHš≈ Àb×¹ UbMŽ
ÆwzUÐdNJ« —UO²« ŸUDI½« bMŽ «œ«bŽù« s¹e² …d«c« WHOþË vKŽ «c¼ ¡«uN« nOJ Íu²×¹
UOzUIKð …bŠu« qOGAð œUF¹ ·uÝ ¨wzUÐdNJ« —UO²« …œuŽ bMŽËÎUI³Þ Îq³ W¹—UÝ X½U w²« «œ«bŽû
ÆXR*« j³{ ¡UM¦²ÝUÐ ¨wzUÐdNJ« —UO²« ŸUDI½«
Æ—UO²« ŸUłd²Ý« bFÐ W¾ON²« …œUŽ≈ v≈ ÃU²×²Ý ¨—UO²« ŸUDI½« q³ U²R*« j³{ - «–≈
o³*« 5²« WHOþËo³*« 5²« WHOþË
o³*« 5²« WHOþËo³*« 5²« WHOþË
o³*« 5²« WHOþË
qOGAð bFÐ ozUœ µ v≈ 5²IOœ —Ëd q³ qLF« w WOł—U)« WŠËd*« ¡b³ð ô b ¨W¾b²K qOGA²« bMŽ
Æ…bŠu« s ÃËd)« s œ—U³« ¡«uN« lM* …bŠu«
ZK¦« WЫ–« WHOþËZK¦« WЫ–« WHOþË
ZK¦« WЫ–« WHOþËZK¦« WЫ–« WHOþË
ZK¦« WЫ–« WHOþË
•
ÂuI¹ ¨©W¾b²«® sšU« qOGA²« ¡UMŁ√ WOł—U)« …bŠu« vKŽ Í—«d(« ‰œU³*« vKŽ ZK¦« ÊuJ²¹ UbMŽ
nu²ð ZK¦« WЫ–« ¡UMŁ« ÆZK¦« W«“ù ozUœ ±∞ v≈ µ s …—«d(« dOu²Ð wJOðUuðü« ZK¦« WЫ–« “UNł
ÆqLF« sŽ WOł—U)«Ë WOKš«b« WŠËd*«
•
5²« l{Ë vKŽ qLF« w UOzUIKð …bŠu« ¡b³ð ¨qUJUÐ ZK¦« WЫ–« bFÐ HEATÆ
5²« …¡UH5²« …¡UH
5²« …¡UH5²« …¡UH
5²« …¡UH
•
pc ÆWdG« v≈ tUšœUÐ ÂuIðË wł—U)« ¡«uN« s …—«d(« V×ð W¹—«dŠ WC …bŠu« Âb²ð
Æ©W¾b²«® 5²« …¡UH vKŽ dO³ qJAÐ dŁRð WOł—U)« …—«d(« Wł—œ ÊS
•
ÆwU{√ s Âb²Ý« ¨WOł—U)« …—«d(« Wł—œ ÷UH½« V³Ð 5²« …¡UH XCH½« «–≈
•
ÆÍdI« ¡«uN« d¹Ëbð ÂUE½ V³Ð Xu« iFÐ ‚dG²¹ qUJUÐ WdG« W¾bðË 5ð
W?U?D« kHŠ ‰uŠ Uþu×KW?U?D« kHŠ ‰uŠ Uþu×K
W?U?D« kHŠ ‰uŠ Uþu×KW?U?D« kHŠ ‰uŠ Uþu×K
W?U?D« kHŠ ‰uŠ Uþu×K
Æp¹b ¡«uN« nOJ ‰ULF²Ý« bMŽ WUD« kHŠ ‰uŠ WDO³« WK¦_« iFÐ wK¹ ULO Æp¹b ¡«uN« nOJ ‰ULF²Ý« bMŽ WUD« kHŠ ‰uŠ WDO³« WK¦_« iFÐ wK¹ ULO
Æp¹b ¡«uN« nOJ ‰ULF²Ý« bMŽ WUD« kHŠ ‰uŠ WDO³« WK¦_« iFÐ wK¹ ULO Æp¹b ¡«uN« nOJ ‰ULF²Ý« bMŽ WUD« kHŠ ‰uŠ WDO³« WK¦_« iFÐ wK¹ ULO
Æp¹b ¡«uN« nOJ ‰ULF²Ý« bMŽ WUD« kHŠ ‰uŠ WDO³« WK¦_« iFÐ wK¹ ULO
W×O×B« …—«d(« Wł—œ j³{√W×O×B« …—«d(« Wł—œ j³{√
W×O×B« …—«d(« Wł—œ j³{√W×O×B« …—«d(« Wł—œ j³{√
W×O×B« …—«d(« Wł—œ j³{√
• ± U²Ýud¦« j³{° b¹d³²« l{Ë w WÐužd*« …—«d(« Wł—œ s vKŽ√ ÂCOOL≤Ë °l{Ë s q« Â
5²«HEATÆ—UO²« „öN²Ý« s •±∞ »—UI¹ U p– duOÝ
• Æ—UO²« „öN²Ý« w …œU¹“ Z²MOÝ b¹d³²« l{Ë qOGAð ¡UMŁ√ Í—ËdC« s q√ …—«d(« Wł—œ j³{
…—«d(« —œUB lM√Ë …dýU³*« fLA« WFý√ lM«…—«d(« —œUB lM√Ë …dýU³*« fLA« WFý√ lM«
…—«d(« —œUB lM√Ë …dýU³*« fLA« WFý√ lM«…—«d(« —œUB lM√Ë …dýU³*« fLA« WFý√ lM«
…—«d(« —œUB lM√Ë …dýU³*« fLA« WFý√ lM«
• Æ—UO²« „öN²Ý« iHÐ ÂuIOÝ b¹d³²« l{Ë qOGAð ¡UMŁ√ …dýU³*« fLA« WFý√ lM
• 5²«Ë b¹d³²« UOKLŽ ¡UMŁ√ »«uÐ_«Ë c«uM« oKž«.
¡«uNK d¹Ëbð qC√ vKŽ ‰uB×K W×O× …—uBÐ ¡«uN« obð ÁU&« j³CÐ r¡«uNK d¹Ëbð qC√ vKŽ ‰uB×K W×O× …—uBÐ ¡«uN« obð ÁU&« j³CÐ r
¡«uNK d¹Ëbð qC√ vKŽ ‰uB×K W×O× …—uBÐ ¡«uN« obð ÁU&« j³CÐ r¡«uNK d¹Ëbð qC√ vKŽ ‰uB×K W×O× …—uBÐ ¡«uN« obð ÁU&« j³CÐ r
¡«uNK d¹Ëbð qC√ vKŽ ‰uB×K W×O× …—uBÐ ¡«uN« obð ÁU&« j³CÐ r
qOGA²K WOUF qC√ ÊULC WHOE½ wUB*UÐ kH²Š«qOGA²K WOUF qC√ ÊULC WHOE½ wUB*UÐ kH²Š«
qOGA²K WOUF qC√ ÊULC WHOE½ wUB*UÐ kH²Š«qOGA²K WOUF qC√ ÊULC WHOE½ wUB*UÐ kH²Š«
qOGA²K WOUF qC√ ÊULC WHOE½ wUB*UÐ kH²Š«
«dO¦ bH²Ý««dO¦ bH²Ý«
«dO¦ bH²Ý««dO¦ bH²Ý«
«dO¦ bH²Ý«
ÎÎ
ÎÎ
Î
qOGA²K ·UI¹ù« XR WHOþË s qOGA²K ·UI¹ù« XR WHOþË s
qOGA²K ·UI¹ù« XR WHOþË s qOGA²K ·UI¹ù« XR WHOþË s
qOGA²K ·UI¹ù« XR WHOþË s
se« s WK¹uÞ …d²H …bŠu« ‰ULF²Ý« ÂbŽ bMŽ WOzUÐdNJ« …dz«b« lÞU ·UI¹SÐ rse« s WK¹uÞ …d²H …bŠu« ‰ULF²Ý« ÂbŽ bMŽ WOzUÐdNJ« …dz«b« lÞU ·UI¹SÐ r
se« s WK¹uÞ …d²H …bŠu« ‰ULF²Ý« ÂbŽ bMŽ WOzUÐdNJ« …dz«b« lÞU ·UI¹SÐ rse« s WK¹uÞ …d²H …bŠu« ‰ULF²Ý« ÂbŽ bMŽ WOzUÐdNJ« …dz«b« lÞU ·UI¹SÐ r
se« s WK¹uÞ …d²H …bŠu« ‰ULF²Ý« ÂbŽ bMŽ WOzUÐdNJ« …dz«b« lÞU ·UI¹SÐ r
• ÆqOGA²« ÂbŽ WUŠ w —UO²« s WDOÐ WOL „öN²Ý« w dL²ð WOKš«b« …bŠu«
qOGA²« …—«dŠ Uł—œ ‚UD½qOGA²« …—«dŠ Uł—œ ‚UD½
qOGA²« …—«dŠ Uł—œ ‚UD½qOGA²« …—«dŠ Uł—œ ‚UD½
qOGA²« …—«dŠ Uł—œ ‚UD½
•qš«œ W−b*«W¹UL(« WKOÝË
s …bŠu« lM9 Ê≈ UNMJ1 “UN'«
×Uš UN«b²Ý« bMŽ qLF«
ÆUM¼ —uc*« ‚UDM«
• Ãd s WÐuÞd« n¦J²ð b
bO …bŠu« XOIÐ «–≈ ¡«uN«
w …dL² …—uBÐ qOGA²«
b¹d³²« l{ËCOOLl{Ë Ë√
·U'«DRYW³½ ÊuJð UbMŽ
ÆWzU*UÐ ∏∞ ‚u WÐuÞd«
= D.B.WOKš«b« …—«d(« Wł—œ W.B. =WOł—U)« …—«d(« Wł—œ
WOł—U)« …—«d(« Wł—œWOł—U)« …—«d(« Wł—œ
WOł—U)« …—«d(« Wł—œWOł—U)« …—«d(« Wł—œ
WOł—U)« …—«d(« Wł—œ
WOKš«b« …—«d(« Wł—œWOKš«b« …—«d(« Wł—œ
WOKš«b« …—«d(« Wł—œWOKš«b« …—«d(« Wł—œ
WOKš«b« …—«d(« Wł—œ
vBü« b(«vBü« b(«
vBü« b(«vBü« b(«
vBü« b(«
vBü« b(«vBü« b(«
vBü« b(«vBü« b(«
vBü« b(«
v½œü« b(«v½œü« b(«
v½œü« b(«v½œü« b(«
v½œü« b(«
v½œü« b(«v½œü« b(«
v½œü« b(«v½œü« b(«
v½œü« b(«
°¥≥ D.B.
-
°≤± D.B.
-
°≤¥ D.B.
°±∏ W.B.
°-∏.µ D.B.
°-π.µ W.B.
°≥≤ D.B.
°≤≥ W.B.
°≤± D.B.
°±µ W.B.
°≤∑ D.B.
-
°≤∞ D.B.
-
b¹d³ðb¹d³ð
b¹d³ðb¹d³ð
b¹d³ð
5ð5ð
5ð5ð
5ð
wÐdŽwÐdŽ
wÐdŽwÐdŽ
wÐdŽ

U?ÞUO²Š«U?ÞUO²Š«
U?ÞUO²Š«U?ÞUO²Š«
U?ÞUO²Š«
≤≤
≤≤
≤
±±
±±
±
UuBš ¨WdG« W¹uN² W¹—Ëœ …—uBÐ »U³« Ë√ …cUM« `²√ÎÆ“UG« vKŽ qLF¹ “UNł ‰ULF²Ý« bMŽ
Æ5−_« W³½ ÷UH½« v≈ ÍœRð b WOU dOG« W¹uN²«
ÆWOzUÐdN Wb ÀËbŠ w V³²¹ b «c¼ Æ¡U*UÐ WKK³ p¹b¹Ë —«—“_« qOGA²Ð ÂuIð ô
Æse« s WK¹uÞ …d²H …bŠu« ‰ULF²Ý« ÂbŽ bMŽ WOzUÐdNJ« …dz«b« lÞU ·UI¹SÐ r ¨ÊUú
…bŠu« Ê√ s bQ²«Ë qP²« ÂbŽ s bQ²K W¹—Ëœ …—uBÐ WOł—U)« …bŠu« VOdð ·— s oI%
ÆÂUJŠSÐ UNF{u w
v≈ «c¼ ÍœR¹ bË ¨hA« Ë√ r'« jI¹ b ÆUNOKŽ nIð Ë√ WOł—U)« …bŠu« vKŽ Tý Í√ lCð ô
ÆUÐU≈ ÀËbŠ
…dOEŠ qš«œ q¦ Èdš√ ÷«dž_ …bŠu« qLF²ð ô ÆweM*« ‰ULF²Ýö WLLB …bŠu« Ác¼
ÆUðU³M« WŽ«—“ Ë√ U½«uO(« WOÐd² WŽ«—e« uOÐ Ë√ U½«uOŠ
WOzUÐdNJ« ‰“«uF« nK²ð bI ¨…bŠu« qš«œ ¡U*« »dð «–≈ Æ…bŠu« vKŽ ¡U UNKš«œ W¹d¼e lCð ô
ÆWOzUÐdN Wb ÀËbŠ w V³²ðË
ÆqUA ÀËbŠ Ë√ w{d dOž ¡«œ√ V³¹ b «c¼ Æ…bŠuK ¡«uN« ×U Ë√ qš«b bÐ rIð ô
ÆnOEM²« Ë√ W½UOB« WOKLFÐ ÂUOI« q³ WOzUÐdNJ« …dz«b« lÞU ·UI¹≈Ë qOGA²« ·UI¹≈ s bQð
Æp²ÐU« v≈ ÍœRð bË …bŠu« qš«bÐ —Ëbð WŠËd błuð
—d{ Ë√ WOzUÐdN Wb ÀËbŠ ¡U*« V³¹ b Æ…bŠu« vKŽ …dýU³ ¡U*« VJÝ Ë√ ‘dÐ rIð ô
Æ“UN'UÐ
ÆW³«d ÊËbÐ 5GUÐ dOG« Ë√ ‰UHÞ_« q³ s ‰ULF²Ýö rLB dOž “UN'« «c¼
“UN'UÐ VFK« ÂbŽ s bQ²K pUHÞ√ W³«d V−¹.
≤≤
≤≤
≤
¥¥
¥¥
¥
≥≥
≥≥
≥
µµ
µµ
µ
∂∂
∂∂
∂
∏∏
∏∏
∏
∑∑
∑∑
∑
‰ULF²Ýô« ‰uŠ «d¹c%‰ULF²Ýô« ‰uŠ «d¹c%
‰ULF²Ýô« ‰uŠ «d¹c%‰ULF²Ýô« ‰uŠ «d¹c%
‰ULF²Ýô« ‰uŠ «d¹c%
ππ
ππ
π
±∞±∞
±∞±∞
±∞
±±±±
±±±±
±±
VOd²«Ølu*« ‰uŠ «d¹c%VOd²«Ølu*« ‰uŠ «d¹c%
VOd²«Ølu*« ‰uŠ «d¹c%VOd²«Ølu*« ‰uŠ «d¹c%
VOd²«Ølu*« ‰uŠ «d¹c%
• UI³Þ —UO²« —bB0 ¡«uN« nOJ qOuð s bQðÎÆ4I*« œœd²«Ë XuHK
ÀËbŠ WO½UJ≈Ë “UN'UÐ —dC« ‚U(≈ w V³²¹ b W×O× dOž œœdðË WOÞuK Ë– —UOð —bB ‰ULF²Ý«
Æo¹dŠ
• Æo¹dŠ ÀËbŠ w p– V³²¹ b ƉUF²ýö qÐU “Už tO »d²¹ b ÊUJ w …bŠu« VOd²Ð rIð ô
Æ¡«uN« w WÐuÞd«Ë ÊUšb« ¨—U³G« qOK ÊUJ w …bŠu« VOd²Ð r
• WÐU≈ w V³²¹ b ·U dOG« n¹dB²« ÆfK« n¹dB²« ÊUL{ l n¹dB²« ÂuÞdš VOd²Ð r
ÆqK³Ð a« ¨ÀUŁ_«Ë WdG«
• UF³ð ¨WOzUÐdN …dz«œ lÞU Ë√ »dð lÞU VOdð s bQðÎWb ÀËbŠ VM−² ¨VOd²« lu*
ÆWOzUÐdN

±±
±±
±
wÐdŽwÐdŽ
wÐdŽwÐdŽ
wÐdŽ
«dJýλ—Uý s ¡«uN« nOJ pz«dý vKŽ .“UN'« qOGAð q³ W¹UMFÐ qOb« «c¼ …¡«d vłd¹ .
U¹u²;«U¹u²;«
U¹u²;«U¹u²;«
U¹u²;«
U?ÞUO²Š«U?ÞUO²Š«
U?ÞUO²Š«U?ÞUO²Š«
U?ÞUO²Š«
•UÞUO²Š«ÆÆÆÆÆÆÆÆÆÆÆÆÆÆÆÆÆÆÆÆÆÆÆÆÆÆÆÆÆÆÆÆÆÆÆÆÆÆÆÆÆÆÆÆÆÆÆÆÆƱ
•qOGA²« ‰uŠ WOU{≈ UEŠö ÆÆÆÆÆÆÆÆÆÆÆÆÆÆÆÆÆÆÆ≥
•WUD« kHŠ ‰uŠ Uþu×K ÆÆÆÆÆÆÆÆÆÆÆÆÆÆÆÆÆÆÆÆÆÆÆÆÆ≥
•¡«eł_« ¡ULÝ√ ÆÆÆÆÆÆÆÆÆÆÆÆÆÆÆÆÆÆÆÆÆÆÆÆÆÆÆÆÆÆÆÆÆÆÆÆÆÆÆÆÆÆÆÆÆ¥
•bFÐ sŽ rJײ« tłu ‰ULF²Ý« ÆÆÆÆÆÆÆÆÆÆÆÆÆÆÆÆÆÆÆÆÆ∂
•U“ö³« lOL& qOGAð sŽ UEŠö ÆÆÆÆÆÆÆÆÆÆÆÆÆ∑
•WOÝUÝ_« qOGA²« UOKLŽ ÆÆÆÆÆÆÆÆÆÆÆÆÆÆÆÆÆÆÆÆÆÆÆÆÆÆ∏
•¡«uN« oœ ÁU&« j³{ ÆÆÆÆÆÆÆÆÆÆÆÆÆÆÆÆÆÆÆÆÆÆÆÆÆÆÆÆÆÆƱ∞
•U“ö³« lOL& qOGAðÆÆÆÆÆÆÆÆÆÆÆÆÆÆÆÆÆÆÆÆÆÆÆÆÆÆÆÆÆÆÆÆÆƱ±
•…bŠ«Ë WŽUÝ ·UI¹≈ XR ÆÆÆÆÆÆÆÆÆÆÆÆÆÆÆÆÆÆÆÆÆÆÆÆÆÆÆÆÆƱ±
•XR*UÐ qOGA²« ÆÆÆÆÆÆÆÆÆÆÆÆÆÆÆÆÆÆÆÆÆÆÆÆÆÆÆÆÆÆÆÆÆÆÆÆÆÆÆÆÆƱ≤
•bŽU l{Ë ÆÆÆÆÆÆÆÆÆÆÆÆÆÆÆÆÆÆÆÆÆÆÆÆÆÆÆÆÆÆÆÆÆÆÆÆÆÆÆÆÆÆÆÆÆÆÆÆƱ¥
•W¹—UO²š« «Ëœ√ÆÆÆÆÆÆÆÆÆÆÆÆÆÆÆÆÆÆÆÆÆÆÆÆÆÆÆÆÆÆÆÆÆÆÆÆÆÆÆÆÆÆƱ¥
•W½UO ÆÆÆÆÆÆÆÆÆÆÆÆÆÆÆÆÆÆÆÆÆÆÆÆÆÆÆÆÆÆÆÆÆÆÆÆÆÆÆÆÆÆÆÆÆÆÆÆÆÆÆÆÆÆÆÆƱµ
•W½UOB« wM ¡UŽb²Ý« q³ ÆÆÆÆÆÆÆÆÆÆÆÆÆÆÆÆÆÆÆÆÆÆÆÆÆÆÆƱ∂
‰ULF²Ýô« ‰uŠ «d¹c%‰ULF²Ýô« ‰uŠ «d¹c%
‰ULF²Ýô« ‰uŠ «d¹c%‰ULF²Ýô« ‰uŠ «d¹c%
‰ULF²Ýô« ‰uŠ «d¹c%
±±
±±
±
uAð Ë√ bAð ôÒ—UO²« œ«b≈ pKÝ Á.‚U(≈ w V³²¹ b —UO²« œ«b≈ pKÝ ‰ULF²Ý« …¡UÝ≈Ë bý
WOzUÐdN Wb V³¹Ë …bŠuUÐ —dC«.
…dýU³ pLł i¹dFð ÂbŽ vKŽ ’dŠ«Ïse« s WK¹uÞ …b* nOJ*« s ×U)« ¡«uN« v≈.dŁR¹ b
WO×B« p²UŠ vKŽ p–.
d« ‰UHÞú ¡«uN« nOJ ‰ULF²Ý« bMŽ^Ë√ ‘«dH« w v{d*« ¨s« w —U³J« ¨—UGB« ‰UHÞ_« ¨l{
WdG« qš«œ ’Uý_« ¡ôRN W³ÝUM …—«d(« Wł—œ ʬ s bQð 5UF*« ’Uý_«.
…bŠu« qš«œ W³¹dž ÂUł√ ‰UšœSÐ rIð ô.V³Ð WÐUù« v≈ Íœu¹ Ê√ sJ1 W³¹dž ÂUł√ ‰Ušœ≈
…dO³ WŽdÐ WOKš«b« ÕË«d*« Ê«—Ëœ.
¡«uN« nOJ i¹—Q²Ð r.VOC ¨¡U*« »u³½« ¨“UG« »u³½√ v≈ i¹—Q²« pKÝ qOu²Ð rIð ô
nðUN« i¹—Qð pKÝ Ë√ oŽ«uB« s W¹UL(«.Wb ÀËbŠ v≈ ÍœR¹ b qU dOG« i¹—Q²«
WOzUÐdN.
ö¦® ¡«uN« nOJ* wFO³Þ dOž Tý Í√ ÀbŠ «–≈Ϋ—u qOGA²« ·UI¹SÐ r ¨©o¹dŠ W×z«— Îq¹uײРrË
·UI¹ù« l{Ë v≈ WOzUÐdNJ« …dz«b« lÞU ÕU²H.
—UO²« œ«b≈ pKÝ qOuð ‰uŠ WOK;« ULOKF²«Ë 5½«uI« l³ð«.b pKK `O× dOG« qOu²«
U³³ wzUÐdNJ« Ãd<«Ë fÐUI«Ë —UO²« œ«b≈ pK …bz«“ W½uÝ ÀËbŠ V³¹Îv≈ ÍœR¹ U2
o¹dŠ ÀËbŠ.
‰«b³²Ýô« bMŽ l½UB« q³ s ·uu*« —UO²« œ«b≈ pKÝ jI qLF²Ý«.WOKLŽ r²ð Ê√ V−¹
W½UO wM Ë√ q¼R wM q³ s ‰«b³²Ýô«
≤≤
≤≤
≤
¥¥
¥¥
¥
≥≥
≥≥
≥
µµ
µµ
µ
∂∂
∂∂
∂
∏∏
∏∏
∏
∑∑
∑∑
∑
`OKB²«ØŸeM«ØVOd²« ‰uŠ «d¹c%`OKB²«ØŸeM«ØVOd²« ‰uŠ «d¹c%
`OKB²«ØŸeM«ØVOd²« ‰uŠ «d¹c%`OKB²«ØŸeM«ØVOd²« ‰uŠ «d¹c%
`OKB²«ØŸeM«ØVOd²« ‰uŠ «d¹c%
• ÀËbŠ w V³OÝ W×O× dOž …—uBÐ pcÐ ÂUOI« ÆpHMÐ …bŠu« `OKBðØŸe½ØVOdð w≈ bLFð ô
’uBÐ q¼R W½UO wM Ë√ p¹b qOu« …—UA²ÝUÐ r Æa« o¹d(« ¨¡ULK »dð ¨WOzUÐdN Wb
Æ…bŠuK `OKB²«ØŸeM«ØVOd²« WOKLŽ
bŽ«u U³KD² oÐUD¹ “UN'« «c¼ 89/336/EECË 73/23/EEC w WbF*«Ë 93/68/EECÆ
wÐdŽwÐdŽ
wÐdŽwÐdŽ
wÐdŽ


AY -AP09DE
AY -AP12DE
AE-A09DE
AE-A12DE
W?OKš«b« …bŠu«
·dGK ¡«u¼ nOJ·dGK ¡«u¼ nOJ
·dGK ¡«u¼ nOJ·dGK ¡«u¼ nOJ
·dGK ¡«u¼ nOJ
qBHM “«dÞqBHM “«dÞ
qBHM “«dÞqBHM “«dÞ
qBHM “«dÞ
qOGA²« qOœ
AY-AP09DE
AY-AP12DE
W?Oł—U)« …bŠu«
SHARP CORPORATION
OSAKA, JAPAN
TINSEA349JBRZ 03CO TH 1
b?MK¹Uð w l³Þ
R
wÐdŽwÐdŽ
wÐdŽwÐdŽ
wÐdŽ

This file has been downloaded from:
www.UsersManualGuide.com
User Manual and User Guide for many equipments like mobile phones, photo cameras, monther board, monitors, software, tv, dvd, and othes..
Manual users, user manuals, user guide manual, owners manual, instruction manual, manual owner, manual owner's, manual guide,
manual operation, operating manual, user's manual, operating instructions, manual operators, manual operator, manual product,
documentation manual, user maintenance, brochure, user reference, pdf manual
Downloaded from: http://www.usersmanualguide.com/