Loading ...
Loading ...
Loading ...
ENGLISH INSTRUCTIONS
6
WARNING! Before cleaning, assembling or disassembling the
Vacuum Sealer, make sure the Vacuum Sealer is OFF and the PLUG IS
REMOVED FROM THE OUTLET/POWER SOURCE!
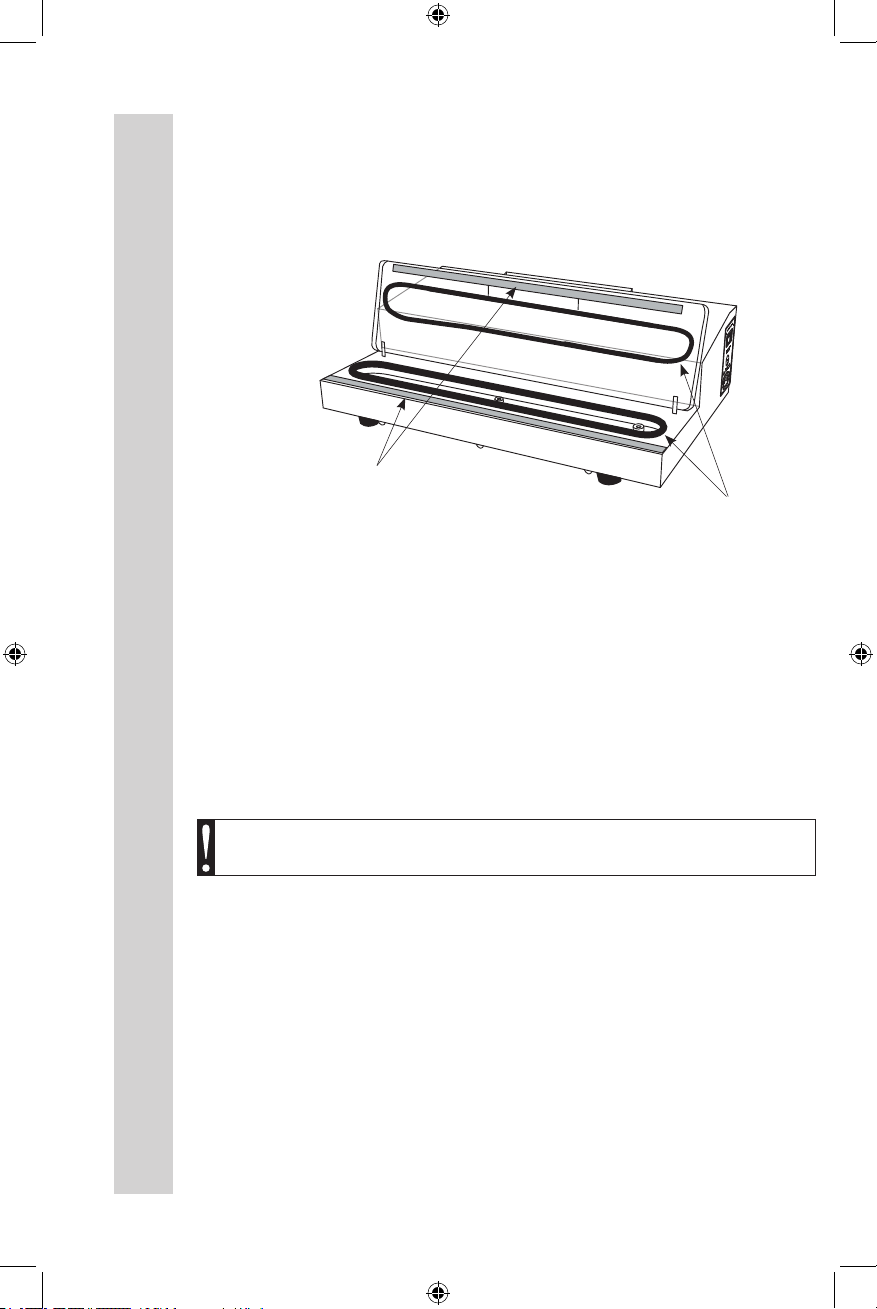
PROTECTIVE TAPE
There are two (2) factory installed
strips of Seal Bar Tape on the Vacuum Sealer.
DO NOT REMOVE THE TAPE!
SEAL BAR TAPE
DO NOT
REMOVE!
The Seal Bar Heating Element and Vacuum Lid Seal are each covered
with Seal Bar Tape to protect vacuum bags during sealing Figure 1.
DO NOT remove the Seal Bar Tape. See the “Service Instructions”
section of this manual for information on replacing the Seal Bar Tape,
if necessary.
*NOTE one extra piece of Seal Bar Tape is included with the original unit as a
spare.
OVAL VACUUM CHAMBER SEALS
DO NOT REMOVE!
CLEANING INSTRUCTIONS
. NEVER IMMERSE the Vacuum Sealer in water or other liquid.
. Make sure the Vacuum Sealer has completely cooled before cleaning it.
. Wipe clean all outside surfaces including the Plastic Vacuum Chamber and
Vacuum Lid with a damp cloth or paper towel. Most household spray cleaners
are safe to use. Avoid spraying directly into the vent on the left side of the
unit. DO NOT use abrasive cleansers! Abrasive cleansers will spoil the
clarity of the Vacuum Lid.
. Be careful while cleaning not to peel or damage the strips of Seal Bar Tape
covering the Seal Bar Heating Element and Vacuum Lid Seal.
. Dry all surfaces and close the Vacuum Lid before storing the Vacuum
Sealer.
FIGURE 1
Loading ...
Loading ...
Loading ...