
Use & Care / Installation Manual
Manual de Uso y Cuidado / Instalación
English / Español
SV07328 rev. D
Sears Brands Management Corporation,
Hoff man Estates, IL 60179 USA
www.kenmore.com
www.sears.com
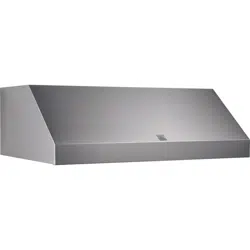
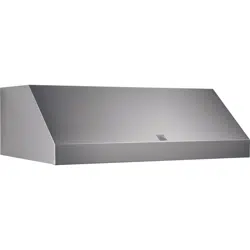
Models / Modelos 233.5817*, 233.5818*
Kenmore Elite®
TM
Range Hood
* = color number, número de color
Campana de cocina

2
READ AND SAVE THESE INSTRUCTIONS
TABLE OF CONTENTS
Warranty .........................................................................2
Safety Instructions ..........................................................3
Operation ........................................................................4
Cleaning ...........................................................................4
Parts Included With Hood .............................................5
Parts Not Included With Hood .....................................5
Tools Needed For Hood Installation ............................5
Equivalent Duct Length Chart .......................................6
Install Ductwork ..............................................................7
Prepare The Hood Location ..........................................7
Prepare The Hood .......................................................8-10
Install The Hood .............................................................10
Connect The Wiring .......................................................11
Finalize The Installation .................................................11
Changing Light Bulbs .....................................................11
Service Parts ....................................................................12
KENMORE LIMITED WARRANTY
When this appliance is installed, operated and
maintained according to all supplied instructions,
the following warranty coverage applies. To arrange
for warranty service, call 1-800-4-MY-HOME
®
(1-800-469-4663).
• For one year from the date of purchase, any
part of this product that fails due to a defect in
material or workmanship will receive free repair or
replacement if repair proves impossible. The length
of this coverage does not apply to the fi nish of any
painted or bright metal part.
• For thirty days date of purchase, any painted or
bright metal part of this product will be replaced
free of charge if its fi nish is defective in material or
workmanship.
All warranty coverage is void if this product is ever
used for other than private household purposes.
This warranty covers only defects in material and
workmanship, and will NOT pay for:
1. Consumable parts that can wear out from normal
use, including but not limited to fi lters, belts, light
bulbs, and bags.
2. A service technician to instruct the user in correct
product installation, operation or maintenance.
3. A service technician to clean or maintain this product.
4. Damage to or failure of this product if it is not
installed, operated or maintained according to the
all instructions supplied with the product.
5. Damage to or failure of this product resulting from
accident, abuse, misuse or use for other than its
intended purpose.
6. Damage to or failure of this product caused by the
use of detergents, cleaners, chemicals or utensils
other than those recommended in all instructions
supplied with the product.
7. Damage to or failure of parts or systems resulting from
unauthorized modifi cations made to this product.
Disclaimer of implied warranties; limitation of remedies
Customer’s sole and exclusive remedy under this
limited warranty shall be product repair as provided
herein. Implied warranties, including warranties of
merchantability or fi tness for a particular purpose,
are limited to one year or the shortest period allowed
by law. Sears shall not be liable for incidental or
consequential damages. Some states and provinces
do not allow the exclusion or limitation of incidental or
consequential damages, or limitation on the duration
of implied warranties of merchantability or fi tness, so
these exclusions or limitations may not apply to you.
This warranty gives you specifi c legal rights, and you
may also have other rights which vary from state to
state.
Sears Brands Management Corporation,
Hoff man Estates, IL 60179

3
Warranty Safety CleaningOperation Installation Service Parts
WARNING
TO REDUCE THE RISK OF FIRE, ELECTRIC SHOCK, OR
INJURY TO PERSONS, OBSERVE THE FOLLOWING:
1. Use this unit only in the manner intended by the
manufacturer. If you have questions, contact the
manufacturer at the address listed in the warranty.
2. Before servicing or cleaning unit, switch power off at
service panel and lock the service disconnecting means
to prevent power from being switched on accidentally.
When the service disconnecting means cannot be
locked, securely fasten a prominent warning device,
such as a tag, to the service panel.
3. Installation work and electrical wiring must be done by
a qualifi ed person(s) in accordance with all applicable
codes and standards, including fi re-rated codes and
standards.
4. Suffi cient air is needed for proper combustion and
exhausting of gases through the fl ue (chimney) of fuel
burning equipment to prevent backdrafting. Follow the
heating equipment manufacturer’s guideline and safety
standards such as those published by the National
Fire Protection Association (NFPA), and the American
Society for Heating, Refrigeration and Air Conditioning
Engineers (ASHRAE), and the local code authorities.
5. When cutting or drilling into wall or ceiling, do not
damage electrical wiring and other hidden utilities.
6. When performing installation, servicing or cleaning
the unit, it is recommended to wear safety glasses and
gloves.
7. Do not use this range hood with any additional solid
state speed control device.
8. Ducted fans must always be vented to the outdoors.
9. To reduce the risk of fi re, use only metal ductwork.
10. This unit must be grounded.
11. When applicable local regulations comprise more
restrictive installation and/or certifi cation requirements,
the aforementioned requirements prevail on those of
this document and the installer agrees to conform to
these at his own expenses.
TO REDUCE THE RISK OF A RANGE TOP GREASE FIRE:
1. Never leave surface units unattended at high settings.
Boilovers cause smoking and greasy spillovers that may
ignite. Heat oils slowly on low or medium settings.
2. Always turn hood ON when cooking at high heat or
when fl ambeing food (i.e.: Crêpes Suzette, Cherries
Jubilee, Peppercorn Beef Flambé).
3. Clean ventilating fans frequently. Grease should not
be allowed to accumulate on fan, fi lters or in exhaust
ducts.
4. Use proper pan size. Always use cookware appropriate
for the size of the surface element.
WARNING
TO REDUCE THE RISK OF INJURY TO PERSONS IN THE
EVENT OF A RANGE TOP GREASE FIRE, OBSERVE THE
FOLLOWING*:
1. SMOTHER FLAMES with a close-fi tting lid, cookie
sheet, or metal tray, then turn off the burner. BE
CAREFUL TO PREVENT BURNS. If the fl ames do not
go out immediately, EVACUATE AND CALL THE FIRE
DEPARTMENT.
2. NEVER PICK UP A FLAMING PAN - You may be burned.
3. DO NOT USE WATER, including wet dishcloths or
towels - This could cause a violent steam explosion.
4. Use an extinguisher ONLY if:
A. You know you have a Class ABC extinguisher and
you already know how to operate it.
B. The fi re is small and contained in the area where it
started.
C. The fi re department is being called.
D. You can fi ght the fi re with your back to an exit.
*Based on “Kitchen Fire Safety Tips” published by NFPA.
CAUTION
1. For indoor use only.
2. For general ventilating use only. Do not use to exhaust
hazardous or explosive materials and vapors.
3. To avoid motor bearing damage and noisy and/or
unbalanced impellers, keep drywall spray, construction
dust, etc. off power unit.
4. Your hood motor has a thermal overload which
will automatically shut off the motor if it becomes
overheated. The motor will restart when it cools down.
If the motor continues to shut off and restart, have the
hood serviced.
5. For best capture of cooking impurities, the bottom of
the hood should be at a minimum distance of 24” and
a maximum of 30” above the cooking surface.
6. To reduce the risk of fi re and to properly exhaust air on a
ducted installation, be sure to duct air outside - Do not
exhaust air into spaces within walls or ceiling or into attics,
crawl spaces, or garage.
7. This product is equipped with a thermostat which
may start blower automatically. To reduce the risk
of injury and to prevent power from being switch on
accidentally, switch power off at service panel and
lock or tag service panel.
8. Because of the high exhausting capacity of this hood,
you should make sure enough air is entering the house
to replace exhausted air by opening a window close
to or in the kitchen.
9. Use with approved cord-connection kit only.
10. Please read specifi cation label on product for further
information and requirements.
SAFETY INSTRUCTIONS
!
INTENDED FOR DOMESTIC COOKING ONLY
!
!
READ AND SAVE THESE INSTRUCTIONS
4
Grease fi lters
The grease fi lters and the bottom panel should be cleaned
fr
equently. Use a warm detergent solution. Grease fi lters
are dishwasher safe.
Wash more often if your cooking style generates greater
grease - like frying foods or wok cooking.
Remove fi lters by pulling latch tabs and rotating fi lters
downward.
OPERATION OPERATION
Always turn ON your hood before you begin cooking in
order to establish an air fl ow in the kitchen. Let the blower run
for a few minutes to clear the air after you turn off the range.
This will help keep the whole kitchen cleaner and brighter.
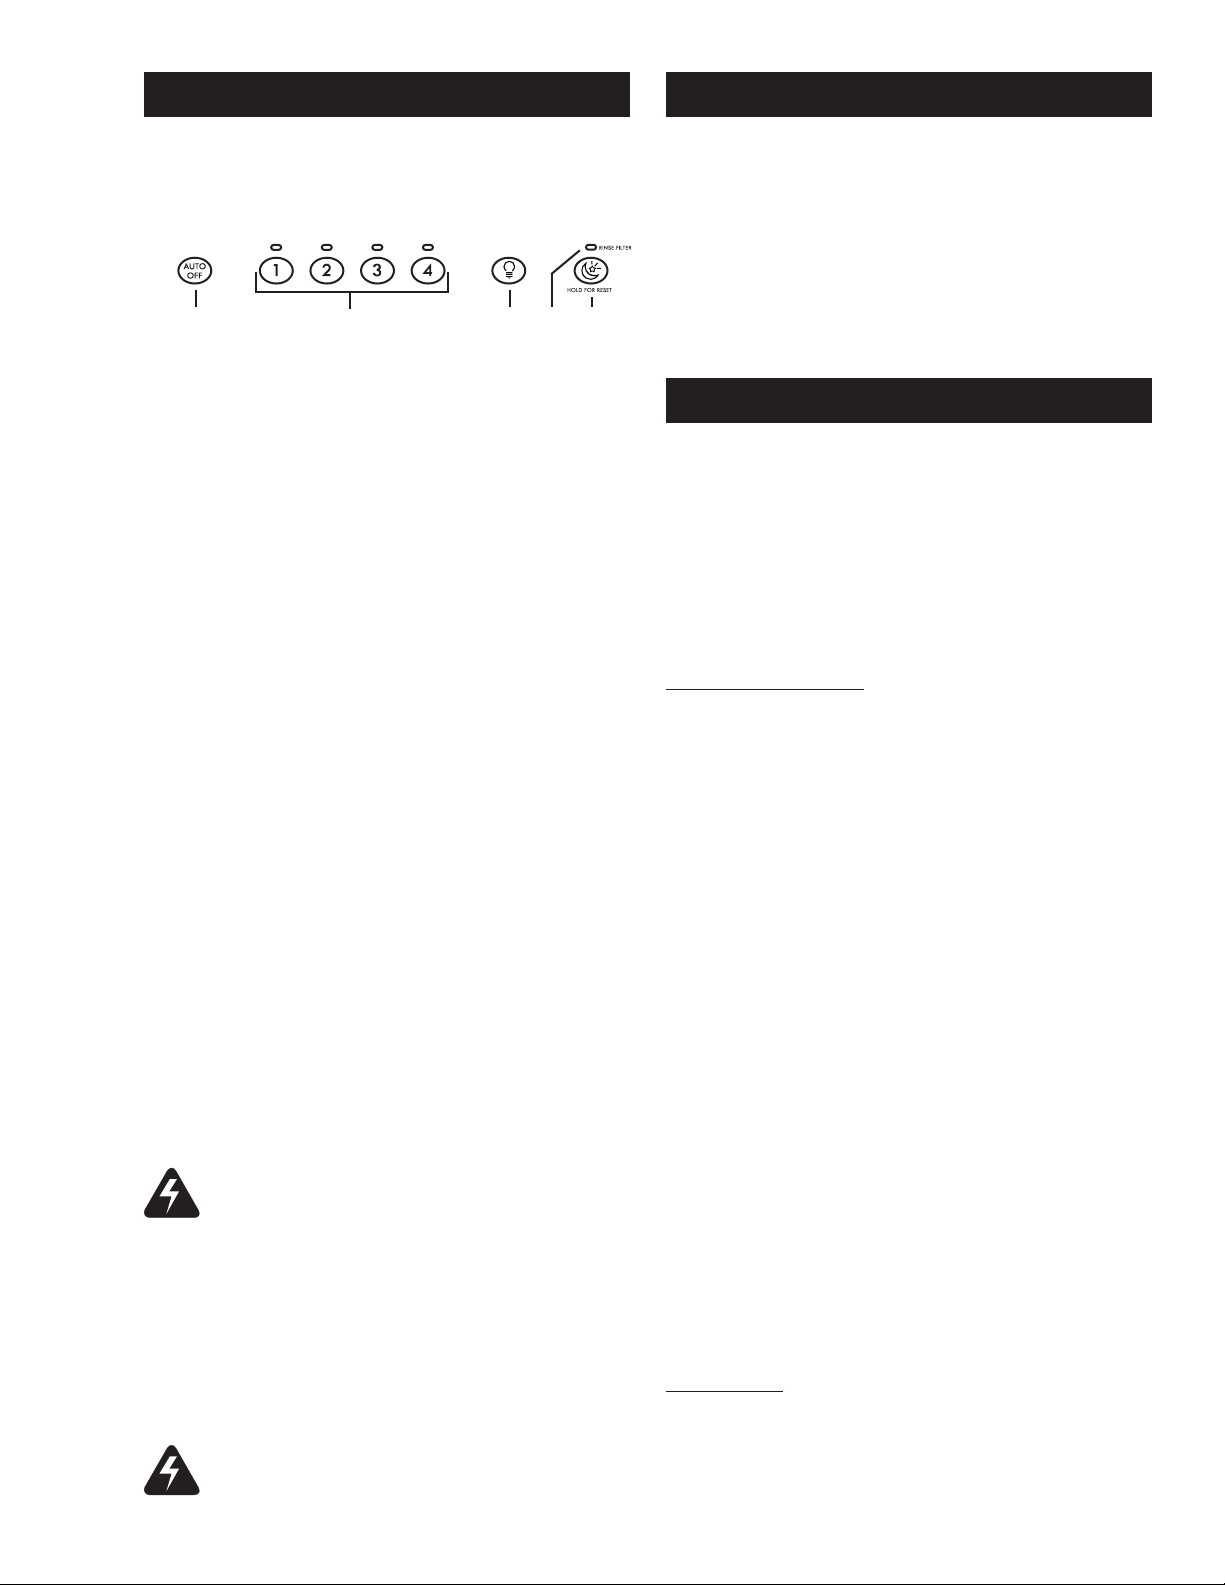
1. Blower Auto OFF switch 4. Filter maintenance indicator
2. ON/OFF Blower speed switches 5. Nightlight switch
3. Halogen lights switch
ON/OFF Blower speed switches
Press the switch corresponding to the desired blower speed.
The light over the switch indicates the selected speed (from 1
for low speed to 4 for high speed). To turn off the blower,
press once more on the corresponding blower speed switch.
NOTE: When speed 1 is chosen, the blower will operate
at high speed for less than one second and then
revert back to speed 1. This operation is normal
and is designed for optimal blower performance.
HEAT SENTRY™
Your hood is equipped with a HEAT SENTRY thermostat.
This thermostat is a device that will turn on or speed up the
blower if it senses excessive heat above the cooking surface.
The light indicator over speed 3 switch will quickly fl ash.
1) If blower is OFF - it turns blower ON to speed 3.
2) If blower is ON at a lower (or higher) speed setting - it
turns blower to speed 3.
When the temperature level drops to normal, the blower
will return to its original setting and the light indicator
over speed 3 switch will stop fl ashing.
Halogen lights switch
This switch provides 3 diff erent lighting levels, according
to your needs. The lighting intensity changes by increments
of 1 (e.g.: Press once for low intensity, once again to get
more, up to three times). From the higher intensity, press
once again to shut off the lights.
Uses 120 Volts, 50 W, MR 16 with GU10 base or PAR 16
with GU10 base, shielded halogen bulbs (included).
WARNING: The HEAT SENTRY thermostat can
start the blower even if the hood is turned OFF. If
this occurs, press the speed 3 switch until its light
indicator stops fl ashing if you must stop the blower.
Hood Cleaning
Stainless steel cleaning:
How to maintain its “BRIGHT LOOK”
Do:
- Regularly wash surfaces with clean cloth or rag soaked
with warm water and mild soap or liquid dish detergent.
- Always clean in the direction of original polish lines.
- Always rinse well with clear water (2 or 3 times) after
cleaning. Wipe dry completely.
- You may also use a specialized household stainless steel
cleaner.
Do not:
- Use any steel or stainless steel wool or any other
scrapers to remove stubborn dirt.
- Use any harsh or abrasive cleaners.
- Allow dirt to accumulate.
- Let plaster dust or any other construction residues
reach the hood. During construction/renovation, cover
the hood to make sure no dust sticks to stainless steel
surface.
Avoid when choosing a detergent:
- Any cleaners that contains bleach will attack stainless
steel.
- Any products containing: chloride, fl uoride, iodide,
bromide will deteriorate surfaces rapidly.
- Any combustible products used for cleaning such
as acetone, alcohol, ether, benzol, etc., are highly
explosive and should not be used close to a range.
Enamel Finish:
Clean with warm water and mild detergent only. If
discoloration occurs, use a good enamel polish such as
automotive polish. (DO NOT use rough abrasive cleaner
or porcelain cleaner).
Auto OFF switch
When a speed is selected, press the Auto OFF switch to
activate the delay function. The corresponding speed
indicator LED will start fl ashing to indicate this function is
activated. The fan will continue to operate for 5 minutes
and will stop automatically. To cancel the delay function,
press the Auto OFF switch once again; the blower will then
work in normal mode.
NOTE: The blower speed can be increased - or decreased -
during Delay mode without starting another
5-minute cycle.
15234
WARNING: In order to prevent the risk of
personal injury, do not install a lamp identifi ed
for use only in enclosed fi xtures.
Filter maintenance indicator
After 24 hours of operation, the fi lter maintenance light
indicator will start blinking. This indicates the fi lters need
to be cleaned in order to maintain effi cient operation of
the unit. The indicator light will blink until the function is
reset by pressing the nightlight switch for 3 seconds.
CLEANING
Nigthlight switch
Press this switch once to turn on the nightlight. Press this
switch once more to shut off the nightlight.
HC0049

8
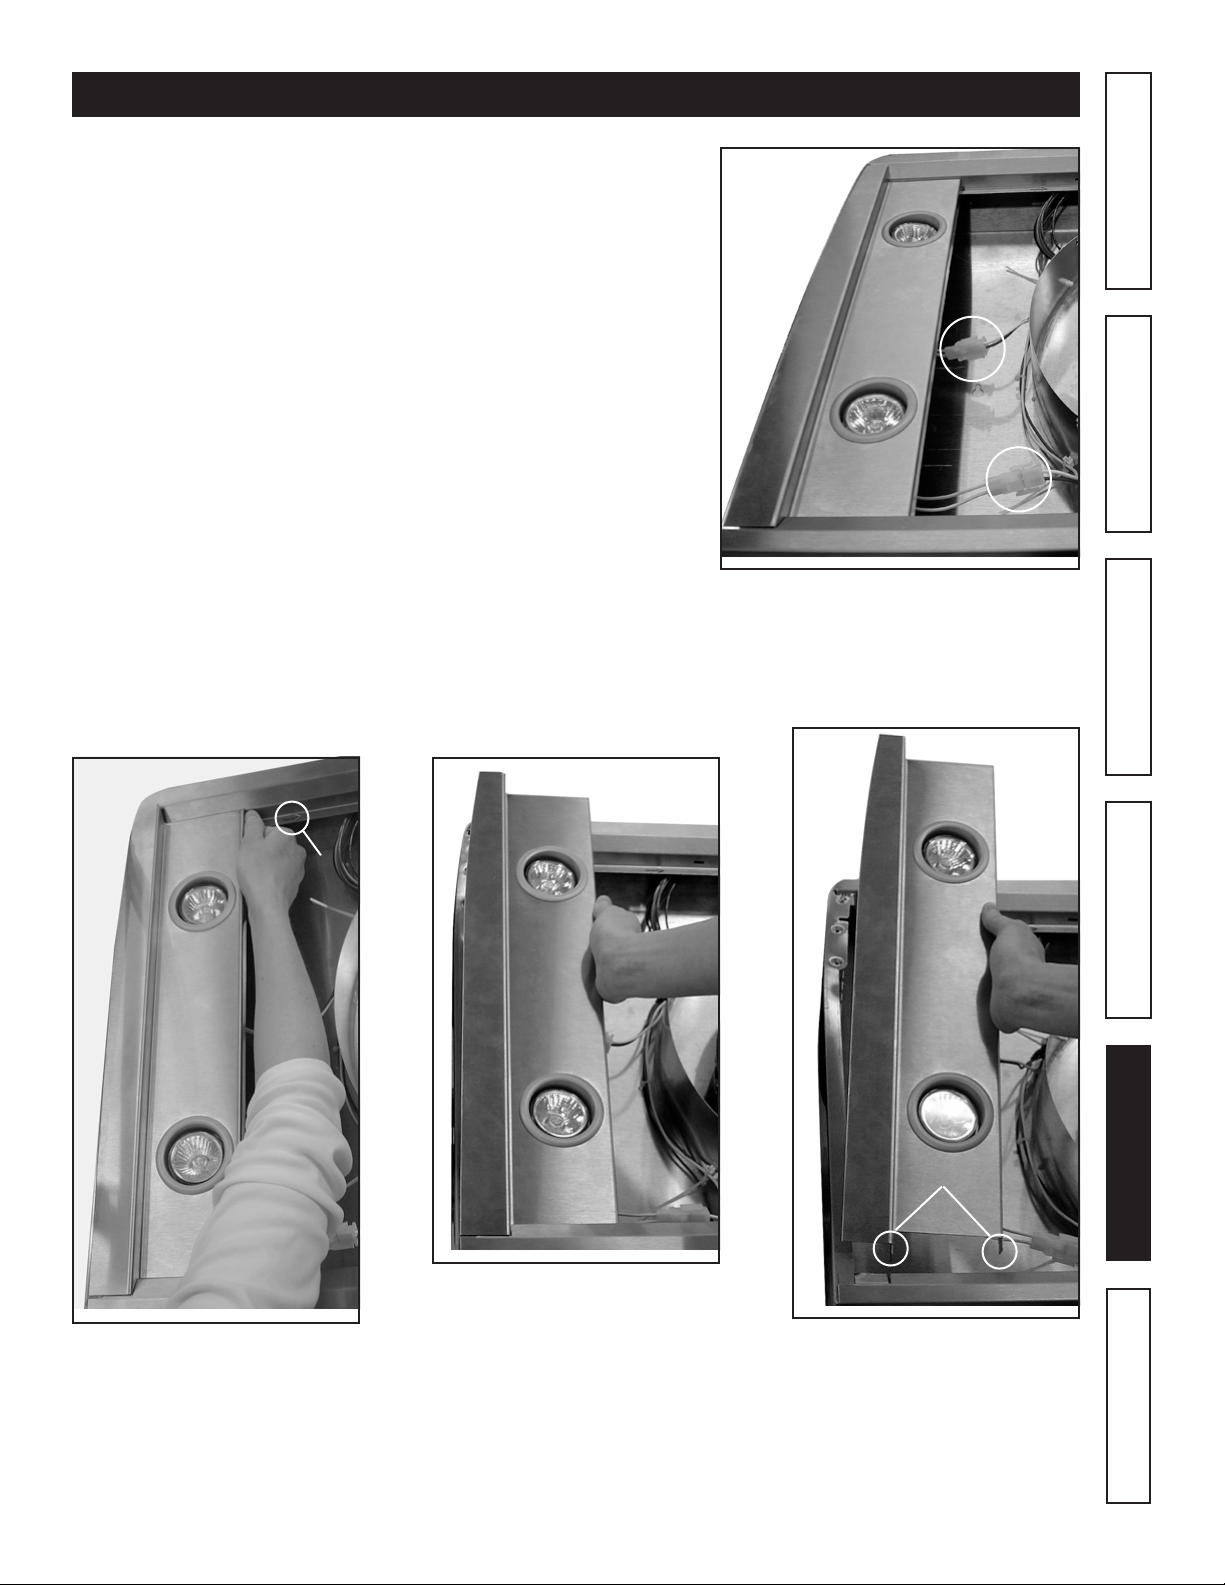
PREPARE THE HOOD
1. Punch-out the knock-out for the chosen opening (horizontal at the back or vertical on top of the hood) and for
electrical connection.
HD0164
2. Pull latch tab and remove both fi lters from the hood.
HD0166
3. Remove the 5 screws retaining the bottom panel to the
hood and set aside. Pull out the bottom panel by the
front part.
HD0167
SCREW
LOCATIONS
HORIZONTAL DISCHARGEVERTICAL DISCHARGE
HD0165
9
5. To remove side panel, hold it
near the front of the hood and
slide in the same direction as
the small arrow (A) in order to
disengage it.
PREPARE THE HOOD
HO0079
6. Then lift the front of the side
panel.
A
HO0080
HO0081
7. Pull out the side panel tabs (B)
from the hood and remove the
side panel.
B
4. Unplug both light connectors mounted on each side panels.
See picture beside.
HE0075
Warranty Safety CleaningOperation Installation Service Parts