Loading ...
Loading ...
Loading ...
16
Clocks and Timers
(Analog Clock - Premiere Models)
3. Set the Oven Function selector to the desired function – BAKE, CONVECTION BAKE, OR TRUCONVEC™, etc.
4. Set the temperature control knob to the desired baking temperature.
5. The automatic time bake program is now set!
NOTE: The display will continue to show the amount of bake time
that was programmed (this will remain until the programmed start time is reached). You can return the display to clock mode by pressing
the “probe/temp” button – Notice that a small clock will be displayed in the upper right corner to indicate that a program is in progress.
Switch back to the timer mode by pressing the “bake hours” button.
6. When the specified time is reached, the oven will automatically turn on. It will bake for the programmed amount of time at the selected
temperature.
NOTE: At one minute from the end of the specified bake program, the oven timer will beep once. At the end of the specified bake
program, the oven will automatically turn off and the timer will sound a series of three beeps. This will continue until the “start time”
button is pressed. The display will then return to displaying the time.
NOTE: Setting the remaining duration time to :00 will cancel the Automatic Bake program.
Probe Function
(Premiere/French Door Models)
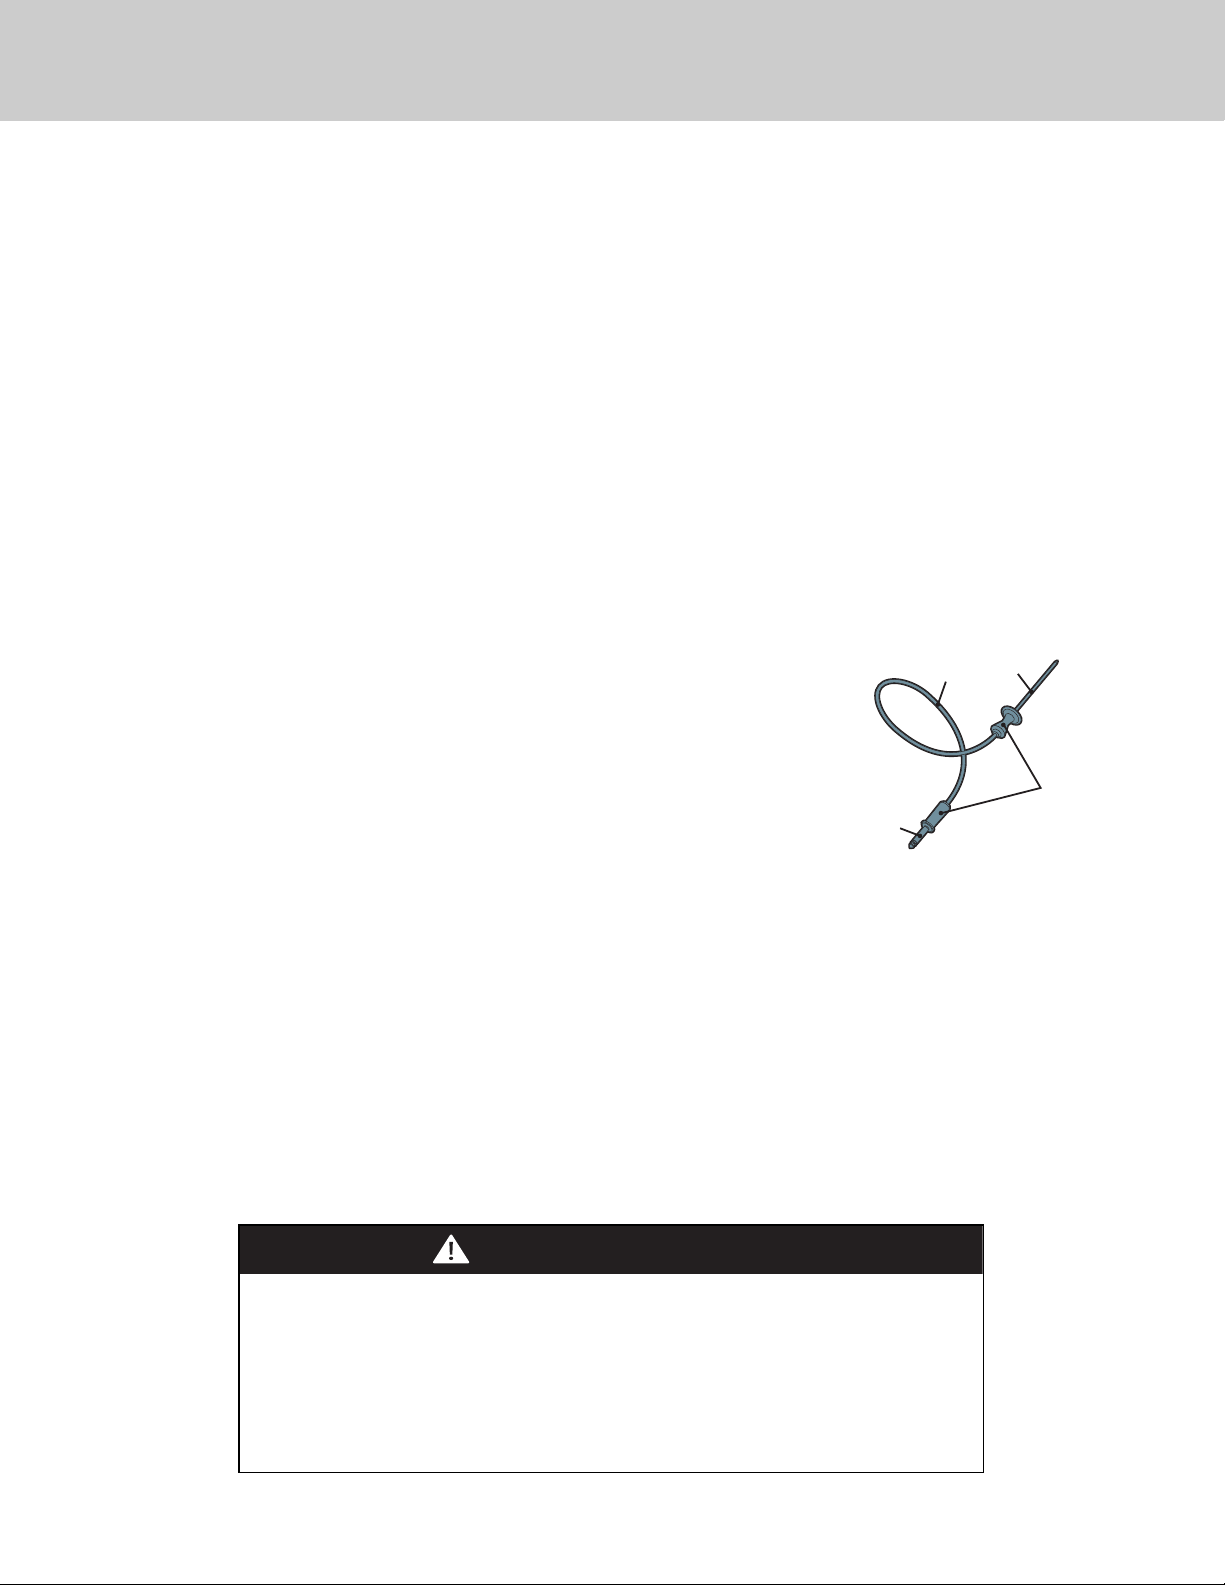
The meat probe takes the guesswork out of roasting by cooking foods to the ideal internal temperature.
Your Viking oven’s built-in probe will help you prepare meats exactly as you want them.
To Set the Automatic Probe Function
1. Plug probe into the outlet located on left interior wall of the oven and close oven door, leaving the
meat probe end outside of the oven. NOTE: If the probe is not plugged into the oven when starting a probe function, the display will
flash “no probe”. (Premiere models only)
2. Select cooking function and set temperature.
3. Press the “PROBE” or “PROBE TEMP” button (depending on model).
4. Turn the “SET” knob to the desired internal temperature. The word PROBE and the desired internal temperature will be displayed on
the lower right of the clock. On Double Ovens, the manual/timed control must be turned to “upper timed.” NOTE: It is
recommended to set the internal temperature about 10 degrees lower than actual desired internal temperature. The meat will
continue to cook when removed from the oven and will reach desired internal temperature while “standing”.
5. Once the oven is preheated, open the oven door. Using a pot holder, carefully slide out the oven rack. Place the roasting pan on the
rack, insert probe into meat. Carefully slide rack back into oven and close the door.
The word PROBE flashes and tone sounds three times when desired temperature is reached. The tone will sound twice every ten seconds
after completion until probe function is closed.
Meat Probe Functions
WARNING
To avoid sickness and food waste when using automatic time baking:
• Do not use foods that will spoil while waiting for cooking to start, such as dishes with milk or eggs, cream
soups, custards, fish, pork, poultry, or foods with stuffing.
• Any food that has to wait for cooking to start should be very cold or frozen before it is placed in the oven.
• Do not use foods containing baking powder or yeast when automatic time baking. They will not rise
properly.
• Do not allow food to remain in the oven for more than two hours after the end of the cooking cycle.
Plug
Cable
Probe
Handles
Loading ...
Loading ...
Loading ...